1. Safety Instructions
- Keep the inflatable decoration away from all heat sources, open flames, and flammable materials.
- Ensure proper ventilation around the blower fan during operation.
- Secure the decoration firmly to the ground using all provided stakes and ropes to prevent it from being blown away or becoming a projectile in high winds.
- Do not operate the inflatable in extreme weather conditions such as heavy rain, strong winds, or blizzards.
- Always unplug the unit when not in use or before performing any maintenance.
- Keep children and pets away from the blower fan and electrical connections.
- Use only with a standard 120V AC outlet. Do not overload electrical circuits.
2. Product Overview
The VINGLI 7FT Lighted Inflatable Christmas Nativity Decoration is designed to enhance your holiday display, suitable for both indoor and outdoor use. This inflatable features a complete nativity scene with integrated LED lights, providing a festive and illuminated presence.

Image: The VINGLI 7FT Lighted Inflatable Christmas Nativity Decoration, fully inflated and illuminated.
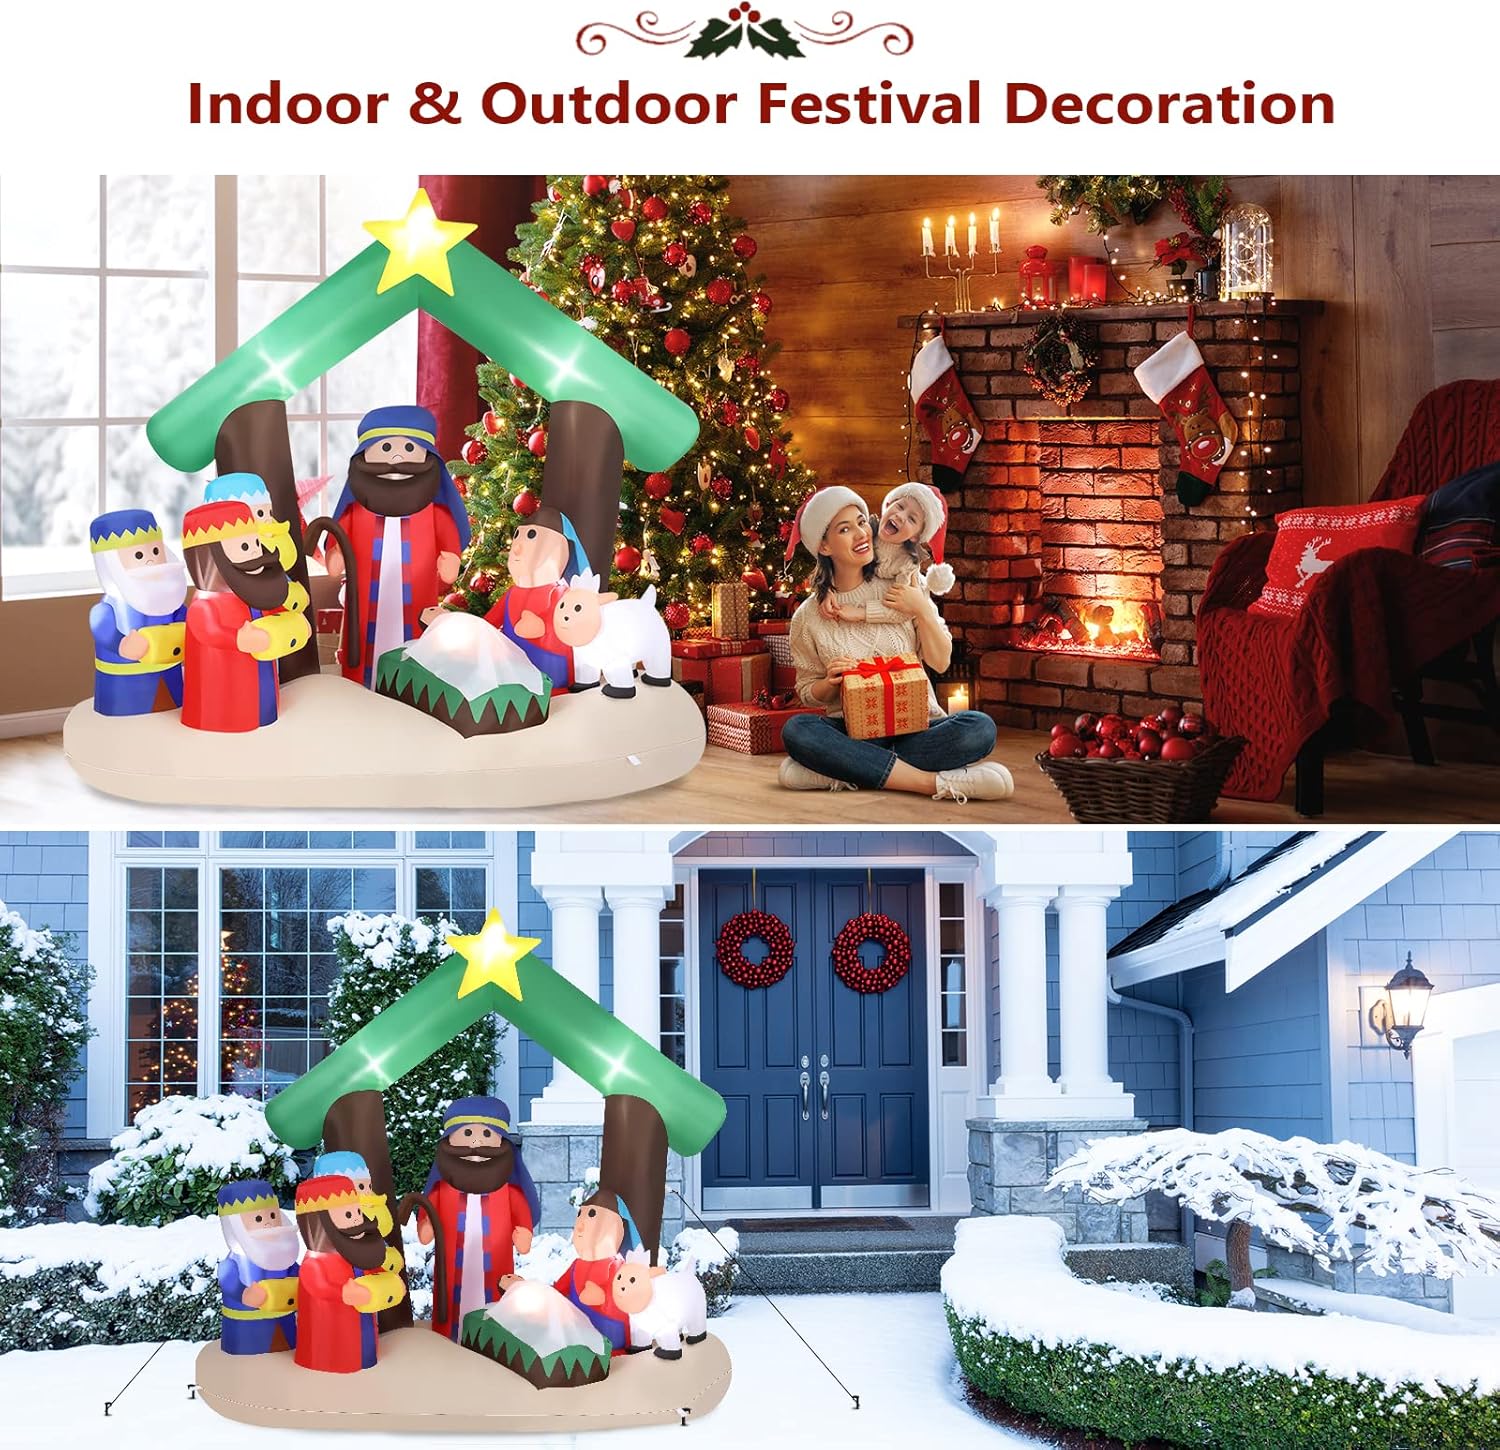
Image: The inflatable nativity scene displayed in both an indoor setting with a Christmas tree and an outdoor snowy yard.
3. Package Contents
- 1 x VINGLI 7FT Lighted Inflatable Christmas Nativity Decoration
- 1 x Built-in Blower Fan
- Integrated LED Lights
- 6 x Ground Stakes
- 2 x Ropes
- Built-in Sandbag(s) for stability
4. Setup Instructions
- Unpack: Carefully remove the inflatable from its packaging and unroll it on a clean, flat surface.
- Position: Place the inflatable in your desired location, ensuring there is enough space for it to fully inflate without obstruction.
- Secure Zipper: Locate the zipper on the bottom or side of the inflatable and ensure it is fully closed.
- Connect Power: Plug the power cord into a standard 120V AC outdoor-rated electrical outlet. The built-in blower fan will begin to inflate the decoration.
- Inflate: Allow approximately 5 minutes for the inflatable to fully expand. Adjust its position as it inflates to ensure proper shape.
- Anchor: Use the provided ground stakes and ropes to secure the inflatable. Attach the ropes to the designated loops on the inflatable and anchor them to the ground using the stakes. The built-in sandbag(s) provide additional stability.

Image: Visual guide illustrating the simple 1-person, 5-minute assembly process and compact deflation for storage.

Image: A detailed view of the powerful air blower integrated into the inflatable's base.

Image: Illustration of how to use the 6 ground stakes and the built-in sandbag to secure the inflatable decoration.
5. Operating Instructions
- To operate, simply ensure the inflatable is properly set up and plugged into a functioning electrical outlet. The blower will automatically inflate the decoration, and the LED lights will illuminate.
- To turn off, unplug the power cord from the electrical outlet. The inflatable will begin to deflate.

Image: The inflatable nativity scene brightly lit at night, showcasing its integrated LED lights in a winter environment.

Image: A close-up view highlighting the bright LED lights that illuminate the inflatable decoration.
6. Maintenance
- Cleaning: To clean the inflatable, wipe it gently with a damp cloth. Do not use harsh chemicals or abrasive cleaners, as these may damage the fabric or colors.
- Weather Resistance: The durable fabric material is designed to withstand rain, snow, and wind. However, for prolonged durability, it is recommended to bring the inflatable indoors during severe weather conditions.
- Inspection: Periodically inspect the inflatable for any tears, punctures, or damage to the fabric, seams, or electrical components. Repair small tears with a patch kit (not included) if necessary.

Image: The inflatable nativity scene with icons indicating its resistance to rain, snow, and wind.

Image: A close-up view of the waterproof polyester fabric used in the inflatable's construction.
7. Storage
- Deflation: Unplug the inflatable from the power source. Open the zipper located on the bottom or side to allow for fast deflation.
- Folding: Once fully deflated, fold the inflatable compactly. Ensure all air is expelled to minimize storage space.
- Storage Location: Store the folded inflatable in its original packaging or a suitable storage bag in a cool, dry place, away from direct sunlight and pests.

Image: A close-up of the zipper mechanism designed for quick and efficient deflation of the inflatable.
8. Troubleshooting
- Inflatable not fully inflating:
- Check that the power cord is securely plugged into a working outlet.
- Ensure the zipper on the inflatable is completely closed.
- Verify that the blower fan is free from obstructions (e.g., leaves, debris).
- Inspect the inflatable for any tears or holes that may be causing air leakage. - LED lights not working:
- Confirm the power connection is secure.
- Check for any loose wires or damaged bulbs (if accessible). - Inflatable falls over or is unstable:
- Ensure all ground stakes are firmly inserted into the ground.
- Verify that the ropes are properly attached and taut.
- Check that the built-in sandbag(s) are positioned correctly and providing adequate weight.
9. Specifications
| Brand | VINGLI |
| Model Number | 1 |
| Theme | Christmas, Nativity Scene |
| Material | Fabric (Waterproof Polyester) |
| Approximate Height | 7 feet (200 cm) |
| Approximate Length | 82 inches (210 cm) |
| Approximate Width | 47 inches (120 cm) |
| Item Weight | 4.99 pounds |
| Special Features | Easy Setup, Built-in LED Lights, Weather Resistant |
| Power Source | Standard US Plug (120V AC) |

Image: The inflatable nativity scene with its approximate dimensions (height, length, width) indicated.
10. Warranty and Support
For warranty information or product support, please refer to the contact details provided with your purchase or visit the official VINGLI website. Keep your purchase receipt as proof of purchase.


