
Introduction
This manual provides essential information for the safe operation, setup, maintenance, and troubleshooting of your WORKPROX 20V Cordless Brad Nailer Kit. Please read and understand all instructions before using the tool to ensure safe and efficient operation.
Safety Information
Always follow basic safety precautions when using power tools to reduce the risk of injury.
- Wear Eye Protection: Always wear ANSI-approved safety goggles or safety glasses with side shields.
- Keep Hands Clear: Never place hands or other body parts in the path of the fastener or near the discharge area.
- Disconnect Power: Always remove the battery pack before making adjustments, changing accessories, or storing the tool.
- Work Area: Keep the work area clean and well-lit. Cluttered or dark areas invite accidents.
- Proper Fasteners: Use only 18GA staples (3/4"–1-9/16") and brad nails (3/4"–2") as specified for this tool.
- Material Compatibility: This tool is designed for wood, upholstery, and soft materials only. Do not use it on metal, concrete, or for tacking to walls.
- Safety Contact Tip: The tool will not fire unless the safety contact tip is pressed firmly against the work surface. Do not bypass or disable this safety feature.
- Avoid Accidental Firing: Keep fingers off the trigger when not actively fastening.
Product Overview
Familiarize yourself with the components of your WORKPROX 20V Cordless Brad Nailer Kit.

Image: Detailed diagram showing the various parts of the WORKPROX 20V Cordless Brad Nailer, including the cylinder, trigger, LED lighting, depth adjustment wheel, battery, belt clip, LED indicator, nail viewer window, magazine, and single/contact firing knob.
Included Components:
- WORKPROX 20V Cordless Brad Nailer
- 2.0Ah Rechargeable Battery
- Battery Charger (USB-C)
- 1000 x 18GA Staples (3/4"–1-9/16")
- 1000 x 18GA Brad Nails (3/4"–2")
- Instruction Manual
Setup and Preparation
Battery Charging and Installation
The 2000mAh Lithium-Ion battery provides power for your nailer. Ensure it is fully charged before initial use.
- Connect the USB-C charger to the battery. The battery features an LED digital display to show the charge status.
- Allow approximately 2 hours for a full charge if the battery is completely depleted.
- To install the battery, align the battery pack with the receptacle on the tool handle and slide it in until it clicks securely into place.
- To remove the battery, press the release button on the battery pack and slide it out.

Image: The 20V 2.0Ah battery, highlighting its Type-C fast charge port, LED digital display for charge status, and its capability to function as a portable power bank.
Loading Fasteners (Nails and Staples)
This 2-in-1 tool is compatible with 18GA staples and brad nails. The 100-fastener capacity magazine minimizes reloads.

Image: A quick 3-step guide demonstrating how to load fasteners: 1. Press the release button and pull down the magazine cover. 2. Load nails/staples into the magazine track with points facing down. 3. Press and hold the release button until the magazine clicks and locks.
- Press the magazine release button and pull down the magazine cover.
- Insert a strip of 18GA staples or brad nails into the magazine track. Ensure the points of the fasteners are facing downwards. For nails, load them all the way to the left towards the driving tip. For staples, load them all the way to the right of the slide.
- Push the magazine cover back until it clicks and locks into place.

Image: The WORKPROX nailer demonstrating its compatibility with 18GA staples (max length 1-9/16") and 18GA brad nails (max length 2").
Operating Instructions
Selecting Firing Mode
The nailer offers two firing modes for different applications:
- Single Firing Mode: For precise fastening. Press the safety contact tip against the workpiece, then pull the trigger.
- Contact Firing Mode: For higher efficiency and rapid, continuous nailing. Hold the trigger, then press the safety contact tip against the workpiece. The tool will fire each time the tip makes contact.
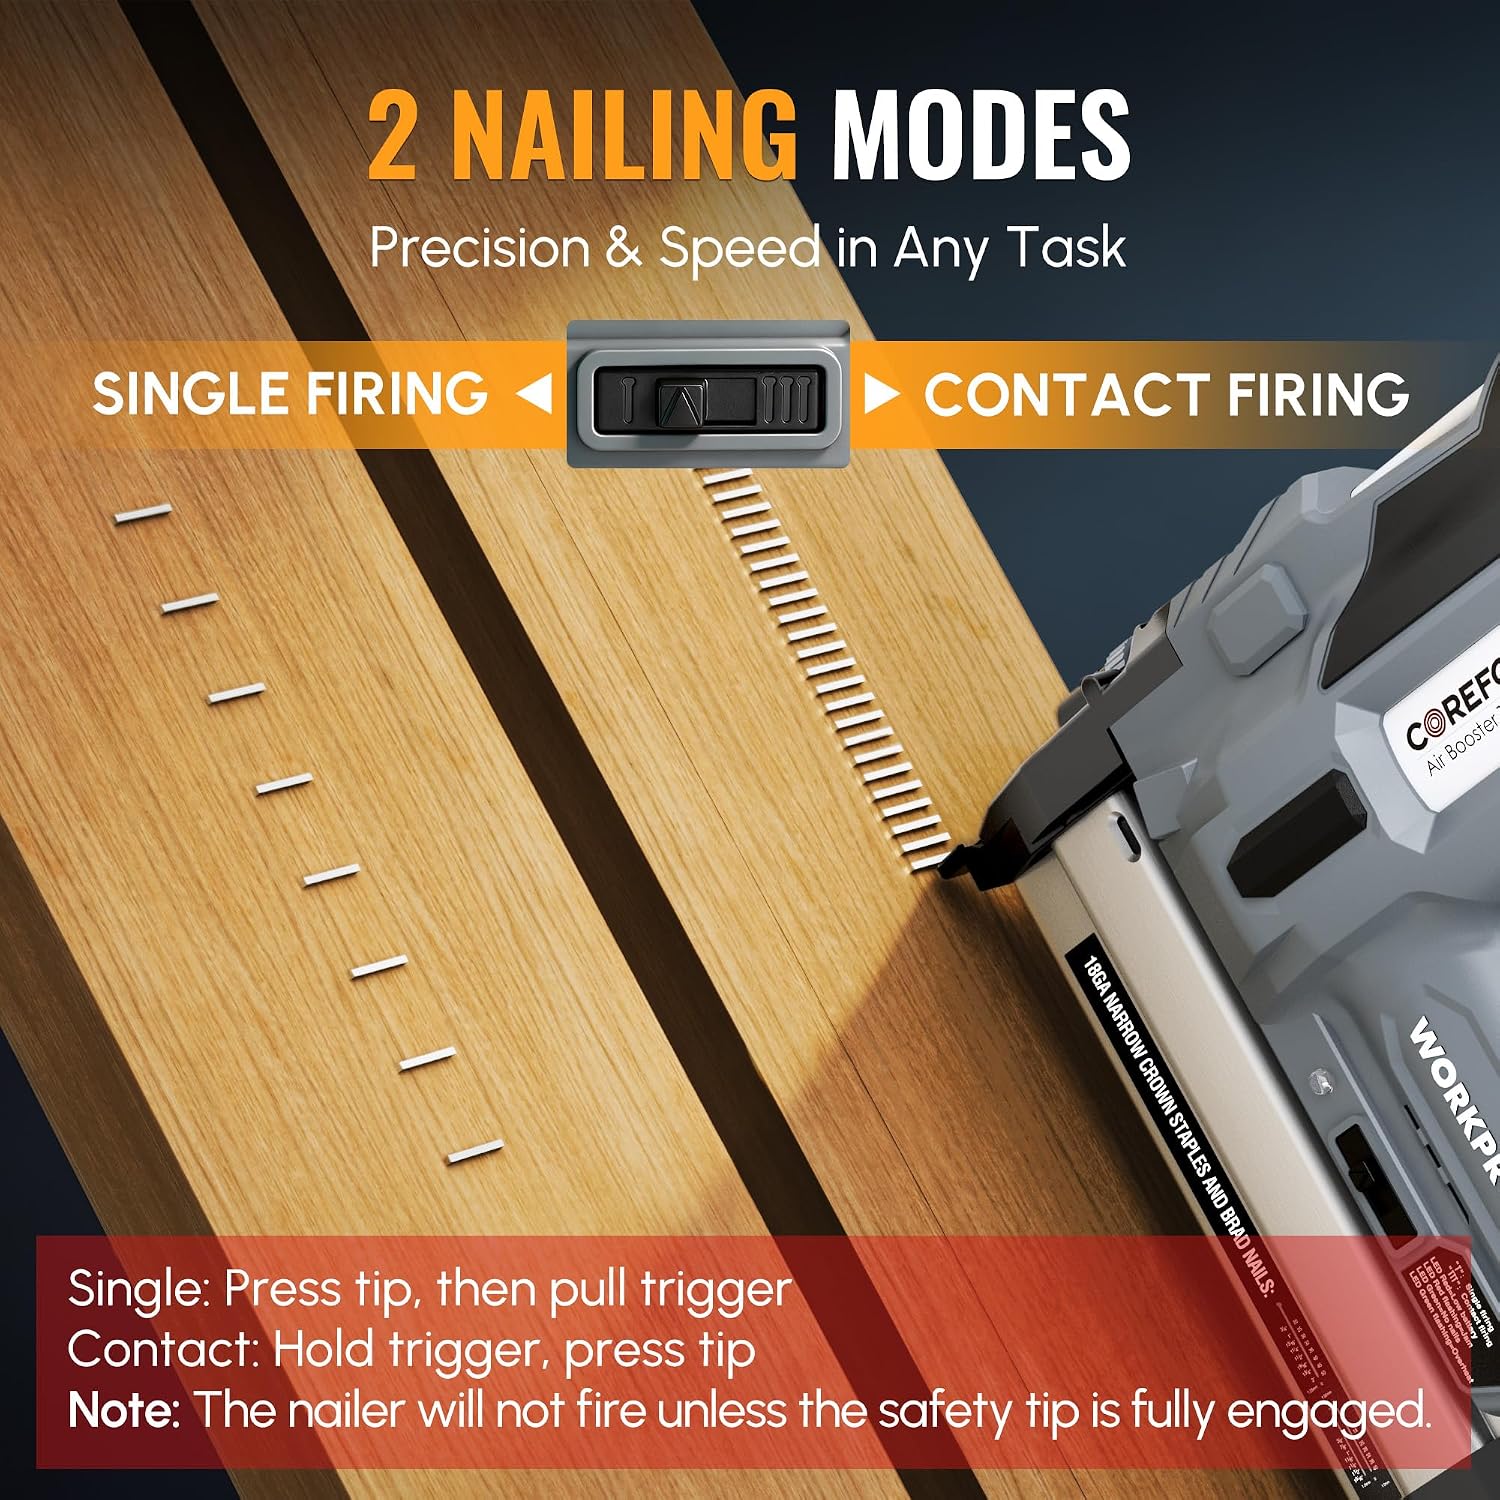
Image: Illustration of the two nailing modes: Single Firing (press tip, then pull trigger) for precision, and Contact Firing (hold trigger, then press tip) for speed. A note reiterates that the nailer will not fire unless the safety tip is fully engaged.
Video: This video demonstrates the dual nailing modes of the WORKPROX 20V Cordless Brad Nailer, showing how to switch between precision single firing and rapid contact firing for various tasks.
Adjusting Nail Depth
The adjustable nail depth feature allows you to adapt to different material thicknesses and desired fastener protrusion.
- Locate the depth adjustment wheel on top of the tool.
- Rotate the wheel to adjust the driving depth. Turn it one direction for deeper penetration and the other for shallower.
- Test on a scrap piece of material to achieve the desired depth before working on your project.

Image: The WORKPROX nailer illustrating the adjustable nail depth feature, allowing users to set fasteners deeper or shallower into the material. The image also highlights the built-in LED lighting for improved visibility.
Using the LED Indicators
The tool is equipped with LED indicators to provide important status updates:
- Red On: Indicates low battery. Recharge the battery.
- Red Flashing: Indicates nails are jammed. Refer to the "Clearing Nail Jams" section.
- Green On: Indicates no nails in the magazine. Reload fasteners.

Image: The WORKPROX nailer displaying its LED status indicators (Red On: Low battery, Red Flashing: Nails jammed, Green On: No nails) and the nail viewer window (Red: Without nails, Black: With nails) for clear monitoring of tool status.
Safety Contact Tip
The safety contact tip is a critical safety feature designed to prevent accidental firing. The tool will only operate when the tip is pressed firmly against the work surface.
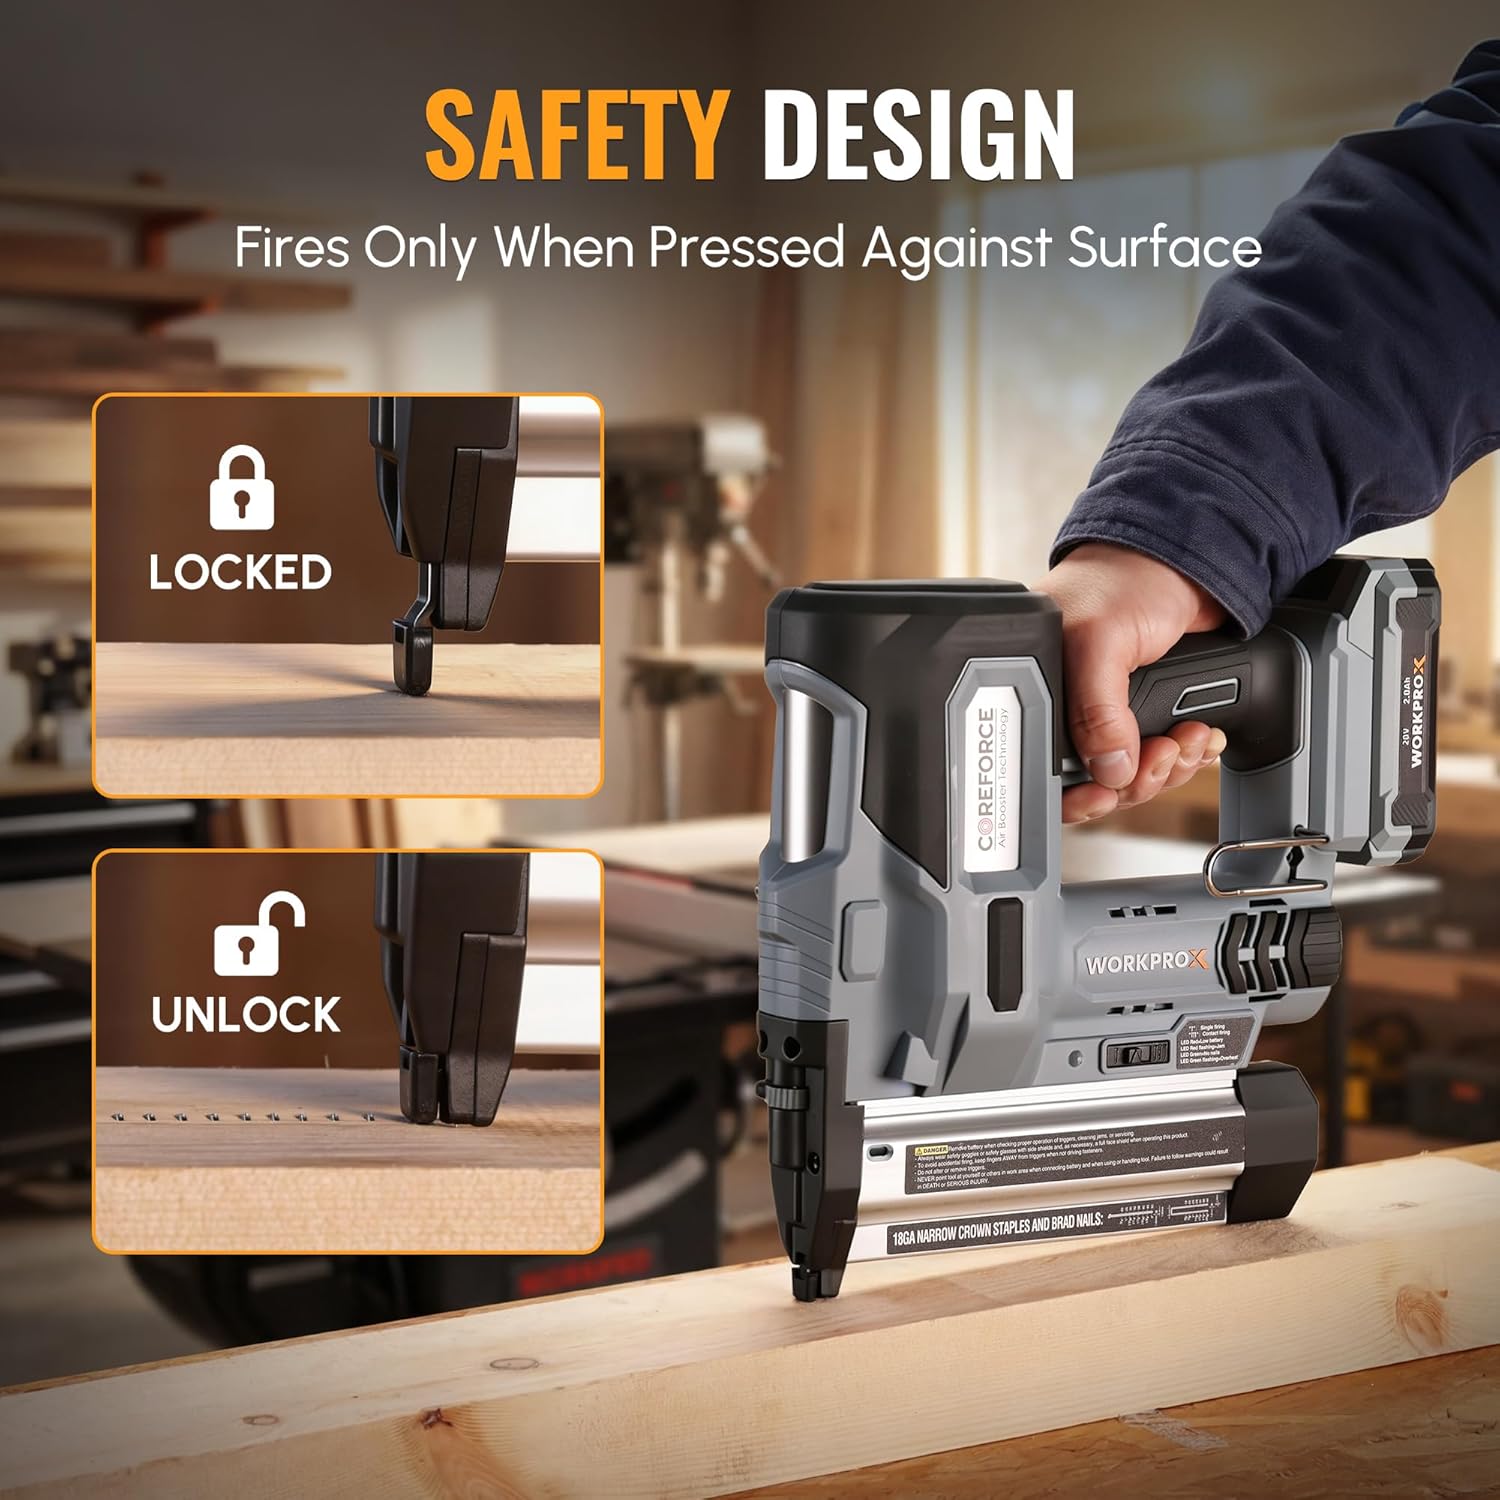
Image: The WORKPROX nailer illustrating its safety design, showing the tool in a 'locked' state when the tip is not engaged and an 'unlocked' state when pressed against a surface, allowing it to fire.
Maintenance
Clearing Nail Jams
If the LED indicator flashes red, it signifies a nail jam. Follow these steps to safely clear the jam:

Image: A visual guide for easy nail jam clearing: 1. Red flashing LED indicates a nail jam. 2. Remove the battery. 3. Open the magazine. 4. Remove the jammed nails/staples.
- Immediately remove the battery pack from the tool.
- Open the magazine by pressing the release button and pulling down the cover.
- Carefully remove any bent or jammed fasteners from the magazine track and the firing mechanism. Use pliers if necessary, but avoid forcing components.
- Close the magazine securely and reinsert the battery.
General Cleaning
Regular cleaning helps maintain tool performance and extends its lifespan.
- Ensure the battery is removed before cleaning.
- Use a clean, dry cloth to wipe down the exterior of the tool.
- Remove any sawdust or debris from the magazine and firing area using compressed air or a small brush.
- Do not use harsh chemicals or abrasive cleaners.
Troubleshooting
Refer to this table for common issues and their solutions.
| Problem | Possible Cause | Solution |
|---|---|---|
| Tool does not fire. | Battery is low or not installed correctly. Safety contact tip not fully engaged. No fasteners in magazine. | Recharge or properly install battery. Press tool firmly against workpiece. Reload fasteners. |
| Fasteners not driving fully. | Depth adjustment set too shallow. Incorrect fastener size. Battery low. | Adjust depth setting deeper. Ensure correct 18GA fasteners are used. Recharge battery. |
| Fasteners jamming frequently. | Bent or incorrect fasteners. Magazine dirty or damaged. Tool being used on unsuitable material. | Use only straight, recommended fasteners. Clean magazine and check for damage. Ensure material is suitable for the tool (wood, upholstery, soft materials). |
| LED indicator shows red (low battery) but battery is charged. | Poor connection between battery and tool. | Remove and reinsert battery, ensuring a secure connection. |
Technical Specifications
Key technical details for the WORKPROX 20V Cordless Brad Nailer Kit.
| Specification | Detail |
|---|---|
| Model Number | WX125409AE |
| Power Source | Battery Powered |
| Voltage | 20 Volts |
| Battery Type | Lithium Ion (2.0Ah) |
| Fastener Type | 18 Gauge Brad Nails & Staples |
| Nail Length Capacity | 3/4" – 2" |
| Staple Length Capacity | 3/4" – 1-9/16" |
| Magazine Capacity | 100 Fasteners |
| Item Weight (without battery) | 5.7 pounds |
| Material | Metal |
| Manufacturer | HANGZHOU GREATSTAR INDUSTRIAL CO.,LTD |
Warranty and Customer Support
WORKPRO products are manufactured to high-quality standards. For warranty information, product registration, or technical assistance, please contact WORKPRO customer service directly. Keep your purchase receipt as proof of purchase.
For further assistance, please visit the official WORKPRO website or contact their customer support channels.
