1. Introduction
The CIRYCASE Double Probe Digital Meat Thermometer FM145 is designed for precise temperature monitoring during cooking. It features two high-precision probes, an LCD screen with backlight, 8 preset temperatures, and an alarm function to ensure your food is cooked to perfection. This thermometer is suitable for use in ovens, grills, BBQs, and smokers, making it a versatile tool for various cooking applications.
The device provides accurate readings within ±1℃/±2℉ across a temperature range of -10°C to 300°C (14°F to 572°F).
2. Package Contents
Please check the box contents upon unpacking:
- 1 x Digital Meat Thermometer Unit
- 2 x Wire Probes (102 cm long)
- 1 x AAA Battery
- 1 x User Manual
3. Product Overview
The CIRYCASE FM145 thermometer is designed for ease of use and accuracy. Key features include:
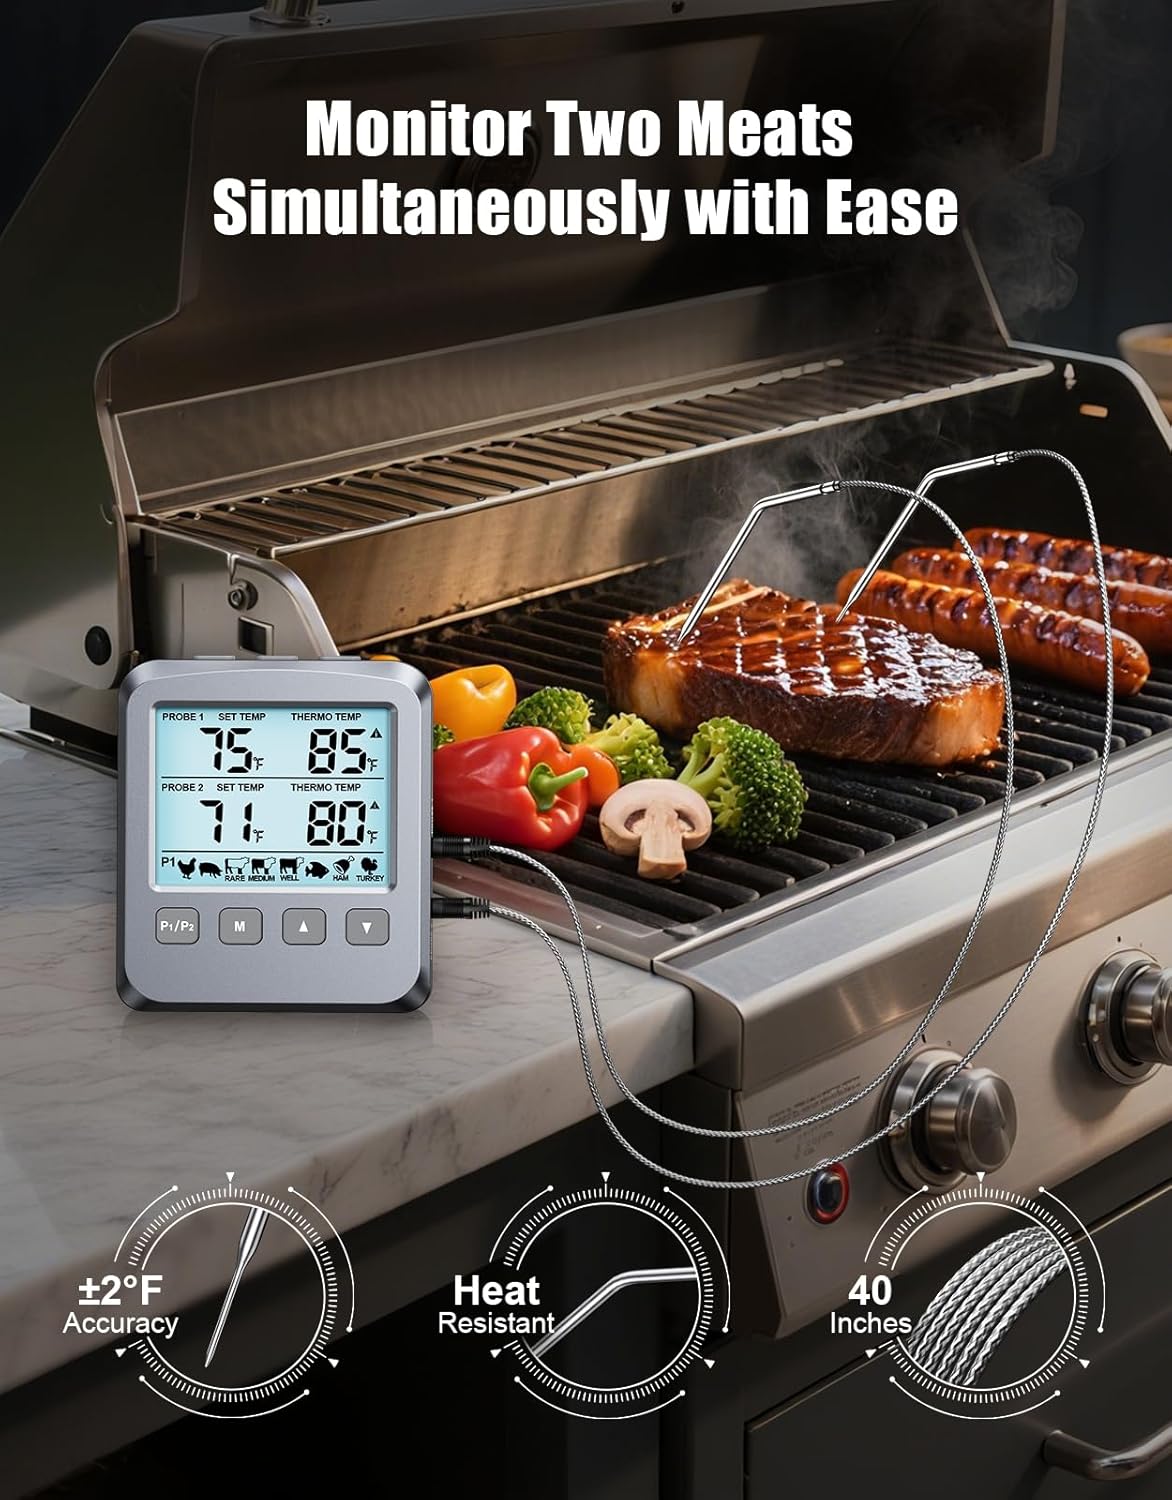
- Dual Probe Monitoring: Allows simultaneous monitoring of two different food items or different parts of a large cut of meat.
- High Accuracy: Provides temperature readings with ±1℃/±2℉ accuracy.
- Wide Temperature Range: Measures from -10°C to 300°C (14°F to 572°F).
- 8 Preset Temperatures: Includes pre-programmed settings for various meat types (Poultry, Pork/Veal, Beef Med Rare, Fish, Beef Med, Ham, Beef Well, Turkey).
- Adjustable Alarms: Notifies you with an audible beep, flashing backlight, and display when the target temperature is reached.
- Large LCD Screen with Backlight: Ensures clear temperature readings in all lighting conditions.
- User-Friendly Interface: Dedicated buttons for single functions simplify operation.
- Versatile Placement: Features a built-in magnet, stand, and hanging holes for convenient positioning.

4. Setup
4.1. Battery Installation
- Locate the battery compartment on the back of the thermometer unit.
- Open the battery compartment cover.
- Insert the included 1 x AAA battery, ensuring correct polarity (+/-).
- Close the battery compartment cover securely.
4.2. Connecting Probes
- Identify the probe ports labeled "PROBE 1" and "PROBE 2" on the side of the thermometer unit.
- Insert the stainless steel wire probes into the respective ports. Ensure they are fully seated.
5. Operating Instructions
5.1. Power On/Off
The thermometer will automatically power on once the battery is installed. To turn off the device, press and hold the power button (if available) or it may enter a low-power state after a period of inactivity.
5.2. Temperature Unit Selection (°C/°F)
Press the “°C/°F” button to switch between Celsius and Fahrenheit temperature displays.
5.3. Setting Preset Temperatures
The thermometer comes with 8 pre-programmed temperature settings for common meat types. To use a preset temperature:
- Press the “M” button to display the menu.
- Use the “UP” or “DOWN” buttons to select the desired food type (e.g., Poultry, Beef Med Rare).
- Press the “M” button again to confirm your selection, or wait 10 seconds for automatic confirmation.

5.4. Custom Temperature Setting
If you require a temperature not listed in the presets, you can manually adjust the target temperature using the “UP” and “DOWN” buttons after selecting a probe (P1/P2) and entering the temperature setting mode (refer to the full manual for specific button sequences if not covered by 'M' button).
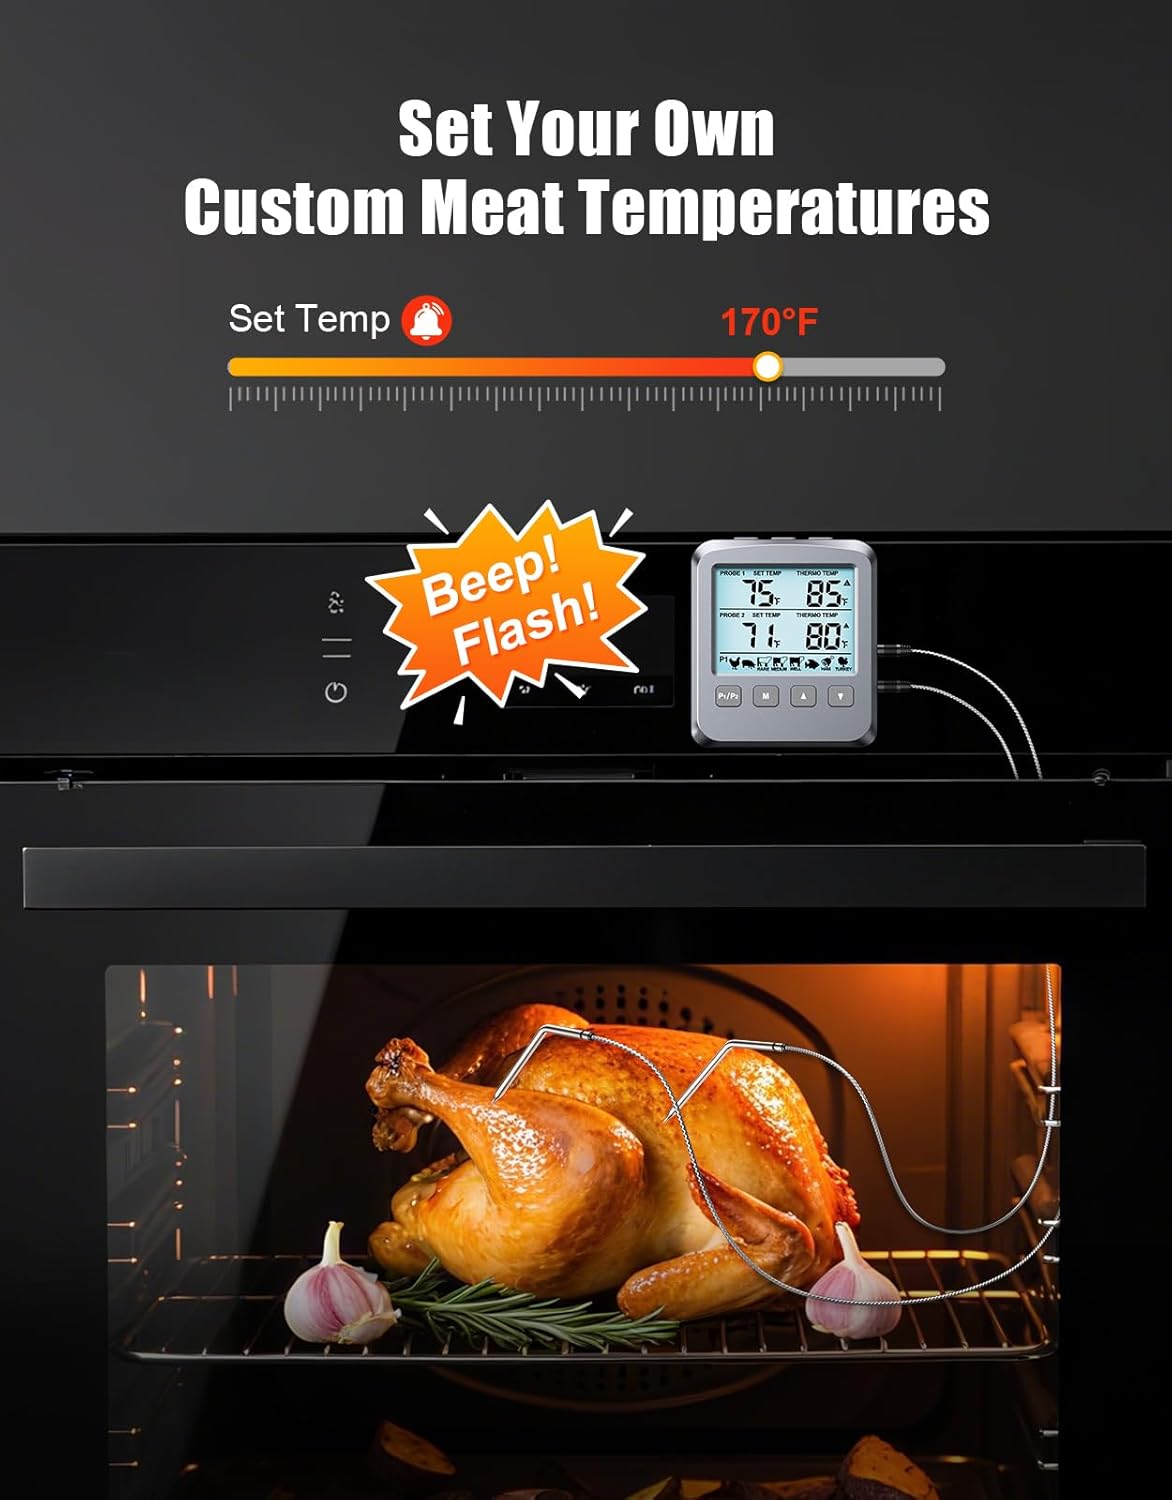
5.5. Alarm Function
Once the set target temperature is reached, the thermometer will activate a triple alarm message: an audible beep, a flashing backlight, and a visual alert on the display. This indicates that your food has reached the desired doneness.
5.6. Backlight
The large LCD screen features a bright backlight for clear readings, especially in low-light conditions. The backlight may activate automatically with button presses or have a dedicated button.
5.7. Probe Placement and Usage
Insert the tip of the stainless steel probe into the thickest part of the meat, avoiding bones. Ensure the probe cable is not directly exposed to flames or extreme heat that could damage the wiring. The thermometer unit can be placed on a countertop using its stand, attached to a metal surface with its magnet, or hung using the hanging hole.

6. Maintenance
6.1. Cleaning
- Probes: After each use, clean the stainless steel probes with warm soapy water. Rinse thoroughly and dry completely before storage. Do not immerse the probe connectors or the main unit in water.
- Main Unit: Wipe the thermometer unit with a damp cloth. Do not use abrasive cleaners or immerse the unit in water.
6.2. Storage
Store the thermometer and probes in a clean, dry place at room temperature. If storing for an extended period, it is recommended to remove the AAA battery to prevent leakage.
7. Troubleshooting
If you encounter issues with your CIRYCASE thermometer, please refer to the following common solutions:
| Problem | Possible Cause | Solution |
|---|---|---|
| No display / Unit won't turn on | Dead or incorrectly installed battery | Check battery polarity; replace with a new AAA battery. |
| Inaccurate temperature readings | Probe not fully inserted; probe damaged; probe tip touching bone/fat | Ensure probe is fully inserted into the port and meat; reposition probe away from bones; if damaged, replace probe. |
| Probe not working | Probe cable damaged; probe not connected properly | Inspect probe cable for damage; ensure probe is securely plugged into the unit. |
| Alarm not sounding | Volume too low (if adjustable); target temperature not reached | Ensure target temperature is set correctly and has been reached. |
8. Specifications
| Feature | Detail |
|---|---|
| Brand | CIRYCASE |
| Model | FM145 |
| Temperature Range | -10°C to 300°C (14°F to 572°F) |
| Accuracy | ±1℃ / ±2℉ |
| Probe Length | 102 cm (wired) |
| Display Type | LCD screen with backlight |
| Power Source | 1 x AAA Battery (included) |
| Special Features | Large Display, 8 Preset Temperatures, Alarm Function, Dual Probes |
| Connectivity Technology | Wired |
| Material | Plastic (outer material) |
9. Warranty & Support
For warranty information or technical support, please refer to the contact details provided on the product packaging or contact CIRYCASE customer service directly. Keep your purchase receipt for warranty claims.


