1. Introduction
The MakeID EP53 All-Weather PET Label Tape is engineered for durable and clear labeling across various indoor and outdoor environments. This label tape, featuring an integrated ribbon cartridge, is specifically designed for compatibility with the MakeID EP53 Portable Industrial Label Maker. It is suitable for a wide range of applications, including patch panel identification, punch block labeling, faceplate labels, asset tracking, warehouse organization, and general equipment identification tasks.
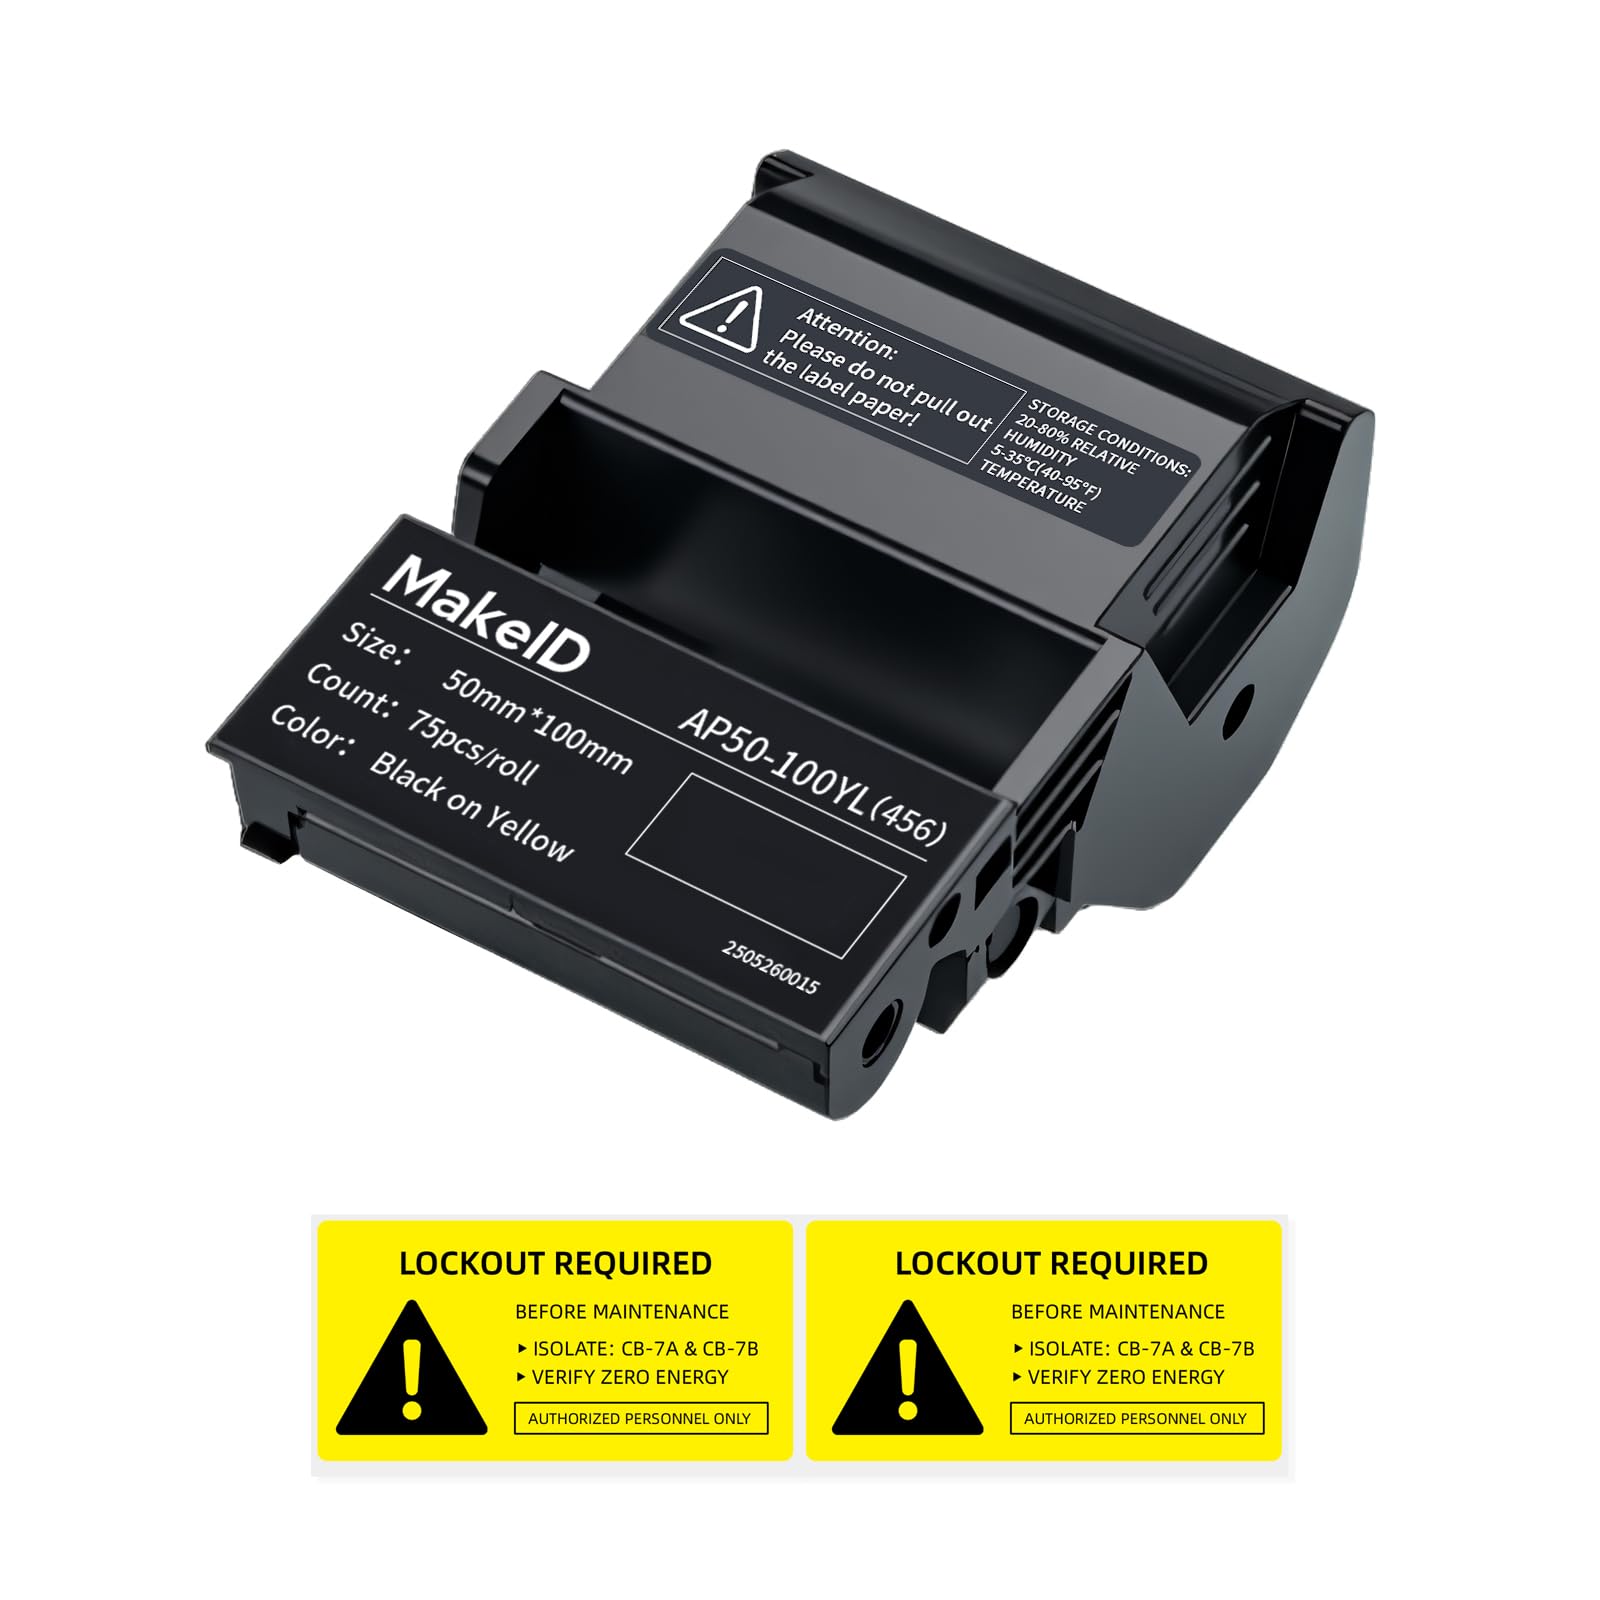
Image 1.1: MakeID EP53 All-Weather PET Label Tape Cartridge.
2. Setup: Installing the Label Cartridge
Follow these steps to correctly install the label tape cartridge into your MakeID EP53 Portable Industrial Label Maker:
- Open the Label Maker Cover: Ensure your MakeID EP53 Portable Industrial Label Maker is powered off. Locate and open the label compartment cover.
- Insert the Cartridge: Hold the MakeID EP53 Label Tape cartridge with the label side facing up. Align the cartridge with the guides inside the label maker's compartment.
- Secure the Cartridge: Gently push the cartridge down until it clicks into place. Ensure it is seated firmly and does not wobble.
- Close the Cover: Close the label compartment cover until it latches securely.
Note: Do not pull on the label paper directly from the cartridge once installed. The integrated design ensures proper feeding.
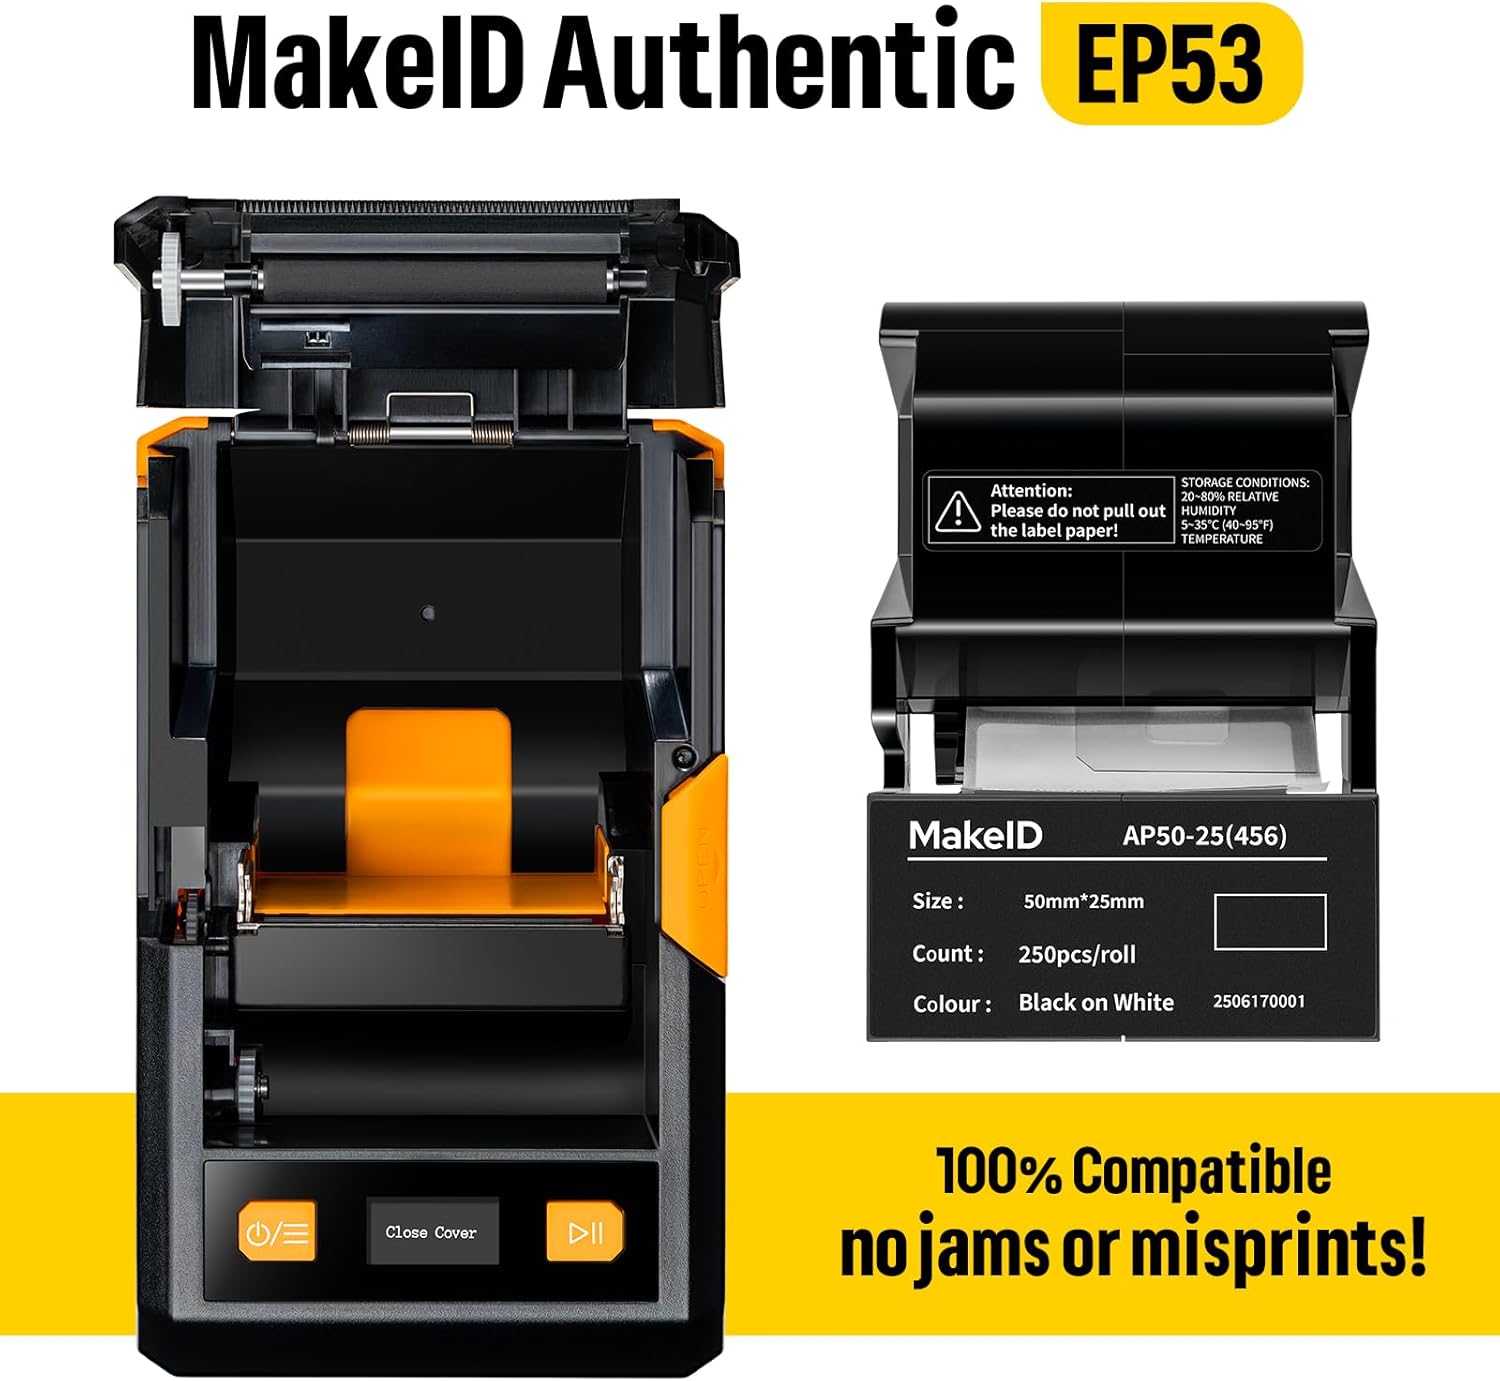
Image 2.1: MakeID EP53 Label Maker with cartridge compartment open.
3. Operating Instructions: Printing Labels
Once the label cartridge is installed, you can begin printing:
- Power On: Turn on your MakeID EP53 Portable Industrial Label Maker.
- Design Your Label: Use the label maker's interface or connected software to design your desired label text, symbols, or barcodes.
- Print: Initiate the printing process. The thermal transfer technology will create a durable, fade-resistant label.
- Cut: Once printed, use the label maker's integrated cutter to separate the label from the roll.
The thermal transfer printing technology ensures that the label text remains clear and readable for at least 5 years, even in challenging conditions.

Image 3.1: Components of the thermal transfer printing system.
4. Features of MakeID EP53 Labels
- Versatile Application: Suitable for a wide range of uses including patch panels, punch blocks, faceplate labels, asset tracking, warehouse organization, and general identification.
- Durability: Built to withstand heavy wear and tear, maintaining clear readability in high-traffic and demanding environments.
- Long-lasting Print: Utilizes thermal transfer printing technology, ensuring label text lasts for at least 5 years without fading.
- Integrated Cartridge Design: The label and ribbon are combined into a single cartridge, simplifying replacement and eliminating the need to purchase consumables separately.
- Strong Permanent Adhesive: Reliably bonds to various surfaces, including smooth, rough, highly textured, or powder-coated materials, and even low-energy surfaces.
- All-Weather Performance: Designed for both indoor and outdoor use, offering resistance to water, oil, sun exposure, low temperatures, and general wear.
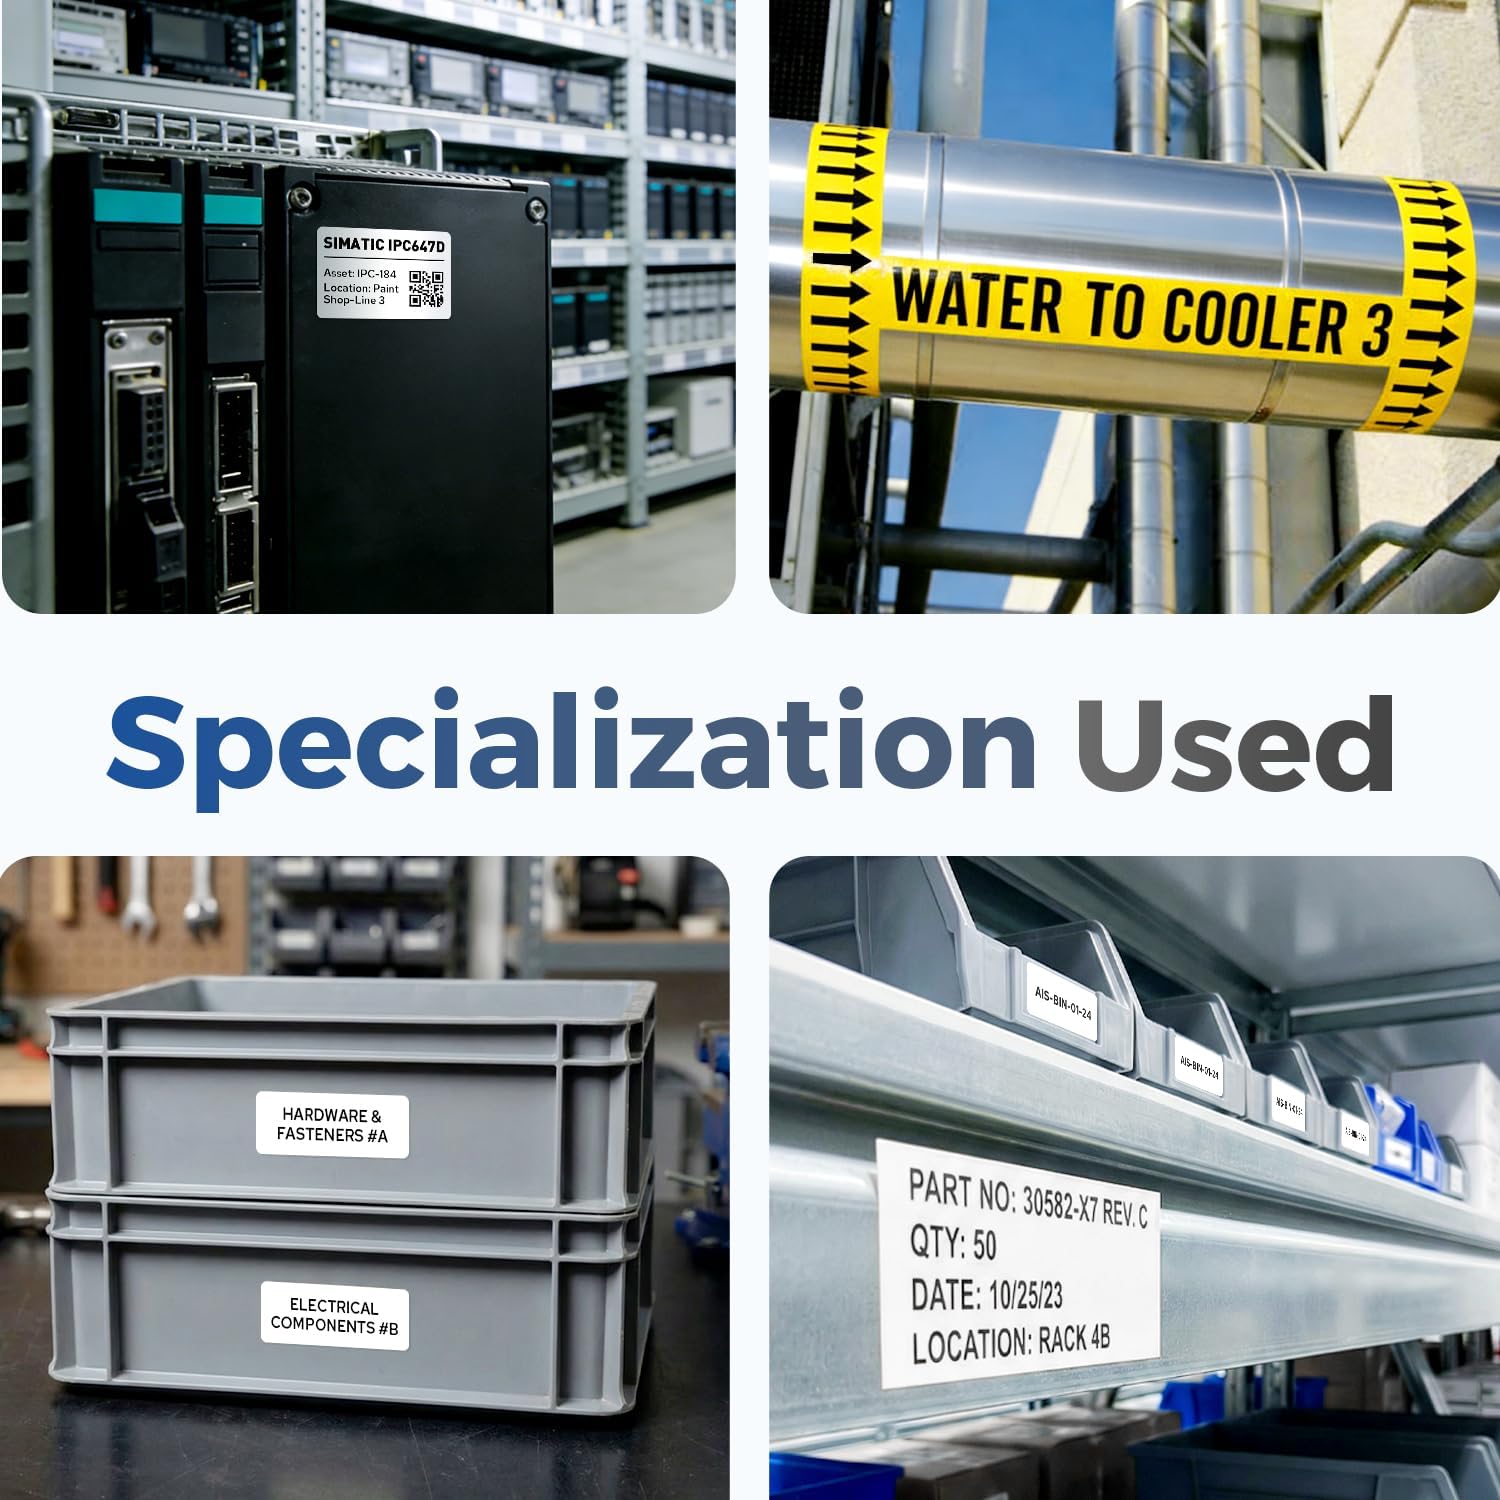
Image 4.1: Examples of MakeID labels in various industrial applications.

Image 4.2: QR code label applied to equipment for identification.

Image 4.3: Durability comparison of MakeID EP53 thermal transfer printing.
5. Maintenance
The MakeID EP53 label tape cartridges require minimal maintenance to ensure optimal performance and longevity.
- Storage: Store unused cartridges in a cool, dry place, away from direct sunlight and extreme temperatures. Recommended storage conditions are 20-80% relative humidity and 5-35°C (40-95°F) temperature.
- Cleaning: If the label maker's print head or cutter becomes dirty, refer to your MakeID EP53 Portable Industrial Label Maker's manual for cleaning instructions. Avoid direct contact with the label tape's adhesive surface.
6. Troubleshooting
For issues related to printing, label feeding, or cartridge recognition, please refer to the troubleshooting section of your MakeID EP53 Portable Industrial Label Maker's instruction manual. Ensure the label cartridge is correctly installed and that the label maker's firmware is up to date.
7. Specifications
| Brand | MakeID |
| Model Number | AP50-100YL-456-CRUS-01 |
| Color | Yellow |
| Size | 2" × 4" (50mm x 100mm) |
| Labels per Roll | 75 pieces |
| Material Type | Polyethylene Terephthalate (PET) |
| Printing Technology | Thermal Transfer |
| Adhesive Type | Strong Permanent Adhesive |
| Durability | All-Weather (Waterproof, Oilproof, Sun Protection, Low Temperature Resistant, Wear Resistant) |

Image 7.1: Available pre-sized label dimensions.

Image 7.2: MakeID EP53 Labels Purchasing Guide.
8. Warranty and Support
For warranty information regarding your MakeID EP53 Label Tape or for technical support, please visit the official MakeID store on Amazon or contact MakeID customer service directly. Contact details can typically be found on the product packaging or the manufacturer's website.


