
VEPRAG RC-G008
VEPRAG Universal TV Remote Control User Manual
Model: RC-G008

Image: Front view of the VEPRAG Universal TV Remote Control, showcasing its layout and buttons.
Introduction
This manual provides comprehensive instructions for the setup, operation, and maintenance of your VEPRAG Universal TV Remote Control (Model RC-G008). This remote is designed to be compatible with a wide range of LED, LCD, 3D, HDTV, and Smart TVs from most major brands. Please read this manual carefully before first use to ensure proper functionality and to maximize your remote control's performance.
Setup
Before using your new universal remote control, you will need to install batteries and program it to work with your television.
1. Battery Installation
The universal remote control requires two (2) AAA alkaline batteries (not included). Ensure correct polarity when inserting the batteries.
- Open the battery compartment cover on the back of the remote control.
- Insert two AAA batteries, matching the (+) and (-) terminals as indicated inside the compartment.
- Close the battery compartment cover securely.
2. Programming the Remote
There are two primary methods to program your VEPRAG Universal TV Remote Control:
Method 1: Brand Search (Automatic Programming)
This method allows the remote to automatically search for the correct code for your TV brand.
- Ensure your TV is turned on.
- Press and hold the corresponding brand button on the remote control (e.g., SAMSUNG, SONY, PHILIPS) for approximately 5 seconds.
- The LED indicator on the remote will flash three times, indicating that the setting is complete.
- Test the remote's functions (e.g., Power, Volume, Channel) with your TV. If it does not work, repeat the process or try Method 2.
Method 2: Set by Code (Manual Programming)
This method requires you to manually enter a 3-digit code specific to your TV brand from the provided code list.
- Ensure your TV is turned on.
- Press and hold the corresponding brand button on the remote control for approximately 3 seconds. Release the button when the LED indicator flashes three times.
- Refer to the code list provided in the instruction manual (also shown in the image below) and enter the 3-digit code for your TV brand using the number buttons on the remote.
- If the code is correct, the LED light on the remote will turn off. If the code is incorrect, the LED light will remain on, indicating an error. Try another code from the list for your brand.
- Test the remote's functions with your TV.

Image: A section of the user manual detailing the "Set by Code" and "Brand Search" programming methods, including a table of 3-digit brand codes for various TV manufacturers.
Operating Instructions
Once programmed, your VEPRAG Universal TV Remote Control functions similarly to your original TV remote. Below are key features and operational notes.
Universal Compatibility
This remote is designed to be compatible with a wide range of TV brands, including but not limited to:
- Samsung, Sanyo, Vizio, Philips, Sharp, Insignia, Toshiba, TCL, Hisense, Panasonic, Magnavox, JVC, Hitachi, Westinghouse, Vestel, Seiki, Sony, Haier, RCA.

Image: The universal remote control displayed alongside a comprehensive list of compatible television brands.
Backlight Feature
The remote control is equipped with fluorescent buttons and stylish orange LED backlighting. This feature improves visibility, allowing you to easily see each button in dark or dimly lit rooms.
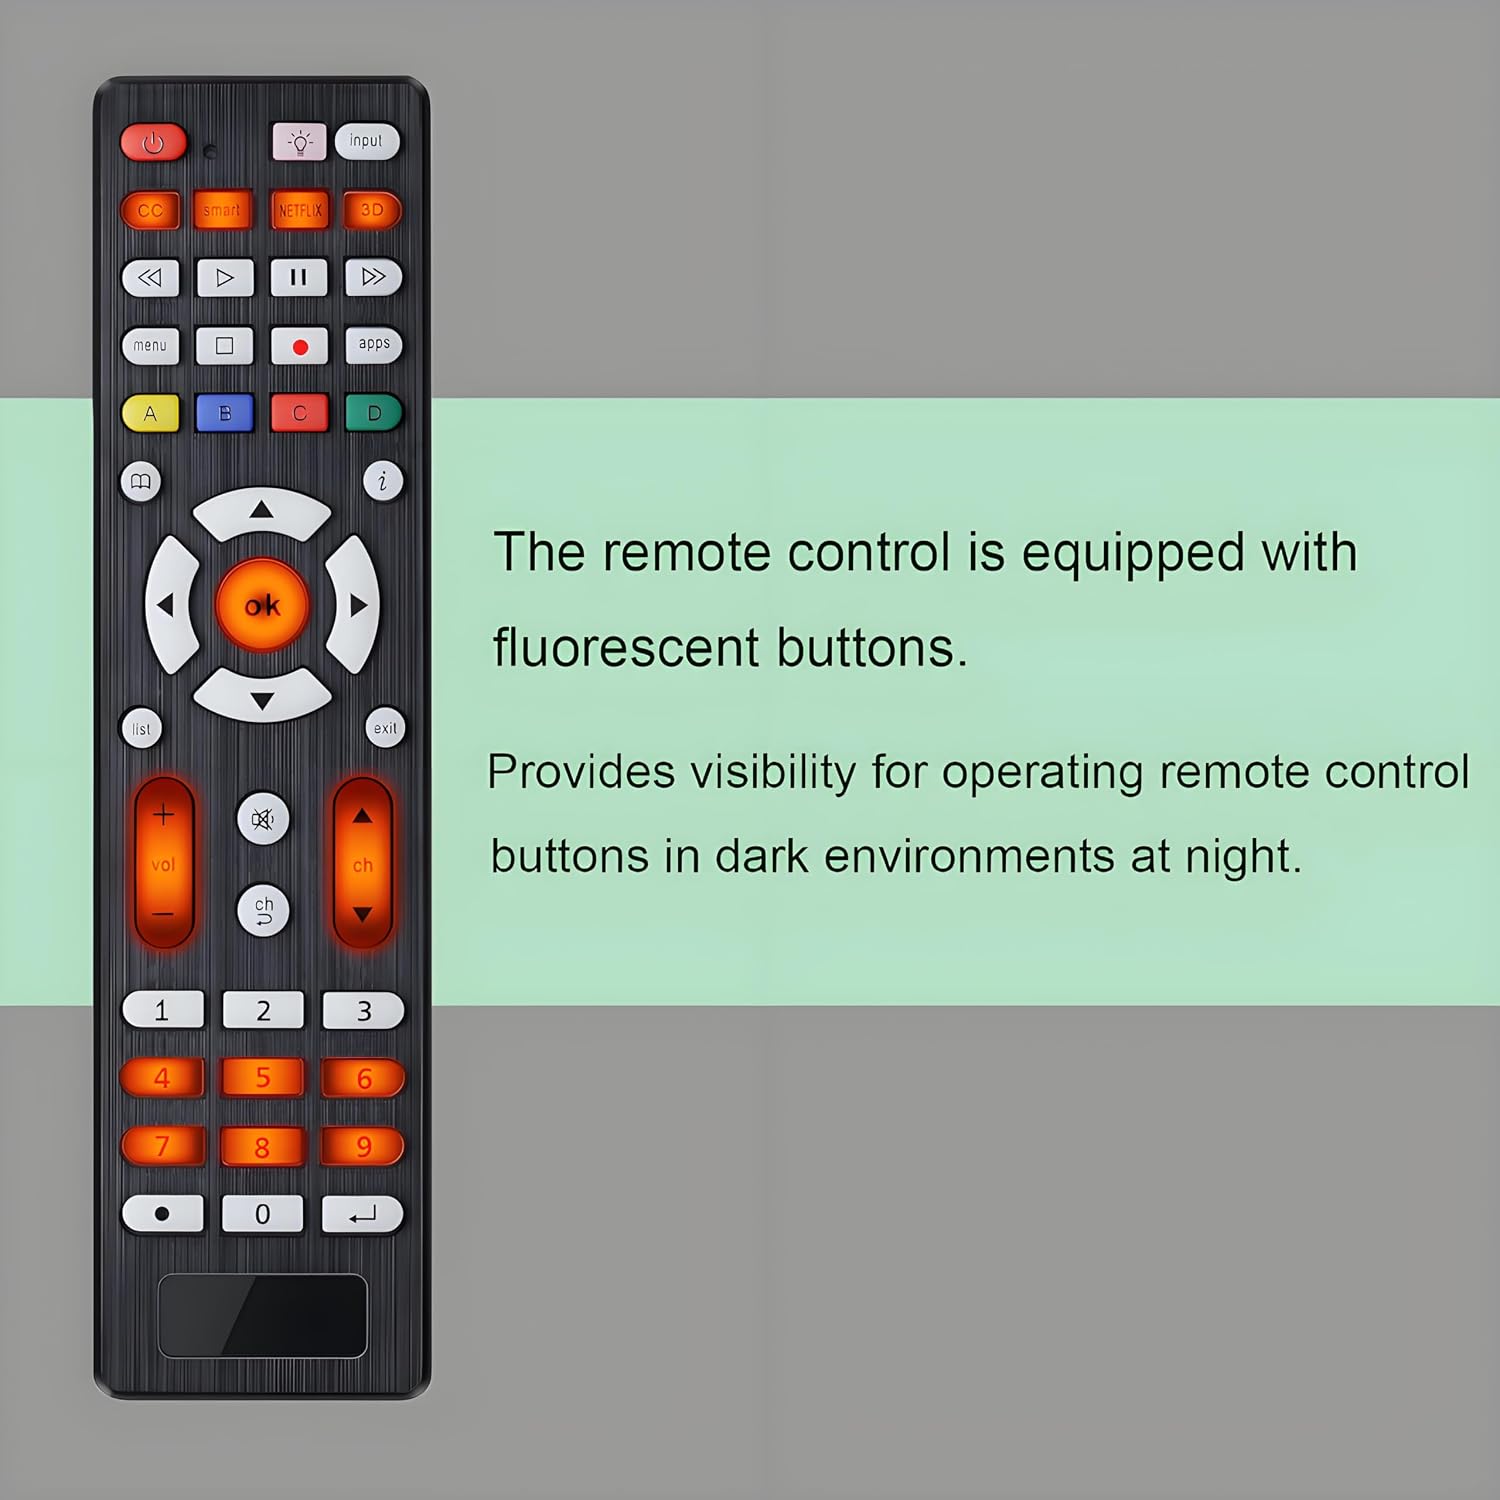
Image: Close-up of the remote control, emphasizing the fluorescent buttons that glow for better visibility in low light.

Image: The remote control with its orange LED backlighting illuminated, showcasing the enhanced visibility of the buttons.
Important Notes
This universal remote control is specifically designed for televisions. It is NOT compatible with streaming devices, Roku Streaming Sticks, or TV Sticks.
Maintenance
Proper care will extend the life of your remote control.
- Keep the remote control clean by wiping it with a soft, dry cloth.
- Avoid exposing the remote to extreme temperatures, humidity, or direct sunlight.
- Do not drop the remote or subject it to strong impacts.
- If the remote will not be used for an extended period, remove the batteries to prevent leakage.
Troubleshooting
If you encounter issues with your remote control, please refer to the following common solutions:
- Remote Not Responding:
- Check if the batteries are inserted correctly with the proper polarity.
- Replace old batteries with new AAA alkaline batteries. Do not mix old and new batteries, or different types of batteries.
- If the remote control is not sensitive, try removing and reinstalling the batteries.
- Programming Issues (LED light remains on after code entry):
- This indicates an incorrect code was entered. Refer to the code list in the manual (or the image in the Setup section) and try another 3-digit code for your TV brand.
- Ensure you are holding the brand button for the correct duration (3 seconds for manual code entry, 5 seconds for brand search).
- Some Functions Not Working:
- While universal, some specific advanced functions might not be supported for all TV models.
- Ensure the remote is pointed directly at the TV's IR receiver.
- Re-program the remote using a different code for your TV brand, if available.
Specifications
| Feature | Detail |
|---|---|
| Model | RC-G008 |
| Brand | VEPRAG |
| Product Dimensions | 6.6 x 1.5 x 0.7 inches |
| Item Weight | 1.06 ounces |
| Batteries Required | 2 AAA batteries (not included) |
| Special Feature | Backlit, Universal |
| Color | Black |
| Max Number of Supported Devices | 2 (typically one TV, but can be programmed for another if compatible) |
| Compatible Devices | Television (LED, LCD, 3D, HDTV, Smart TV) |
| Manufacturer | VEPRAG |
Warranty and Support
For specific warranty information regarding your VEPRAG Universal TV Remote Control, please refer to the documentation included with your purchase or visit the official VEPRAG website. If you require further assistance or have questions not covered in this manual, please contact VEPRAG customer support through the channels provided on their official website or your retailer's support page.
Please retain your proof of purchase for any warranty claims.
Ask a question about this manual
Ask about setup, troubleshooting, compatibility, parts, safety, or missing instructions. Manuals+ will review the question and use this page’s manual context to help answer it.