
Creality Ferret Pro 6
Creality Ferret Pro 3D Scanner User Manual
Model: Ferret Pro 6
1. Introduction
The Creality Ferret Pro 3D Scanner is a versatile, handheld device designed for high-accuracy 3D scanning. It features 0.1mm accuracy, an RGB camera for true-to-life color capture, and a 30FPS scanning speed. Compatible with PC, iOS, and Android devices, it offers wireless connectivity via WiFi 6 and can scan challenging surfaces like black and metal without the need for scanning spray. This manual provides essential information for setting up, operating, and maintaining your Ferret Pro 3D Scanner.
2. Safety Information
- Read all instructions before operating the device.
- Do not look directly into the scanner's light source.
- Keep the device away from water or other liquids.
- Handle the scanner with care to avoid damage.
- Ensure proper ventilation during operation.
- Use only manufacturer-approved accessories and power supplies.
3. Package Contents
Verify that all items are present in your package:
- Creality CR Scan Ferret Pro 3D Scanner
- USB Cable
- Phone Holder
- Tripod
- Carrying Case
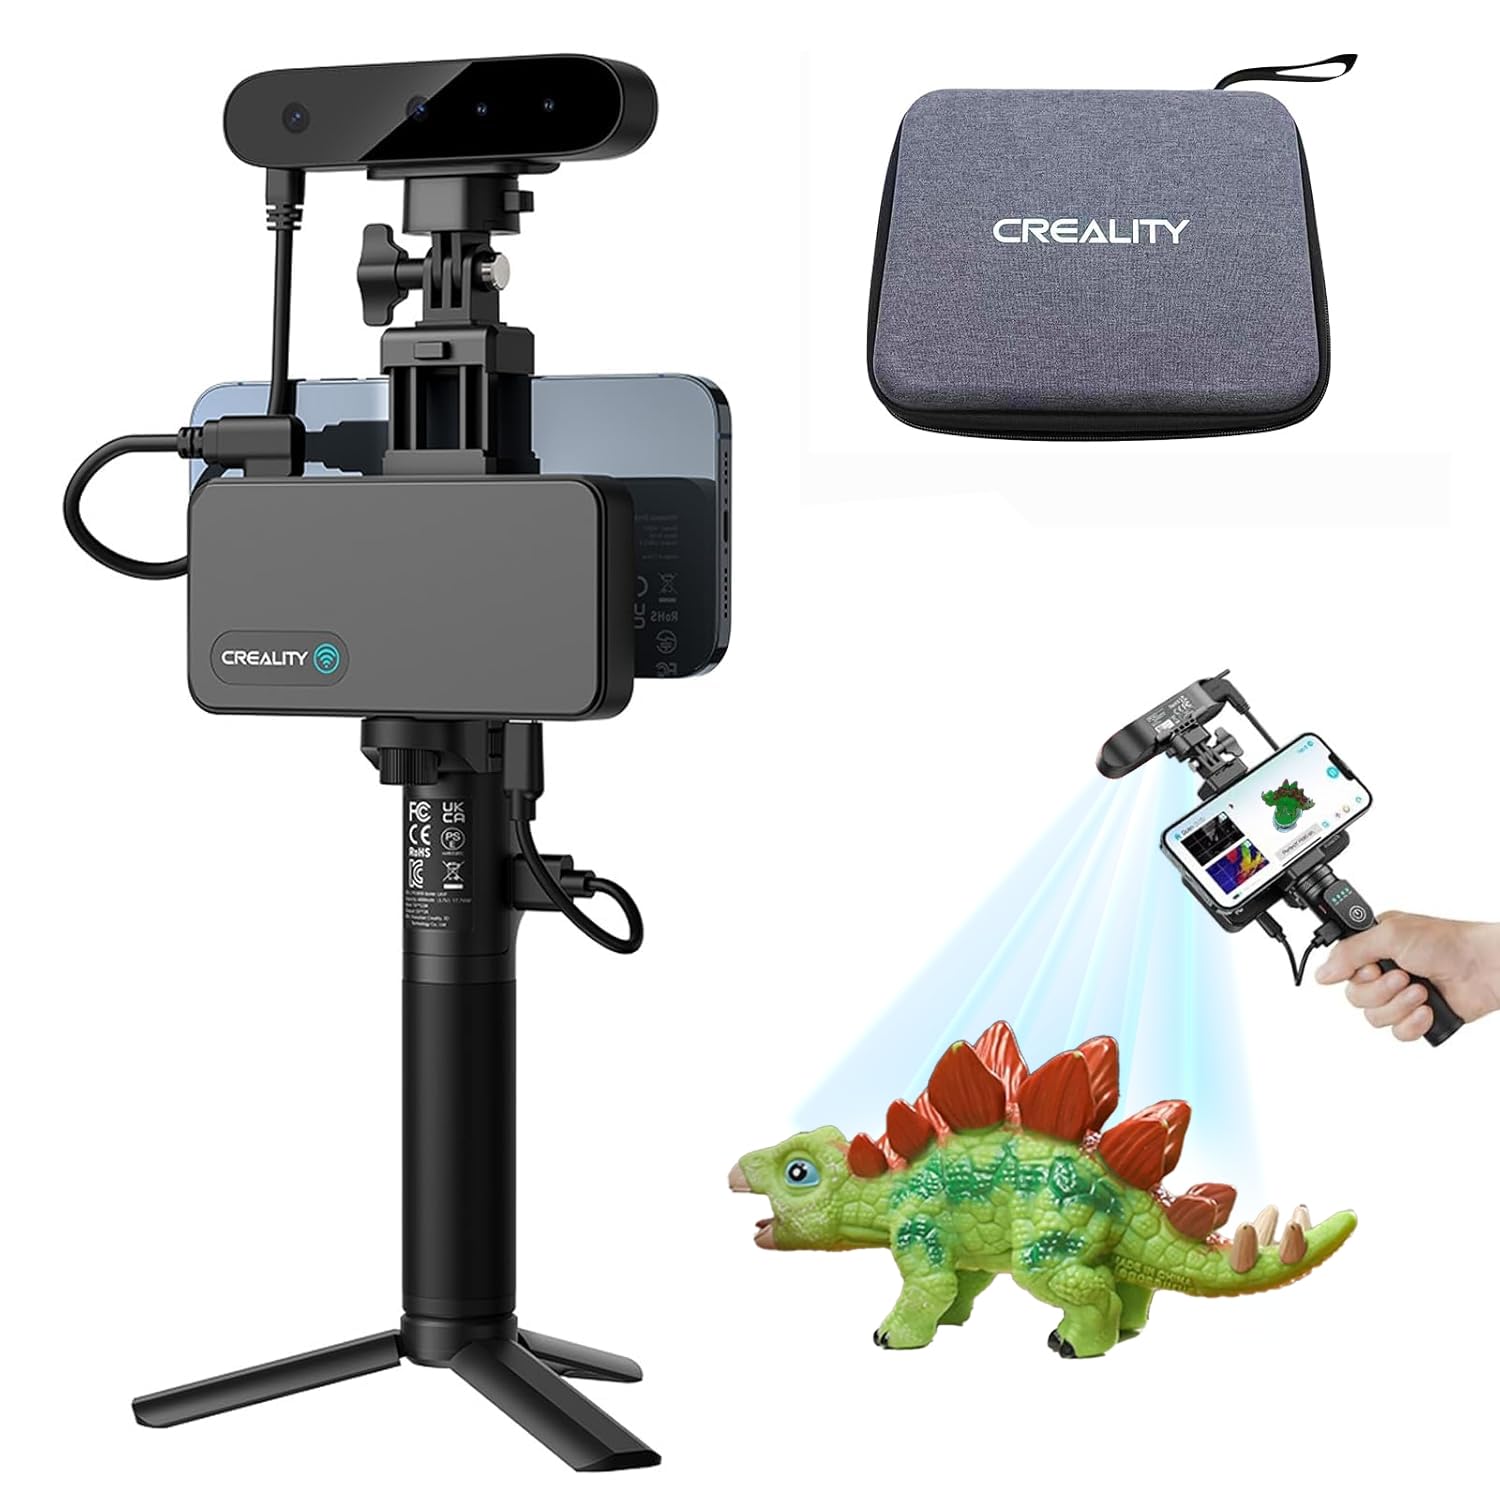
Image: Creality Ferret Pro 3D Scanner with its included accessories, demonstrating its portability and setup options.
4. Product Overview
The Ferret Pro 3D Scanner is engineered for precision and ease of use. Key features include:
- Pro-Grade Accuracy: Up to 0.1mm precision for detailed models.
- True-to-Life Color: 2MP RGB camera for rich color and texture capture.
- Stable Scanning: Optical anti-shake tracking and smart exposure control for consistent results.
- Fast Frame Rate: Up to 30FPS for smooth 3D scanning.
- Versatile Compatibility: Connects wirelessly via WiFi 6 or USB to Windows, Mac, and Android devices. iPhone users connect via WiFi.
- Compact & Portable: Weighs only 105g, making it easy to carry and use anywhere.

Image: The Creality CR-Scan Ferret Pro 3D Scanner, emphasizing its wireless capabilities, anti-shaking technology, and fast data transmission.
5. Setup Guide
5.1 Software Installation
- Download the latest Creality Scan software from the official Creality website or your device's app store (for iOS/Android).
- Install the software on your PC, Mac, Android, or iOS device.
5.2 Connecting the Scanner
- For PC/Mac/Android (USB): Connect the scanner to your device using the provided USB cable.
- For PC/Mac/Android/iOS (Wireless): Connect the scanner to your device via WiFi 6. Follow the on-screen instructions in the Creality Scan software for wireless pairing.
5.3 Initial Calibration
Upon launching the software, follow any prompts for initial calibration to ensure optimal scanning performance.
6. Operating Instructions
6.1 General Scanning Principles
To achieve the best scanning results, maintain an optimal distance between the scanner and the object. Move the scanner slowly and steadily. Rapid movements or quick rotations of the object can lead to tracking loss.
Video: This video demonstrates how to maintain optimal scanning distance and movement to prevent tracking loss during the 3D scanning process, showing an engine part being scanned.
6.2 Scanning Modes
The Ferret Pro offers different scanning modes to suit various object types:
- High-Quality Mode: Provides up to 0.1mm accuracy, ideal for capturing fine details on medium-sized objects (10-30 inches).
- Wide-Range Mode: Utilizes a dedicated 3D imaging ASIC chip for fast scanning of medium and large objects.

Image: Illustration of the scanner's multi-mode capabilities, including High-Quality mode for intricate details and Wide-Range mode for larger objects.
6.3 Scanning Challenging Surfaces
The Ferret Pro is equipped to handle surfaces that are typically difficult for 3D scanners:
- Black & Metal Surfaces: The built-in "dark mode" setting allows for scanning dark, black, or metallic surfaces without the need for scanning spray.

Image: The scanner capturing a black car tire, illustrating its capability to scan black and metal objects without requiring a scanning spray.
6.4 Outdoor Scanning
Engineered with optical anti-shake tracking and smart exposure control, the Ferret Pro delivers consistent results even in bright outdoor lighting conditions (up to 30,000 lux).

Image: A user scanning an eagle statue outdoors, highlighting the scanner's performance in various lighting conditions.
6.5 Using Markers for Scanning
For objects with few distinct geometric or textural features, using markers can significantly improve tracking stability and accuracy. This is particularly useful for small objects or those with uniform surfaces.
Video: An instructional video demonstrating the use of marker features for stable tracking during 3D scanning, showing a mug being scanned with markers.
Tips for Sticking Markers:
- Markers can be placed on the object's surface or on surrounding surfaces (e.g., a turntable) to aid tracking. Do not paste markers directly onto a turntable if the object itself has sufficient features.
- Ensure markers are stuck flat, without warping, folding, or overlapping.
- Maintain a distance greater than 10mm between markers and paste them irregularly to avoid creating a regular pattern.
- Avoid placing markers on the main features of the object. They are best used on large, flat, or curved surfaces lacking obvious features.
- Do not add markers while scanning is already in progress.
Scanning with Markers:
- In the Creality Scan software, select the 'Marker' feature option before starting a new scan.
- Ensure at least 4-6 valid marker points are visible in the scanner's frame for stable tracking.
- Move the scanner at a slow speed to prevent motion blur and image distortion, especially when scanning new areas with newly observed markers.
6.6 Exporting Models
After scanning and processing, your 3D models can be exported in common formats such as OBJ, STL, or PLY, making them compatible with most CAD, design, printing, and modeling software.
7. Maintenance
- Regularly clean the scanner's lenses and sensors with a soft, dry cloth.
- Keep the scanner in its protective carrying case when not in use.
- Periodically check for and install software updates to ensure optimal performance and access to new features.
8. Troubleshooting
- Tracking Loss: If tracking is lost (indicated by red areas in the software), return the scanner to its previous position and hold it steady for a few seconds to allow it to re-establish tracking. Ensure the object has sufficient features or markers.
- Insufficient Valid Scanned Points: Adjust the IR exposure manually or modify the scanning distance to ensure enough valid points are captured.
- Connection Issues: Verify that all cables are securely connected (for USB) or that your device is properly connected to the scanner's WiFi network (for wireless). Restart the software and scanner if necessary.
9. Specifications
| Feature | Specification |
|---|---|
| Model Number | Ferret Pro 6 |
| Accuracy | Up to 0.1mm |
| Frame Rate | Up to 30FPS |
| RGB Camera | 2MP for color and texture capture |
| Connectivity | WiFi 6, USB |
| Compatibility | Windows, Mac, Android, iOS (WiFi only for iPhone) |
| Weight | 105g |
| Output Formats | OBJ, STL, PLY |
| Package Dimensions | 8.6 x 6.6 x 3.1 inches |
| Manufacturer | Creality |
| Date First Available | June 23, 2025 |
10. Warranty and Support
For detailed warranty information, technical support, and additional resources, please refer to the documentation included with your product or visit the official Creality website. You can also find community forums and FAQs for further assistance.
Related documentsFerret Pro 6


Ask a question about this manual
Ask about setup, troubleshooting, compatibility, parts, safety, or missing instructions. Manuals+ will review the question and use this page’s manual context to help answer it.