
1. Product Overview
This manual provides detailed instructions for the installation, operation, and maintenance of your AINAVI 15-inch Android 13 Car Stereo Radio, designed specifically for Toyota FJ Cruiser models from 2007 to 2021. This unit integrates advanced features such as wireless CarPlay, Android Auto, GPS navigation, and a high-resolution QLED touch screen to enhance your driving experience.

Image 1.1: Overview of the AINAVI Car Stereo Radio's key features.
Key Features:
- Wireless CarPlay & Android Auto: Stable signal flow for seamless smartphone integration.
- 15-inch HD QLED Touch Screen: 1920x1080 resolution for clear visuals and responsive interaction.
- Advanced GPS Navigation: Supports most satellite services with 5G WiFi for accurate real-time mapping.
- High Performance: 8-Core CPU, Dual-Core GPU, 6GB RAM, and 128GB ROM for smooth operation and ample storage.
- Integrated Audio Processing: 48-band EQ with DSP for customizable sound profiles.
- Rear View Camera Support: 1080P AHD input for clear reversing visuals with trajectory display.
- Physical Controls: Two large knobs for AC temperature and fan speed, a central knob for volume, and dedicated AC function buttons.
- Split Screen Functionality: Run multiple applications simultaneously on the display.
- USB to RCA Output: Allows independent video playback on multiple screens for rear passengers.
2. What's Included
Verify that all components listed below are present in your package before beginning installation.
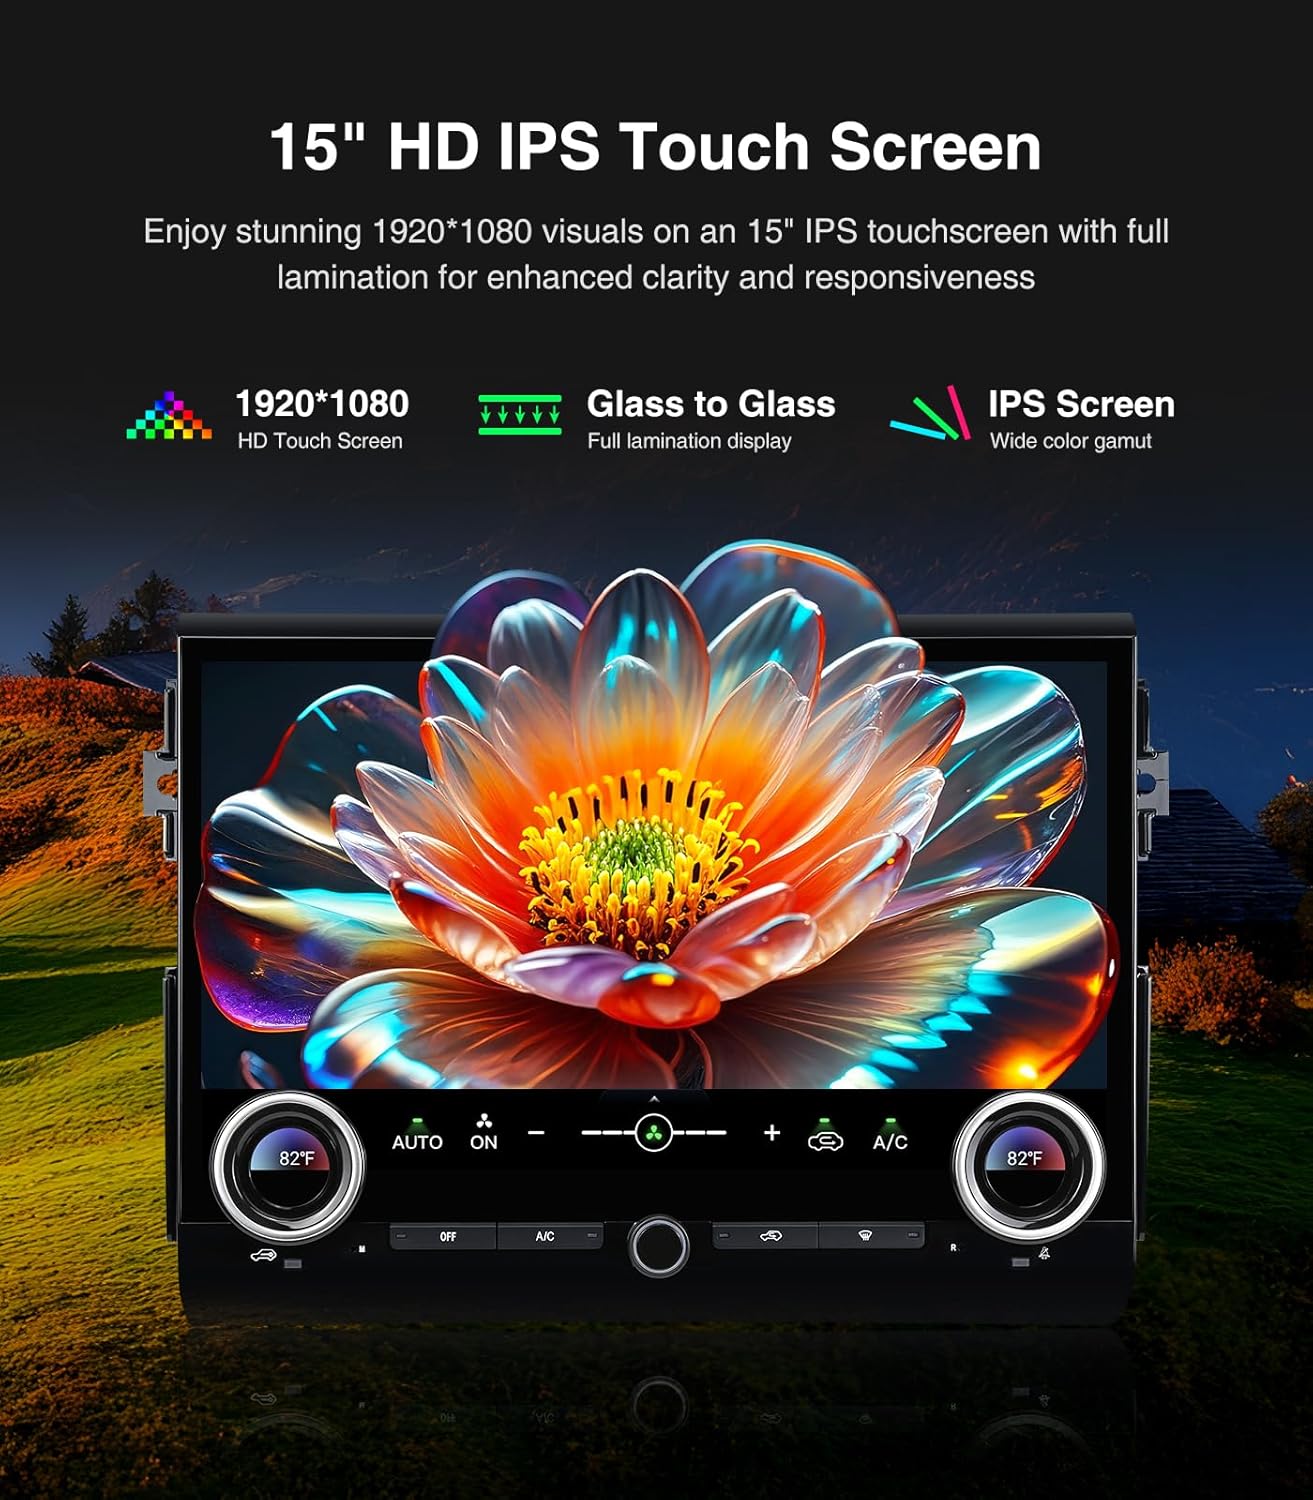
Image 2.1: Contents of the AINAVI Car Stereo Radio package.
- Car Head Unit with Frame for Toyota FJ Cruiser (1 unit)
- AHD 1080P Rear View Camera (1 unit)
- GPS Antenna (1 unit)
- USB 4-Pin Cable (1 unit)
- USB 6-Pin Cable (1 unit)
- Microphone (1 unit)
- Blue Frame Removal Tool (1 unit)
- User Manual (1 unit)
- Power Cable (1 unit)
3. Setup and Installation
Professional installation is recommended for this product. Ensure the vehicle's battery is disconnected before starting any electrical work. Refer to the provided wiring diagrams and follow these general steps.
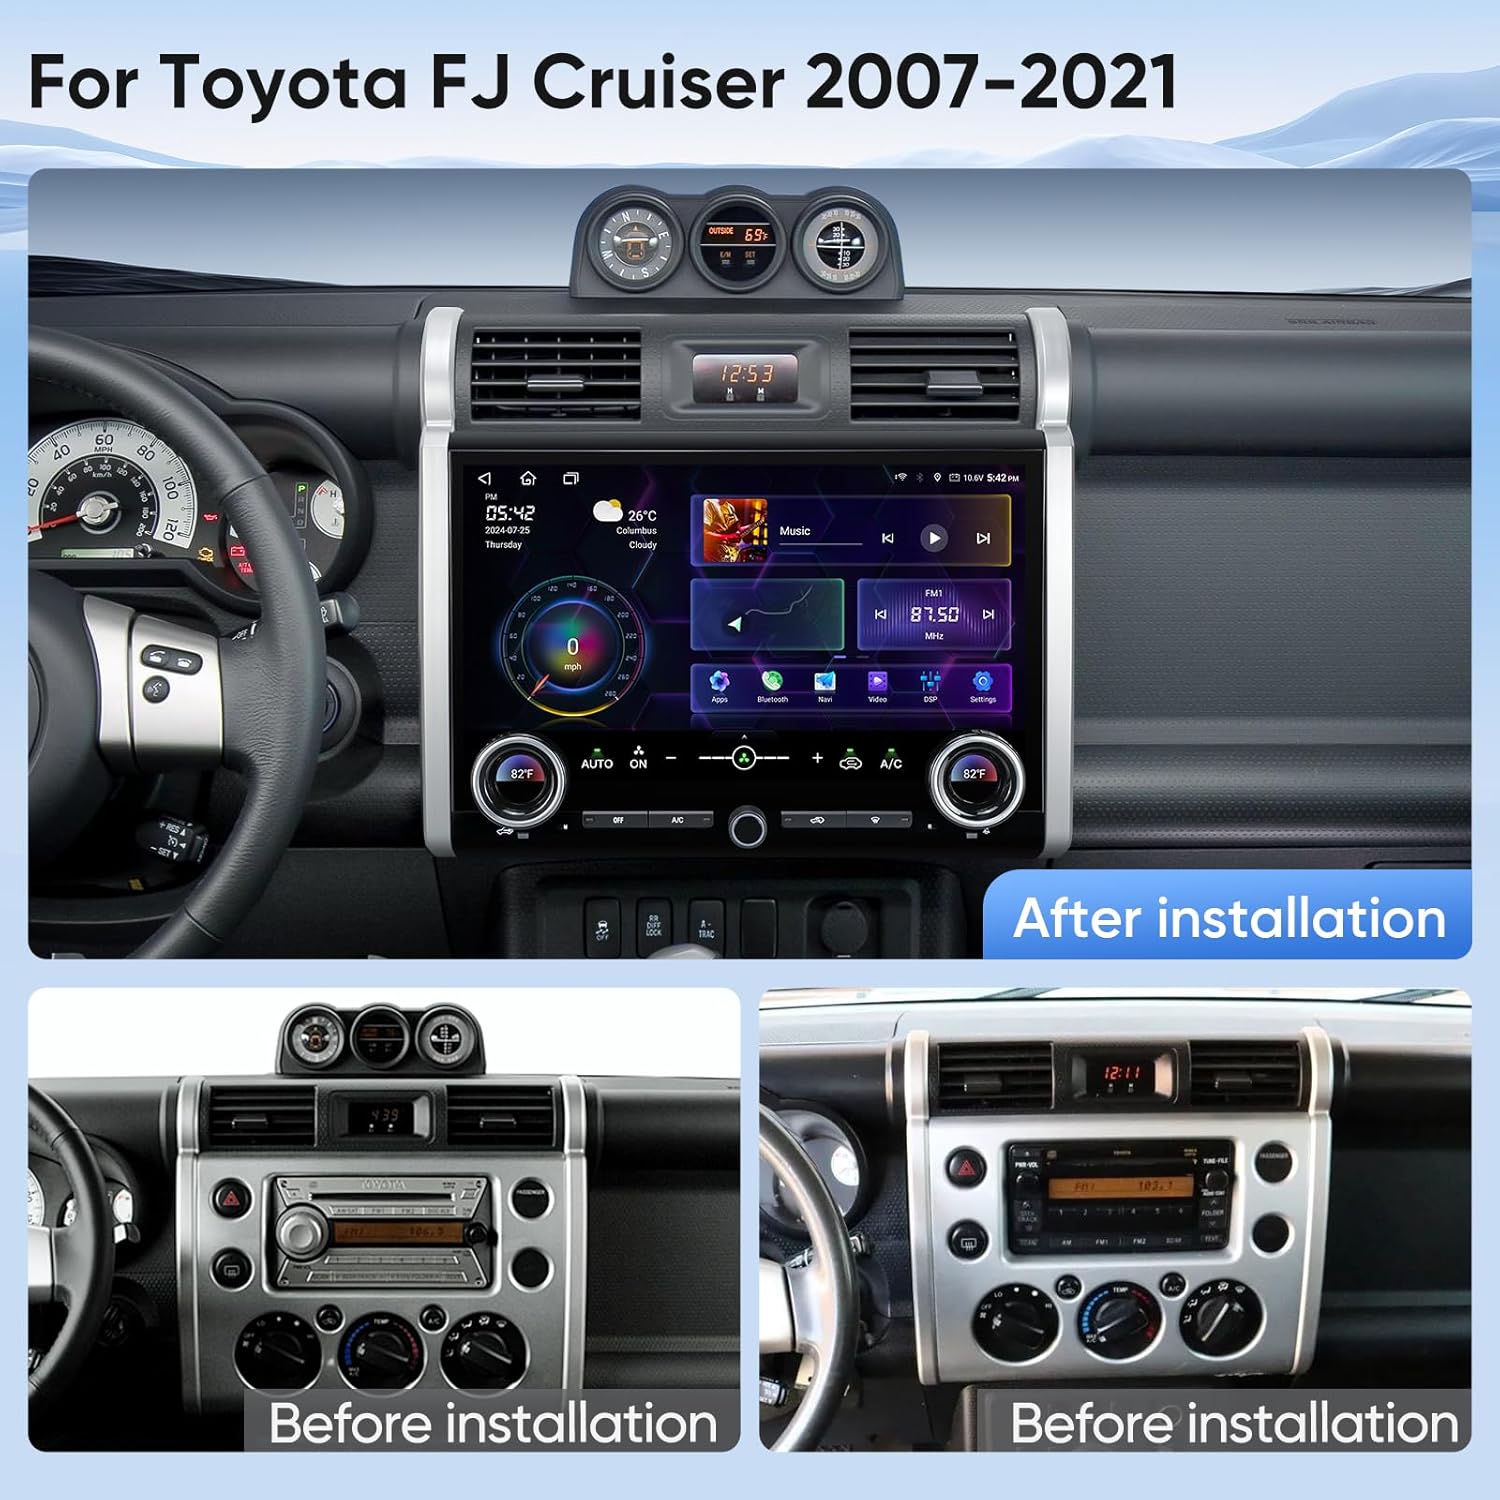
Image 3.1: Visual comparison of the dashboard before and after installing the AINAVI Car Stereo Radio.
3.1 Head Unit Installation
- Carefully remove the original factory radio and dashboard trim using the provided frame removal tool.
- Connect the main power harness from the new head unit to the vehicle's wiring harness. Ensure all connections are secure.
- Connect the GPS antenna and external microphone to the designated ports on the head unit. Position the GPS antenna in a location with a clear view of the sky, and the microphone near the driver for optimal voice pickup.
- If applicable, connect the USB cables for external devices.
- Carefully mount the new head unit and frame into the dashboard opening. Secure it with screws if necessary.
- Reconnect the vehicle's battery and test the unit's basic functions before fully reassembling the dashboard trim.
3.2 Rear View Camera Installation
- Mount the AHD 1080P rear view camera in a suitable location at the rear of your vehicle, typically near the license plate light.
- Route the camera's video cable and power cable through the vehicle's interior to the head unit.
- Connect the camera's video output to the 'CAM IN' or 'REVERSE CAMERA' input on the head unit.
- Connect the camera's power wire to the vehicle's reverse light circuit (12V) so it receives power when the vehicle is in reverse.
- Connect the reverse trigger wire from the head unit's harness to the vehicle's reverse light signal wire. This tells the head unit to switch to the camera view when reverse gear is engaged.
Installation Videos:
Video 3.1: Detailed installation manual for the AINAVI Car Stereo Radio in a Toyota FJ Cruiser (2007-2021).
Video 3.2: Instructions for installing a camera with the head unit.
4. Operating Instructions
This section details the various functions and features of your AINAVI Car Stereo Radio.
4.1 General Interface and Navigation
The 15-inch QLED touchscreen provides access to all functions. Swipe left or right to navigate between application pages. Tap icons to launch applications.

Image 4.1: GPS Navigation interface on the AINAVI Car Stereo Radio.
The built-in GPS module and 5G WiFi connectivity ensure accurate and real-time navigation. You can use pre-installed navigation apps or download others from the Google Play Store.
4.2 Wireless CarPlay & Android Auto
Connect your iPhone or Android smartphone wirelessly to access navigation, music, messages, and more directly on the head unit's screen.

Image 4.2: Wireless CarPlay and Android Auto functionality.
4.3 Audio Controls and DSP
The unit features a professional DSP (Digital Sound Processor) with a 48-band equalizer. Adjust sound settings, including bass boost, surround sound patterns, and individual speaker volume, to customize your audio experience.

Image 4.3: DSP and Equalizer interface for audio customization.
Video 4.1: Demonstration of DSP settings and audio adjustments.
4.4 Air Conditioning Control
The unit integrates with your vehicle's AC system. Use the two large physical knobs to adjust temperature and fan speed. Press the knobs to switch between functions. Additional physical buttons control various AC modes.
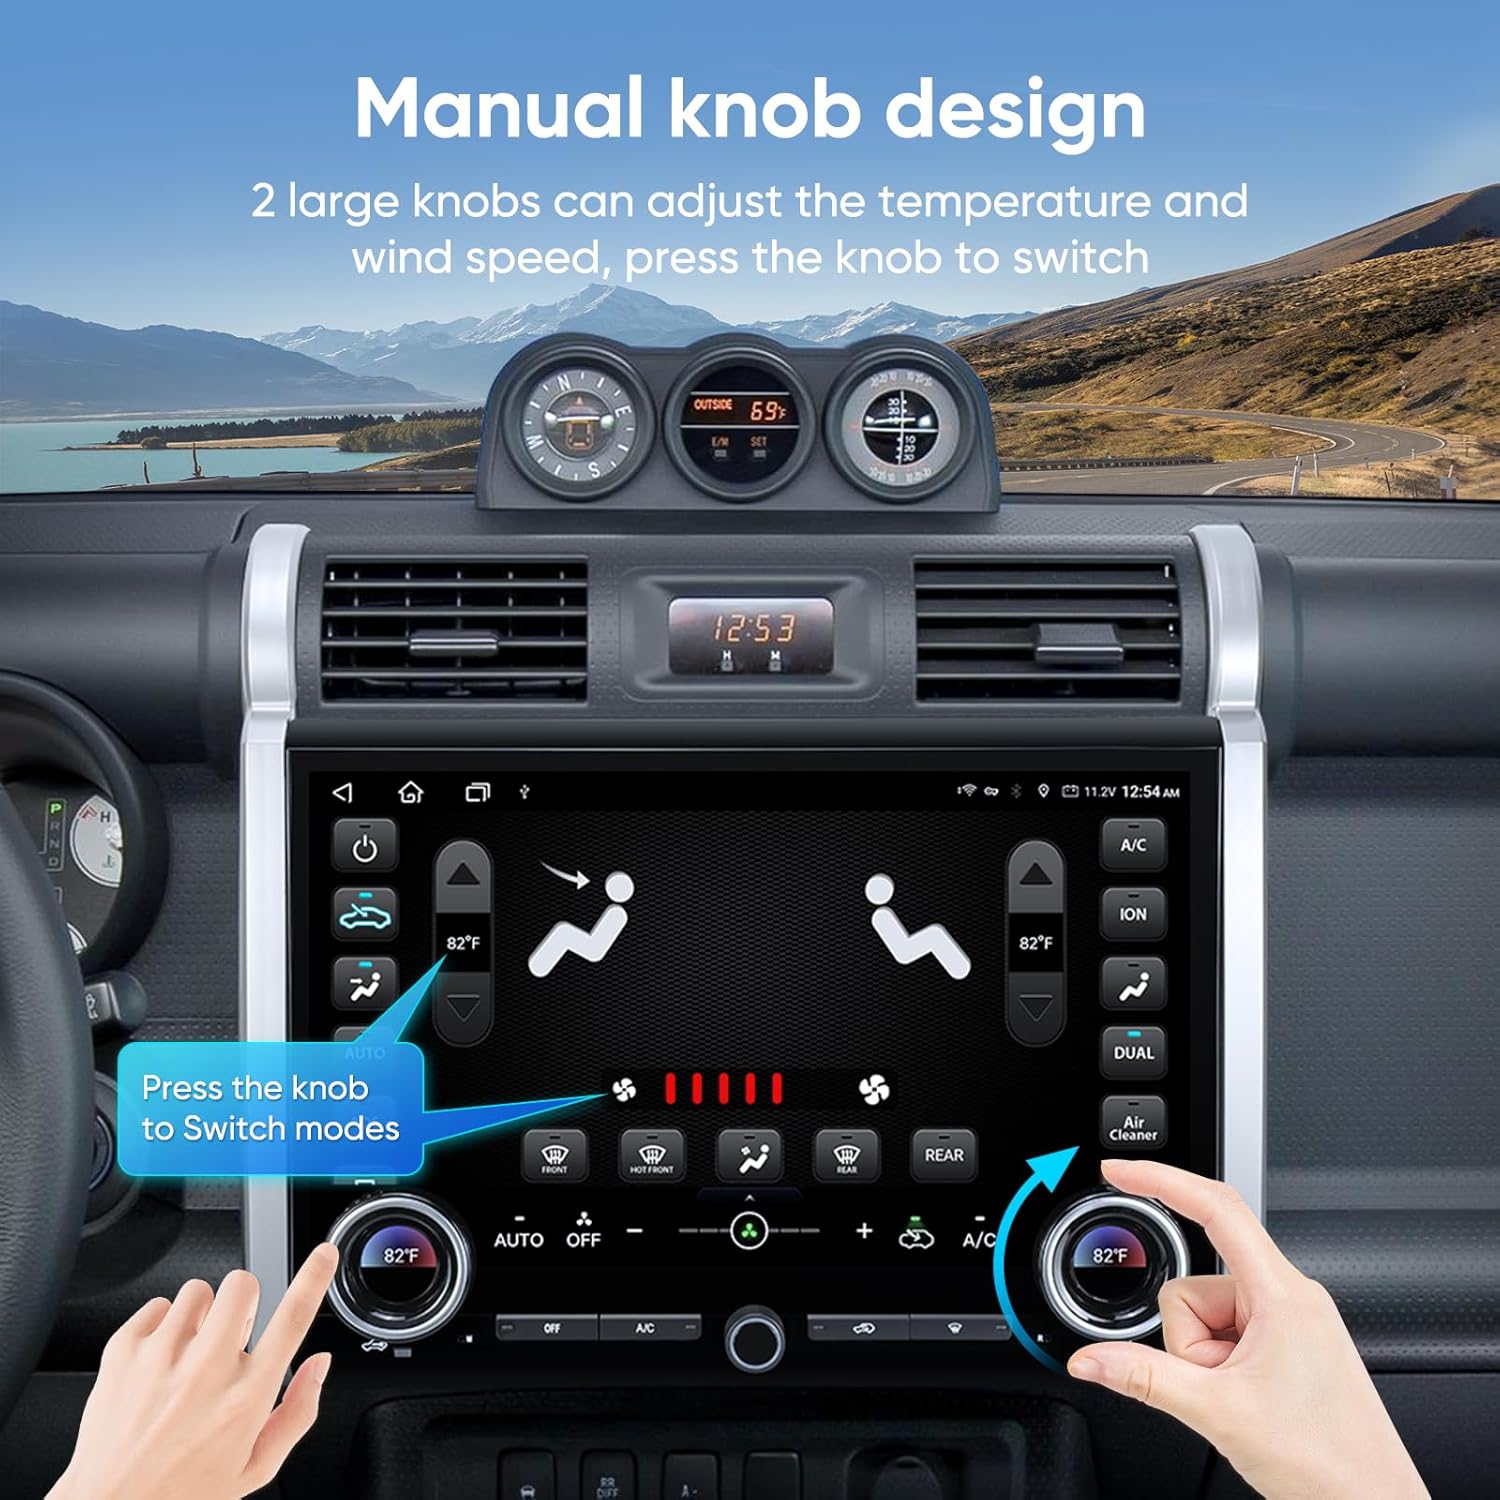
Image 4.4: Manual knob design for integrated AC control.
Video 4.2: Demonstration of AC control functionality on the touchscreen.
4.5 Split Screen Functionality
Utilize the split-screen feature to run two applications simultaneously, such as navigation on one side and music playback on the other.

Image 4.5: Split screen and mirroring capabilities.
4.6 Rear View Camera Display
When the vehicle is shifted into reverse, the screen automatically displays the 1080P AHD rear view camera feed, complete with guiding lines for safe maneuvering.

Image 4.6: Rearview camera display with parking assistance.
4.7 Connectivity (WiFi & Bluetooth)
The unit supports 2.4GHz and 5GHz WiFi for internet access and Bluetooth for hands-free calling and audio streaming.

Image 4.7: WiFi and Bluetooth connection options.
4.8 Product Showcase Video
Video 4.3: A brief showcase of the 15-inch head unit's features.
5. Maintenance
To ensure the longevity and optimal performance of your AINAVI Car Stereo Radio, follow these maintenance guidelines:
- Screen Cleaning: Use a soft, lint-free cloth specifically designed for electronics to clean the touchscreen. Do not use abrasive cleaners or harsh chemicals.
- Software Updates: Periodically check for and install software updates to ensure the system runs efficiently and has the latest features and security patches.
- Cable Connections: Ensure all cables remain securely connected. Loose connections can lead to intermittent issues.
- Environmental Conditions: Avoid exposing the unit to extreme temperatures, direct sunlight for prolonged periods, or excessive moisture.
6. Troubleshooting
If you encounter issues with your AINAVI Car Stereo Radio, refer to the following common troubleshooting steps:
- No Power: Check all power cable connections. Ensure the vehicle's battery is charged and the ignition is on. Verify the fuse for the stereo is not blown.
- No Sound: Check speaker connections. Ensure the volume is not muted or set too low. Verify audio settings in the DSP/Equalizer.
- Touchscreen Unresponsive: Try restarting the unit. If the issue persists, a factory reset might be necessary (note: this will erase custom settings).
- GPS Not Working: Ensure the GPS antenna has a clear view of the sky. Check GPS settings in the system menu. Update navigation maps if available.
- CarPlay/Android Auto Connection Issues: Ensure Bluetooth and WiFi are enabled on both the head unit and your smartphone. Try forgetting the device and re-pairing. Check for software updates on both devices.
- Rear View Camera Not Displaying: Check the camera's video and power connections. Ensure the reverse trigger wire is correctly connected to the vehicle's reverse light circuit.
- AC Control Issues: If you experience problems with air conditioner control, please contact customer support for assistance.
For persistent issues not resolved by these steps, please contact AINAVI customer support.
7. Specifications
| Brand | AINAVI |
| Vehicle Service Type | Toyota FJ Cruiser 2007-2021 |
| Screen Size | 15 Inches |
| Display Type | QLED |
| Touch Screen Type | Capacitive |
| Operating System | Android |
| Memory Storage Capacity | 128 GB |
| Connectivity Technology | Bluetooth, USB, Wi-Fi, Wired, Wireless |
| Supported Satellite Navigation System | BeiDou, GPS, Galileo |
| Audio Output Mode | Surround Stereo |
| Control Method | App, Remote, Touch, Voice |
| Item Weight | 3.01 Kilograms |
8. Warranty and Support
8.1 Manufacturer's Warranty
This AINAVI Car Stereo Radio comes with a 12-month manufacturer's guarantee from the date of purchase. This warranty covers defects in materials and workmanship under normal use. Please retain your proof of purchase for warranty claims.
8.2 Technical Support
Our professional technical support team is available to assist you with installation, troubleshooting, and any questions you may have regarding your product. If you encounter any issues, particularly with air conditioner integration, please do not hesitate to contact us.

Image 8.1: Customer Installation Support contact details.
You can reach our customer service team via:
- Phone: +1 (833) 858-5016
- Email: info@ainavi.com
- Operating Hours (PST):
- Monday - Friday: 9:00 AM - 9:00 PM
- Saturday: 2:00 PM - 10:00 PM
Please have your product model number (B0FCY3Z2D1) and purchase details ready when contacting support.

