
1. Introduction
This manual provides instructions for the safe assembly, operation, maintenance, and troubleshooting of your EYESUN Exercise Bike Model QM-530W. Please read this manual thoroughly before using the product and retain it for future reference.
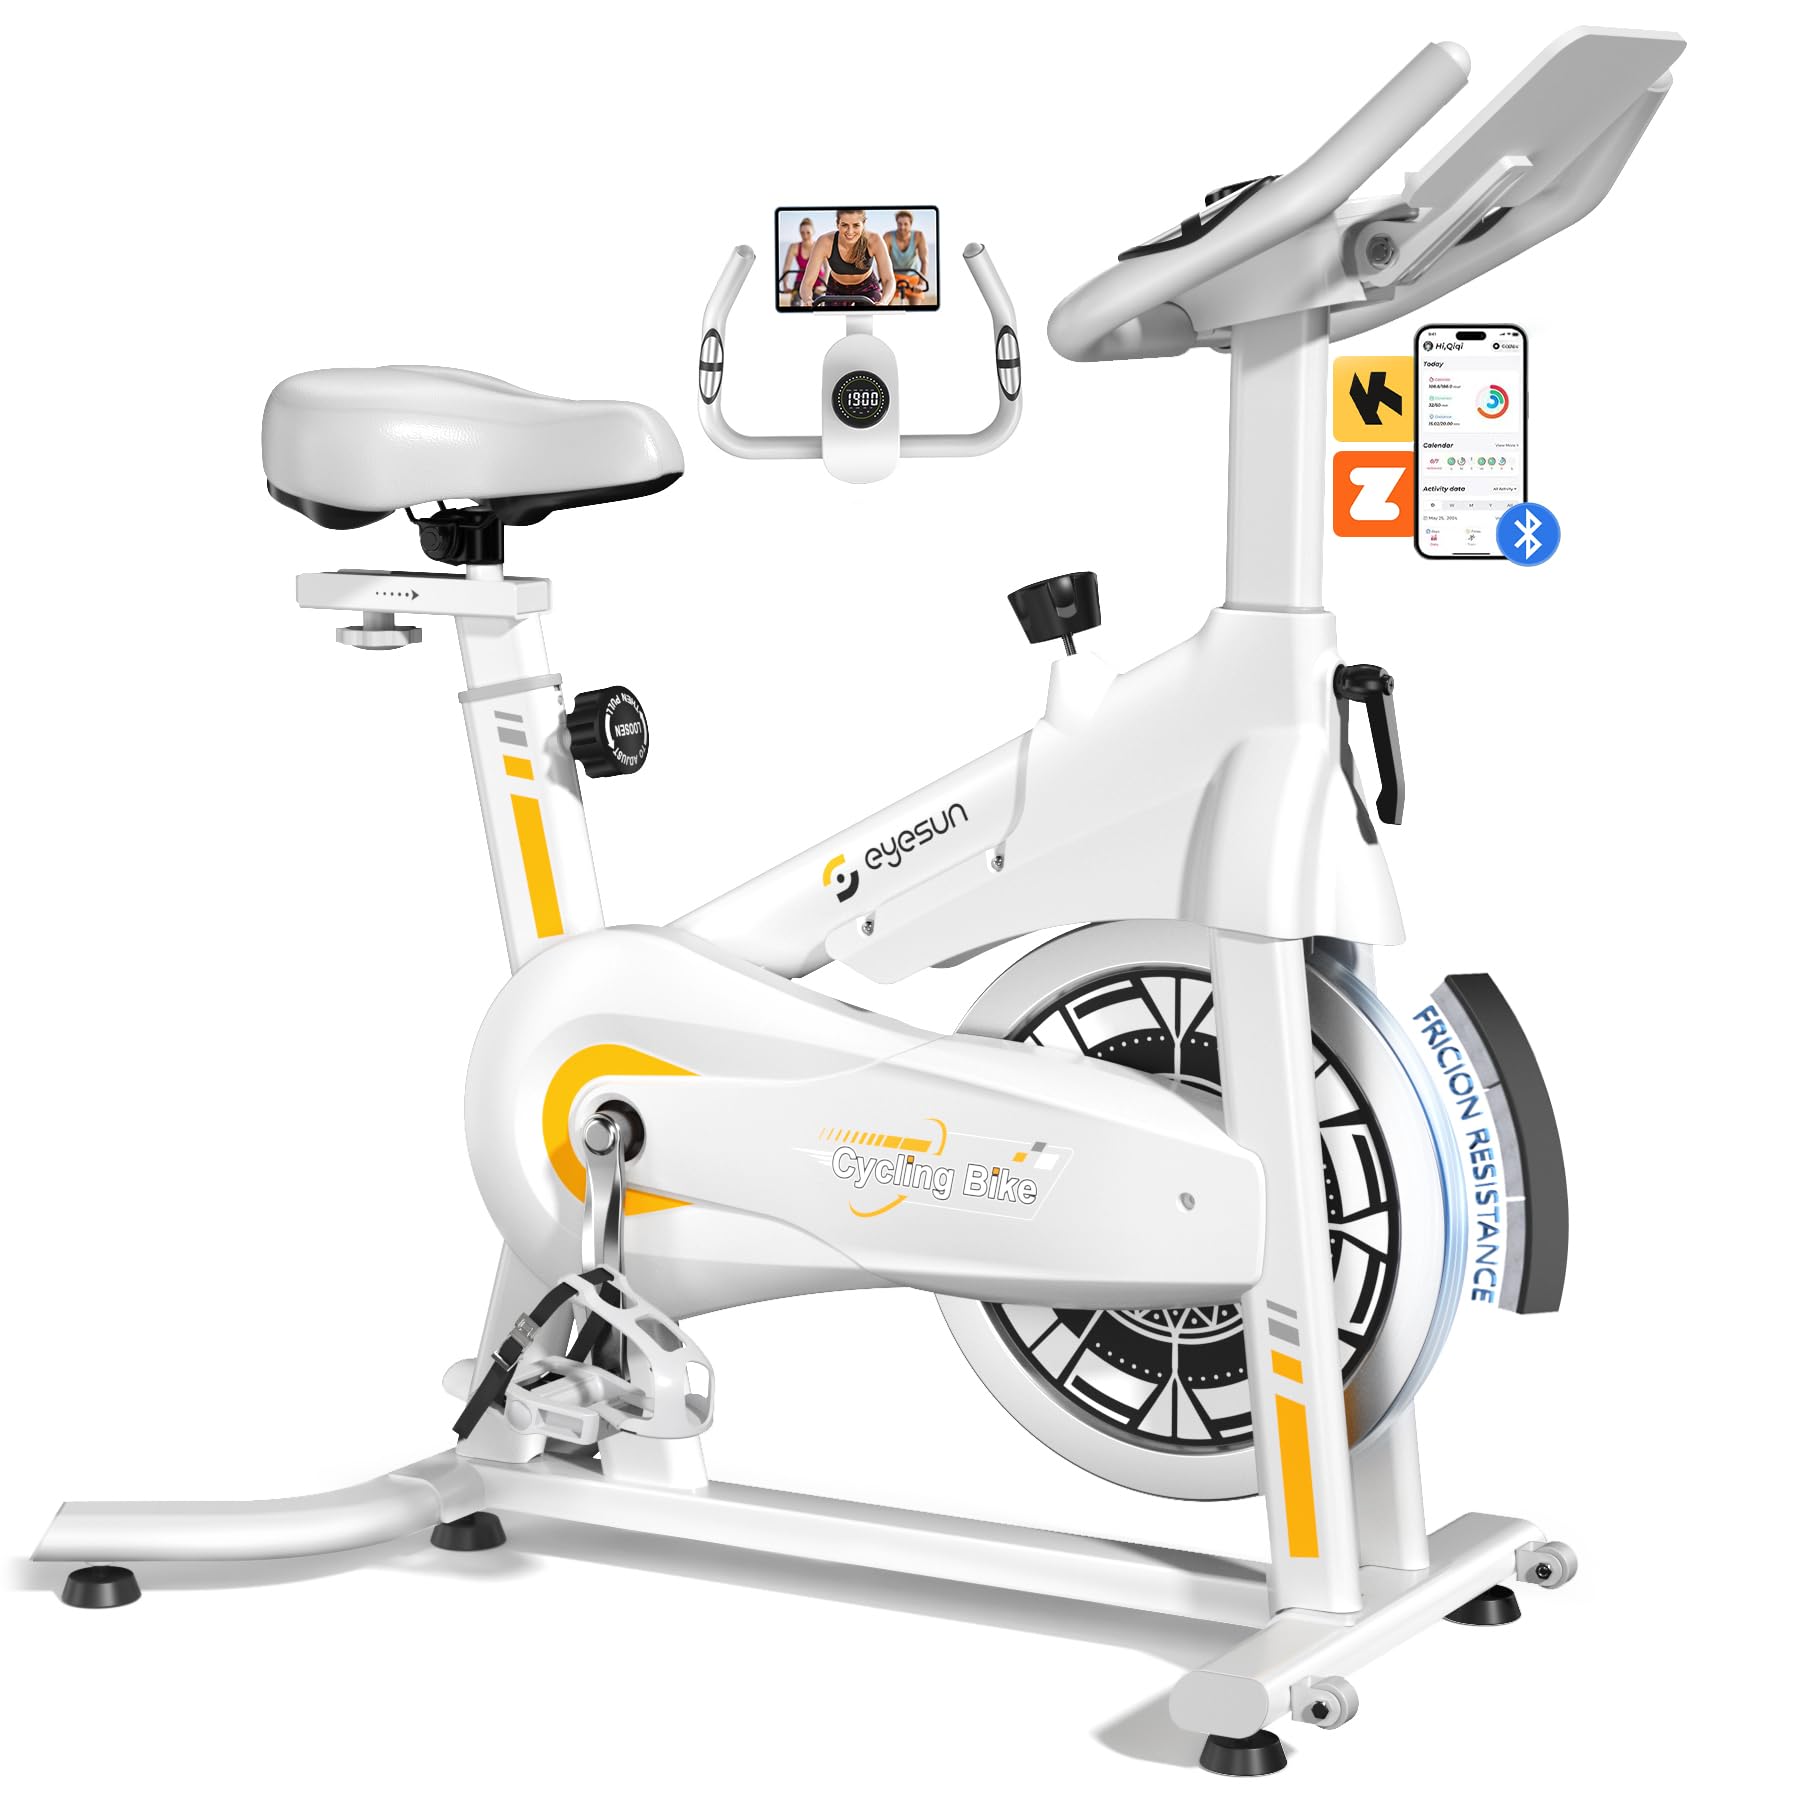
Image 1: EYESUN Exercise Bike QM-530W, White & Yellow model.
2. Safety Information
Before beginning any exercise program, consult with your physician. It is essential to understand and follow all safety precautions to prevent injury and ensure proper operation of the exercise bike.
- Ensure all parts are securely fastened before each use.
- Place the exercise bike on a flat, stable surface. Use a mat underneath to protect flooring and reduce noise.
- Keep children and pets away from the equipment during operation.
- Wear appropriate athletic footwear and clothing. Avoid loose clothing that could get caught in moving parts.
- The maximum user weight capacity for this bike is 330 lbs (150 kg).
- The resistance bar functions as an emergency stop. Press it down firmly to stop the flywheel immediately.
- Adjustable cage pedals are designed to keep your feet secure during exercise. Ensure your feet are properly secured before starting.
- Do not dismount the bike until the flywheel has completely stopped.

Image 2: Illustration of the exercise bike's sturdy construction and body muscles engaged during use.
3. Package Contents
Verify that all components are present before beginning assembly. If any parts are missing or damaged, contact customer support.
- Main Frame (pre-assembled)
- Handlebar Assembly
- Seat Post and Seat
- Front and Rear Stabilizers
- Pedals (Left and Right)
- LCD Monitor
- Hardware Kit (bolts, washers, nuts, tools)
- User Manual
4. Assembly Instructions
The EYESUN Exercise Bike is designed for quick assembly, with approximately 80% of the unit pre-assembled. Typical assembly time is around 25 minutes.
- Attach Stabilizers: Secure the front and rear stabilizers to the main frame using the provided bolts and washers. Ensure they are tightened firmly.
- Install Pedals: Identify the left (L) and right (R) pedals. The left pedal screws counter-clockwise, and the right pedal screws clockwise. Thread them into the crank arms and tighten securely with a wrench.
- Mount Seat: Insert the seat post into the main frame and adjust to your desired height. Secure with the adjustment knob. Attach the seat to the seat post.
- Attach Handlebar: Slide the handlebar assembly into the front post. Adjust the height and secure with the adjustment knob.
- Connect LCD Monitor: Connect the sensor cable from the main frame to the back of the LCD monitor. Ensure the connection is vertical and perpendicular to the flywheel for accurate data tracking. Mount the LCD monitor onto the handlebar post.
Video 1: Detailed assembly guide for the EYESUN Exercise Bike. This video demonstrates step-by-step installation of components.
5. Adjustments
Proper adjustment of the bike ensures comfort and effectiveness during your workout.
5.1 Seat Adjustment
- Height: Loosen the adjustment knob on the vertical seat post. Raise or lower the seat until your leg has a slight bend at the knee when the pedal is at its lowest point. Tighten the knob securely.
- Forward/Backward: Loosen the adjustment knob under the seat. Slide the seat forward or backward to achieve a comfortable position relative to the handlebars. Ensure your knees are aligned with the balls of your feet when pedals are horizontal. Tighten the knob securely.
5.2 Handlebar Adjustment
- Loosen the adjustment knob on the handlebar post. Raise or lower the handlebars to a comfortable height that allows for a relaxed upper body posture. Tighten the knob securely.
5.3 Resistance Adjustment
- The resistance knob is located on the main frame. Turn the knob clockwise to increase resistance and counter-clockwise to decrease resistance.
- To engage the emergency brake, press the resistance knob down firmly.

Image 3: Visual guide for adjusting handlebar and seat positions for various user heights.
Video 2: Demonstration of adjusting the seat and handlebar for optimal user comfort.
6. Operating the Exercise Bike
6.1 LCD Monitor Functions
The upgraded LCD monitor tracks your workout data in real-time.
- Time: Duration of your workout.
- Speed: Current cycling speed.
- Distance: Total distance covered during the workout.
- Calories: Estimated calories burned.
- Pulse: Heart rate (if connected to a compatible sensor, not included).
- Odometer: Total accumulated distance.
Ensure the APP sensor cable is correctly connected to the flywheel for accurate data tracking.

Image 4: Close-up of the digital LCD display and proper sensor cable connection.
6.2 App Integration
The exercise bike supports Bluetooth connectivity for integration with fitness applications.
- Compatible Apps: FantomFite, KINOMAP, and Zwift.
- Data Sync: Supports syncing with Google Fit and Apple Health for comprehensive fitness tracking.
- Tablet Holder: Use the built-in tablet holder to enjoy music or videos while riding, or to view your fitness app.

Image 5: Illustration of the exercise bike's compatibility with popular fitness applications.
Video 3: Overview of the LCD monitor and Bluetooth connectivity features.
7. Maintenance
Regular maintenance ensures the longevity and safe operation of your exercise bike.
- Cleaning: Wipe down the bike with a damp cloth after each use to remove sweat and dust. Avoid abrasive cleaners.
- Inspection: Periodically check all bolts, nuts, and moving parts for tightness and wear. Tighten any loose fasteners.
- Lubrication: The belt drive system is designed to be low maintenance and quiet. No lubrication is typically required for the belt.
- Storage: When not in use, store the bike in a dry, cool place away from direct sunlight and moisture. The built-in transport wheels allow for easy relocation.

Image 6: Features like the smooth belt drive and stable U-shaped bottom contribute to low maintenance and durability.

Image 7: The space-saving design and transport wheels facilitate easy movement and storage.
8. Troubleshooting
If you encounter issues with your EYESUN Exercise Bike, refer to the following common problems and solutions.
| Problem | Possible Cause | Solution |
|---|---|---|
| Squeaking or grinding noise during operation | Loose components; debris in flywheel area; worn belt. | Check and tighten all bolts and nuts. Inspect flywheel area for foreign objects. If noise persists, contact support. |
| Inaccurate LCD monitor readings | Sensor cable not connected properly; low battery in monitor. | Ensure the APP sensor cable is securely and vertically connected to the monitor. Replace monitor batteries if necessary. |
| Resistance not changing | Resistance knob mechanism issue. | Check if the resistance knob is fully engaged. If the mechanism feels loose or unresponsive, contact support. |
| Wobbly seat or handlebars | Adjustment knobs not tightened sufficiently. | Ensure all seat and handlebar adjustment knobs are tightened firmly after positioning. |
9. Specifications
| Feature | Detail |
|---|---|
| Model Number | QM-530W |
| Product Dimensions | 100.08 x 50.55 x 106.93 cm (39.4 x 19.9 x 42.1 inches) |
| Item Weight | 21.32 kg (47 lbs) |
| Maximum Weight Capacity | 330 lbs (150 kg) |
| Drive System | Belt Drive |
| Material | Alloy Steel |
| Resistance Mechanism | Friction (Adjustable Brake Pad) |
| Special Features | Adjustable Pedal, Adjustable Resistance Level, Adjustable Seat, Flywheel |
| Recommended User Height | 4'8" to 6'1" (142 cm to 185 cm) |
| Inseam Range | 25"–35" (63.5 cm – 89 cm) |
| Power Source (Monitor) | Battery Powered (Batteries Included) |
10. Warranty and Support
EYESUN provides a 24-month worry-free warranty for your exercise bike. This warranty covers manufacturing defects and ensures product quality.
For any questions, concerns, or warranty claims, please contact EYESUN customer service:
- Email: support@eyesun.net
- Customer support is available 24/7.

