Introduction
This manual provides essential instructions for the safe and efficient operation, maintenance, and care of your AMZCHEF 3-in-1 Electric Meat Mincer. This versatile appliance functions as a meat grinder, sausage stuffer, and food grinder, designed for home use. Please read all instructions carefully before first use and retain this manual for future reference.
Important Safety Instructions
- Always ensure the appliance is unplugged before assembling, disassembling, or cleaning.
- Do not immerse the motor unit in water or any other liquid. Clean with a damp cloth only.
- Keep hands and utensils away from moving parts during operation. Always use the food pusher provided to feed ingredients into the hopper. Never use fingers or other objects.
- Ensure all parts are correctly assembled and securely locked before operating the appliance.
- Do not operate the appliance continuously for more than 10 minutes. Allow a 10-minute rest period between cycles to prevent overheating.
- This appliance is for household use only. Do not use outdoors or for commercial purposes.
- If the power cord is damaged, it must be replaced by the manufacturer, its service agent, or similarly qualified persons to avoid a hazard.
- Keep the appliance out of reach of children.

Image: Key safety and design features of the AMZCHEF meat mincer, highlighting the safety lock, reverse function, cooling vents, and suction base for stable operation.
Product Overview and Components
Familiarize yourself with the various parts of your AMZCHEF Electric Meat Mincer before assembly and operation.

Image: Exploded view illustrating the assembly sequence of the meat mincer's grinding head, screw, blade, and various grinding plates. This image also shows the option to use the mincer without a grinding plate for specific applications.
Main Components:
- Motor Unit (Main Body)
- Hopper Plate
- Food Pusher
- Grinding Head (Aluminum Alloy)
- Feeding Screw
- Cutting Blade
- Grinding Plates (Fine, Medium, Coarse)
- Locking Ring
- Sausage Stuffer Attachments
- Kubbe Attachment
Setup and Assembly
Follow these steps to assemble your meat mincer for grinding:
- Ensure the motor unit is unplugged and placed on a stable, flat surface.
- Insert the grinding head into the motor unit's front opening, aligning the tab with the slot. Rotate clockwise until it locks securely.
- Insert the feeding screw into the grinding head.
- Place the cutting blade onto the square shaft of the feeding screw, ensuring the sharp edges face outwards towards the grinding plate.
- Select the desired grinding plate (e.g., 7mm for general meat filling) and place it over the cutting blade and feeding screw.
- Screw the locking ring onto the grinding head clockwise until it is hand-tight. Do not overtighten.
- Place the hopper plate onto the top of the grinding head.
For sausage stuffing or kubbe making, refer to the specific attachment instructions included in the packaging. The assembly process for these functions will involve different components after step 3.
Operating Instructions
Prepare your ingredients and operate the mincer as follows:
- Prepare Ingredients: Chop all foods into small pieces, approximately 20x20x60 mm (0.8x0.8x2.4 inch), to ensure they can be easily inserted into the hopper opening. For best results, opt for lean, boneless, and fat-free meat.
- Power On: Plug the appliance into a suitable power outlet. Switch the button to "ON". The machine will start working.
- Feed Ingredients: Place the prepared food onto the hopper plate. Use only the food pusher to gently guide the food into the grinding head. Never use your hands or other utensils.
- Monitor Operation: Allow the mincer to process the food. Do not overload the machine.
- Finish: Once all ingredients are processed, switch the button to "O" (OFF).
- Disconnect Power: Unplug the appliance from the power supply immediately after use.
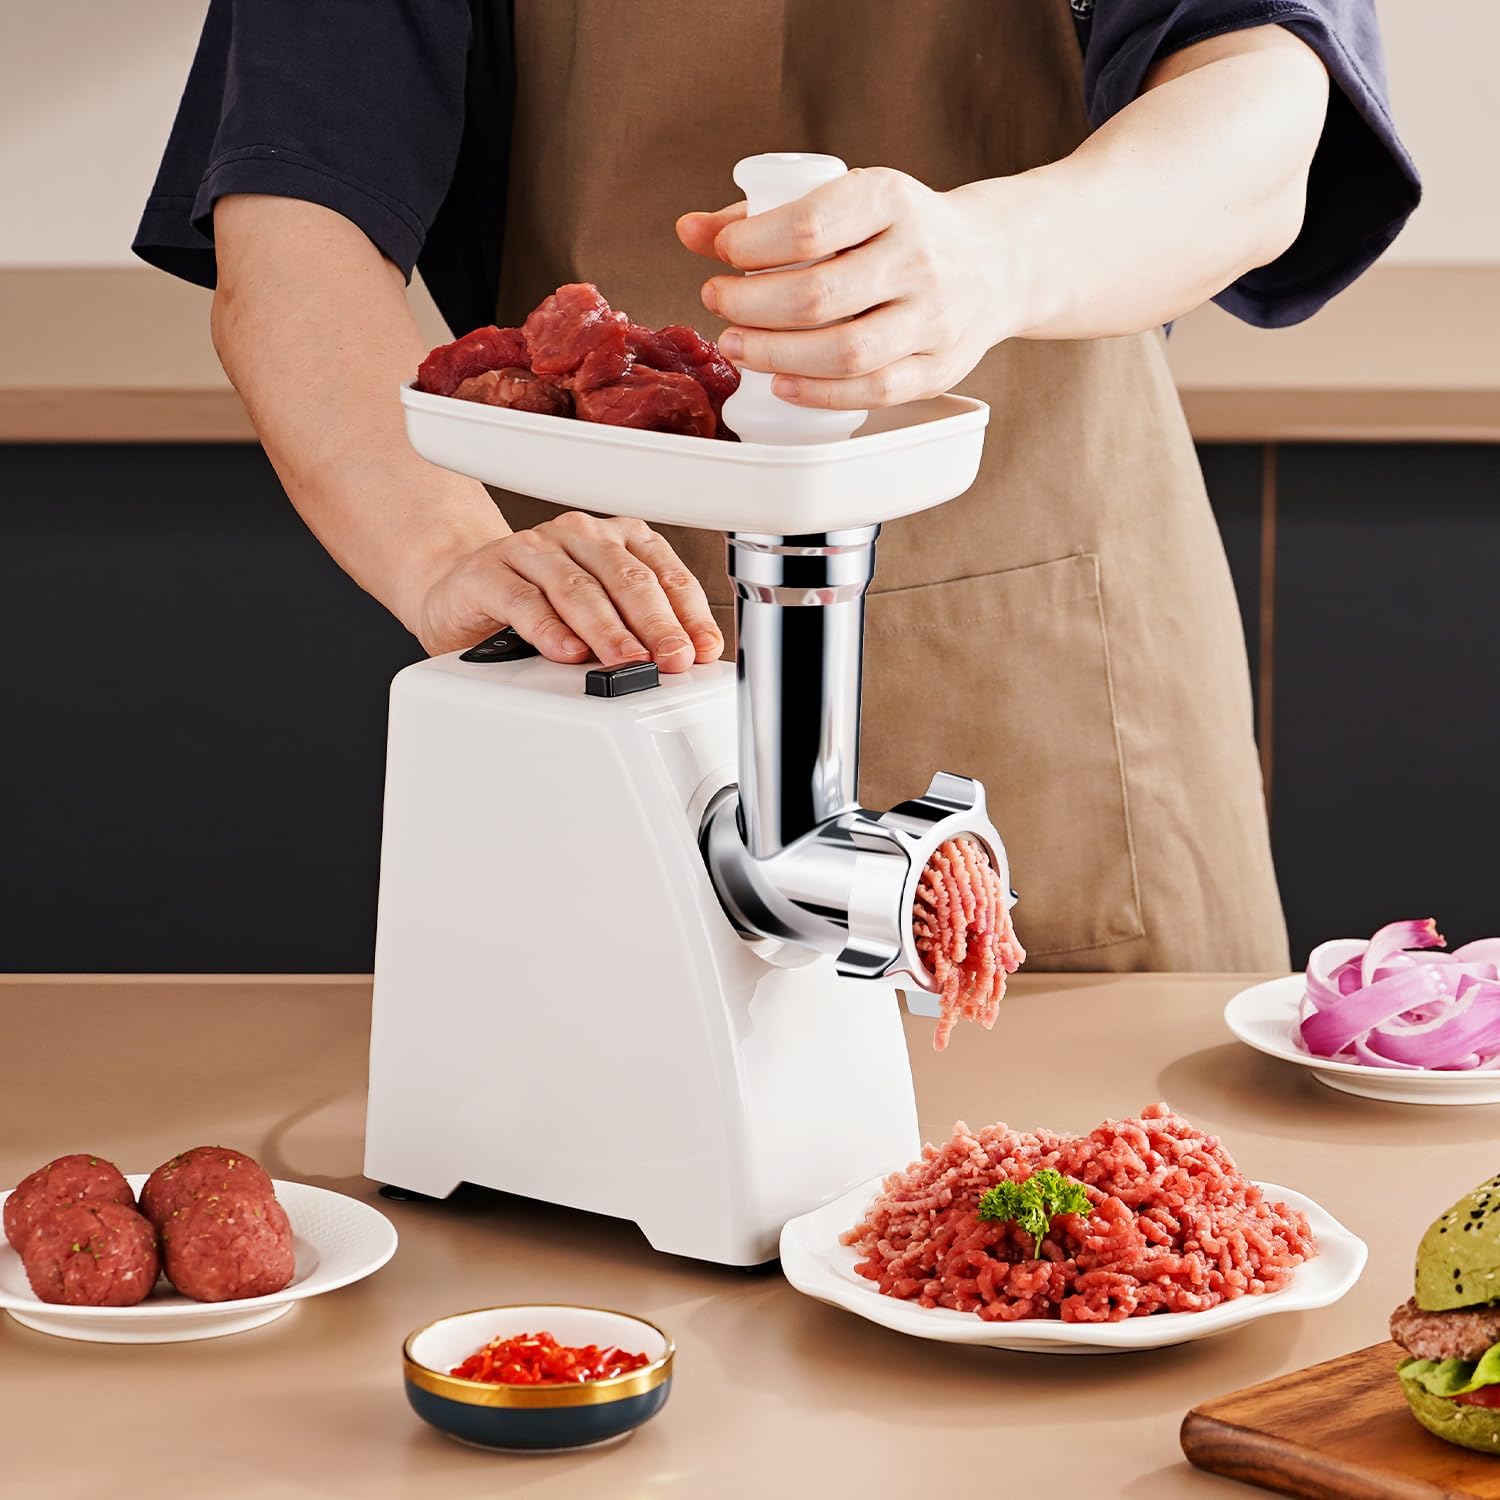
Image: A user demonstrating the operation of the AMZCHEF meat mincer, feeding meat into the hopper using the provided food pusher. Ground meat is visible exiting the machine.
Maintenance and Cleaning
Proper cleaning and maintenance ensure the longevity and hygienic operation of your appliance.
- Unplug: Always ensure the appliance is unplugged before cleaning.
- Disassemble: Disassemble all removable parts (grinding head, screw, blade, plates, locking ring, hopper plate, attachments).
- Wash Parts: Wash all removable parts in warm, soapy water. Use a brush to remove any food residue from the grinding plates and blade. Rinse thoroughly.
- Dry Thoroughly: Dry all metal parts immediately after washing to prevent rust. Air dry non-metal parts.
- Clean Motor Unit: Wipe the motor unit with a damp cloth. Never immerse it in water.
- Reassemble/Store: Once all parts are completely dry, reassemble them or store them in a clean, dry place.
Note: Some parts may be dishwasher safe; however, hand washing and immediate drying are recommended for metal components to preserve their finish and prevent corrosion.
Troubleshooting
| Problem | Possible Cause | Solution |
|---|---|---|
| Appliance does not start. | Not plugged in; power switch off; safety lock not engaged. | Check power connection; ensure switch is "ON"; verify grinding head is securely locked. |
| Motor stops during operation. | Overload protection activated; motor overheating. | Turn off and unplug. Remove excess food. Allow motor to cool for at least 30 minutes before restarting. Reduce load. |
| Food is stuck or not grinding properly. | Ingredients too large; bone/gristle obstruction; parts incorrectly assembled. | Turn off and unplug. Press the 'R' (Reverse) button to clear jams. Disassemble and check for obstructions or incorrect assembly. Ensure meat is boneless and cut to recommended size. |
| Loud noise during operation. | Parts loose; foreign object inside. | Turn off and unplug. Check all parts are securely assembled. Disassemble and inspect for any foreign objects. |
Specifications
- Brand: AMZCHEF
- Model: UL-AZ-MGC03-SV
- Type: 3-in-1 Electric Meat Mincer (Meat Grinder, Sausage Stuffer, Food Grinder)
- Rated Wattage: 300W
- Maximum Wattage: 2800W
- Voltage: 120 Volts
- Material: Stainless Steel (parts), ABS Plastic (housing)
- Color: White
- Product Dimensions: 10"L x 7.3"W x 16"H (25.4cm L x 18.5cm W x 40.6cm H)
- Item Weight: Approximately 6.3 Pounds (2.85 kg)

Image: Front-side view of the AMZCHEF Electric Meat Mincer with key dimensions indicated in both inches and centimeters.

Image: Diagram showing the internal 2800W Max Pure-Copper Motor of the AMZCHEF meat mincer, emphasizing its intelligent chip for auto-shutoff protection against overheating.
Warranty and Support
Your AMZCHEF Electric Meat Mincer comes with a standard manufacturer's warranty. Please refer to the warranty card included in your product packaging for specific terms and conditions, including warranty duration and coverage details.
For technical support, troubleshooting assistance, or to inquire about replacement parts, please contact AMZCHEF customer service. Contact information can typically be found on the product packaging, the official AMZCHEF website, or through your retailer's support channels.
When contacting support, please have your model number (UL-AZ-MGC03-SV) and purchase date readily available.


