
Aoxun G37009BR1012-OLD
Aoxun 10 x 12FT Outdoor Storage Shed Instruction Manual
Model: G37009BR1012-OLD | Brand: Aoxun
1. Introduction
Thank you for choosing the Aoxun 10 x 12FT Outdoor Storage Shed. This manual provides essential information for the safe and efficient assembly, operation, and maintenance of your new storage shed. Please read all instructions carefully before beginning assembly and retain this manual for future reference.
This metal shed is designed to provide ample storage space for gardening tools, lawn equipment, bicycles, and other outdoor essentials, offering protection from various weather conditions.
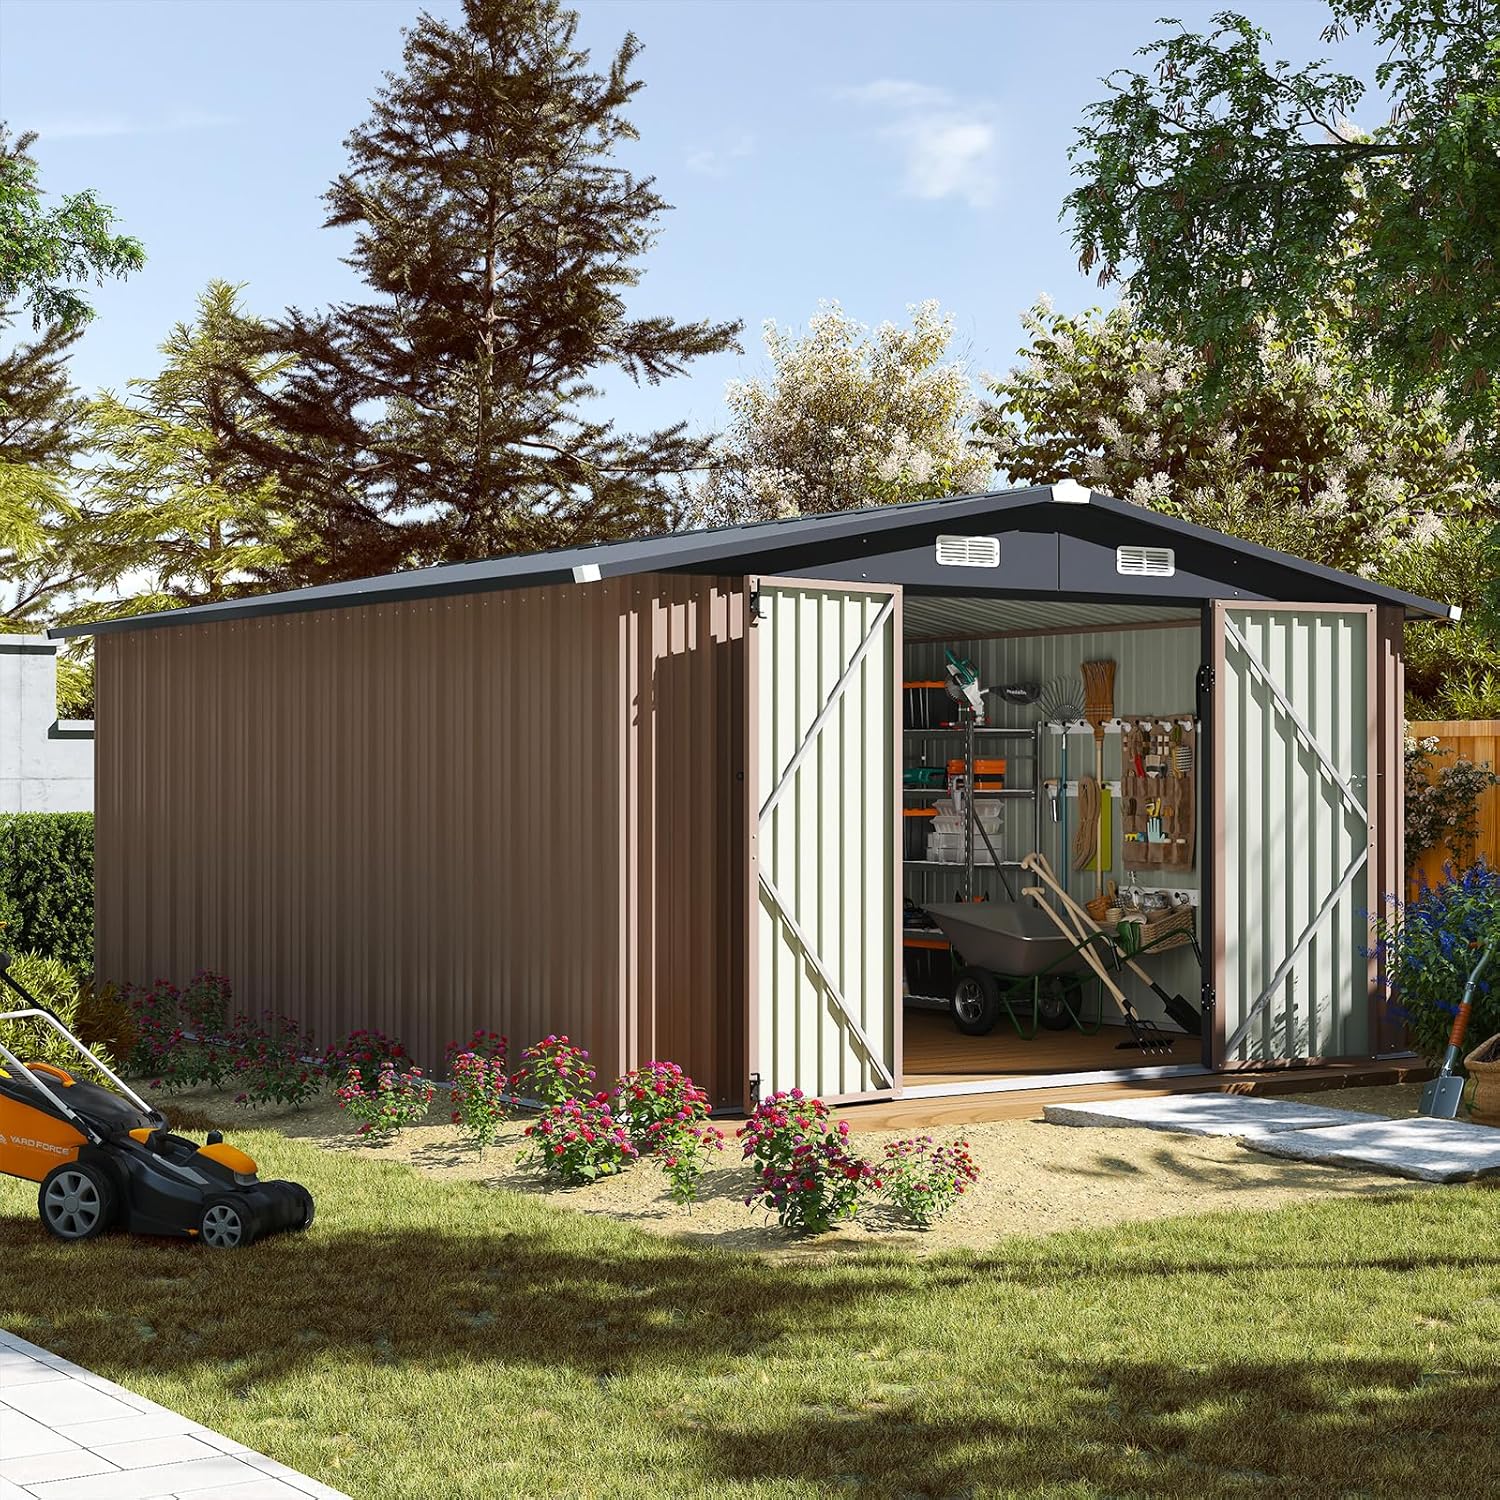
Image: The Aoxun 10 x 12FT Outdoor Storage Shed, showcasing its spacious interior and double hinged doors, situated in a typical backyard environment.
2. Important Safety Information
Always follow these safety guidelines to prevent injury or damage to the product.
- Read Instructions: Read and understand all assembly instructions before starting.
- Two-Person Assembly: Assembly typically requires two or more people for safety and ease.
- Wear Protective Gear: Always wear gloves to protect hands from sharp edges of metal panels. Safety glasses are also recommended.
- Choose a Level Site: Select a firm, level surface for installation. An uneven surface can compromise the shed's stability and structural integrity.
- Anchor Securely: Ensure the shed is securely anchored to the ground to prevent wind damage.
- Ventilation: The shed is equipped with air vents. Do not block these vents, as proper airflow is crucial to reduce moisture buildup.
- Avoid Overloading: Do not overload the shed or attach heavy items to the walls or roof that could compromise its structure.
- Children and Pets: Keep children and pets away from the assembly area.
- Electrical Safety: Do not install electrical wiring or appliances inside the shed without proper professional consultation and adherence to local codes.
3. Package Contents & Components
Before beginning assembly, verify that all parts listed in your specific packing list are present and undamaged. Refer to the detailed parts list provided in your physical manual for exact quantities and identification.
Typical components include:
- Galvanized Steel Panels (Walls, Roof, Doors)
- Frame Components (Beams, Supports, Brackets)
- Hardware (Screws, Nuts, Washers, Bolts)
- Door Hinges and Lock Latch Mechanism
- Air Vents
- Corner Protectors
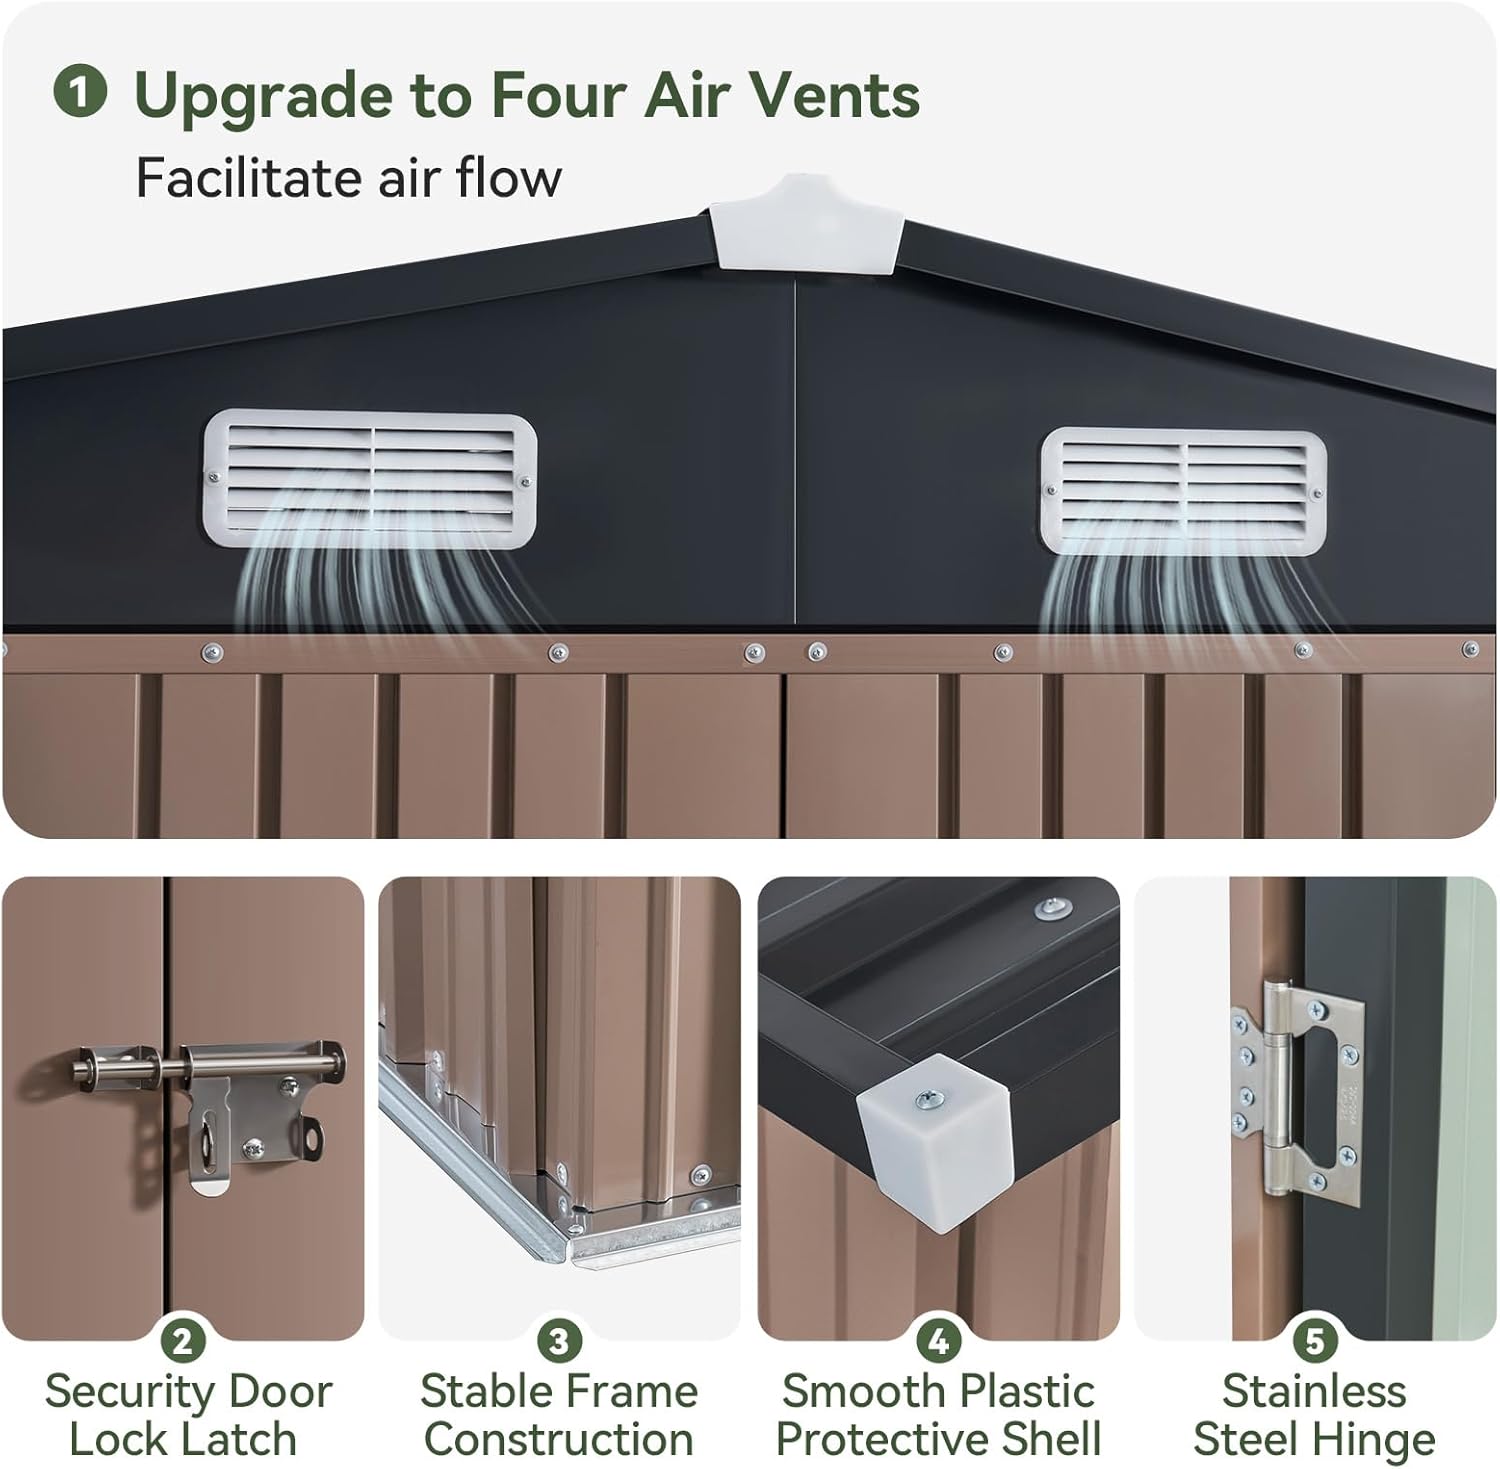
Image: Detailed view of key shed components: upgraded four air vents for airflow, a robust security door lock latch, stable frame construction, smooth plastic protective shells for corners, and durable stainless steel hinges.
4. Setup and Assembly
4.1 Site Preparation
Choosing the correct location and preparing the site are critical for the shed's stability and longevity.
- Level Surface: Ensure the chosen area is completely flat and level. Use a spirit level to check.
- Drainage: Select a site with good drainage to prevent water accumulation around the shed base.
- Clearance: Allow sufficient space around the shed for assembly, maintenance, and door operation.
- Foundation: A concrete slab, paved patio, or a treated timber frame filled with gravel are recommended foundations to provide a stable and dry base. The shed does not include a floor base.
4.2 Assembly Steps (General Guide)
Follow the step-by-step instructions provided in your specific assembly manual. The following is a general overview:
- Base Frame Assembly: Assemble the base frame components according to the diagrams. Ensure it is square and level.
- Wall Panel Installation: Attach the wall panels to the base frame and to each other using the provided screws and hardware. Work systematically around the shed.
- Roof Frame Assembly: Construct the roof frame, ensuring all supports and beams are securely fastened.
- Roof Panel Installation: Carefully attach the roof panels to the roof frame. The sloped design facilitates water drainage.
- Door Assembly and Installation: Assemble the double hinged doors and attach them to the designated frame openings using the stainless steel hinges. Install the lock latch mechanism.
- Vent Installation: Install the air vents on the roof or upper wall sections as indicated in the manual to ensure proper air circulation.
- Final Checks and Anchoring: Verify all screws are tightened, and the shed is stable. Securely anchor the shed to your chosen foundation using appropriate anchoring hardware (not always included, check your package).
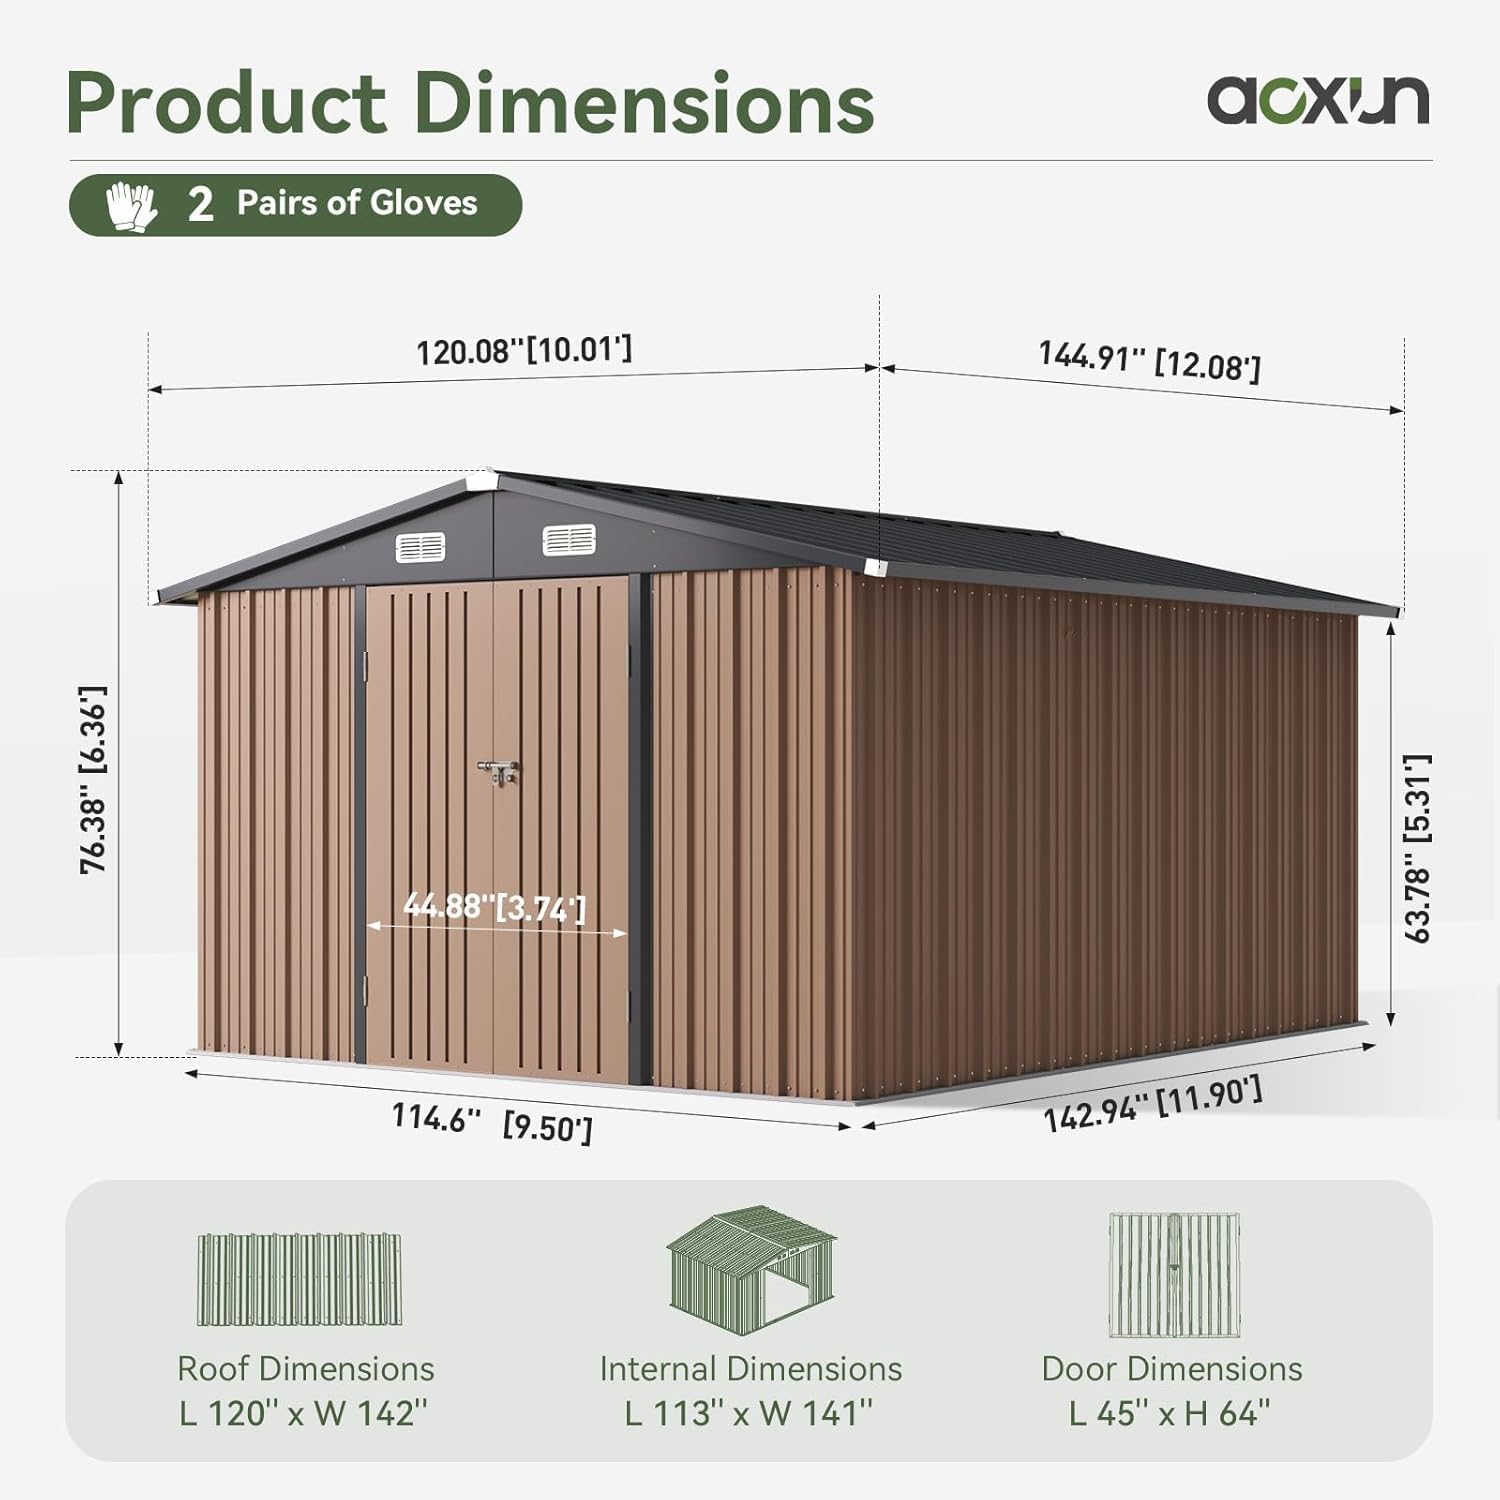
Image: Product dimensions diagram, illustrating the overall roof, internal, and door measurements for the Aoxun 10 x 12FT shed, crucial for planning and assembly.

Image: An Aoxun Tool Shed with its doors open, revealing a well-organized interior with shelving units and various garden tools, demonstrating its storage capacity.
5. Operating Your Shed
- Door Operation: The shed features double hinged doors for wide access. Ensure the doors open and close smoothly without obstruction.
- Locking Mechanism: Utilize the integrated lockable door latch for security. For enhanced security, a padlock (not included) can be added.
- Ventilation: The built-in air vents facilitate cross-ventilation, reducing condensation and maintaining air quality inside the shed. Do not obstruct these vents.
- Storage: Arrange items inside to allow for easy access and to prevent damage to the shed walls. Consider adding shelving or hooks for optimal organization.

Image: The spacious interior of the Aoxun shed, demonstrating its capacity to house a workbench, various tools, and a bicycle, highlighting its utility for organizing outdoor equipment.
6. Maintenance
Regular maintenance will extend the life and appearance of your Aoxun storage shed.
- Cleaning: Clean the exterior periodically with mild soap and water. Avoid abrasive cleaners or harsh chemicals that could damage the metal coating.
- Rust Prevention: While made from galvanized steel, inspect for any scratches or damage to the coating that could lead to rust. Touch up any affected areas with appropriate rust-inhibiting paint.
- Door Hinges: Lubricate door hinges annually to ensure smooth operation.
- Anchoring: Periodically check the anchoring points to ensure the shed remains securely fastened to the ground, especially after strong winds.
- Ventilation: Ensure air vents remain clear of debris to maintain proper airflow.

Image: The shed's roof, illustrating its UV protection and weatherproof capabilities, designed to withstand sun exposure and heavy rain.

Image: A comparison highlighting Aoxun's upgraded coating on its metal panels, demonstrating superior durability and resistance to wear compared to standard metal and wood materials over time.
7. Troubleshooting
| Problem | Possible Cause | Solution |
|---|---|---|
| Water leakage inside shed | Improper roof panel installation; damaged sealant; uneven foundation. | Check roof panel overlaps and screw tightness. Apply silicone sealant to seams if necessary. Ensure foundation is level. |
| Doors do not close properly | Uneven foundation; misaligned hinges; bent door frame. | Verify shed is level. Adjust hinge alignment. Gently straighten any bent door frame sections. |
| Excessive condensation inside | Blocked air vents; insufficient air circulation. | Clear any obstructions from the air vents. Ensure items inside are not blocking airflow. |
| Shed feels unstable/wobbly | Not properly anchored; uneven foundation; loose frame connections. | Securely anchor the shed to the ground. Re-check foundation level. Tighten all frame screws. |
8. Specifications
| Feature | Detail |
|---|---|
| Model Number | G37009BR1012-OLD |
| Brand | Aoxun |
| Product Dimensions (Overall) | 117"D x 101"W x 77"H (approx. 9.75 ft D x 8.4 ft W x 6.4 ft H) |
| Nominal Size | 10 x 12 FT |
| Material | Galvanized Steel |
| Color | Brown |
| Door Style | Double Hinged Door |
| Roof Type | Sloped Roof |
| Assembly Required | Yes |
| Item Weight | 109 pounds |
9. Warranty Information
Aoxun products are manufactured to high-quality standards. This product comes with a limited warranty against defects in materials and workmanship under normal use. Please refer to the warranty card included with your purchase for specific terms, conditions, and duration. Keep your proof of purchase for any warranty claims.
10. Customer Support
If you have any questions regarding the assembly, operation, or maintenance of your Aoxun storage shed, or if you require replacement parts, please contact Aoxun customer support.
- Online Support: Visit the official Aoxun website for FAQs and support resources.
- Contact Information: Refer to the contact details provided in your product packaging or on the Aoxun brand store page on Amazon (Aoxun Store).
Thank you for choosing Aoxun.
Related documentsG37009BR1012-OLD


Ask a question about this manual
Ask about setup, troubleshooting, compatibility, parts, safety, or missing instructions. Manuals+ will review the question and use this page’s manual context to help answer it.