
BANDAI T13444
BANDAI Armarouge Pokemon Model Kit T13444 Instruction Manual
Introduction
This manual provides detailed instructions for assembling, operating, and maintaining your BANDAI Armarouge Pokemon Model Kit. This easy-to-assemble kit requires no tools and allows you to recreate the iconic Armarouge character from the Pokémon series. Please read all instructions carefully before beginning assembly.
Assembly Instructions
1. Unpacking and Part Identification
Carefully remove all components from the packaging. Identify the different plastic runners (sprues) and individual parts. No cutting tools are required as parts are designed for snap-fit assembly.

Image: Overview of the plastic runners (sprues) showing all the individual parts for the Armarouge model kit before assembly. Each part is molded onto a frame, ready to be detached.
2. Step-by-Step Assembly
Follow the numerical order indicated in the included graphical instructions. Gently twist or pull parts from the runners. Ensure parts align correctly before pressing them firmly together until they snap into place.
- Head Assembly: Begin by assembling the head components. The flame on Armarouge's head utilizes advanced insert molding technology for a dynamic gradation effect; handle these parts with care.
- Torso and Waist: Connect the front and back torso pieces, then attach the waist section.
- Arm Assembly: Assemble the shoulder pauldrons and forearms. Attach them to the torso. Ensure the shoulder pauldrons are securely fitted but allow for movement.
- Leg Assembly: Assemble the upper and lower leg sections. Attach the completed legs to the waist.
- Display Stand: Assemble the clear display stand components. The stand consists of a base and an adjustable arm.
Refer to the detailed diagrams in the physical instruction booklet for precise part placement and orientation.
Display and Posing
1. Attaching the Display Stand
The included clear display stand is essential for posing Armarouge. Locate the attachment point on Armarouge's back or between its legs, and securely connect it to the adjustable arm of the stand. Ensure the connection is firm to prevent accidental falls.

Image: The Armarouge model kit displayed in a dynamic pose, supported by its clear, adjustable stand. This illustrates how the stand provides stability for various action poses.
2. Posing Your Model
Armarouge features articulated joints allowing for various poses. Gently manipulate the joints to achieve desired stances. Avoid excessive force to prevent damage to the plastic components.
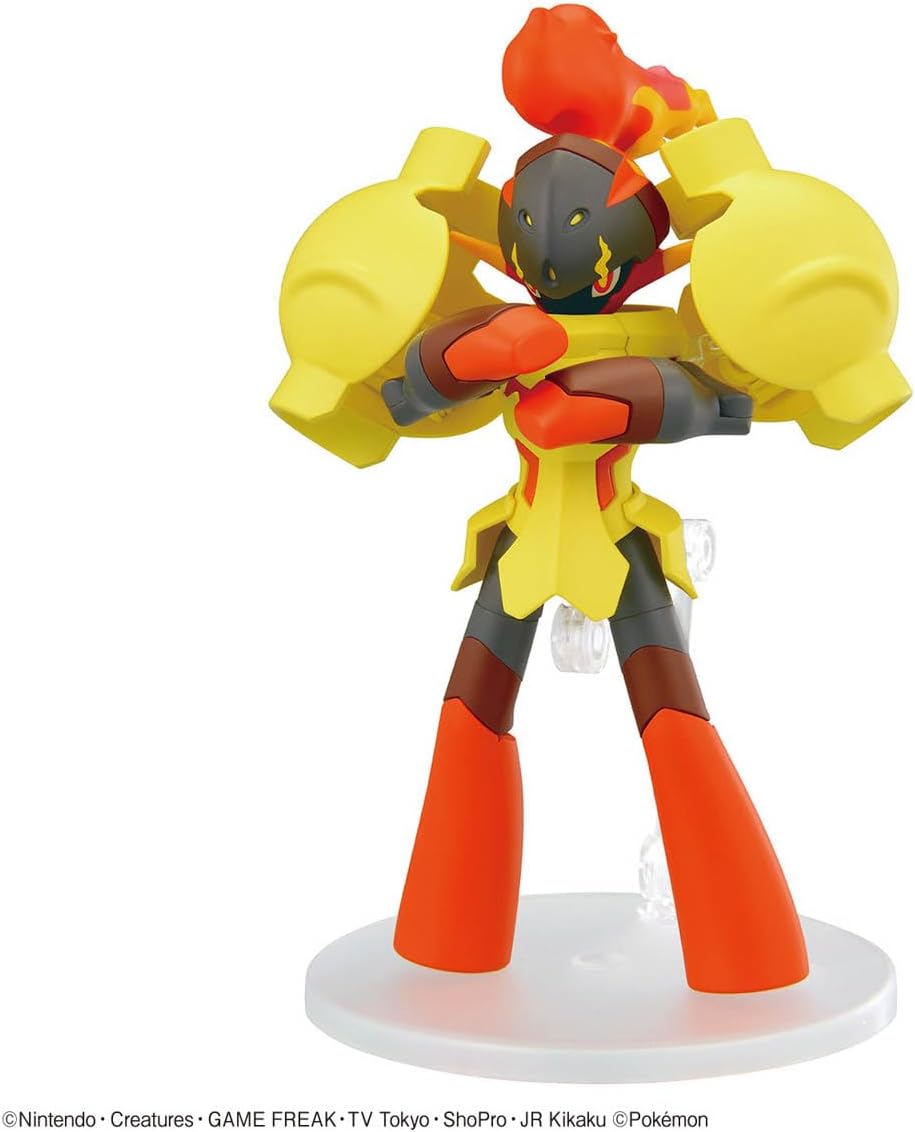
Image: Armarouge model kit in a confident pose with its arms crossed, showcasing articulation.

Image: Armarouge model kit in an action pose with one arm extended, ready for battle.
While the model is designed for posing, some joints, particularly the shoulder pauldrons and legs, may become loose with frequent manipulation. It is recommended to find a preferred pose for display to maintain stability.
Care and Maintenance
- Cleaning: To clean the model, gently wipe it with a soft, dry cloth. For stubborn dust, a slightly damp cloth can be used, followed by immediate drying. Avoid harsh chemicals or abrasive cleaners.
- Storage: Store the model away from direct sunlight, extreme temperatures, and high humidity to prevent discoloration or material degradation.
- Handling: Always handle the model by its main body parts. Avoid gripping small, delicate components or joints tightly.
Troubleshooting
- Loose Parts: If parts like shoulder pauldrons or legs become loose, gently re-attach them. For persistent looseness, a small amount of hobby-grade plastic cement (not included) can be applied to the inner surfaces of the joint, allowing it to dry completely before re-assembly. Use sparingly to maintain articulation.
- Difficulty Posing: Ensure all joints are fully snapped into place. If a pose is unstable, utilize the included display stand for support.
- Missing Parts: If you believe a part is missing, carefully re-check the packaging and runners. Contact BANDAI customer support if a part is genuinely absent.
Product Specifications
| Feature | Detail |
|---|---|
| Brand | BANDAI |
| Model Number | T13444 |
| Material | Plastic |
| Color | Red, White (Pre-painted) |
| Item Dimensions (L x W x H) | 5.91 x 8.07 x 2.56 inches |
| Item Weight | 0.25 kg |
| Assembly Type | Snap-fit, No tools required |
| Included Accessories | Display Stand |
Warranty and Support Information
For specific warranty details or product support, please refer to the information provided on the product packaging or visit the official BANDAI website. Keep your proof of purchase for any warranty claims.
For further assistance, you may contact BANDAI customer service through their official channels. Contact information is typically available on the manufacturer's website or included in the product box.
Ask a question about this manual
Ask about setup, troubleshooting, compatibility, parts, safety, or missing instructions. Manuals+ will review the question and use this page’s manual context to help answer it.