
1. Introduction
This manual provides detailed instructions for the safe and effective use of your OLIGHT Oclip Ultra EDC Flashlight and the compatible Oclip Series Headlamp Strap. Please read this manual thoroughly before operating the product and retain it for future reference.

Image 1.1: The OLIGHT Oclip Ultra EDC Flashlight and the Oclip Series Headlamp Strap. This bundle provides versatile lighting solutions for various activities.
2. Package Contents
- OLIGHT Oclip Ultra EDC Flashlight
- OLIGHT Oclip Series Headlamp Strap
- User Manual (this document)
3. Product Features
3.1. Oclip Ultra EDC Flashlight
- Three-in-One Functionality: Combines a 530 lumens floodlight for wide-area illumination, a 130 meters range spotlight for focused distance lighting, and an 800 mW pure 365nm UV light for specialized inspections.
- Durable Construction: Manufactured from O-aluminum, a material nearly twice as hard as standard 6061 aluminum, offering exceptional hardness and wear resistance for long-term durability.
- Versatile UV Light: The high-purity 365nm UV beam is ideal for detecting counterfeit currency, identifying minerals, and performing cleanliness checks.
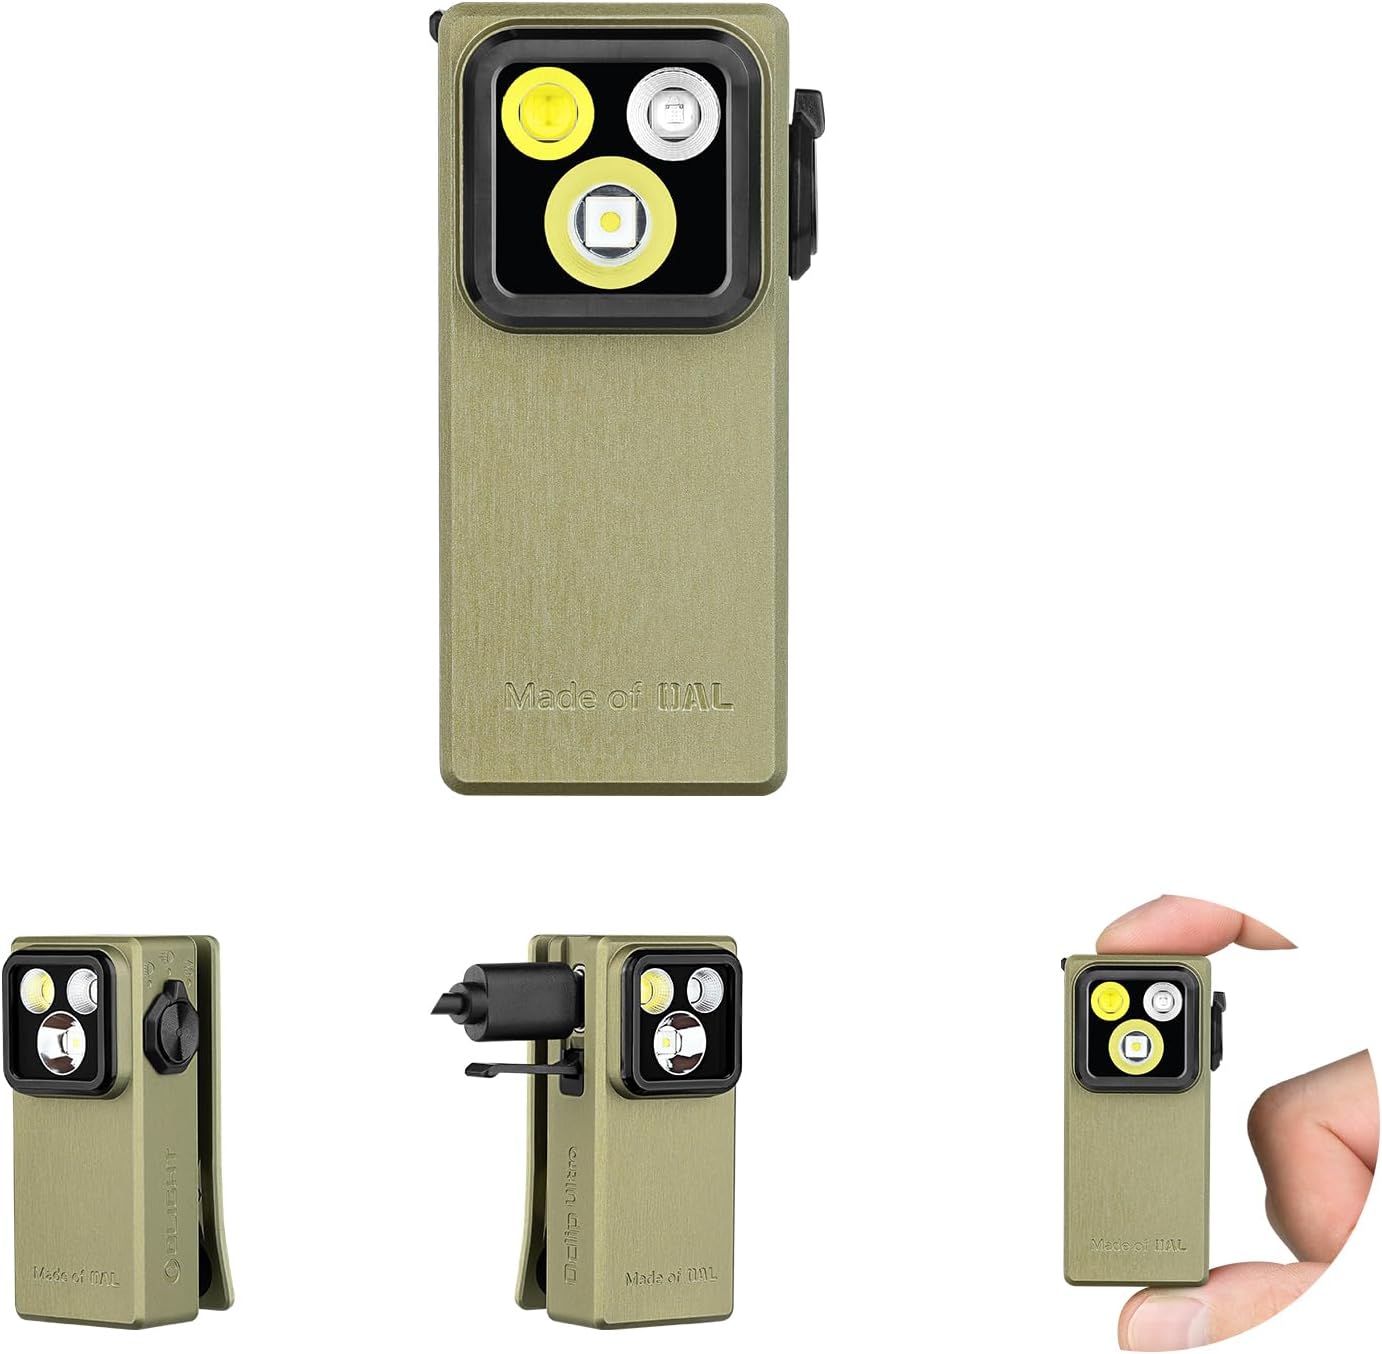
Image 3.1: Various views of the OLIGHT Oclip Ultra, highlighting its compact design and integrated clip mechanism.
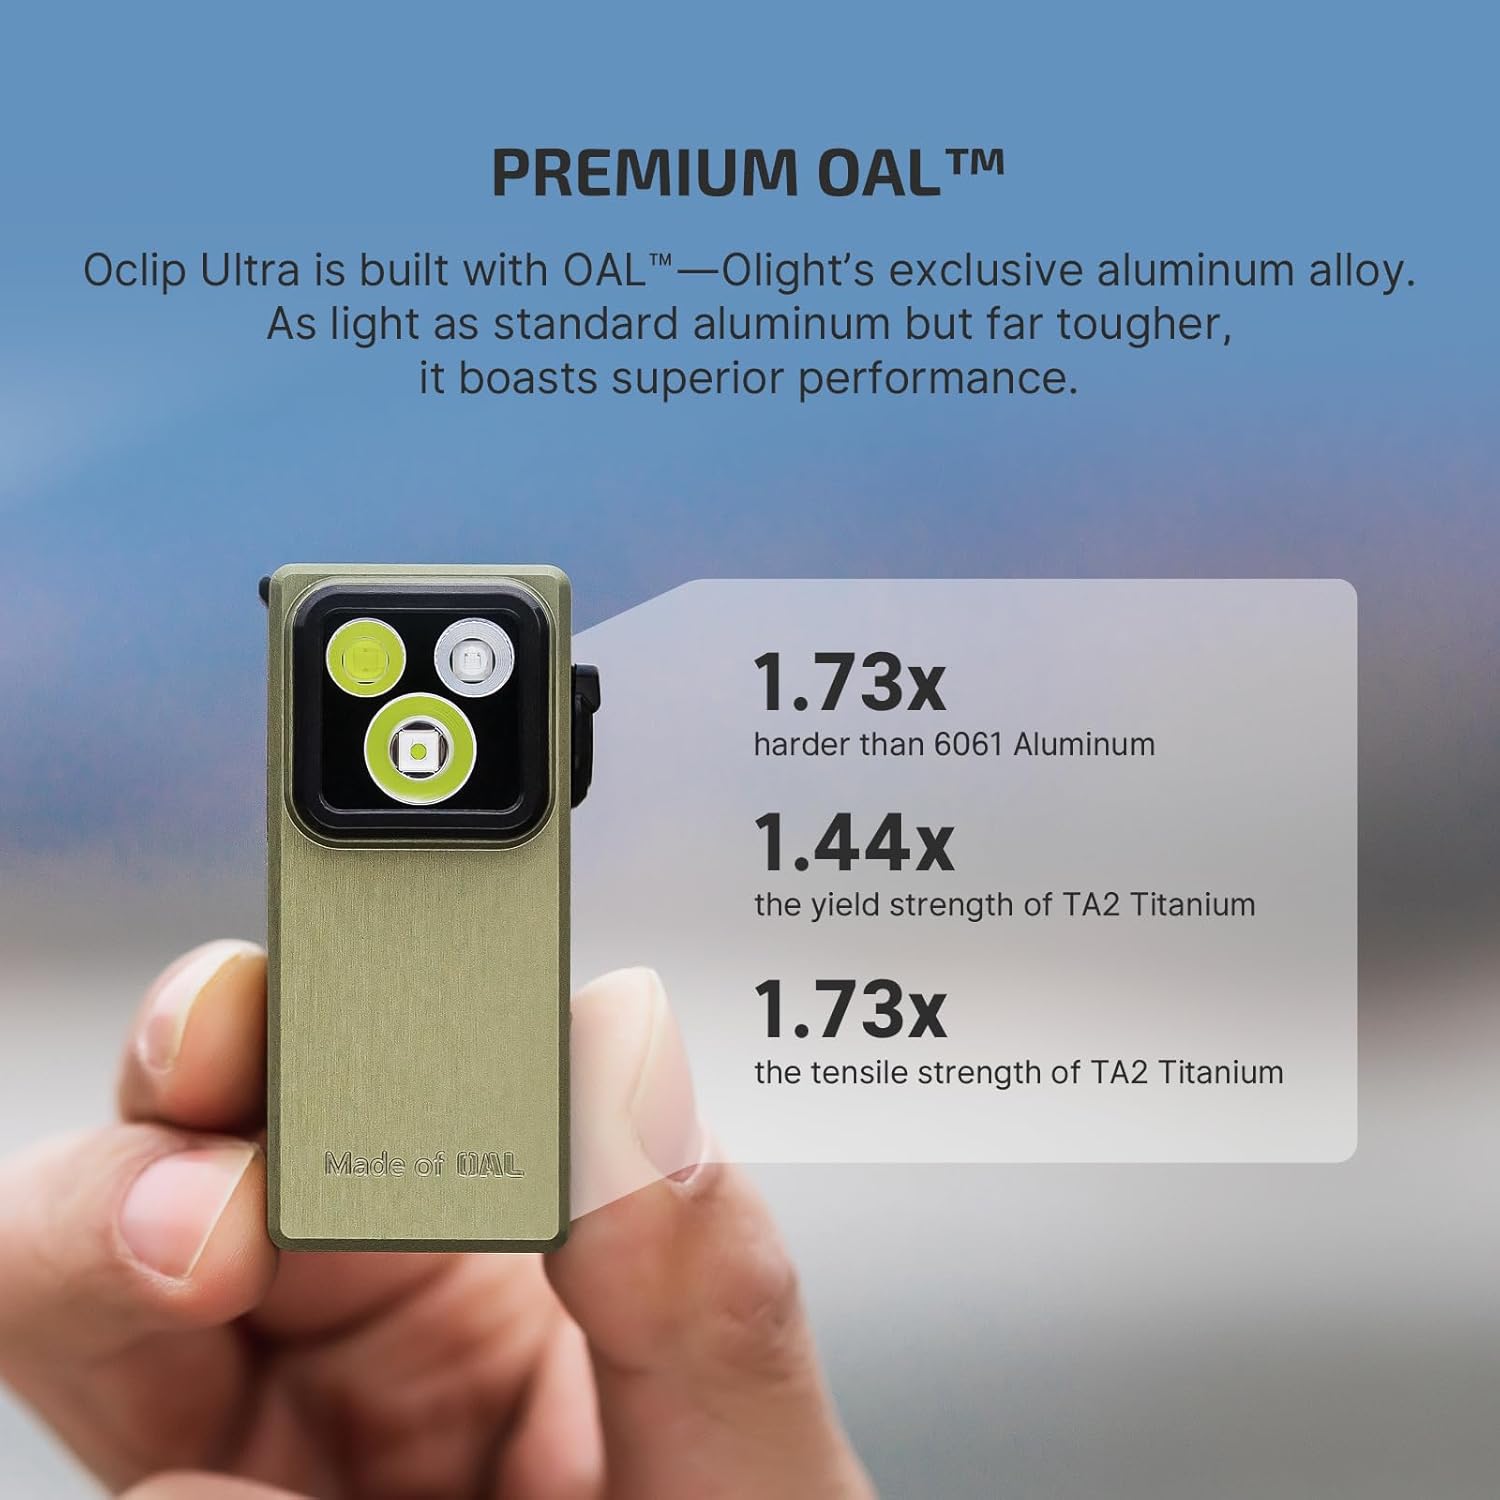
Image 3.2: Illustration detailing the superior material properties of O-aluminum used in the Oclip Ultra, including its hardness and strength compared to other materials.

Image 3.3: The Oclip Ultra flashlight clipped to clothing, demonstrating its hands-free utility and compact size, along with key performance metrics.

Image 3.4: Examples of the Oclip Ultra's floodlight, spotlight, and UV light functions in practical scenarios, showcasing its versatile illumination capabilities.
3.2. Oclip Series Headlamp Strap
- Compatibility: Exclusively designed for the Oclip series flashlights, including Oclip, Oclip Pro, and Oclip Ultra.
- Flexible Rotating Light Holder: Features an adjustable bracket that allows the flashlight to be rotated 160 degrees, ensuring optimal lighting direction. The mechanism is tested for over 5,000 flip cycles.

Image 3.5: The OLIGHT Oclip Series Headlamp Strap, designed for comfortable and secure wear.
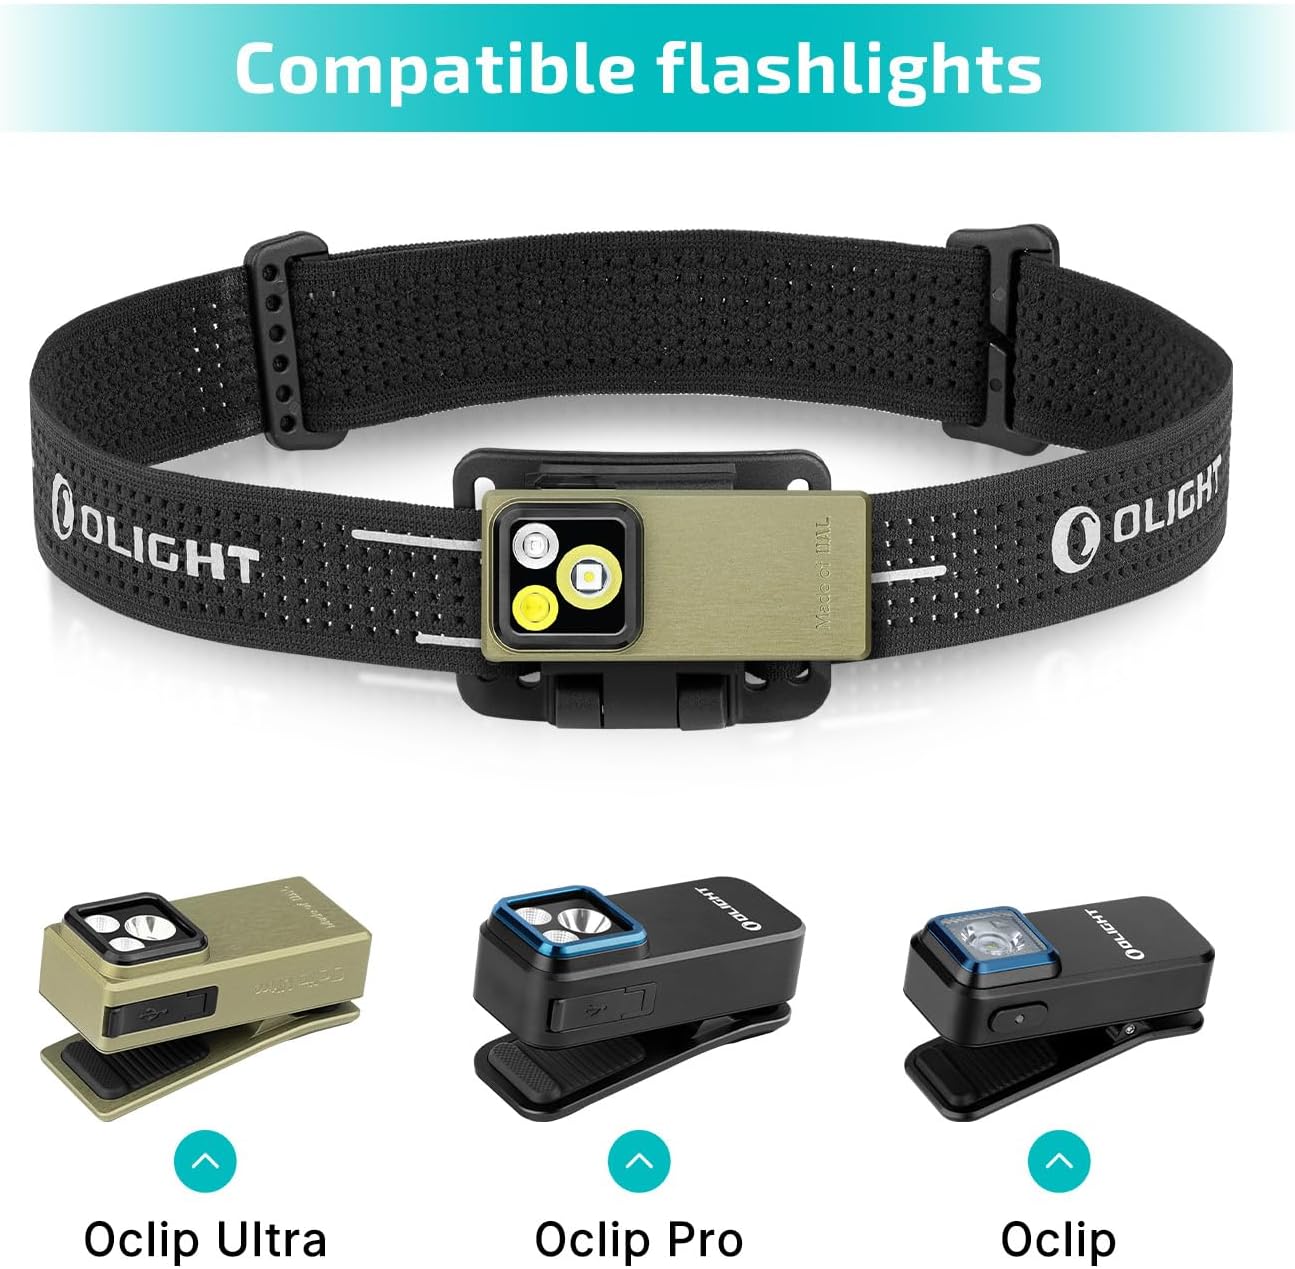
Image 3.6: The Headlamp Strap shown with various Oclip series flashlights (Oclip Ultra, Oclip Pro, Oclip), demonstrating its universal compatibility within the series.

Image 3.7: A person utilizing the Oclip Ultra with the headlamp strap to illuminate a path, illustrating hands-free operation in low-light conditions.
4. Setup
4.1. Attaching the Oclip Ultra to the Headlamp Strap
- Locate the mounting bracket on the Oclip Series Headlamp Strap.
- Align the clip of the Oclip Ultra flashlight with the slot on the headlamp strap's mounting bracket.
- Gently push the flashlight into the bracket until it securely clicks into place. Ensure there is no play and the flashlight is firmly seated.
- Adjust the angle of the flashlight as needed using the flexible rotating holder.
5. Operating Instructions
5.1. Power On/Off and Mode Selection
- Power On/Off: Press the power button once to turn the flashlight on or off.
- Brightness Adjustment: When the flashlight is on, press and hold the power button to cycle through brightness levels (Moonlight, Low, Medium, High). Release the button at your desired brightness.
- Turbo Mode: A quick double-press of the power button will activate Turbo mode.
- UV Light Activation: Refer to the specific instructions provided with your Oclip Ultra for activating the UV light mode, typically involving a specific button sequence or long press.

Image 5.1: Diagram illustrating how to change the brightness level of the Oclip Ultra by long-pressing the button, cycling through Moonlight, Low, Medium, and High modes.
6. Maintenance
- Cleaning: Wipe the flashlight and headlamp strap with a soft, damp cloth. Avoid abrasive cleaners or solvents.
- Storage: Store the product in a cool, dry place away from direct sunlight and extreme temperatures.
- Battery Care: For optimal performance, ensure the flashlight is charged regularly. Avoid fully depleting the battery for extended periods.
7. Troubleshooting
- Flashlight not turning on: Ensure the battery is charged. Check for any debris obstructing the power button.
- Light output is dim: The battery may be low. Recharge the flashlight.
- Flashlight not securely attaching to strap: Ensure the clip is properly aligned with the bracket and pushed firmly until it clicks. Inspect the clip and bracket for any damage.
8. Specifications
| Feature | Specification |
|---|---|
| Brand | OLIGHT |
| Model | Oclip Ultra |
| Material | O-aluminum |
| Floodlight Output | 530 Lumens (Max) |
| Spotlight Throw | 130 Meters (Max) |
| UV Light Output | 800 mW (365nm) |
| Moonlight Runtime | Up to 144 Hours |
| Headlamp Strap Compatibility | Oclip Series (Oclip, Oclip Pro, Oclip Ultra) |
| Headlamp Strap Rotation | 160 Degrees |
| Headlamp Strap Flip Life | Over 5,000 times |
| ASIN | B0F9WL239N |
| Date First Available | May 24, 2025 |
9. Warranty and Support
For warranty information, product support, or service inquiries, please refer to the official OLIGHT website or contact their customer service directly. Keep your purchase receipt as proof of purchase for warranty claims.


