1. Introduction
This manual provides essential information for the setup, operation, and maintenance of your INNOCN 40B2R 40 Inch Ultrawide Monitor. Please read this manual thoroughly before using the product to ensure proper functionality and safety.
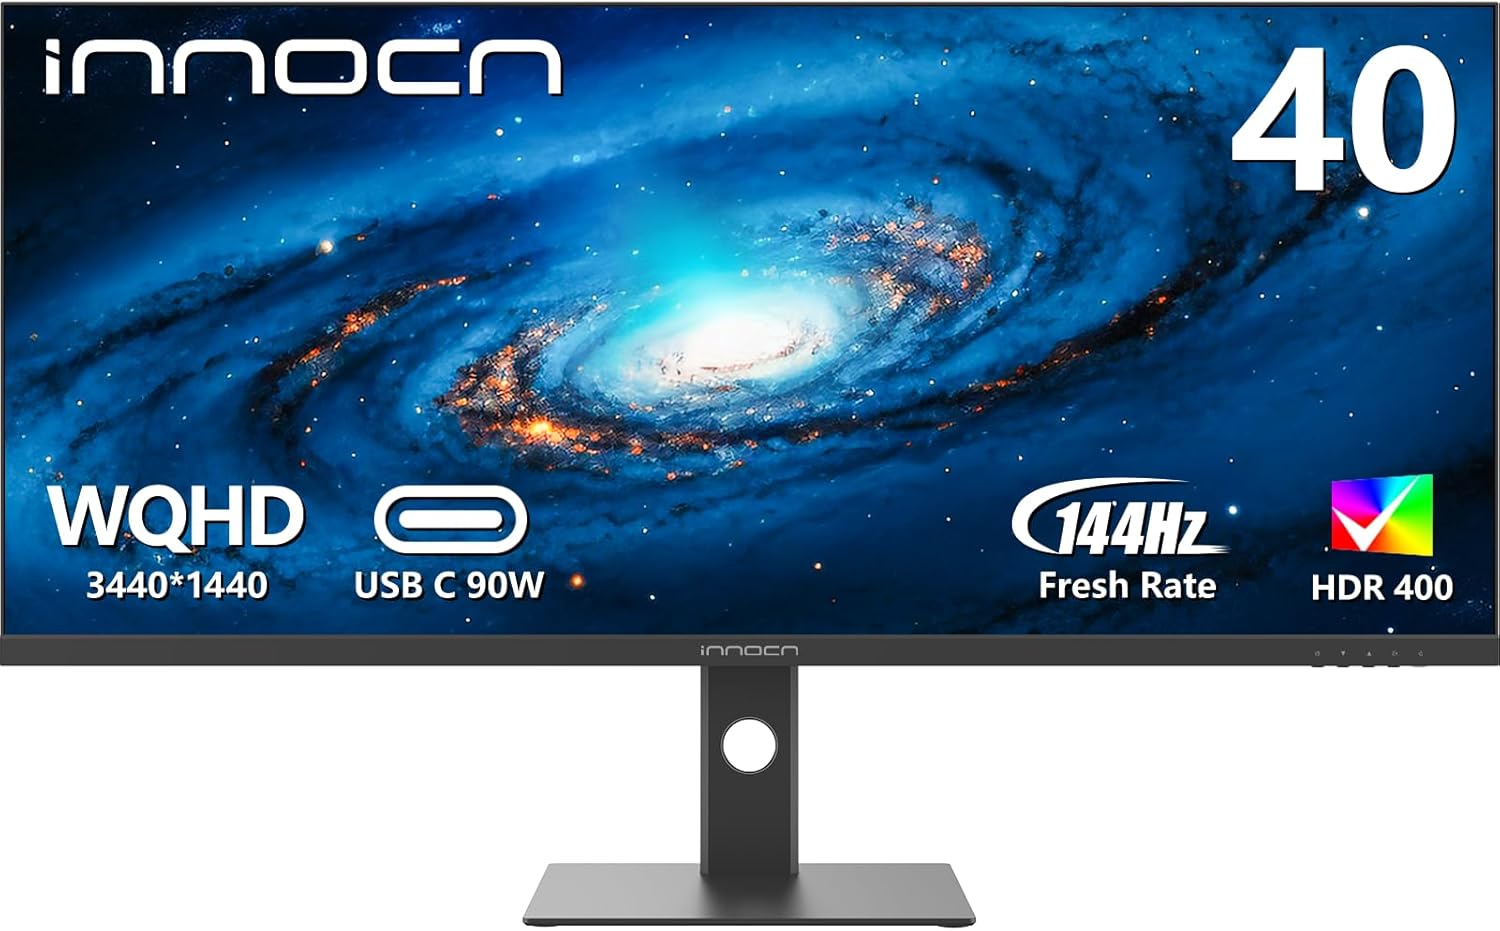
Figure 1: Front view of the INNOCN 40B2R 40 Inch Ultrawide Monitor.
2. Safety Information
- Ensure the monitor is placed on a stable, level surface to prevent accidental falls.
- Do not expose the monitor to rain, moisture, or extreme temperatures.
- Avoid blocking ventilation openings to prevent overheating.
- Use only the power adapter supplied with the monitor.
- Disconnect the power cable from the outlet before cleaning or if the monitor will not be used for an extended period.
3. Package Contents
Verify that all items are present in the package:
- INNOCN 40B2R Ultrawide Monitor
- Monitor Stand (Base and Neck)
- Power Adapter and Cable (US Power Adapter)
- HDMI Cable
- DisplayPort Cable
- USB-C Cable
- User Manual (this document)
4. Product Overview
4.1. Monitor Features
- Display: 40-inch Ultrawide ADS Panel, 3440 x 1440p resolution.
- Refresh Rate: 144Hz (DisplayPort), 100Hz (HDMI).
- Color Gamut: 95% DCI-P3.
- Brightness: 500 nits.
- Contrast Ratio: 1200:1.
- HDR Support: DisplayHDR 400.
- Adaptive Sync: AMD FreeSync Premium.
- Response Time: Up to 1ms.
- Audio: Built-in speakers.
- Adjustability: Tilt, Swivel, Height adjustable stand.
- Mounting: VESA Wall Mountable (100x100mm).
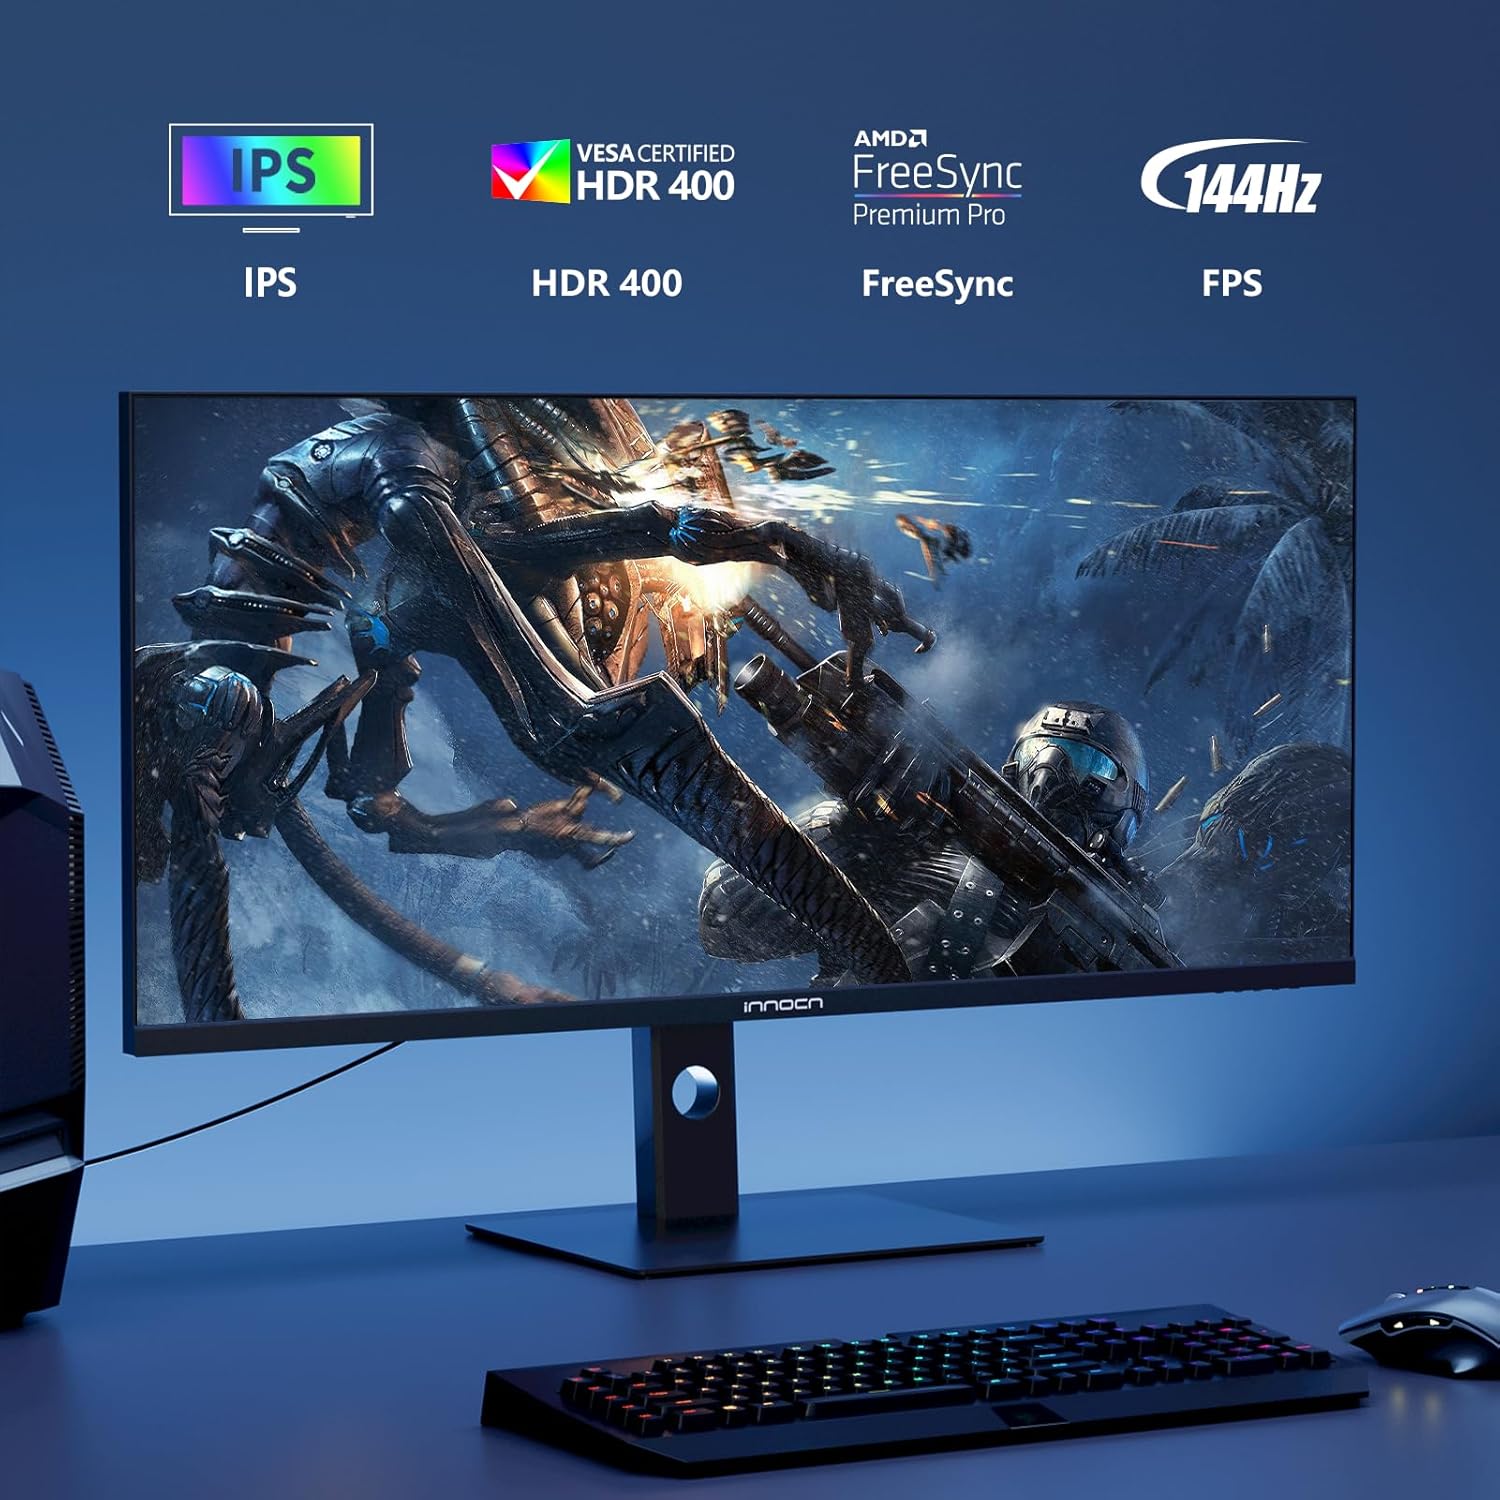
Figure 2: Key features of the INNOCN 40B2R monitor.
4.2. Ports and Controls
Refer to the image below for an overview of the monitor's rear ports and controls.

Figure 3: Rear view illustrating connectivity ports including HDMI, USB-C, and DisplayPort.
- Power Input: Connects to the power adapter.
- DisplayPort (DP): For high-resolution video input, supports 144Hz refresh rate.
- HDMI (x2): For video input, supports 100Hz refresh rate.
- USB Type-C (90W): For video input, data transfer, and power delivery (up to 90W) to connected devices like laptops.
- 3.5mm Audio Jack: For connecting external headphones or speakers.
- OSD Control Buttons: Typically located on the rear or bottom right for navigating the On-Screen Display menu.

Figure 4: Location of built-in speakers on the monitor's rear.
5. Setup
5.1. Stand Assembly
- Carefully remove the monitor and stand components from the packaging.
- Attach the stand neck to the monitor panel. Ensure it clicks securely into place or is fastened with screws as indicated in the quick start guide.
- Attach the stand base to the stand neck, securing it with the provided screw.
- Place the assembled monitor on a stable, flat surface.
Alternatively, the monitor supports VESA 100x100mm mounting for wall mounts or monitor arms.

Figure 5: Illustration of the adjustable stand features (height, swivel, tilt) and VESA mounting points.
5.2. Connecting Cables
- Power: Connect the power adapter to the monitor's power input, then plug the adapter into a power outlet.
- Video Input:
- DisplayPort: Connect one end of the DisplayPort cable to your computer's graphics card and the other end to the monitor's DP port for optimal refresh rates (up to 144Hz).
- HDMI: Connect an HDMI cable from your device to one of the monitor's HDMI ports (supports up to 100Hz).
- USB Type-C: Connect a USB-C cable from a compatible laptop or device to the monitor's USB-C port. This single connection can provide video, data, and power delivery (up to 90W).
- Audio Output: If using external headphones or speakers, connect them to the 3.5mm audio jack on the monitor.
6. Operating Instructions
6.1. Power On/Off
Press the power button (usually located on the rear or bottom right of the monitor) to turn the monitor on or off. The power indicator light will illuminate when the monitor is on.
6.2. On-Screen Display (OSD) Menu
Use the OSD control buttons to navigate and adjust monitor settings. Common settings include:
- Picture Settings: Brightness, Contrast, Sharpness, Color Temperature.
- Input Source: Select between DisplayPort, HDMI 1, HDMI 2, or USB-C.
- Audio: Volume control for built-in speakers or headphone output.
- Display Settings: Aspect Ratio, HDR mode, FreeSync.
- PIP/PBP: Picture-in-Picture / Picture-by-Picture modes for multi-source display.
6.3. Key Features
6.3.1. Ultrawide Display (21:9 Aspect Ratio)
The 21:9 ultrawide aspect ratio provides an expanded viewing area compared to standard 16:9 monitors, enhancing productivity and immersive experiences.

Figure 6: The 21:9 ultrawide screen enhances entertainment and productivity.
6.3.2. High Refresh Rate and Fast Response Time
The monitor supports a 144Hz refresh rate via DisplayPort and a 1ms response time, contributing to smoother motion and reduced ghosting, particularly beneficial for fast-paced content.

Figure 7: Visual representation of 144Hz refresh rate for smoother visuals.

Figure 8: Demonstrating the clarity provided by a 1ms fast response time.
6.3.3. AMD FreeSync Premium
This technology synchronizes the monitor's refresh rate with your graphics card's frame rate, eliminating screen tearing and stuttering for a fluid visual experience.

Figure 9: AMD FreeSync Premium ensures smooth, tear-free visuals.
6.3.4. HDR 400 and Color Accuracy
With DisplayHDR 400 certification and 95% DCI-P3 color gamut, the monitor delivers enhanced contrast, brightness, and accurate color reproduction for vibrant visuals.

Figure 10: VESA DisplayHDR 400 provides enhanced detail and color.

Figure 11: The 95% DCI-P3 wide color gamut is suitable for creative tasks.
6.3.5. Split Screen (PBP/PIP)
The Picture-by-Picture (PBP) and Picture-in-Picture (PIP) functions allow you to display content from multiple input sources simultaneously on the screen, enhancing multitasking capabilities.

Figure 12: Split screen functionality for enhanced productivity with multiple devices.

Figure 13: Example of a multi-tasking setup utilizing the ultrawide monitor.
7. Maintenance
- Cleaning the Screen: Gently wipe the screen with a soft, lint-free cloth. For stubborn marks, use a screen-specific cleaning solution applied to the cloth, not directly to the screen.
- Cleaning the Casing: Use a soft, dry cloth to wipe the monitor casing. Avoid abrasive cleaners or solvents.
- Ventilation: Ensure the monitor's ventilation openings are clear of dust and obstructions to maintain proper airflow.
8. Troubleshooting
| Problem | Possible Cause | Solution |
|---|---|---|
| No image on screen |
|
|
| Image flickering or unstable |
|
|
| No sound from speakers/headphones |
|
|
9. Specifications
| Feature | Detail |
|---|---|
| Model Number | 40B2R |
| Screen Size | 40 Inches |
| Panel Type | ADS Panel (IPS-like) |
| Resolution | 3440 x 1440 (WQHD) |
| Aspect Ratio | 21:9 |
| Refresh Rate | 144Hz (DP), 100Hz (HDMI) |
| Response Time | 1ms |
| Brightness | 500 nits |
| Contrast Ratio | 1200:1 |
| Color Gamut | 95% DCI-P3 |
| HDR Support | DisplayHDR 400 |
| Adaptive Sync | AMD FreeSync Premium |
| Connectivity | 1x DisplayPort, 2x HDMI, 1x USB Type-C (90W PD), 1x 3.5mm Audio Jack |
| USB Ports | 1 (USB Type-C) |
| Built-in Speakers | Yes |
| Adjustable Stand | Height, Swivel, Tilt |
| VESA Mount Compatibility | 100x100mm |
| Product Dimensions (with stand) | 2.23 x 37.17 x 16.48 inches |
| Item Weight (with stand) | 34.2 pounds |
| Manufacturer | Guangxi Century Innovation Display Electronics Co.,Ltd |
10. Warranty Information
INNOCN products are covered by a limited warranty. For specific warranty terms and conditions, please refer to the warranty card included with your product or visit the official INNOCN website. Keep your purchase receipt as proof of purchase for warranty claims.
11. Support
If you encounter any issues or have questions not covered in this manual, please contact INNOCN customer support through their official website or the contact information provided on your warranty card. You can also visit the INNOCN Store on Amazon for additional product information and support resources.


