1. Introduction
Thank you for choosing the QLT Bathroom Heater with Wall Mount and Towel Rack. This manual provides essential information for the safe installation, operation, and maintenance of your new heater. Please read this manual thoroughly before using the appliance and keep it for future reference.
2. Safety Instructions
To prevent injury or damage, always observe basic safety precautions when using electrical appliances. This heater is designed for bathroom use and includes specific safety features.
- Electrical Safety: Ensure the power supply matches the heater's requirements (220-240V / 50Hz). Do not operate with a damaged cord or plug.
- Water Resistance: The heater has an IP22 rating, making it safe for use in damp environments like bathrooms. However, do not immerse the unit in water or expose it to direct water spray.
- Overheating Protection: The unit is equipped with an automatic shut-off feature to prevent overheating. If activated, disconnect power and allow the unit to cool before restarting.
- Open Window Detection: This feature automatically turns off the heater if a sudden drop in temperature is detected, saving energy.
- Placement: Mount the heater securely on a wall, away from flammable materials. Do not cover the air inlets or outlets.
- Children and Vulnerable Persons: This appliance can be used by children aged 8 years and above and persons with reduced physical, sensory or mental capabilities or lack of experience and knowledge if they have been given supervision or instruction concerning use of the appliance in a safe way and understand the hazards involved.
- Maintenance: Always unplug the heater before cleaning or performing any maintenance.
3. Package Contents
Please check that all items are present and undamaged:
- QLT Bathroom Heater Unit
- Remote Control
- Wall Mounting Hardware (screws, anchors)
- User Manual (this document)
4. Product Overview
Familiarize yourself with the components of your QLT Bathroom Heater.
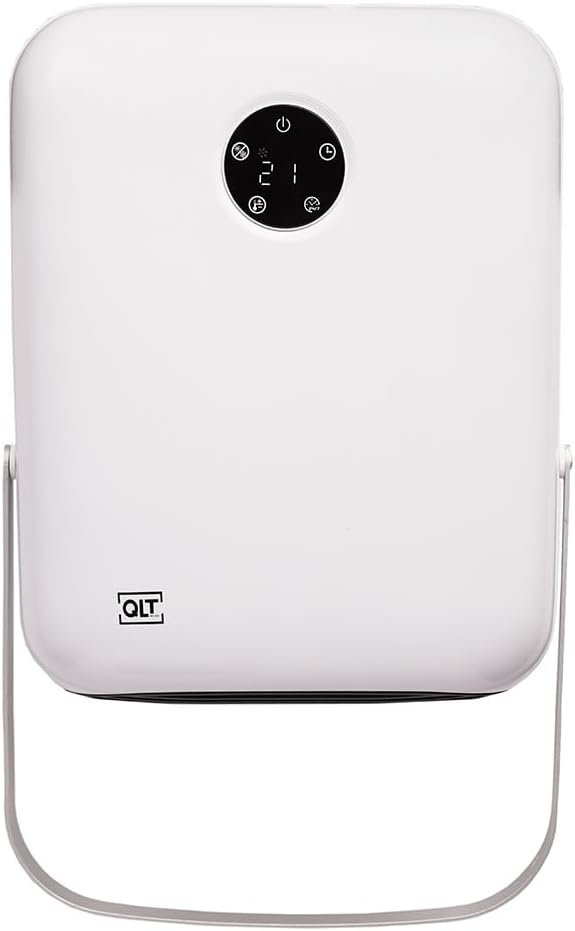
Figure 1: Front view of the QLT Bathroom Heater. It is a white, rectangular unit with rounded corners. A circular black control panel with a digital display (showing '21') and various icons (power, mode, timer, fan, temperature up/down) is located at the top center. The 'QLT' logo is visible on the bottom left. A silver-colored metal bar, serving as a towel rack, extends from the bottom of the unit.
Control Panel Features:
- Power Button: Turns the heater on or off.
- Mode Button: Selects between different heating power levels (e.g., 1000W, 2000W).
- Timer Button: Activates and sets the weekly timer function.
- Temperature Up/Down Buttons: Adjusts the desired temperature setting.
- Digital Display: Shows current temperature, timer settings, or power mode.
5. Setup and Installation
The QLT Bathroom Heater is designed for wall mounting to save space and ensure optimal performance.
- Choose Location: Select a suitable wall location in your bathroom, ensuring it is away from direct water spray and at a safe distance from other objects. The IP22 rating allows for bathroom installation, but avoid areas directly above a bath or shower.
- Mark Drilling Points: Use the provided mounting template (if included, otherwise measure carefully) to mark the drilling points on the wall.
- Drill Holes: Drill holes at the marked points and insert the wall anchors.
- Mount Heater: Secure the heater to the wall using the provided screws. Ensure it is firmly attached.
- Connect Power: Plug the 1.5-meter electrical cable into a grounded 220-240V / 50Hz power outlet. Ensure the cable is not stretched or pinched.
- Towel Rack: The integrated towel rack is ready for use once the heater is mounted.
6. Operating Instructions
Your QLT Bathroom Heater can be operated via the control panel on the unit or the included remote control.
6.1 Basic Operation
- Power On/Off: Press the Power button (symbol: circle with vertical line) on the control panel or remote control to turn the heater on or off.
- Adjust Power Level: Press the Mode button (symbol: fan icon or similar) to cycle through the available power selections (e.g., 1000W, 2000W). The digital display will indicate the selected power.
- Set Temperature: Use the Temperature Up (symbol: plus sign) and Temperature Down (symbol: minus sign) buttons to set your desired room temperature. The heater will automatically maintain this temperature.
6.2 Weekly Timer Function
The weekly timer allows you to program the heater to turn on and off at specific times throughout the week.
- Activate Timer: Press the Timer button (symbol: clock icon) on the control panel or remote.
- Program Settings: Follow the on-screen prompts on the digital display to set the desired on/off times and temperature for each day of the week. Refer to the specific instructions in the remote control section for detailed programming steps.
- Save Settings: Ensure you save your timer settings before exiting the timer menu.
6.3 Open Window Detection
This feature is automatically enabled. If the heater detects a rapid drop in room temperature (indicating an open window or door), it will temporarily switch off to conserve energy. The heater will resume operation once the temperature stabilizes or can be manually restarted.
7. Maintenance
Regular cleaning ensures optimal performance and extends the lifespan of your heater.
- Cleaning: Always unplug the heater from the power outlet before cleaning. Use a soft, damp cloth to wipe the exterior surfaces. Do not use abrasive cleaners or solvents.
- Air Vents: Periodically check and gently clean the air inlet and outlet vents to ensure they are free from dust and debris. Do not insert any objects into the vents.
- Storage: If storing the heater for an extended period, ensure it is clean and dry. Store it in a cool, dry place.
8. Troubleshooting
If you encounter issues with your heater, refer to the following common problems and solutions:
| Problem | Possible Cause | Solution |
|---|---|---|
| Heater does not turn on. | No power supply; Power button not pressed; Overheating protection activated. | Check power plug and outlet; Press the Power button; Unplug, wait 30 minutes, then plug back in. |
| Heater stops working unexpectedly. | Overheating protection activated; Open window detection activated. | Check for obstructions around vents, unplug and allow to cool; Close windows/doors, heater should resume or can be restarted. |
| Heater is on but not heating. | Temperature setting is too low; Mode is set to fan-only (if applicable). | Increase the desired temperature setting; Ensure a heating mode (1000W/2000W) is selected. |
| Remote control not working. | Batteries are dead or incorrectly inserted; Obstruction between remote and heater. | Replace batteries, ensure correct polarity; Remove any obstructions. |
If the problem persists after trying these solutions, please contact customer support.
9. Specifications
| Model Number: | BEDI 23C18/23110 |
| Brand: | QLT |
| Color: | White |
| Material: | Plastic |
| Power Output: | 1000W - 2000W |
| Power Selections: | 2 |
| Thermostat: | Yes, built-in |
| Timer: | Weekly timer function |
| Control: | Remote control / Control panel |
| Mounting: | Wall-mounted |
| Overheating Protection: | Yes |
| Electrical Cable Length: | 1.5 meters |
| IP Rating: | IP22 (safe for damp environments) |
| Connection Voltage: | 220-240V / 50Hz |
| Special Features: | Open window detection, Automatic shut-off |
| Product Dimensions (L x W x H): | 31D x 11B x 12H centimeters |
| Weight: | 1.7 kilograms |
10. Warranty and Support
For warranty information or technical support, please refer to the documentation provided at the time of purchase or contact your retailer. Keep your proof of purchase for any warranty claims.
Manufacturer: Concept Online, De Kreek 28, 3871 MM, Hoevelaken, Nederland


