
Hyper-Tough VH105 3502
Hyper-Tough 1.5 Gallon Wet Dry Vacuum
Model: VH105 3502
Brand: Hyper-Tough
Introduction
The Hyper-Tough 1.5 Gallon 2 Peak HP Wet Dry Vacuum is a compact and powerful cleaning solution designed for quick and efficient cleanup tasks in various environments, including homes, garages, cars, and workshops. This versatile unit is engineered to handle both dry debris and liquid spills with strong suction, and also features a blower function for clearing dust and debris from hard-to-reach areas. Its lightweight and portable design, coupled with convenient onboard accessory storage, makes it an ideal tool for a wide range of cleaning applications.
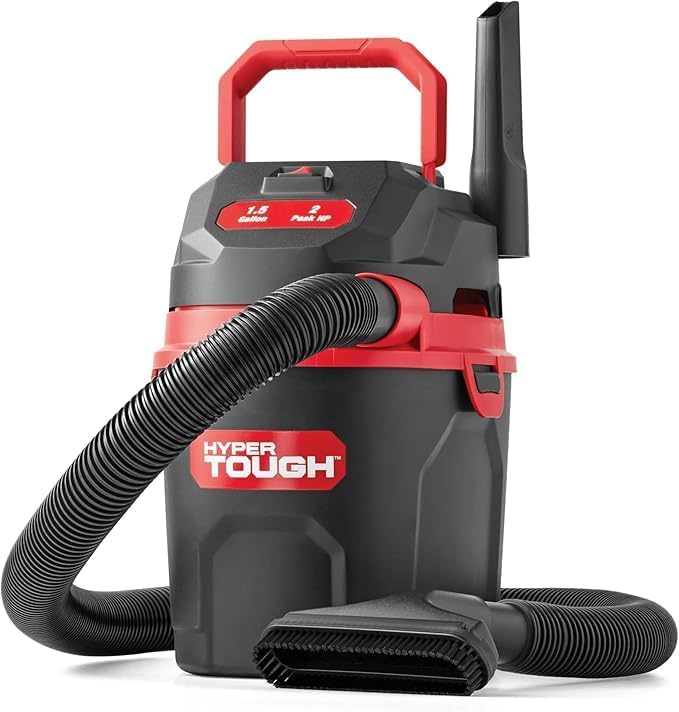
Figure 1: The Hyper-Tough 1.5 Gallon Wet Dry Vacuum, showcasing its compact design and included accessories.
Important Safety Instructions
WARNING: To reduce the risk of electric shock, do not expose to rain. Always ensure the power cord is disconnected from the power outlet before assembling, disassembling, or performing any maintenance on the wet/dry vacuum.
- Read and understand all instructions before using this vacuum cleaner.
- Do not leave the vacuum unattended when plugged in. Unplug from outlet when not in use and before servicing.
- Do not use outdoors or on wet surfaces.
- Do not allow to be used as a toy. Close attention is necessary when used by or near children.
- Use only as described in this manual. Use only manufacturer’s recommended attachments.
- Do not use with damaged cord or plug. If vacuum is not working as it should, has been dropped, damaged, left outdoors, or dropped into water, return it to a service center.
- Do not pull or carry by cord, use cord as a handle, close a door on cord, or pull cord around sharp edges or corners. Do not run vacuum over cord. Keep cord away from heated surfaces.
- Do not unplug by pulling on cord. To unplug, grasp the plug, not the cord.
- Do not handle plug or vacuum with wet hands.
- Do not put any object into openings. Do not use with any opening blocked; keep free of dust, lint, hair, and anything that may reduce air flow.
- Keep hair, loose clothing, fingers, and all parts of body away from openings and moving parts.
- Do not pick up anything that is burning or smoking, such as cigarettes, matches, or hot ashes.
- Do not use to pick up flammable or combustible liquids, such as gasoline, or use in areas where they may be present.
- Do not use without filters in place.
- Turn off all controls before unplugging.
- Use extra care when cleaning on stairs.
- Do not use to pick up toxic material.
- Do not use in an enclosed space where vapors are given off by oil base paint, paint thinner, some mothproofing substances, flammable dust, or other explosive or toxic vapors.
- Connect to a properly grounded outlet only.
Unpacking & Checking Carton Contents
Carefully remove all contents from the box. Remove the power head and take out any contents inside the collection tank. Check each item against the carton contents list below. The hose and accessories for this vacuum are 1.25 inches (3.18 cm) in diameter.

Figure 2: Exploded view of the vacuum and a list of included components.
Carton Contents List:
- Vacuum Assembly (Qty: 1)
- Hose (Qty: 1)
- Crevice Tool (Qty: 1)
- Utility Nozzle (Qty: 1)
- Reusable Cloth Filter (Qty: 1)
- Foam Wet Filter (Qty: 1)
- Wall Mount Bracket (Qty: 1)
- 2 Screws (Bag) (Qty: 1)
- Operator's Manual (Qty: 1)
General Assembly Instructions
Before beginning assembly, ensure the power cord is disconnected from the outlet to prevent electric shock.

Figure 3: Visual guide for assembling the vacuum cleaner.
- Verify that the power cord is disconnected from the outlet (Refer to Figure 3, Step 1).
- Undo the latches on the sides of the collection tank (Refer to Figure 3, Step 2).
- Lift the power head off the collection tank (Refer to Figure 3, Step 3).
- Remove all contents from inside the collection tank; make sure you have all contents as listed in the 'Unpacking & Checking Carton Contents' section (Refer to Figure 3, Step 4).
- Your vacuum is now ready for dry vacuum cleaning if the reusable cloth filter is not installed. For installation instructions, refer to the 'Installing & Cleaning Reusable Cloth Filter' section.
- For wet vacuum cleaning, remove the reusable cloth filter and install the supplied foam wet filter. Refer to the 'Installing & Cleaning Foam Wet Filter' section for detailed instructions (Refer to Figure 3, Step 6).
- Place the power head back on the collection tank, aligning the top section with the latches, and snap into place (Refer to Figure 3, Steps 8 & 9).
- Insert the larger end of the hose into the vacuum port on the power head (Refer to Figure 3, Step 10).
- Choose your desired attachment (e.g., crevice tool, utility nozzle) and insert it onto the end of the hose (Refer to Figure 3, Step 11).
Wall Mount Storage
For your convenience, this vacuum comes with a wall mount bracket for storage. Follow these important guidelines:
- Do not mount the rack over 5 ft / 1.5 m from the floor.
- Do not screw the wall mount rack to drywall only. Secure the screws to a stud.
- Do not hang from or sit on the vacuum when on wall mount rack.
- Do not use the vacuum while it is mounted on the wall mount rack.
- Empty the collection tank before mounting the vacuum on the wall.
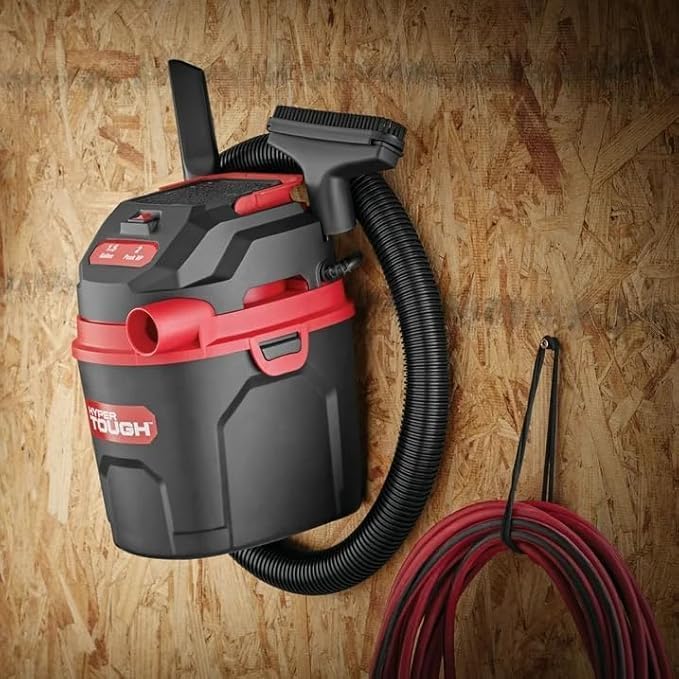
Figure 4: The Hyper-Tough vacuum conveniently stored using its wall mount bracket.
Operating the Vacuum
Dry Vacuum Operation
For dry vacuuming, ensure the reusable cloth filter is properly installed over the filter cage. This filter is designed to capture fine dust and debris. Attach the desired nozzle (e.g., utility nozzle) to the hose. Plug the power cord into a suitable electrical outlet. Turn the vacuum on using the power switch located on the power head. Begin vacuuming dry materials such as sawdust, dirt, or small debris.
Liquid Vacuum Operation
For liquid pickup, remove the reusable cloth filter and install the foam wet filter over the filter cage. The foam filter is specifically designed to handle liquids and protect the motor. Attach the utility nozzle or other appropriate attachment. Plug the power cord into a suitable electrical outlet. Turn the vacuum on. Carefully vacuum liquid spills. The vacuum has a float mechanism that will rise and shut off suction when the tank is full to prevent overflow. When this happens, turn off the vacuum, unplug it, and empty the collection tank.
Blower Operation
The Hyper-Tough wet dry vacuum also functions as a blower. To use the blower feature, remove the hose from the vacuum port on the front of the power head. Locate the blower port, typically on the back or side of the power head. Insert the larger end of the hose firmly into the blower port. Attach a nozzle to the other end of the hose if desired. Plug in the vacuum and turn it on. This function is useful for clearing debris from workbenches, patios, or other surfaces.
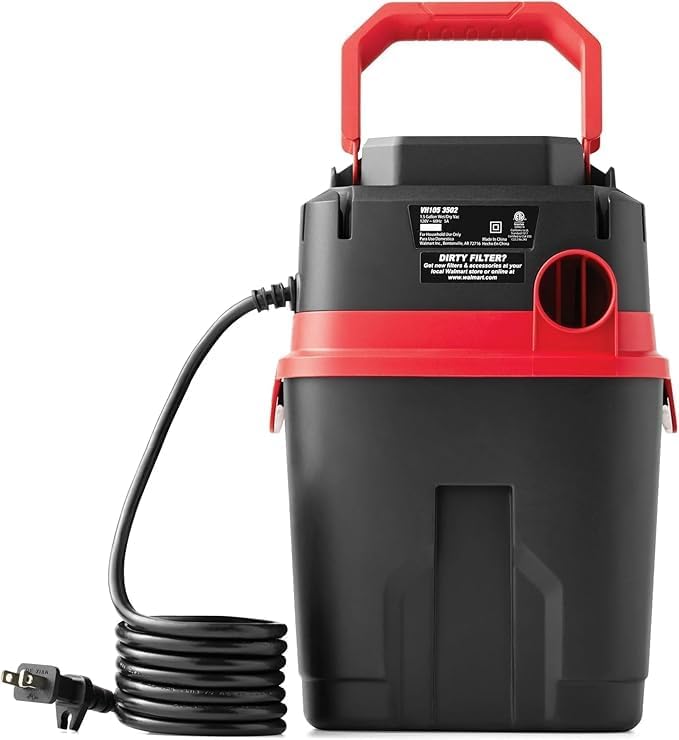
Figure 5: Rear view of the vacuum, highlighting the power cord and product label.
Maintenance
Regular maintenance ensures the longevity and optimal performance of your Hyper-Tough wet dry vacuum. Always unplug the vacuum before performing any maintenance.
Installing & Cleaning Reusable Cloth Filter
For dry vacuuming, the reusable cloth filter must be installed. To install, slide the cloth filter over the filter cage, ensuring it covers the entire cage. To clean, remove the power head and gently tap the filter to dislodge dust. For a more thorough cleaning, rinse the filter with water and allow it to air dry completely before reinstallation. Do not use the vacuum with a wet cloth filter.
Installing & Cleaning Foam Wet Filter
For wet vacuuming, the foam wet filter must be installed. To install, slide the foam filter over the filter cage after removing the cloth filter. To clean, rinse the foam filter thoroughly with water to remove any debris or liquids. Squeeze out excess water and allow it to air dry completely before storing or reinstalling. Do not use the vacuum with a wet foam filter.
General Cleaning
Wipe down the exterior of the vacuum and accessories with a damp cloth. Empty the collection tank regularly, especially after picking up liquids, to prevent odors and maintain hygiene. Check the hose and nozzles for any blockages and clear them as needed.
Troubleshooting
| Problem | Possible Cause | Solution |
|---|---|---|
| Vacuum does not turn on. | No power to outlet; Power cord not plugged in; Faulty power switch. | Check power outlet with another device; Ensure power cord is securely plugged in; Contact customer support if switch is faulty. |
| Loss of suction. | Collection tank full; Filter clogged; Hose or nozzle blocked; Power head not sealed properly. | Empty collection tank; Clean or replace filter; Clear any blockages from hose/nozzle; Ensure latches are securely fastened. |
| Motor runs but no suction (wet pickup). | Float mechanism activated (tank full). | Turn off vacuum, unplug, and empty the collection tank. |
| Dust escaping from vacuum. | Filter not installed or damaged; Power head not sealed properly. | Ensure reusable cloth filter is correctly installed and undamaged; Check that the power head is securely latched onto the tank. |
Specifications
| Feature | Detail |
|---|---|
| Brand | Generic (Hyper-Tough) |
| Model Name | Hyper-Tough 1.5 Gallon Wet Dry Vacuum |
| Model Number | VH105 3502 |
| Capacity | 1.5 Gallons |
| Motor Horsepower | 2 Peak HP |
| Product Dimensions | 7.91"L x 9.09"W x 11.47"H |
| Item Weight | 9.9 pounds |
| Color | Black & Red |
| Filter Type | Reusable Cloth Filter, Foam Wet Filter |
| Included Components | Flexible Hose, Crevice Tool, Utility Nozzle, Reusable Filter Bag |
| Special Features | Corded, Blower Function, Compact Design, Onboard Storage for Accessories, Secure Latches for Sealed Operation |
| Recommended Uses | Home, Garage, Car, Workshop |
| Indoor/Outdoor Usage | Indoor |
Support & Replacement Parts
For replacement filters and accessories, please visit the official website: www.walmart.com.
This product is distributed by Walmart Inc., Bentonville, AR 72716.
Ask a question about this manual
Ask about setup, troubleshooting, compatibility, parts, safety, or missing instructions. Manuals+ will review the question and use this page’s manual context to help answer it.