
1. Introduction
Thank you for choosing the TFA Dostmann Wi-Fi Weather Station 35.8100. This device provides professional weather forecasts from Wetter.com, along with local indoor and outdoor temperature and humidity readings. It acts as a gateway to the free TFA.me online portal, allowing you to access your measurement data worldwide. This manual will guide you through the setup, operation, and maintenance of your weather station.
2. Safety Information
- Read this manual carefully before using the device.
- Keep this manual for future reference.
- Do not expose the device to extreme temperatures, vibrations, or shocks.
- Avoid direct sunlight and moisture.
- Use only specified batteries and power adapter.
- Do not attempt to repair the device yourself. Contact customer support for assistance.
3. Package Contents
Ensure all items are present in the package:
- Wi-Fi Weather Station ID-02 (Main Unit)
- 1 Thermo-Hygro Transmitter (Outdoor Sensor)
- Power Adapter for Main Unit
- Quick Start Guide (in 6 languages)
- 5 x 1.5 V AA Batteries (for Main Unit)
Note: Additional backup batteries (5 x 1.5 V AA) for the main unit and batteries for the outdoor sensor may need to be purchased separately if not included.
4. Setup
4.1 Battery Installation
- Main Unit: Open the battery compartment on the back of the Wi-Fi Weather Station. Insert 5 x 1.5 V AA batteries, observing the correct polarity (+/-). Close the compartment.
- Outdoor Sensor: Open the battery compartment on the thermo-hygro transmitter. Insert the required batteries (typically 2 x 1.5 V AA, check sensor manual for specifics), observing the correct polarity. Close the compartment.
4.2 Power Connection
Connect the provided power adapter to the main unit's DC 5.0V input port, located on the back of the station. Plug the adapter into a power outlet. The station will power on automatically.

Image: Back view of the main unit, highlighting the power input and gateway button.
4.3 Initial Setup and Wi-Fi Connection
- Upon first power-on, the station will enter setup mode. Follow the on-screen instructions to set basic parameters like time zone and date.
- To connect to Wi-Fi, access the station's settings menu (refer to the quick start guide for specific button presses, usually involving a 'SET' or 'SWITCH/SET' button).
- Select the Wi-Fi setup option. The station will display an SSID (network name) and password, or a QR code for easy setup via a smartphone app.
- Using a smartphone, tablet, or computer, connect to the station's temporary Wi-Fi network.
- Open a web browser and navigate to the IP address provided by the station (or follow app instructions).
- Enter your home Wi-Fi network details (SSID and password) to connect the station to the internet.
- Once connected, the station will synchronize time and begin receiving professional weather forecasts from Wetter.com.
4.4 Outdoor Sensor Placement
Place the thermo-hygro transmitter in a shaded, well-ventilated area outdoors, protected from direct rain and sunlight. Ensure it is within the wireless range of the main unit. Avoid placing it near heat sources or reflective surfaces that could affect temperature readings.
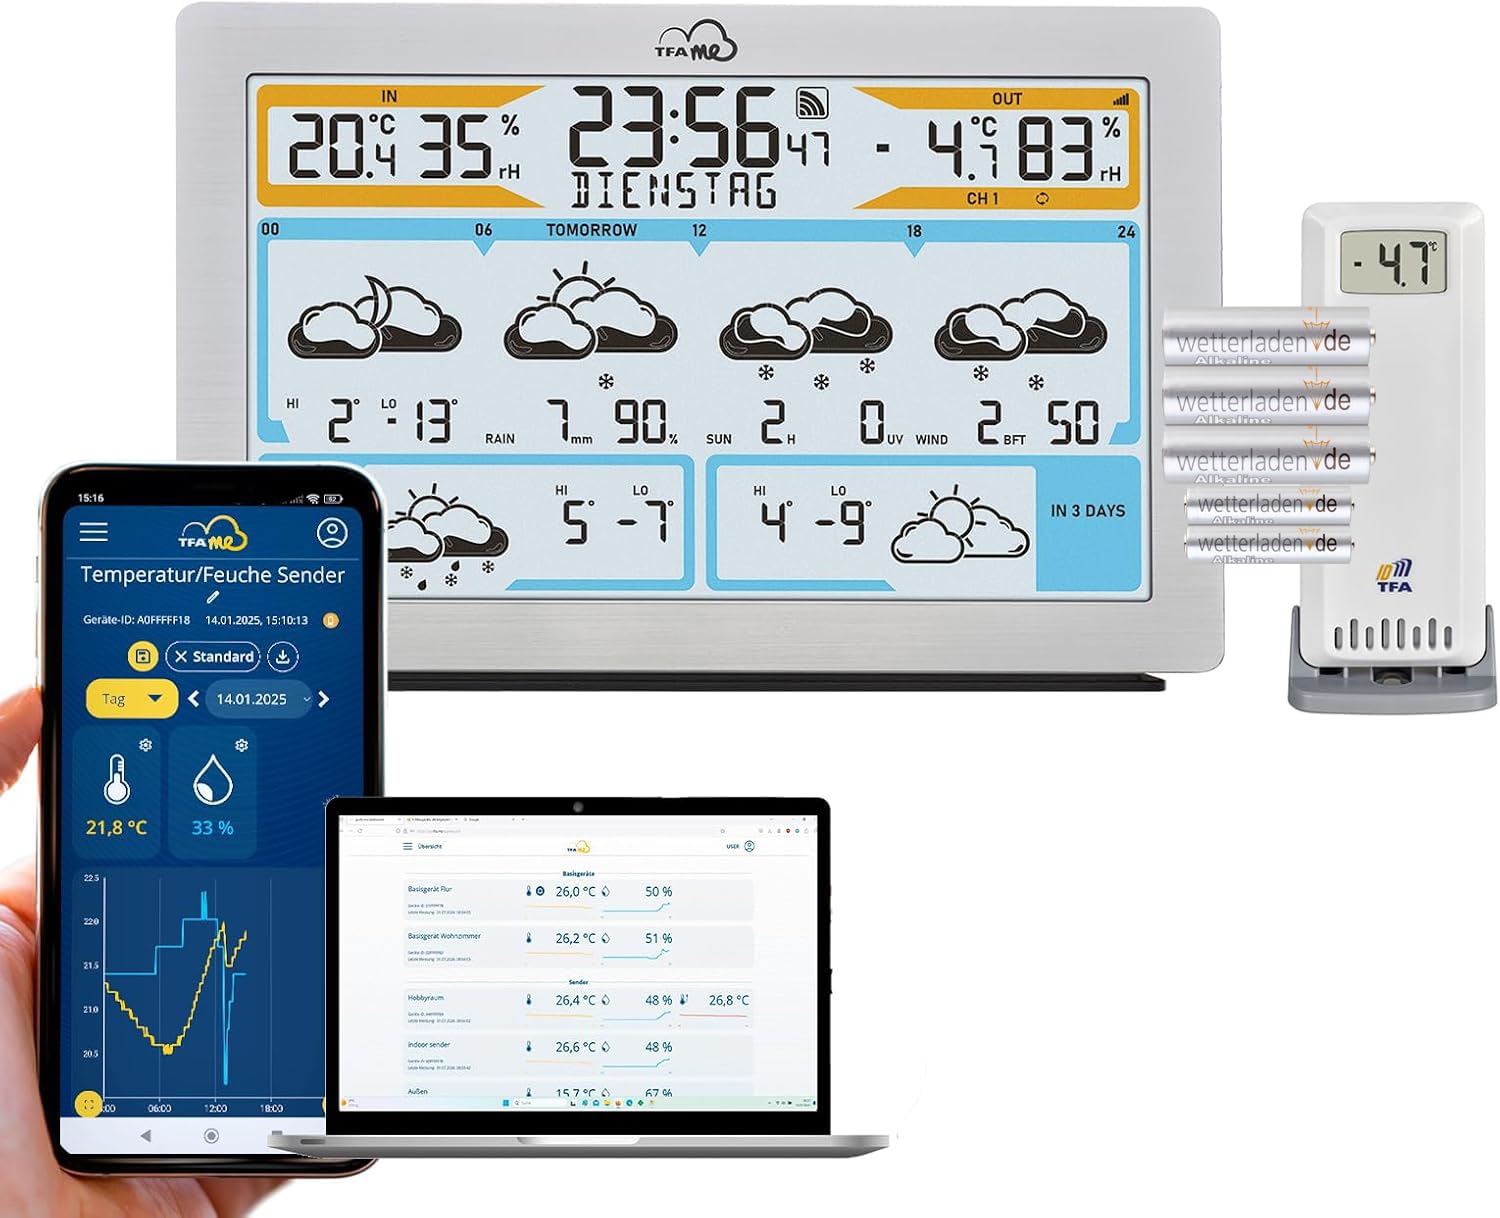
Image: The main weather station unit, its outdoor sensor, and digital devices displaying the TFA.me portal.
5. Operating Instructions
5.1 Display Overview
The LCD display provides comprehensive weather information:
- Indoor Readings: Temperature and humidity inside your home.
- Outdoor Readings: Temperature and humidity from the wireless outdoor sensor.
- Time and Date: Automatically synchronized via Wi-Fi.
- Weather Forecast: Icons representing 3 to 6-day professional forecasts from Wetter.com.
- Additional Data: Max/Min values, rain risk, predicted rain quantity, sunshine hours, UV index, wind speed, and wind direction.

Image: Detailed view of the weather station's LCD display, showing current conditions and forecast.
5.2 Navigating the Display
Use the buttons on the top of the unit to navigate and adjust settings:
- LIGHT: Adjusts display brightness (4 levels available).
- CHANNEL: Cycles through data from multiple outdoor sensors (if connected).
- SWITCH / SET: Used to switch between display modes or enter settings.
- - / +: Adjusts values during setup or navigates through forecast days.

Image: Top view of the weather station, illustrating the control buttons.
5.3 Weather Forecasts and Symbols
The station displays professional 3 to 6-day forecasts with hourly updates and up to 40 different weather symbols. These symbols indicate conditions such as sunny, partly cloudy, cloudy, rain, snow, thunderstorms, etc. Pay attention to the 'HI' and 'LO' temperature indicators for each forecast period.
5.4 Alert Function
The station features an alert function for dangerous weather conditions. A warning symbol will appear on the display for events like storms, heavy rain, extreme heat, icing, or high UV loads. You can also configure email notifications via the TFA.me portal to receive alerts when measured values exceed or fall below your selected thresholds.
5.5 TFA.me Online Portal
The free TFA.me portal allows you to access your weather data from anywhere in the world using a PC, tablet, or smartphone. The weather station acts as a gateway, uploading measurement values. The portal displays all data (up to 50 stations online) clearly with graphical images. You can also manually or automatically export data via email.

Image: The weather station and various devices displaying the TFA.me online portal.

Image: The TFA.me brand logo and slogan.
6. Maintenance
6.1 Cleaning
Clean the main unit and outdoor sensor with a soft, damp cloth. Do not use abrasive cleaners or solvents, as these can damage the display or casing.
6.2 Battery Replacement
Replace batteries in both the main unit and the outdoor sensor when the low battery indicator appears on the display. Always replace all batteries at once with new ones of the same type. Dispose of old batteries responsibly.
6.3 Sensor Care
Periodically check the outdoor sensor for any debris, insects, or blockages that might affect its readings. Ensure its placement remains optimal for accurate measurements.
7. Troubleshooting
- No Display: Check if the power adapter is securely connected and if the batteries are correctly inserted and charged.
- No Outdoor Readings: Ensure the outdoor sensor batteries are fresh and correctly inserted. Verify the sensor is within range and not obstructed. Try re-pairing the sensor with the main unit (refer to the quick start guide for pairing instructions).
- Wi-Fi Connection Issues: Ensure your home Wi-Fi network is 2.4 GHz (most weather stations do not support 5 GHz). Check your Wi-Fi password. If issues persist, try restarting your router and the weather station. Refer to the quick start guide for detailed Wi-Fi setup steps. Some users have reported difficulties with initial Wi-Fi setup; ensure all steps are followed precisely.
- Inaccurate Readings: Ensure the outdoor sensor is placed in a shaded, well-ventilated area away from direct sunlight or heat sources. Compare readings with other reliable thermometers if possible.
- Forecast Not Updating: Verify the Wi-Fi connection is active. The station requires an internet connection to receive professional forecasts.
For further assistance, consult the detailed quick start guide or visit the TFA Dostmann support website.
8. Specifications
| Feature | Detail |
|---|---|
| Manufacturer | TFA Dostmann |
| Product Reference | 35.8100.54 |
| Model Color | Silver |
| Material | Plastic |
| Power Type | Battery operated with optional power adapter |
| Display Type | LCD |
| Special Features | Professional weather forecasts with Wi-Fi from wetter.com, Gateway function for TFA.me system |
| Included Components | Wi-Fi Weather Station ID-02, 1 thermo-hygro transmitter, power adapter, quick start guide |
| Batteries Included | 5 AA (for main unit) |
| Batteries Required | Yes |
| Battery Composition | Alkaline |
| Temperature Accuracy | 0.5 °C |
| Connectivity Technology | Wi-Fi |
| Package Dimensions | 21.7 x 13.9 x 3 cm; 380 grams |
9. Warranty and Support
This product comes with a manufacturer's warranty. Please refer to the warranty information provided in the quick start guide or on the official TFA Dostmann website for details regarding warranty duration and terms.
For technical support, troubleshooting assistance, or to inquire about spare parts, please visit the official TFA Dostmann website or contact their customer service department. Contact information can typically be found in the quick start guide or on the manufacturer's website.


