1. Introduction
This manual provides essential information for the safe and efficient installation, operation, and maintenance of your VEVOR 500W Utility Sink Macerator Pump, model FLO500-DE Pro. Please read these instructions thoroughly before use and retain them for future reference.

Figure 1.1: VEVOR 500W Utility Sink Macerator Pump with connection accessories. This image displays the main unit along with various hoses, clamps, and connectors required for installation.
2. Safety Instructions
Observe all safety precautions to prevent injury or damage. Failure to follow these instructions may result in electric shock, fire, or serious injury.
- Ensure the power supply matches the pump's voltage (110 Volts).
- Always disconnect power before performing any installation, maintenance, or troubleshooting.
- Do not operate the pump if the power cord or plug is damaged.
- Install the pump in a dry, well-ventilated area, protected from freezing temperatures.
- Do not pump flammable liquids, corrosive chemicals, or solids larger than specified.
- Ensure all connections are watertight to prevent leaks.
- This appliance is not intended for use by persons with reduced physical, sensory, or mental capabilities unless supervised or instructed.
3. Product Overview
3.1 Key Features
- Powerful Performance: 0.7 HP/500W motor with a flow rate of 29 GPM (110 LPM) and a maximum head lift of 26 ft (8 m).
- Multiple Inlets: Equipped with 4 water inlets (1 x 89 mm and 3 x 40 mm) for versatile connections to various fixtures.
- Durable Motor: Features an IPX8 waterproof copper motor with an oil-filled design for efficient heat dissipation and extended life.
- Auto-Delay Start: Reduces frequent motor starts, contributing to longer motor lifespan and quieter operation (≤60dB).
- Anti-Clogging Design: Stainless steel blades effectively grind hair and debris to prevent pipe blockages.
- Hot Water Capability: Designed to handle wastewater up to 75℃ (167℉), suitable for washing machines and dishwashers.
- Antimicrobic Water Tank: Silver ion treated tank inhibits odor generation with an inhibition rate of up to 99%.
3.2 Components and Diagrams

Figure 3.1: Multi-Use Macerator Pump with 3 water inlets. This diagram illustrates the various inlet ports (three 40mm and one 89mm) and the single 40mm outlet, highlighting its adaptability for different plumbing fixtures.

Figure 3.2: Efficient Grinding, Clog-Free mechanism. This image details the stainless steel blades responsible for macerating waste, ensuring smooth operation and preventing blockages.

Figure 3.3: PCB Delay Function. This graphic explains how the integrated PCB (Printed Circuit Board) delay function reduces frequent motor startups, leading to lower noise and an extended service life for the pump.
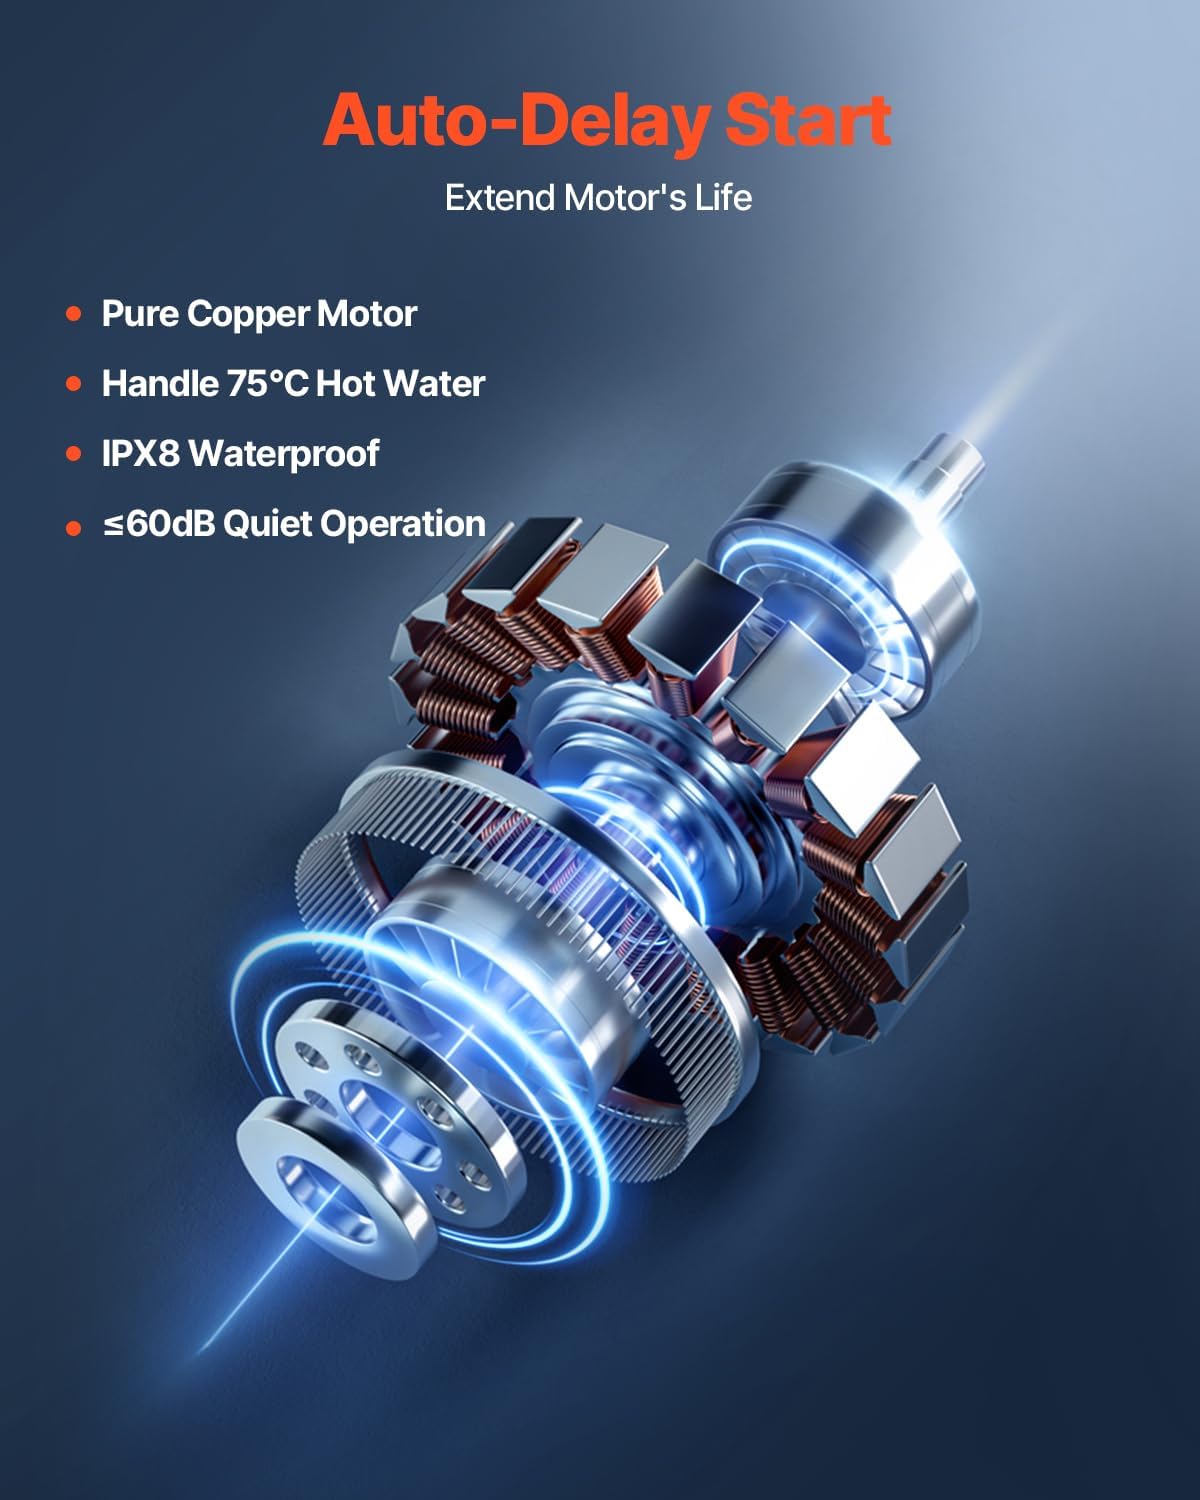
Figure 3.4: Auto-Delay Start and Motor. This image highlights the pure copper motor and its auto-delay start function, designed to extend the motor's life and efficiently handle hot water up to 75℃.

Figure 3.5: Antimicrobic Silver Ion Water Tank. This graphic illustrates the silver ion treated water tank, which provides an inhibition rate of up to 99% against odor-causing bacteria, ensuring a hygienic environment.
4. Setup and Installation
Proper installation is crucial for the pump's performance and longevity. Consult a qualified plumber if you are unsure about any steps.
4.1 Pre-Installation Checks
- Verify all components are present: Macerator Pump, Outlet Connection Kit, 3 Inlet Hoses, 5 Clamps.
- Ensure the installation area is level, stable, and has access to a 110V power outlet.
- Confirm that the wastewater sources (sinks, showers, etc.) are within the pump's lift and horizontal distance capabilities.
4.2 Installation Steps
- Positioning: Place the macerator pump in the desired location, ensuring it is accessible for maintenance and connected to the wastewater sources. The compact design allows for installation under sinks or in cabinets without extensive demolition.
- Inlet Connections: Connect the wastewater pipes from your fixtures (sink, shower, bathtub, washing machine) to the appropriate inlet ports on the pump using the provided hoses and clamps. Ensure all connections are secure and leak-free.
- Outlet Connection: Attach the discharge pipe to the pump's outlet using the outlet connection kit. Route the discharge pipe to the main drainage system. The pump is capable of lifting wastewater up to 26 ft (8 m) vertically and pumping it horizontally over long distances.
- Electrical Connection: Plug the pump into a grounded 110V electrical outlet. Ensure the circuit is protected by a Ground Fault Circuit Interrupter (GFCI) for safety.
- Testing: After all connections are made, run water through the connected fixtures to test for leaks and proper pump operation.

Figure 4.1: No Wall Demolition Construction Needed. This image contrasts traditional plumbing installations requiring wall demolition with the simple, hassle-free installation of the macerator pump, ideal for quickly resolving basement drainage issues.

Figure 4.2: 26 ft/8 m High Lift Capability. This diagram visually represents the pump's ability to lift wastewater up to 26 feet (8 meters), making it suitable for basement installations or areas where gravity drainage is not feasible.
5. Operating Instructions
The VEVOR Macerator Pump operates automatically once properly installed and connected to power.
- When wastewater enters the pump chamber, the internal float switch activates the motor.
- The stainless steel blades will macerate any solids, and the pump will discharge the wastewater through the outlet pipe.
- The auto-delay start function ensures the motor does not start too frequently, optimizing its lifespan.
- The pump is designed to handle hot water up to 75℃ (167℉), making it suitable for discharge from washing machines and dishwashers.

Figure 5.1: Capable of Handling 75℃ Hot Water. This image demonstrates the pump's ability to process hot wastewater from appliances like dishwashers and showers, thanks to its pure copper, oil-filled motor design.
6. Maintenance
The VEVOR Macerator Pump is designed for low maintenance. Regular checks can ensure optimal performance.
- Regular Inspection: Periodically check all connections for leaks and ensure the pump is free from external damage.
- Cleaning: If the pump's performance decreases, disconnect power and inspect the inlet and outlet for any blockages. Clear any accumulated debris.
- Odor Prevention: The integrated silver ion water tank actively prevents odor generation, reducing the need for frequent chemical treatments.
- Winterization: If the pump is installed in an area prone to freezing, ensure it is drained and protected during cold periods to prevent damage.
7. Troubleshooting
Before contacting support, review the following common issues and solutions.
| Problem | Possible Cause | Solution |
|---|---|---|
| Pump does not start | No power, faulty float switch, motor issue | Check power connection and circuit breaker. Ensure float switch is not obstructed. Contact support if motor is faulty. |
| Pump runs continuously | Float switch stuck, constant water inflow, faulty check valve | Check float switch for obstructions. Verify no continuous water source. Inspect check valve. |
| Pump is noisy or vibrates excessively | Debris in pump, improper installation, worn bearings | Disconnect power and inspect for debris. Ensure pump is securely mounted. Contact support for internal component issues. |
| Pump not discharging water | Clogged inlet/outlet, discharge pipe blockage, airlock | Disconnect power and clear blockages. Check for kinks in discharge pipe. Prime the pump if necessary. |
| Unpleasant odors | Accumulated waste, lack of ventilation | Ensure proper ventilation. The silver ion tank helps, but occasional cleaning may be needed if severe. |
8. Specifications

Figure 8.1: Product Dimensions. This image provides a detailed view of the pump's measurements: 16.54 inches (420 mm) length, 5.51 inches (140 mm) width, and 10.63 inches (270 mm) height.
| Specification | Value |
|---|---|
| Model Number | FLO500-DE Pro |
| Rated Power | 0.7 HP / 500W |
| Maximum Flow Rate | 29 GPM / 110 LPM |
| Maximum Head Lift | 26 ft / 8 m |
| Voltage | 110 Volts |
| Inlet Diameter | 1 x 89 mm, 3 x 40 mm |
| Outlet Diameter | 40 mm |
| Material | Acrylonitrile Butadiene Styrene (ABS) |
| Item Weight | 12.79 lbs / 5.8 kg |
| Item Dimensions (L x W x H) | 16.54 x 5.51 x 10.63 inches / 420 x 140 x 270 mm |
| Included Components | 1 x Macerator Pump, 1 x Outlet Connection Kit, 3 x Inlet Hoses, 5 x Clamps |
9. Warranty and Support
For warranty information or technical support, please refer to the official VEVOR website or contact their customer service directly. Keep your purchase receipt as proof of purchase.
Protection plans may be available for extended coverage. Please check with your retailer for details.


