
1. Introduction
Thank you for purchasing the Geevon DCF 0397 Weather Station. This device provides accurate indoor and outdoor temperature and humidity readings, a 12-hour weather forecast, DCF radio-controlled time, moon phase display, and an alarm clock function. This manual will guide you through the setup, operation, and maintenance of your new weather station.
2. Safety Information
- Read all instructions carefully before use and keep this manual for future reference.
- Do not expose the main unit or sensor to extreme temperatures, direct sunlight, or moisture.
- Use only the specified power adapter (if included) and batteries.
- Do not attempt to disassemble or repair the device. Contact customer support if service is required.
- Keep batteries out of reach of children. Dispose of used batteries responsibly.
3. Package Contents
Please check the package contents to ensure all items are present:
- Geevon DCF 0397 Main Weather Station Unit
- Wireless Outdoor Sensor (1 unit)
- Power Adapter
- AA Batteries (5 pieces)
- User Manual (this document)
4. Product Overview
Main Unit and Outdoor Sensor Components
Familiarize yourself with the main components of your weather station:

Image 4.1: Main Unit and Outdoor Sensor Components. This image displays the front and back of the main weather station unit, along with the outdoor sensor. Key features labeled include the weather forecast display, frost warning, low battery indicator, max/min temperature/humidity records, comfort indicator, city display, sunrise/sunset times, automatic dimming, alarm, snooze, RCC (Radio Controlled Clock) indicator, hanging hole, DC jack, battery compartment, stand, channel slide switch, and rope eyelet.
Main Unit (Front Display)
- Indoor/Outdoor Temperature & Humidity: Displays current readings.
- Weather Forecast: Icons indicating predicted weather conditions for the next 12 hours.
- Time & Date: DCF radio-controlled time, day of the week, and date.
- Moon Phase: Current moon phase display.
- Comfort Indicator: Shows indoor comfort level based on temperature and humidity.
- Alarm & Snooze: Indicators for active alarms and snooze function.
- Low Battery Indicator: For both main unit and outdoor sensor.
Main Unit (Rear)
- DC Jack: For connecting the power adapter.
- Battery Compartment: For backup batteries.
- Stand: For tabletop placement.
- Hanging Hole: For wall mounting.
Outdoor Sensor
- Battery Compartment: For AA batteries.
- Channel Slide Switch: To select the transmission channel (1, 2, or 3).
- LED Indicator: Flashes during data transmission.
5. Setup
5.1 Battery Installation
- Outdoor Sensor: Open the battery compartment on the back of the outdoor sensor. Insert 2 AA batteries, observing the correct polarity (+/-). Close the compartment.
- Main Unit: Open the battery compartment on the back of the main unit. Insert 3 AA batteries, observing the correct polarity (+/-). Close the compartment. These batteries serve as a backup in case of power loss.
5.2 Power Connection
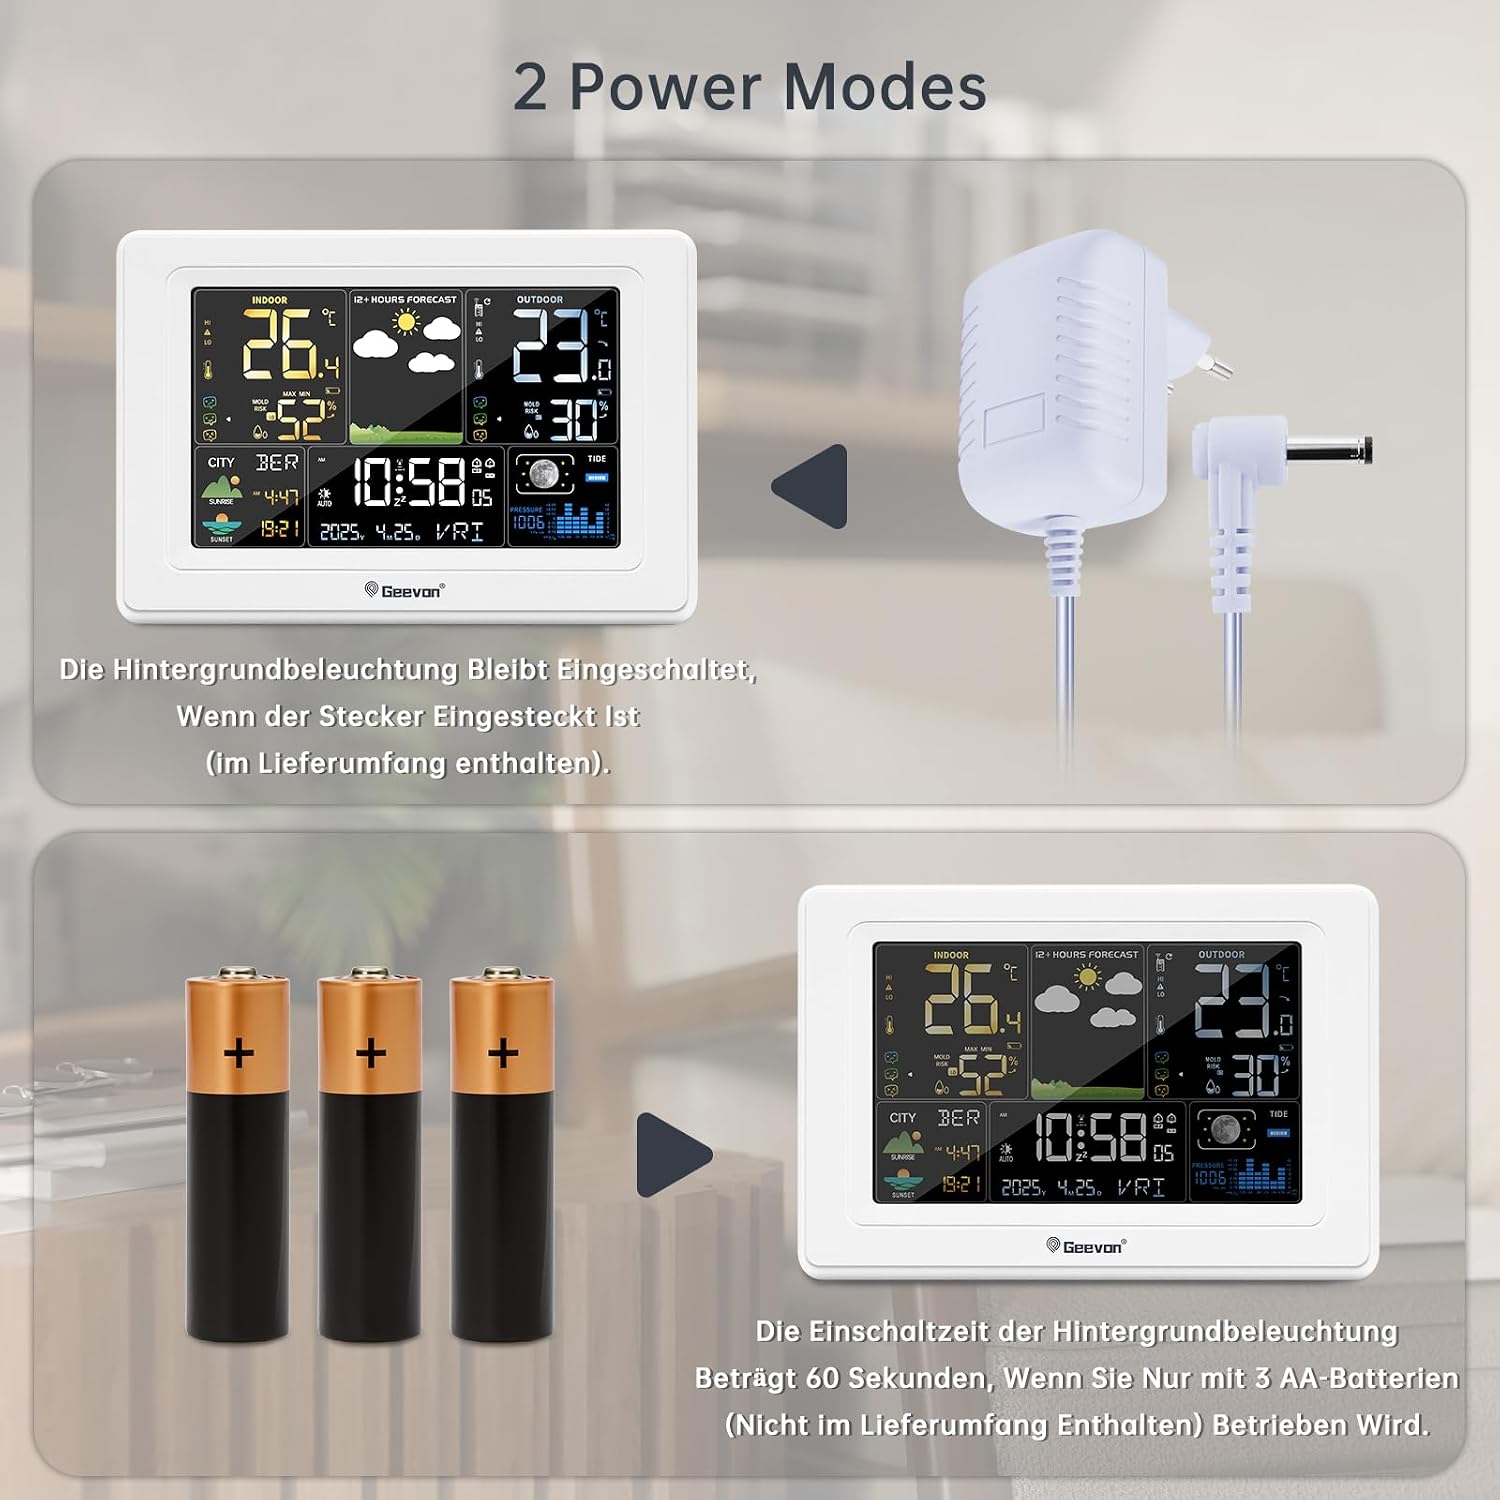
Image 5.1: Power Modes. The weather station can be powered by the included AC adapter for continuous backlight, or by 3 AA batteries (not included for primary power) for temporary use, where the backlight activates for 60 seconds when a button is pressed.
For continuous display backlight and optimal functionality, connect the included power adapter to the DC jack on the back of the main unit and plug it into a power outlet. The backlight will remain on when powered by the adapter.
5.3 Outdoor Sensor Placement
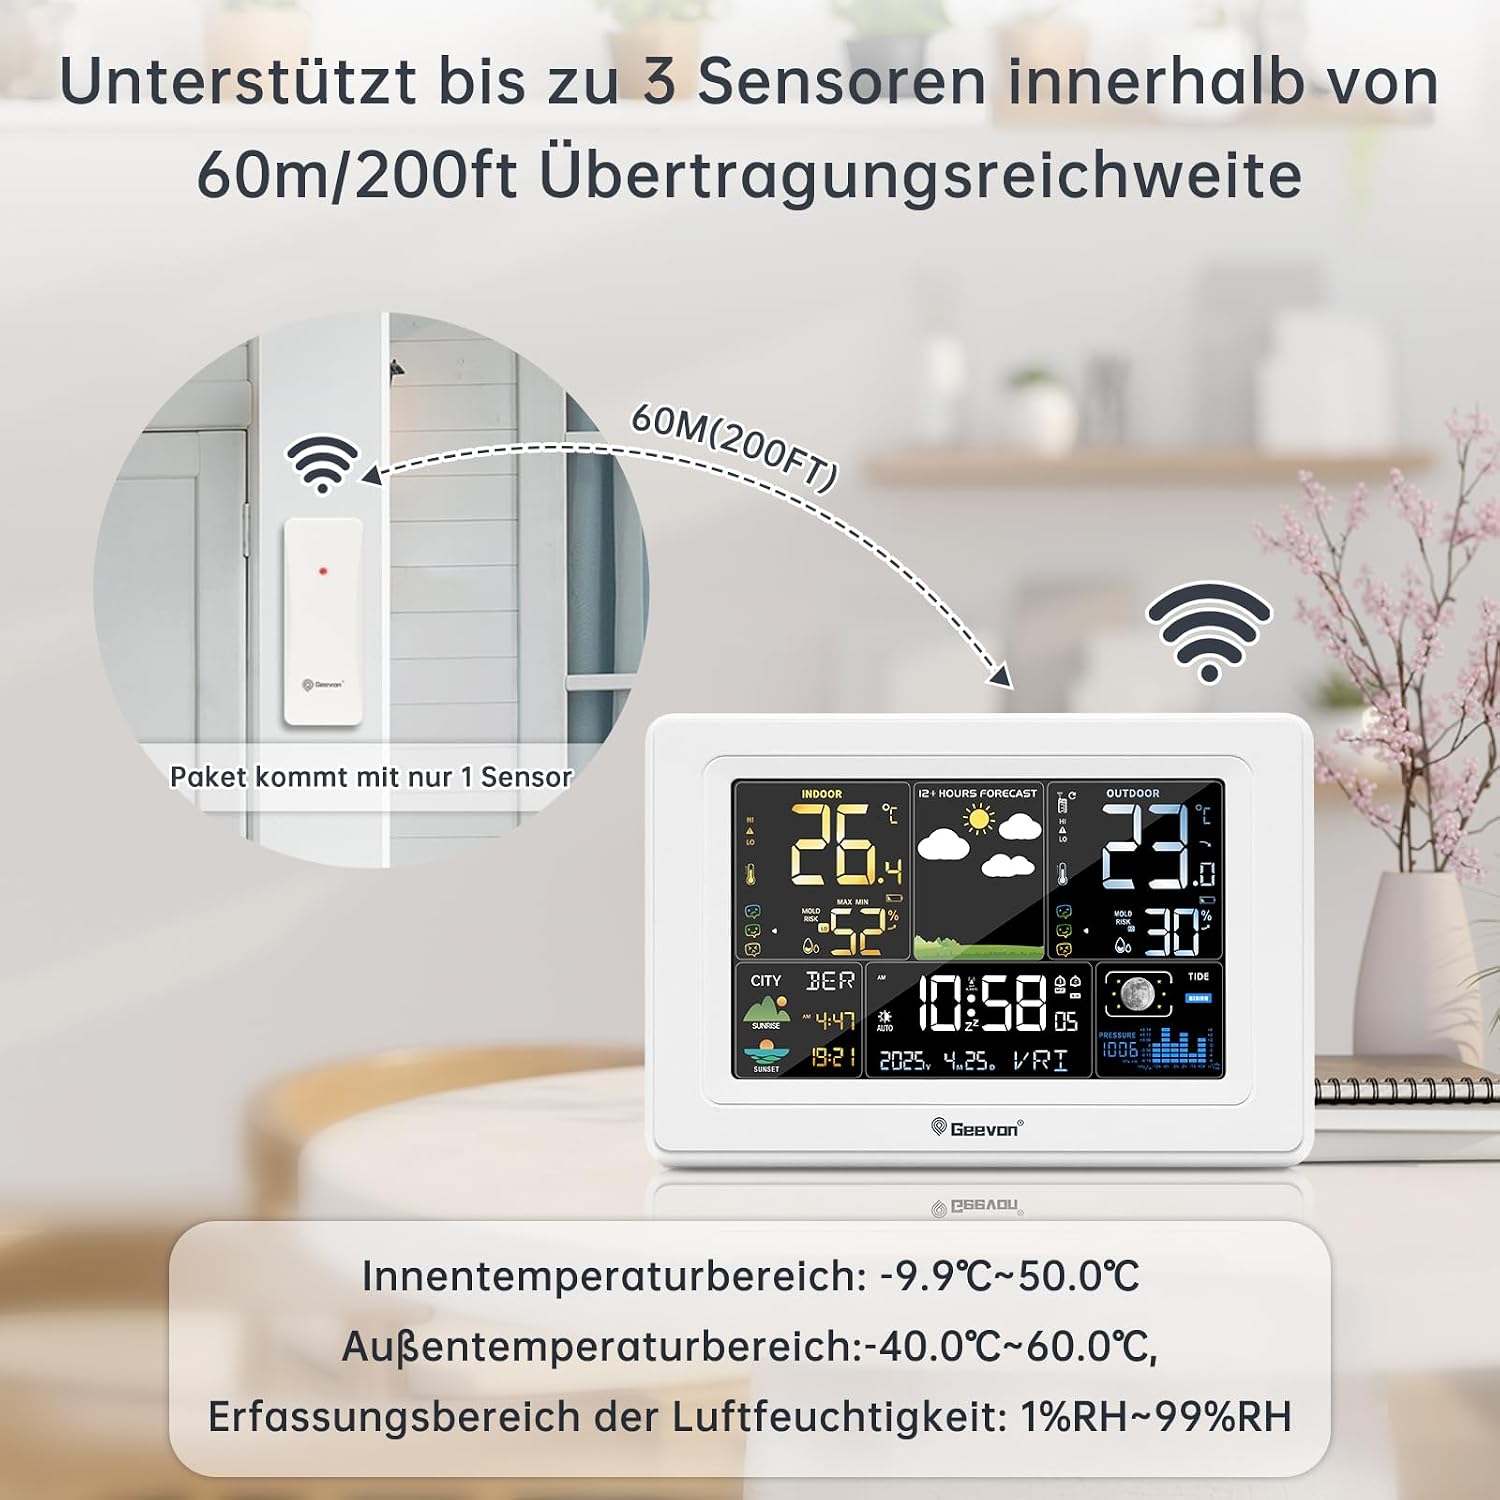
Image 5.2: Sensor Placement. This image illustrates the recommended placement of the outdoor sensor, emphasizing that it supports up to 3 sensors within a 60m/200ft transmission range. The package includes only one sensor.
- Place the outdoor sensor in a shaded, dry location, protected from direct sunlight and rain, to ensure accurate temperature and humidity readings.
- Ensure the sensor is within the maximum transmission range of 60 meters (200 feet) from the main unit. Walls and other obstacles can reduce this range.
- Select a channel (1, 2, or 3) on the outdoor sensor using the slide switch. The main unit will automatically detect the sensor.
5.4 Initial Synchronization
After powering on both units, the main unit will automatically search for the outdoor sensor signal and the DCF radio signal. This process may take a few minutes. Once synchronized, the outdoor temperature/humidity and the correct time will be displayed.
6. Operating Instructions
6.1 Display Functions
The main unit's display provides a wealth of information at a glance. Refer to Image 4.1 for a visual guide to the display sections.
6.2 Time and Date Setting (DCF Atomic Clock)

Image 6.1: DCF Atomic Clock with DST. This image highlights the DCF atomic clock feature with Daylight Saving Time (DST) support, covering 150 cities in Europe, 24 time zones, 7 week languages (German, English, French, Italian, Spanish, Dutch, Danish), and 3 barometric pressure formats.
The weather station automatically synchronizes with the DCF atomic clock signal, ensuring accurate time and date, including automatic adjustment for Daylight Saving Time (DST). The display supports 7 languages for the day of the week: German, English, French, Italian, Spanish, Dutch, and Danish.
- Manual Time Setting: If the DCF signal is weak or unavailable, you can manually set the time and date. Consult the full instruction manual for specific button sequences.
- Time Zone: The device supports 24 time zones. Adjust as needed for your location.
6.3 Alarm Function

Image 6.2: Alarm and Snooze. This image demonstrates the alarm and snooze functions. Pressing the SNZ/LIGHT button activates a 5-minute snooze. Pressing any other button (besides SNZ/LIGHT) will turn off the alarm. Two separate alarm times can be set for weekdays and weekends, with snooze duration adjustable from 5 to 60 minutes.
- Setting Alarms: The weather station allows setting two separate alarm times, which can be configured for weekdays, weekends, or daily.
- Snooze Function: When an alarm sounds, press the SNZ/LIGHT button to activate the snooze function. The snooze duration is adjustable from 5 to 60 minutes.
- Turning Off Alarm: To turn off the alarm completely, press any button other than SNZ/LIGHT.
6.4 Weather Forecast, Moon Phase, and Brightness
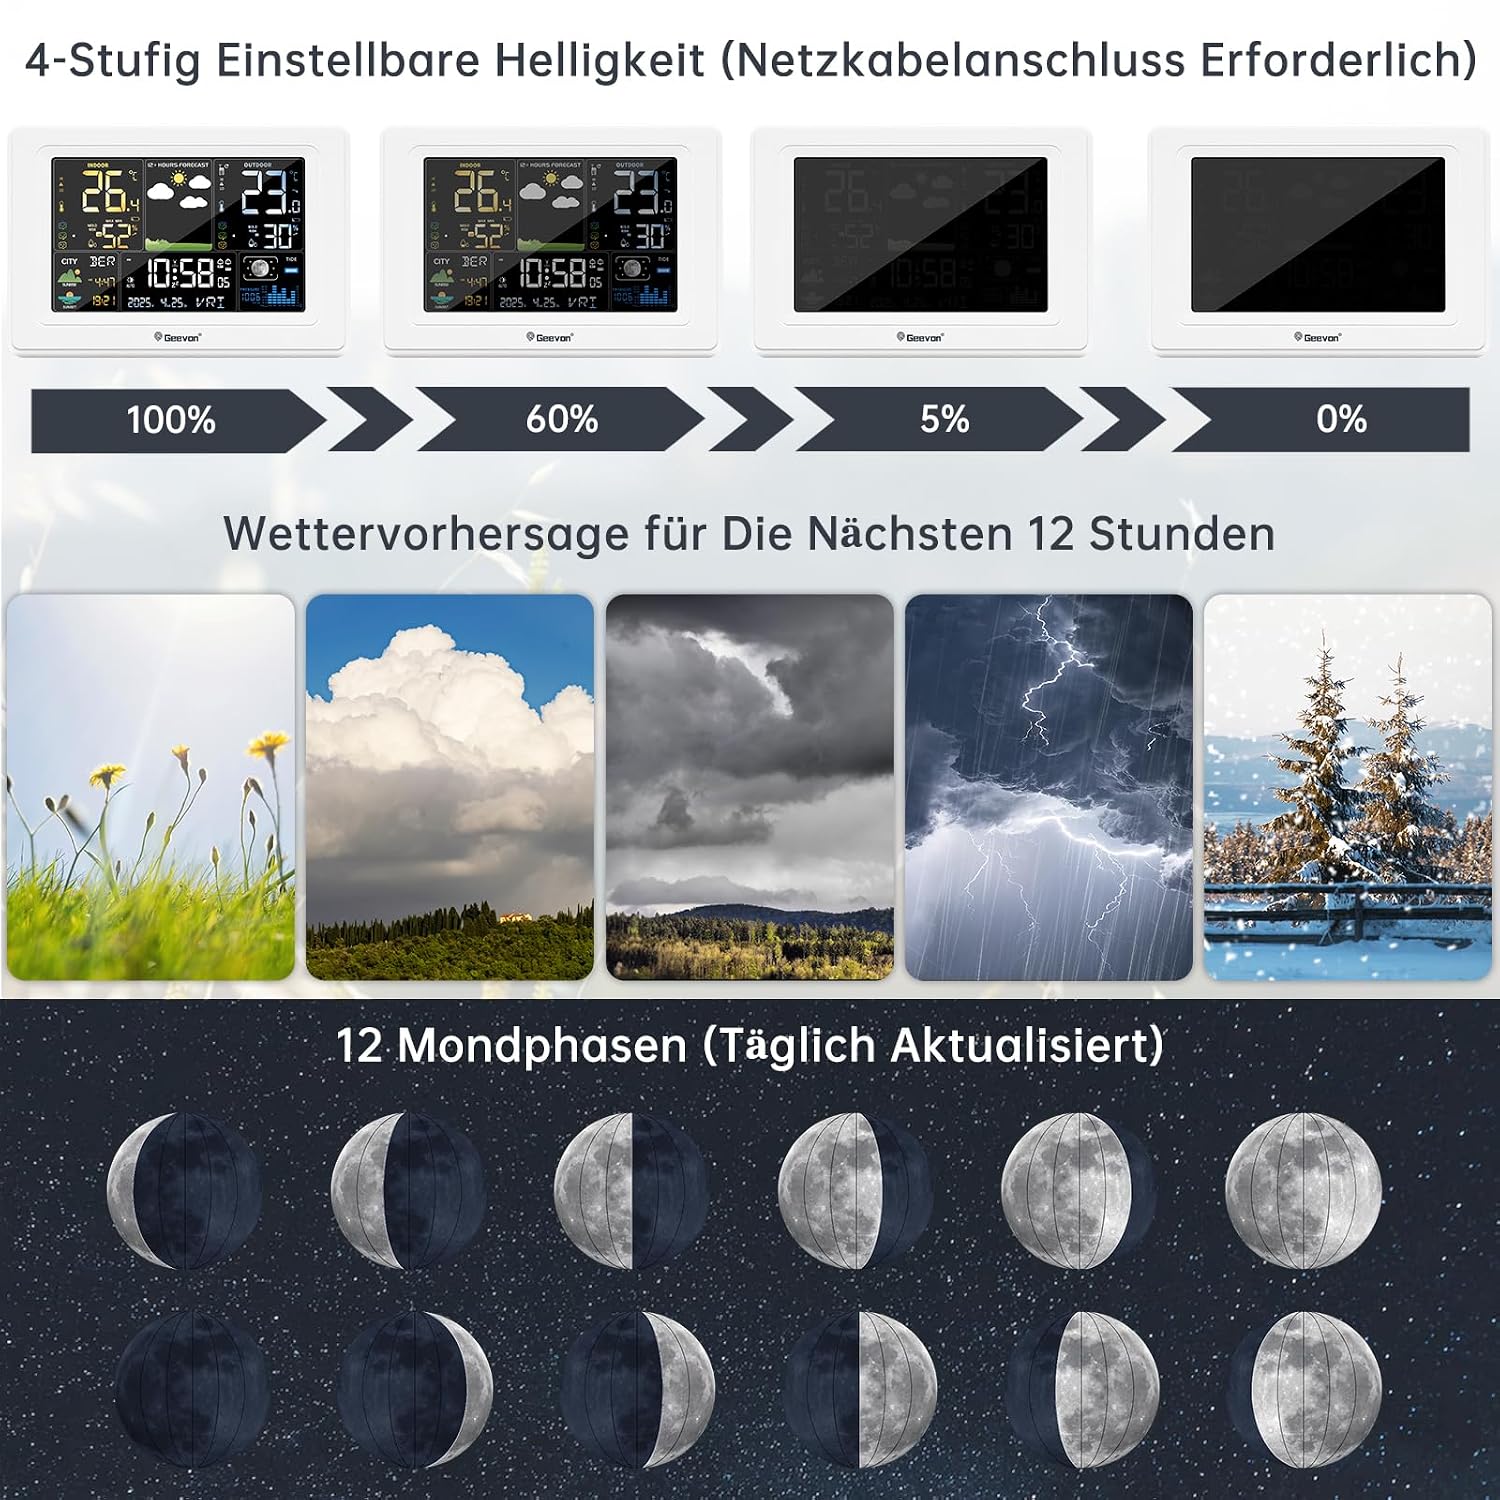
Image 6.3: Display Features. This image illustrates the 4-level adjustable brightness (requires power adapter), the 12-hour weather forecast icons (sunny, cloudy, overcast, stormy, snowy), and the 12 moon phases, which are updated daily.
- Weather Forecast: The station provides a 12-hour weather forecast using intuitive icons (e.g., sunny, partly cloudy, cloudy, rainy, snowy). This forecast is based on barometric pressure changes.
- Moon Phase: The display shows 12 different moon phases, updated daily.
- Adjustable Brightness: When powered by the AC adapter, the display backlight has 4 adjustable brightness levels (100%, 60%, 5%, 0%). Use the appropriate button (refer to the full manual) to cycle through these levels.
6.5 Placement Options

Image 6.4: Placement Options. This image demonstrates two ways to place the weather station: standing on a surface using its integrated stand, or hanging on a wall using the hanging hole. It also highlights the 350° clear viewing angle of the display.
The main unit can be placed on a tabletop using its integrated stand or mounted on a wall using the hanging hole on the back. The display is designed for a 350° clear viewing angle.
7. Maintenance
- Cleaning: Wipe the main unit and sensor with a soft, damp cloth. Do not use abrasive cleaners or solvents.
- Battery Replacement: Replace batteries in both the main unit and outdoor sensor when the low battery indicator appears on the display. Ensure correct polarity.
- Sensor Care: Periodically check the outdoor sensor for debris or obstructions that might affect its performance.
8. Troubleshooting
| Problem | Possible Cause | Solution |
|---|---|---|
| No outdoor temperature/humidity reading | Sensor out of range or interference; low sensor battery; incorrect channel. | Move sensor closer to main unit; replace sensor batteries; ensure sensor and main unit are on the same channel. Press the 'Sensor' button on the main unit to re-search. |
| Incorrect time display | Weak DCF signal; manual time not set correctly. | Move main unit to a location with better signal reception (e.g., near a window); manually set the time and date. |
| Display is dim or off | Main unit not connected to power adapter; low main unit batteries. | Connect the power adapter for continuous backlight; replace main unit batteries if running on battery power. |
| Weather forecast seems inaccurate | Weather forecasts are predictions based on barometric pressure changes and may not always be 100% accurate for local conditions. | Use the forecast as a general guide. The device predicts for the next 12 hours. |
9. Specifications
| Feature | Detail |
|---|---|
| Model Number | 250397 |
| Manufacturer Part Number | 0397 |
| Dimensions (L x W x H) | 3 x 5 x 10 cm (Main Unit); 350 grams |
| Material | Acrylonitrile Butadiene Styrene (ABS) |
| Power Source | Battery Powered (Main Unit: 3x AA, Sensor: 2x AA) and AC Adapter |
| Batteries Included | Yes (5 AA batteries) |
| Display Type | LCD |
| Indoor Temperature Range | -9.9°C to 50.0°C (14.2°F to 122°F) |
| Outdoor Temperature Range | -40.0°C to 60.0°C (-40°F to 140°F) |
| Humidity Detection Range | 1% RH to 99% RH |
| Temperature Reading Accuracy | ±0.5°C |
| Sensor Technology | Radio (Wireless) |
| Wireless Range | Up to 60 meters (200 feet) in open air |
| Connectivity Technology | Wi-Fi (Note: This likely refers to internal wireless communication, not internet Wi-Fi) |
| Special Feature | DCF Atomic Clock, Alarm, Snooze, Weather Forecast, Moon Phase |
| Language (Manual) | German (Original provided, translated to English here) |
10. Warranty and Support
Geevon is committed to providing high-quality products and customer satisfaction. We offer a lifetime consulting service for our products.
If you have any questions or encounter problems with your Geevon DCF 0397 Weather Station, please do not hesitate to contact our customer support. Your feedback is important to us, and we are dedicated to resolving any issues you may experience.
For specific warranty details, please refer to the documentation provided with your purchase or contact your retailer.


