
Nilox J1 PRO ORANGE
Nilox J1 PRO ORANGE Folding Electric Bike
Instruction Manual
Model: J1 PRO ORANGE
1. Introduction
The Nilox J1 PRO ORANGE is a folding electric pedal-assisted bicycle designed for urban use. It combines portability with electric assistance, making it suitable for city commutes and leisure rides. This manual provides essential information for the safe and efficient use, assembly, and maintenance of your electric bike.
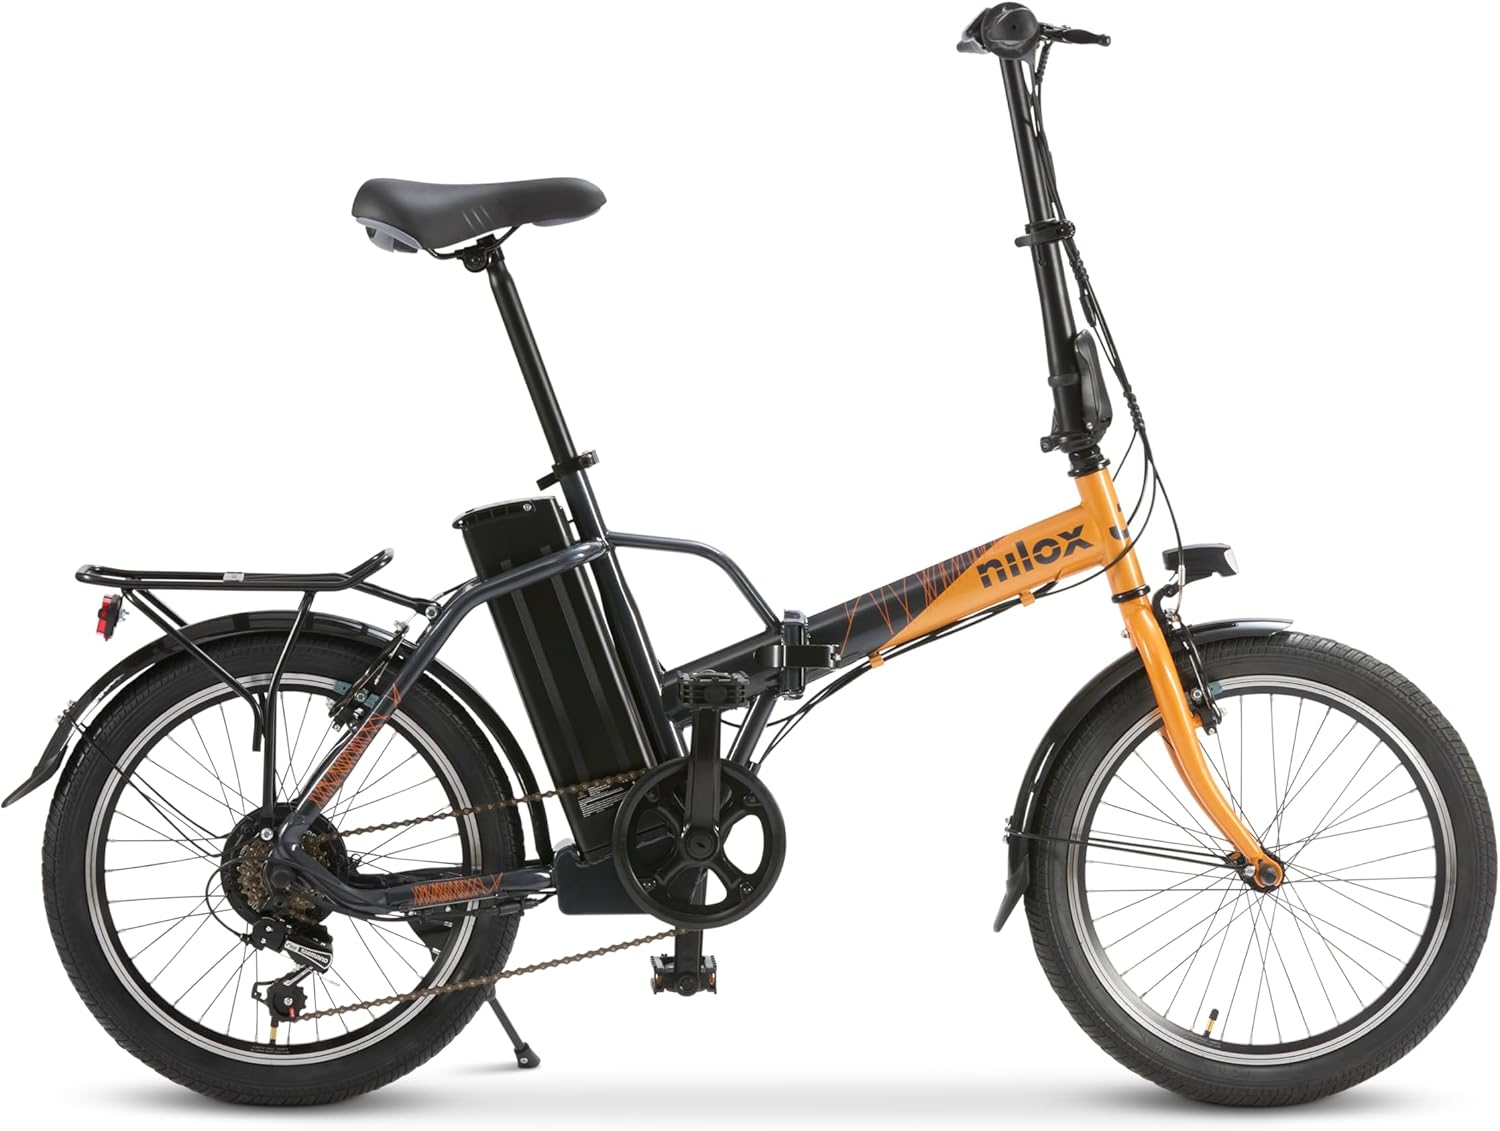
Image: Side view of the Nilox J1 PRO ORANGE Folding Electric Bike.
2. Safety Information
Always prioritize safety when operating your electric bike. Failure to follow these guidelines may result in injury or damage to the product.
- Wear a helmet and appropriate safety gear at all times.
- Familiarize yourself with local traffic laws and regulations regarding electric bikes.
- Perform a pre-ride inspection before each use, checking brakes, tires, and battery level.
- Do not operate the bike under the influence of alcohol or drugs.
- Avoid riding in adverse weather conditions or on excessively rough terrain.
- Ensure the folding mechanism is securely locked before riding.
3. Package Contents
Upon opening the package, verify that all components are present and undamaged:
- Nilox J1 PRO ORANGE Electric Bike (partially assembled)
- Battery Charger
- Bell
- Kickstand
- User Manual
- Assembly Tools (basic wrenches and hex keys)
4. Setup and Assembly
Your Nilox J1 PRO ORANGE electric bike arrives partially assembled. Follow these steps to complete the assembly:
- Unpacking: Carefully remove all components from the packaging. Retain packaging for future transport or storage.
- Handlebar Installation: Insert the handlebar stem into the fork tube and tighten the securing bolts. Ensure the handlebar is straight and aligned with the front wheel.
- Seat and Seat Post Installation: Insert the seat post into the frame's seat tube. Adjust the height to a comfortable riding position and secure it with the quick-release lever.
- Front Fender and Light Installation: Attach the front fender to the fork. Mount the front LED light to the designated bracket on the front fork or handlebar.
- Front Wheel Installation: Carefully align the front wheel with the fork dropouts. Ensure the brake pads are disengaged or spread apart to allow the wheel to fit. Secure the wheel using the axle nuts, ensuring the anti-rotation washers are correctly seated in the fork slots.
- Pedal Installation: Identify the left (L) and right (R) pedals. The right pedal (R) threads clockwise, and the left pedal (L) threads counter-clockwise. Screw them firmly into the crank arms.
- Brake Adjustment: Adjust the V-brakes to ensure proper clearance between the pads and the wheel rim. Test both front and rear brakes for effective stopping power.
- Grip and Display Adjustment: Secure the handlebar grips and position the LED display and shifter for easy access and visibility.

Image: Front view of the assembled electric bike.
5. Operating Instructions
5.1 Battery Operation and Charging
The bike is equipped with a 36V – 8 Ah (288 Wh) removable lithium-ion battery. To charge, connect the charger to the battery charging port and then to a power outlet. The battery can be charged on or off the bike. A key is provided to lock the battery in place and for removal.

Image: Detail of the removable battery pack with key access.
5.2 Power On/Off and Pedal Assist Levels
The LED display on the handlebar controls the power and pedal assist levels.
- Power On/Off: Press and hold the power button on the display to turn the bike on or off.
- Pedal Assist Levels: The display offers 5 levels of pedal assistance. Use the '+' and '-' buttons to cycle through the levels (Low, Medium, High). The motor provides assistance only when pedaling, up to a maximum speed of 25 km/h.

Image: Handlebar display and brake lever.
5.3 Gear Shifting
The Nilox J1 PRO ORANGE features a SHIMANO 6-speed gear system. Use the shifter on the handlebar to change gears according to terrain and desired pedaling effort.

Image: Handlebar with gear shifter.

Image: Rear wheel with Shimano derailleur.
5.4 Lighting System
The bike is equipped with LED lights for visibility. The front light is controlled via the handlebar display. The rear light has its own power source (battery) and is activated by a small button on the light unit itself.
5.5 Folding Mechanism
The J1 PRO ORANGE features a foldable frame for easy storage and transport. To fold the bike, locate the folding lever near the pedal crank. Release the safety latch, open the lever, and fold the frame in half. The handlebar does not fold but can be loosened and lowered for compactness. The seat post can also be lowered using its quick-release lever.
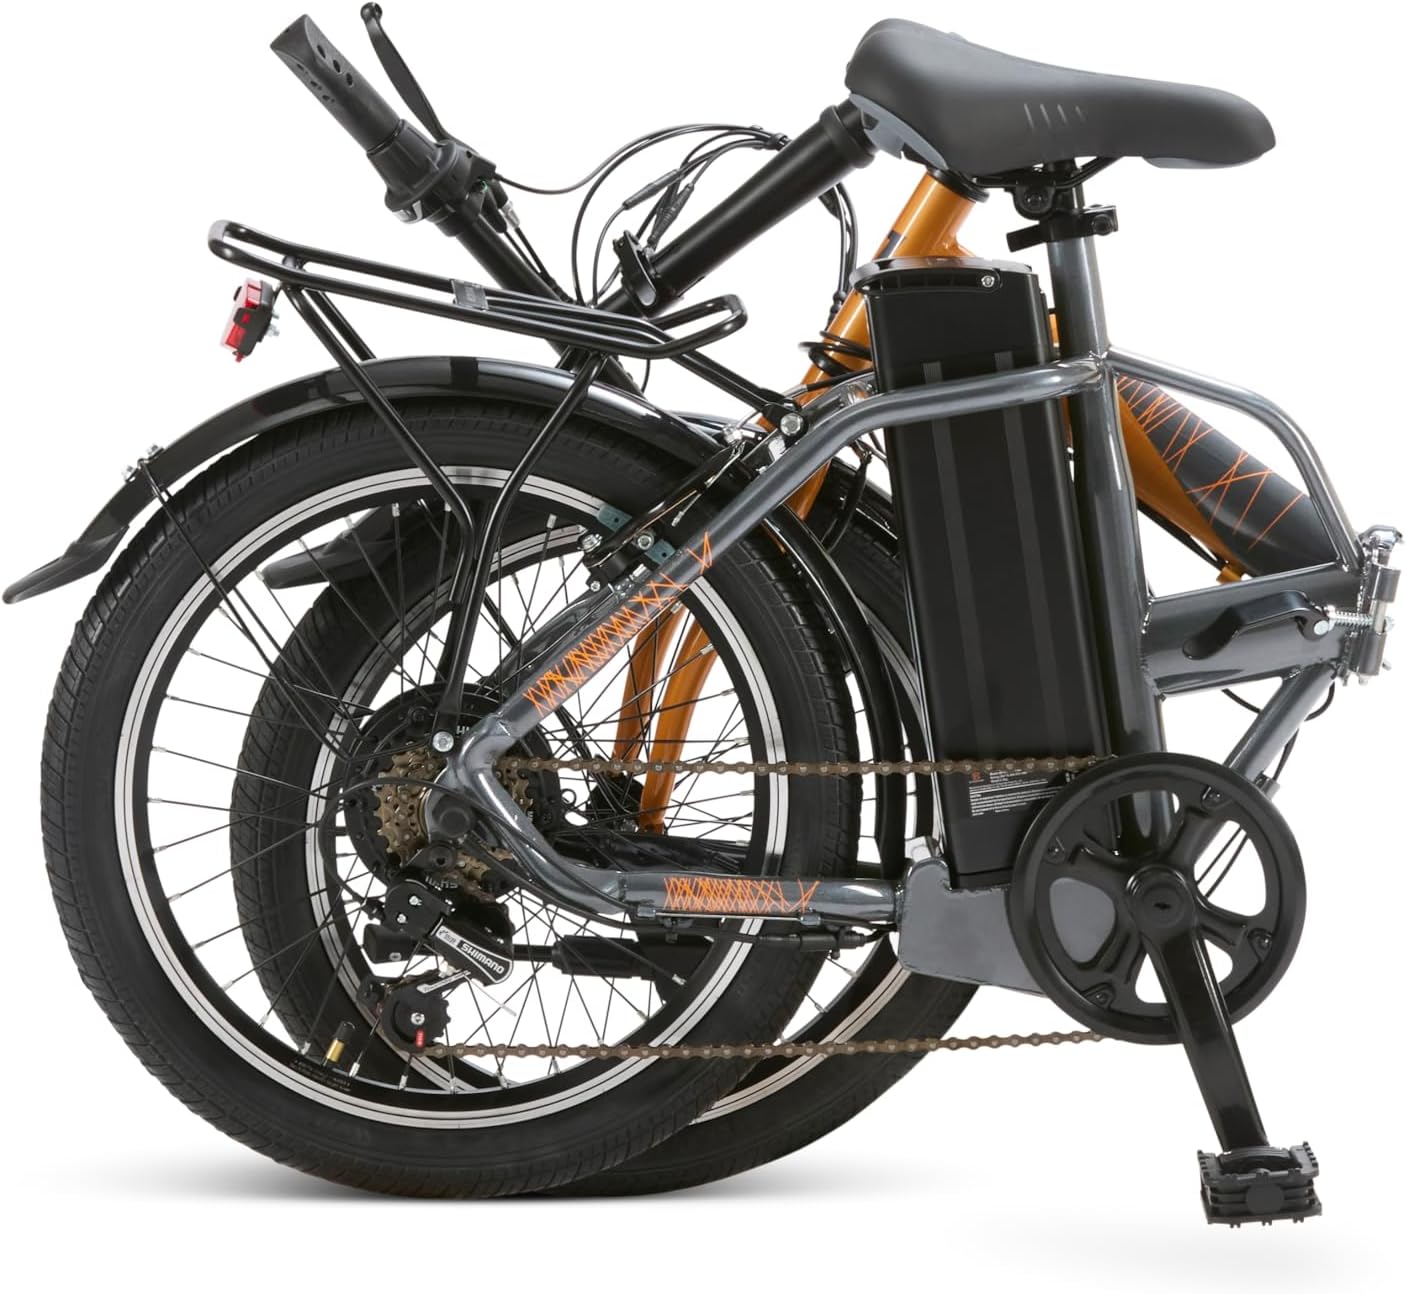
Image: The electric bike in its folded configuration.
6. Maintenance
Regular maintenance ensures the longevity and safe operation of your electric bike.
- Battery Care: Charge the battery regularly, even if the bike is not in use, to maintain its health. Store the battery in a cool, dry place.
- Tires: Check tire pressure before each ride. Recommended pressure is typically indicated on the tire sidewall.
- Brakes: Periodically inspect brake pads for wear and ensure brake levers provide firm and responsive stopping power. Adjust as needed.
- Chain: Keep the chain clean and lubricated to ensure smooth gear changes and prevent rust.
- General Cleaning: Clean the bike with a damp cloth. Avoid using high-pressure water jets directly on electrical components.
- Fasteners: Regularly check all bolts and fasteners for tightness.
7. Troubleshooting
This section addresses common issues you might encounter with your Nilox J1 PRO ORANGE electric bike.
| Problem | Possible Cause | Solution |
|---|---|---|
| Motor not assisting | Low battery; Pedal assist level too low; Brake levers engaged; Loose connection. | Charge battery; Increase pedal assist level; Release brake levers fully; Check all cable connections. |
| Short battery range | Under-inflated tires; Riding uphill frequently; High pedal assist level; Heavy load; Cold weather. | Inflate tires to recommended pressure; Use lower assist levels; Reduce load; Battery performance may decrease in cold. |
| Brakes feel weak or noisy | Worn brake pads; Misaligned pads; Loose brake cable; Dirty rims. | Inspect and replace brake pads; Adjust pad alignment; Tighten brake cable; Clean wheel rims. |
| Creaking noise | Loose components (e.g., seat post, handlebar, folding mechanism, pedals). | Identify the source and tighten relevant bolts or lubricate moving parts. |
8. Specifications
| Brand | Nilox |
| Model | J1 PRO ORANGE |
| Bike Type | City Bike, Electric Bike |
| Frame Material | Steel Alloy |
| Wheel Size | 20 Inches |
| Motor Wattage | 250 Watts |
| Battery | 36V – 8 Ah (288 Wh) Lithium-ion |
| Max Range (Assisted) | Up to 40 km |
| Max Speed (Assisted) | Up to 25 km/h |
| Number of Speeds | 6 (SHIMANO) |
| Brake Type | V-Brake (Front and Rear) |
| Suspension Type | No Suspension |
| Product Weight | 25 Kilograms |
| Color | Grey / Orange |
| Recommended Age | Adults |
9. Warranty and Support
Nilox products are covered by a standard warranty. For specific warranty terms and conditions, please refer to the documentation included with your purchase or visit the official Nilox website. In case of technical issues, missing parts, or warranty claims, please contact Nilox customer support.
For further assistance, you may visit the Nilox Store on Amazon.
Ask a question about this manual
Ask about setup, troubleshooting, compatibility, parts, safety, or missing instructions. Manuals+ will review the question and use this page’s manual context to help answer it.