1. Important Safety Instructions
Please read all instructions carefully before using your Karinear Bread Maker. Keep this manual for future reference.
- Always ensure the appliance is unplugged from the power outlet before cleaning or when not in use.
- Do not immerse the appliance, cord, or plug in water or other liquids.
- This appliance is for household use only. Do not use outdoors.
- Keep children away from the appliance during operation, as surfaces can become hot.
- Do not operate the appliance with a damaged cord or plug. Contact customer service for repairs.
- Ensure the bread maker is placed on a stable, heat-resistant surface, away from walls or cabinets to allow for proper ventilation.
2. Product Overview and Components
Familiarize yourself with the parts of your Karinear Bread Maker.

Image: The Karinear Bread Maker MBF-014A-1, showing its sleek design, control panel, and large viewing window.
Included Accessories:
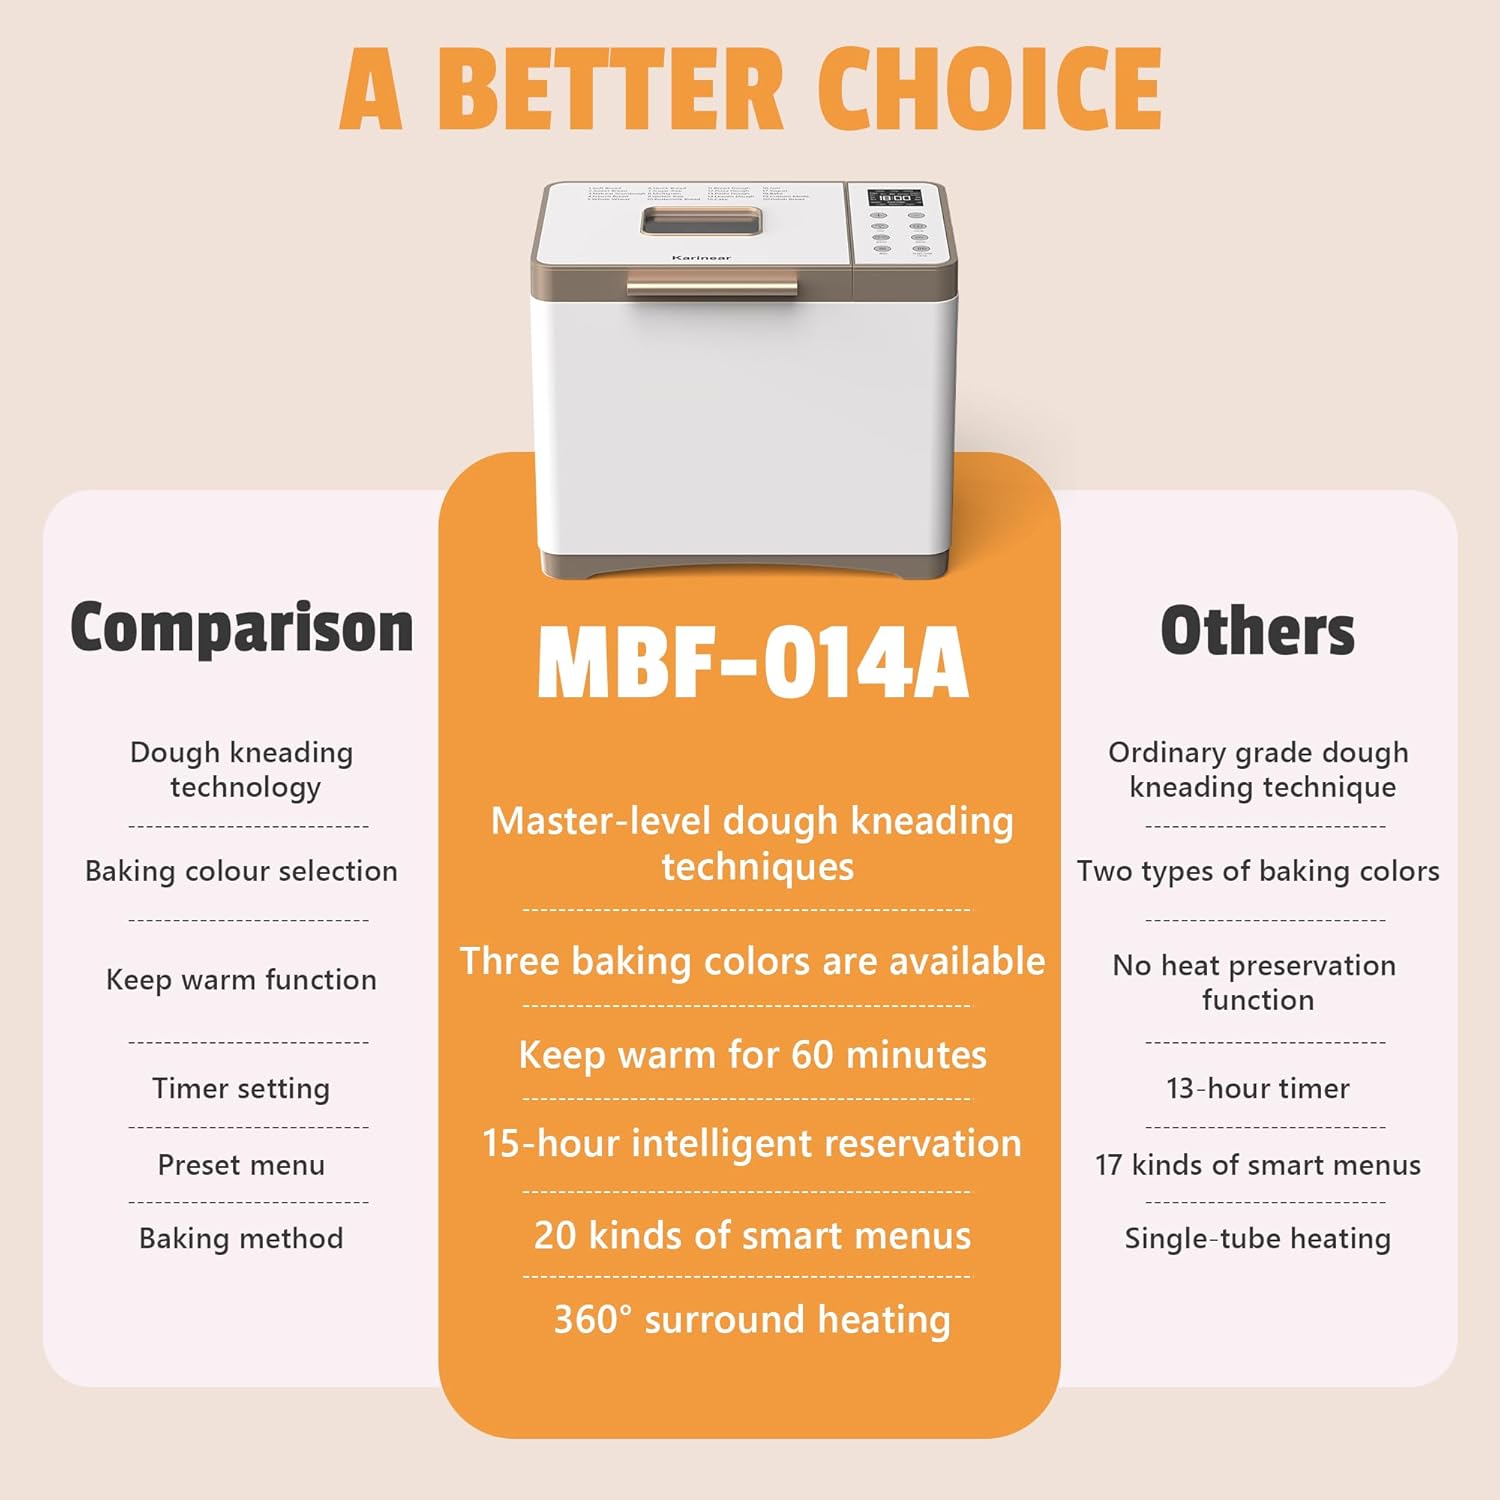
Image: A display of the accessories that come with the bread maker, including a hook, stirring rod, measuring cup, measuring spoon, bread pan, protective gloves, and the instruction manual.
- Bread Pan: Non-stick ceramic coated pan for baking.
- Kneading Paddle: Detachable paddle for mixing and kneading dough.
- Measuring Cup: For precise liquid measurements.
- Measuring Spoon: For precise dry ingredient measurements (e.g., yeast, salt).
- Hook: Tool for removing the kneading paddle from the baked bread.
- Protective Gloves: For safe handling of the hot bread pan.
3. Setup and First Use
- Unpacking: Carefully remove the bread maker and all accessories from the packaging.
- Cleaning: Wash the bread pan and kneading paddle with warm, soapy water. Rinse thoroughly and dry completely. Wipe the exterior of the appliance with a damp cloth.
- Placement: Place the bread maker on a dry, stable, heat-resistant surface, ensuring adequate ventilation around the unit.
- First Bake Cycle (Empty): For the first use, it is recommended to run an empty bake cycle to burn off any manufacturing residues. Plug in the appliance, select the 'Bake' program (Program 18), and let it run for approximately 10 minutes. A slight odor or smoke is normal during this initial process. Ensure the area is well-ventilated. Unplug and allow to cool completely before proceeding.
4. Operating Instructions
Control Panel Overview:

Image: A close-up of the bread maker's control panel, highlighting the HD LCD display, buttons for Menu, Loaf Size, Crust Color, and Start/Stop/Pause functions.
- HD LCD Display: Shows program number, time, loaf size, and crust color.
- MENU Button: Press to cycle through the 20 preset programs.
- LOAF Button: Selects loaf size (1LB, 1.5LB, 2LB).
- COLOR Button: Selects crust color (Light, Medium, Dark).
- START/STOP/PAUSE Button: Initiates, pauses, or cancels a program.
- +/- Buttons: Adjust the delay timer for delayed baking.
Baking Process:

Image: A visual guide illustrating the four simple steps to operate the bread maker: adding ingredients, setting program/size/color, pressing start, and enjoying fresh bread.
- Insert Kneading Paddle: Place the kneading paddle onto the shaft inside the bread pan.
- Add Ingredients: Add ingredients to the bread pan in the order specified by your recipe (typically liquids first, then dry ingredients, with yeast last and separate from liquids/salt). Ensure accurate measurements using the provided measuring cup and spoon.
- Place Bread Pan: Insert the bread pan into the bread maker and twist clockwise until it locks into place. Close the lid.
- Select Program: Plug in the bread maker. The default program (Basic Bread) will display. Press the MENU button repeatedly to select your desired program (e.g., Basic Bread, French Bread, Gluten Free, Jam, Yogurt, Pizza Dough).
- Select Loaf Size: Press the LOAF button to choose your desired loaf size (1LB, 1.5LB, or 2LB).
- Select Crust Color: Press the COLOR button to choose your preferred crust color (Light, Medium, or Dark).
- Set Delay Timer (Optional): If you wish to delay the start of the baking process, use the +/- buttons to set the desired delay time. The total time displayed includes the delay time and the program's baking time.
- Start Baking: Press the START/STOP/PAUSE button to begin the program. The machine will beep, and the timer will start counting down.
- Monitoring: You can observe the baking process through the large viewing window.
- End of Program: Once the program is complete, the bread maker will beep several times and automatically switch to a 1-hour Keep Warm function.
- Remove Bread: Wearing the protective gloves, carefully remove the hot bread pan by twisting it counter-clockwise and lifting it out. Invert the pan onto a cooling rack to release the bread. If the kneading paddle remains in the bread, use the provided hook to carefully remove it.
- Cooling: Allow the bread to cool on a wire rack for at least 15-20 minutes before slicing.
Preset Functions:

Image: An illustration of the 20 preset functions available on the bread maker, such as Yogurt, Jam, Pizza Dough, and Cake Dough, alongside the three selectable loaf sizes (1LB, 1.5LB, 2LB) and three crust colors (Light, Medium, Dark).
The Karinear Bread Maker offers 20 preset programs for various baking needs:
- Basic Bread
- French Bread
- Whole Wheat
- Sweet Bread
- Gluten Free
- Rapid Bake
- Dough
- Knead
- Cake
- Jam
- Yogurt
- Bake
- Custom Mode
- And more...
Special Features:
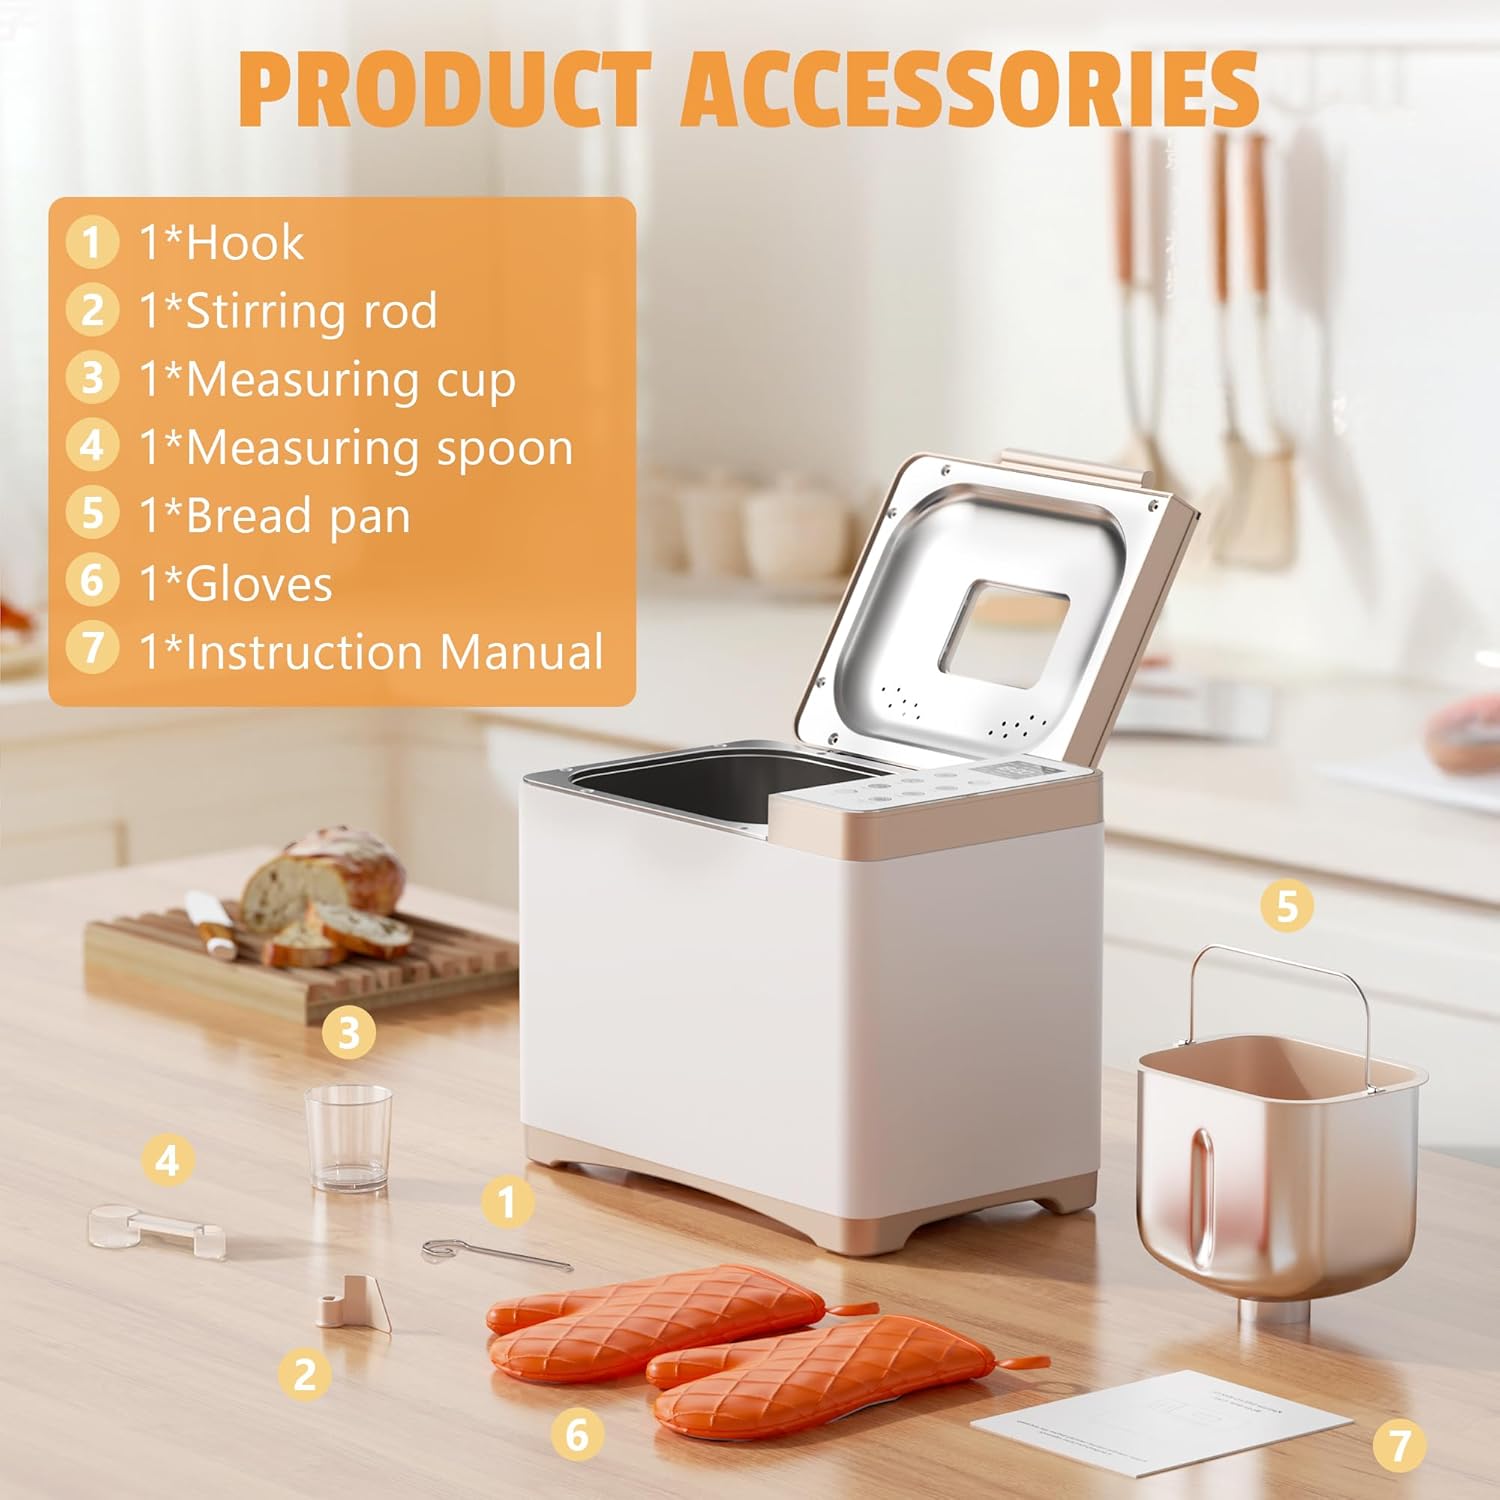
Image: Visual representation of key features including 360-degree surround baking for even results, a 15-hour delay timer, a 1-hour automatic keep warm function, and the ability to restore settings within 15 minutes of a power interruption.
- 15-Hour Delay Timer: Allows you to prepare ingredients in advance and set the machine to start baking at a later time.
- 1-Hour Keep Warm Function: Automatically keeps bread warm after baking is complete.
- 360° Surround Baking: Ensures even heat distribution for consistent baking results.
- Power Interruption Memory: The machine can restore settings within 15 minutes of a power outage.
5. Maintenance and Cleaning
Proper maintenance ensures the longevity and performance of your bread maker.
- Unplug and Cool: Always unplug the appliance and allow it to cool completely before cleaning.
- Bread Pan and Kneading Paddle: Remove the bread pan and kneading paddle. Fill the pan with warm, soapy water and let it soak for 10-15 minutes to loosen any stuck dough. Clean with a soft sponge or cloth. Do not use abrasive cleaners or metal scouring pads, as these can damage the non-stick coating. Rinse thoroughly and dry completely.
- Exterior: Wipe the exterior of the bread maker with a soft, damp cloth. Do not use harsh chemicals or abrasive cleaners.
- Lid and Viewing Window: Clean the lid and viewing window with a damp cloth. For stubborn stains, use a mild detergent.
- Storage: Ensure all parts are clean and dry before storing the bread maker in a cool, dry place.
6. Troubleshooting
Refer to this section for common issues and their solutions.
| Problem | Possible Cause | Solution |
|---|---|---|
| Bread does not rise | Expired yeast, incorrect water temperature, too much salt/sugar | Check yeast expiration date. Use lukewarm water (38-43°C). Adjust salt/sugar according to recipe. |
| Bread is too dense | Too much flour, not enough liquid, insufficient kneading | Measure ingredients precisely. Ensure correct liquid-to-flour ratio. |
| Bread sticks to pan | Pan not properly cleaned, damaged non-stick coating | Ensure pan is clean and dry. Avoid using metal utensils that can scratch the coating. |
| Machine beeps continuously | Error code displayed (check manual for specific codes) | Unplug, wait 10 minutes, then plug back in. If error persists, contact customer support. |
7. Specifications
| Feature | Detail |
|---|---|
| Model | MBF-014A-1 |
| Brand | Karinear |
| Dimensions (L x W x H) | 37 x 28 x 40 cm |
| Weight | 5.86 kg |
| Capacity | 2 Liters (for 1LB, 1.5LB, 2LB loaves) |
| Material | Stainless Steel (exterior) |
| Voltage | 220V |
| Preset Programs | 20 |
| Crust Colors | Light, Medium, Dark |
| Delay Timer | Up to 15 hours |
| Keep Warm Function | 1 hour |
8. Warranty and Support
Karinear products are manufactured to high-quality standards. For warranty information, please refer to the warranty card included in your product packaging or contact Karinear customer support.
If you encounter any issues or have questions regarding your bread maker, please contact our customer support team:
- Website: Visit the Karinear Store on Amazon
- Email: Refer to your product packaging or warranty card for specific contact details.


