
1. Introduction
Thank you for choosing the MOKPR Wireless Car Charger. This device provides a convenient and secure way to hold and wirelessly charge your smartphone in your vehicle. Please read this manual carefully before use to ensure proper installation and operation.

Image 1.1: MOKPR Wireless Car Charger with a smartphone, illustrating its charging function.
2. What's in the Box
Verify that all components are present in your package:
- 1 x Wireless Car Charger Unit
- 1 x Air Vent Clip
- 1 x Suction Cup Mount (for dashboard/windshield)
- 1 x USB Cable
- 1 x User Manual (this document)
3. Product Overview
The MOKPR Wireless Car Charger offers versatile mounting options and automatic phone clamping for ease of use.

Image 3.1: Various installation scenarios for the MOKPR Wireless Car Charger, including dashboard, air vent, windshield, and tabletop use.
Key Features:
- 15W Fast Wireless Charging: Provides efficient power delivery to compatible devices.
- Automatic Clamping: Infrared sensor detects the phone and automatically secures it.
- Automatic Alignment: Intelligently adjusts the phone to the optimal charging area.
- Multiple Mounting Options: Includes suction cup for dashboard/windshield and clip for air vent.
- 360-Degree Rotation: Allows for flexible viewing angles.
- Case Friendly: Charges through phone cases up to 4mm thick.
4. Setup and Installation
The MOKPR Wireless Car Charger can be installed using either the suction cup mount or the air vent clip.
4.1 Suction Cup Mount Installation (Dashboard/Windshield)
- Prepare the Surface: Clean the desired installation area on your dashboard or windshield thoroughly to ensure it is free of dust and grease.
- Attach the Mount: Press the suction cup firmly onto the cleaned surface.
- Secure the Mount: Push down the locking lever on the suction cup base to create a strong vacuum seal.
- Connect the Charger: Attach the wireless charger unit to the ball joint of the suction cup mount and tighten the securing nut. Adjust the angle as desired.

Image 4.1: Visual guide for installing the suction cup mount on a dashboard, showing cleaning, attaching, and securing steps.
4.2 Air Vent Clip Installation
- Assemble the Clip: Pass the securing nut over the ball head of the air vent clip.
- Attach to Charger: Push the ball head into the joint on the back of the wireless charger unit.
- Tighten: Tighten the securing nut to fix the charger unit to the air vent clip.
- Hook to Vent: Hook the air outlet blades of your car's vent with the clip. Ensure your vent type is compatible (refer to Image 4.3).
- Secure: Flip the grip on the air vent clip to firmly secure it to the vent.

Image 4.2: Visual guide for installing the air vent clip mount, detailing assembly and attachment to the car's air vent.

Image 4.3: Examples of compatible and incompatible air vent designs for secure mounting.
4.3 Power Connection
Connect the provided USB cable to the charging port on the MOKPR Wireless Car Charger and plug the other end into a QC 3.0 compatible car charger (not included). A QC 3.0 charger is required for fast charging functionality.
5. Operating Instructions
5.1 Automatic Clamping and Charging
- Ensure the car charger is powered on. The clamping arms will automatically open slightly.
- Place your smartphone into the holder. The infrared sensor will detect your phone, and the clamping arms will automatically close to secure it firmly.
- The charger will then intelligently identify your phone model and automatically adjust its internal coil to the best charging area for optimal wireless charging.
- A blue LED indicator may illuminate to confirm charging is active.

Image 5.1: Demonstrates the one-handed operation and automatic clamping feature of the charger.
5.2 Adjusting Viewing Angle
The charger features a 360-degree rotating and pivoting ball joint. Loosen the securing nut, adjust your phone to the most comfortable and safest viewing angle (portrait or landscape), and then tighten the nut to lock it in place.

Image 5.2: Illustrates the 360-degree angle adjustment capability for optimal viewing.
5.3 Removing Your Phone
To remove your phone, gently press the release button (usually located on the side or bottom of the charger). The clamping arms will automatically open, allowing you to retrieve your device.
6. Compatibility
This wireless car charger is compatible with all wireless charging phones, provided they are not foldable phones. It supports various charging speeds depending on the device:
- 15W Wireless Fast Charging: For LG V50/V40/V30/G8/G7.
- 10W Wireless Fast Charging: For Samsung Galaxy S24/S23/S22 series, Note 20/10 series, S10 series.
- 7.5W Wireless Charging: For iPhone 16/15/14/13/12/11/X/8 series.
- 5W Standard Wireless Charging: For other wireless charging phones.
Note: Not compatible with foldable phones for charging.
Case Compatibility:
The charger supports charging through phone cases up to 4mm thick. However, for optimal performance and safety, remove cases containing metal, magnets, credit cards, or pop holders before charging.
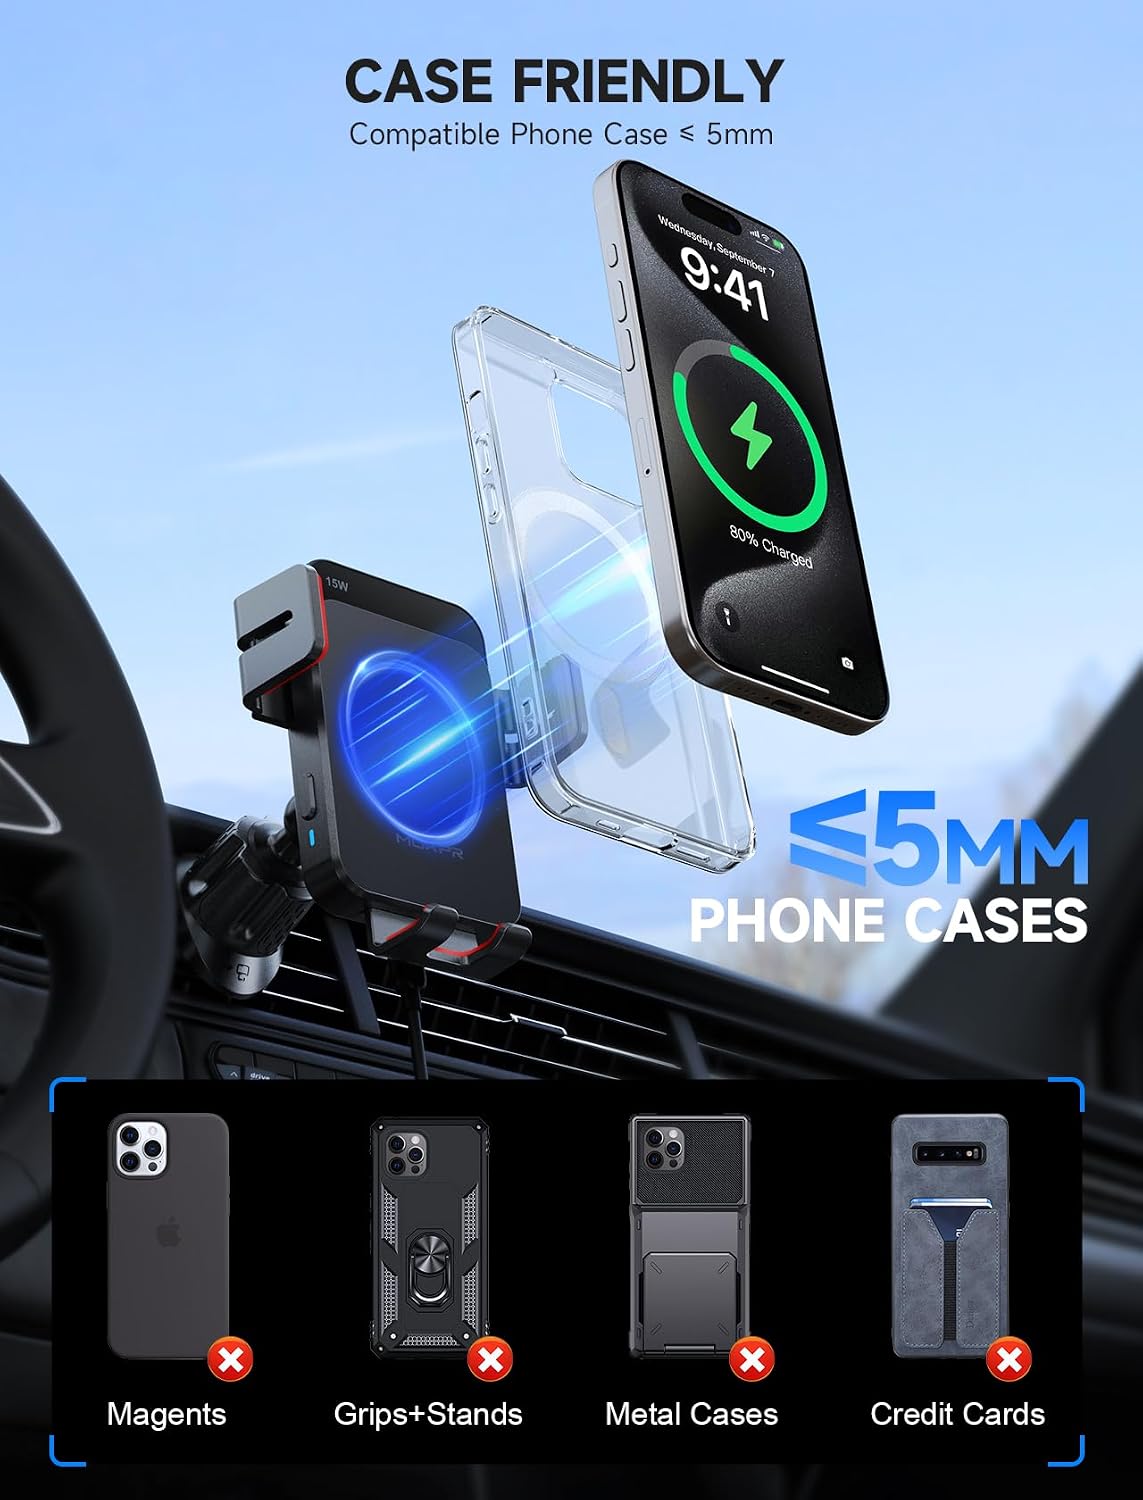
Image 6.1: Guidelines for phone case compatibility, indicating maximum thickness and types of cases to avoid.
7. Maintenance
- Cleaning: Use a soft, dry cloth to clean the surface of the charger and mounts. Avoid abrasive cleaners or solvents.
- Suction Cup: If the suction cup loses its stickiness, rinse it with warm water and let it air dry. It can be washed and reused.
- Storage: When not in use for extended periods, store the charger in a cool, dry place away from direct sunlight.
8. Troubleshooting
| Problem | Possible Cause | Solution |
|---|---|---|
| Phone not charging or charging slowly. |
|
|
| Clamping arms not opening/closing automatically. |
|
|
| Mount is not stable or falls off. |
|
|
9. Specifications
| Feature | Detail |
|---|---|
| Brand | MOKPR |
| Model | Wireless Car Charger |
| ASIN | B0F2MZ3VHL |
| Input Power | Requires QC 3.0 car charger (not included) |
| Output Power | 15W / 10W / 7.5W / 5W (Automatic detection) |
| Mounting Type | Dashboard, Windshield, Air Vent |
| Compatible Phone Case Thickness | Up to 4mm |
| Item Weight | 12 ounces (approximately 340 grams) |
| Package Dimensions | 5 x 4.33 x 3.19 inches |
| Date First Available | March 27, 2025 |
10. Safety Information
- Do not disassemble or modify the device.
- Keep the device away from water, fire, and high temperatures.
- Avoid placing metal objects or magnetic cards between your phone and the charger, as this can interfere with charging and potentially damage the device or card.
- Ensure the charger is securely mounted before driving to prevent distraction or obstruction of your view.
- Do not operate the device if it has been damaged in any way.
11. Warranty and Support
For warranty information or technical support, please refer to the contact details provided with your purchase or visit the official MOKPR website. Please have your product model and purchase date available when contacting support.
