Introduction
This manual provides detailed instructions for the assembly, operation, and maintenance of your AECOJOY 20' x 10' White Outdoor Gazebo. Please read all instructions carefully before beginning assembly and retain this manual for future reference.
Important Safety Information
Always follow the provided manual and video tutorials for safe assembly. Secure the gazebo to the wall and ground as instructed to ensure stability, especially in windy conditions. Be cautious when handling the product in harsh weather or when the gazebo is under heavy snow load.
Product Overview
The AECOJOY 20' x 10' Outdoor Gazebo is designed to enhance your outdoor living space with durable construction and thoughtful features.
Key Features:
- Hard Top Roof: Provides superior protection against sun, rain, and snow.
- Robust Construction: Engineered for stability, capable of withstanding significant snow loads and wind speeds.
- Wall-Mounted Design: Offers enhanced stability compared to freestanding structures.
- Waterproof Performance: Inclined design and meticulous detailing ensure complete water resistance.
- UV Protection: Awning roof covers 200 Sq.Ft., providing protection against harmful UV rays.

Figure 1: AECOJOY 20' x 10' White Outdoor Gazebo installed on a patio, providing shaded outdoor living space.
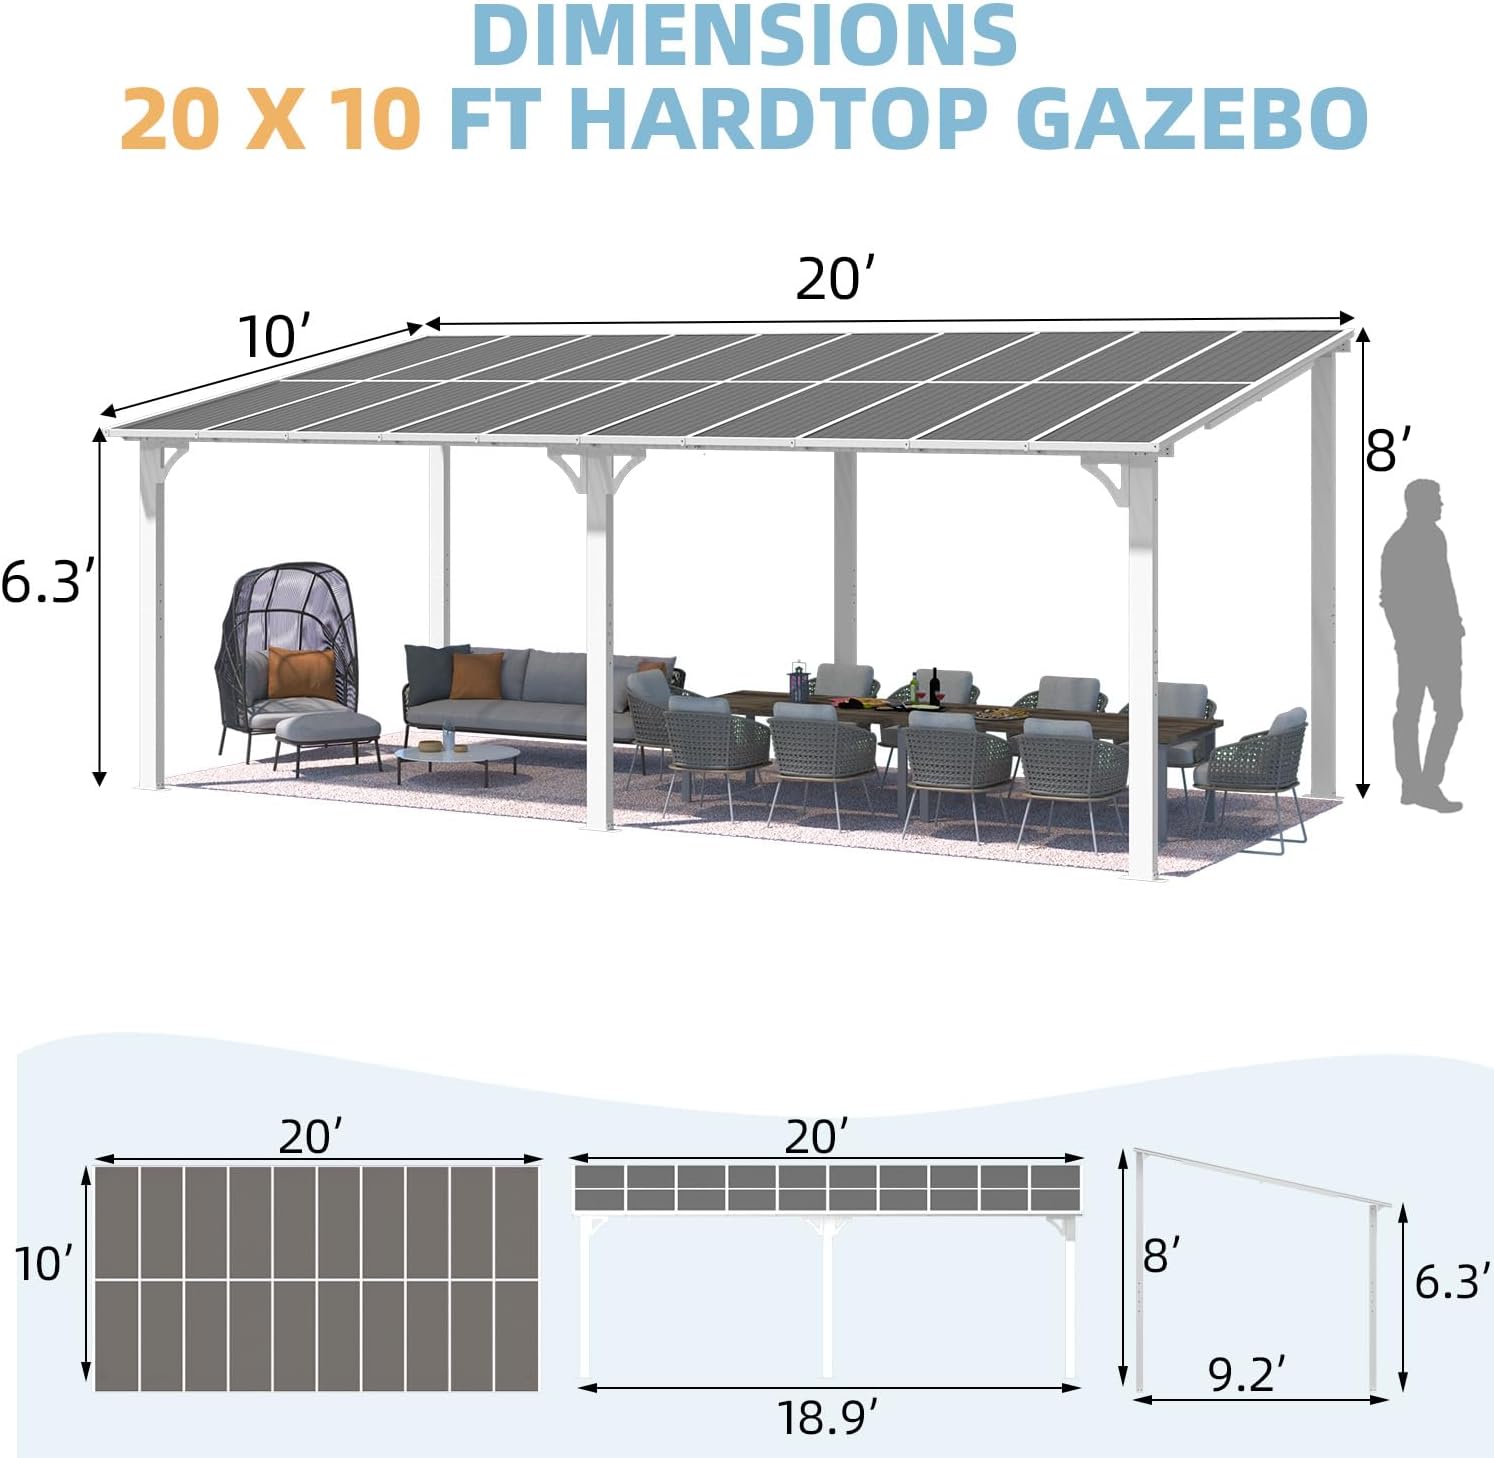
Figure 2: Detailed dimensions of the 20' x 10' hardtop gazebo, illustrating its length, width, and height.
Assembly Instructions
Follow these step-by-step instructions for proper assembly. Ensure all parts are present before you begin. For visual guidance, refer to the embedded video tutorials.
Preparation:
- Unpack all components and verify against the parts list in your physical manual.
- Lay out parts on a clean, flat surface to easily identify them.
- Ensure you have the necessary tools (e.g., drill, screwdriver, wrench).
Video 1: Comprehensive installation guide for the Pamapic Outdoor Gazebo, demonstrating each step of the assembly process.
Step-by-Step Assembly:
- Step 1: Assemble the Main Beams
Connect the designated frame sections (F3, F4, F5, F6) using bolts (H) and nuts (T) as shown in the diagram. Ensure all connections are secure.
Figure 3: Diagram illustrating the connection of main beam components (F3, F4, F5, F6) using bolts (H) and nuts (T).
- Step 2: Attach the Legs to the Base Plates
Secure the leg sections (A1-A4, B1-B4) to the base plates (I1) using screws (S). Ensure the correct leg sections are paired with their corresponding base plates.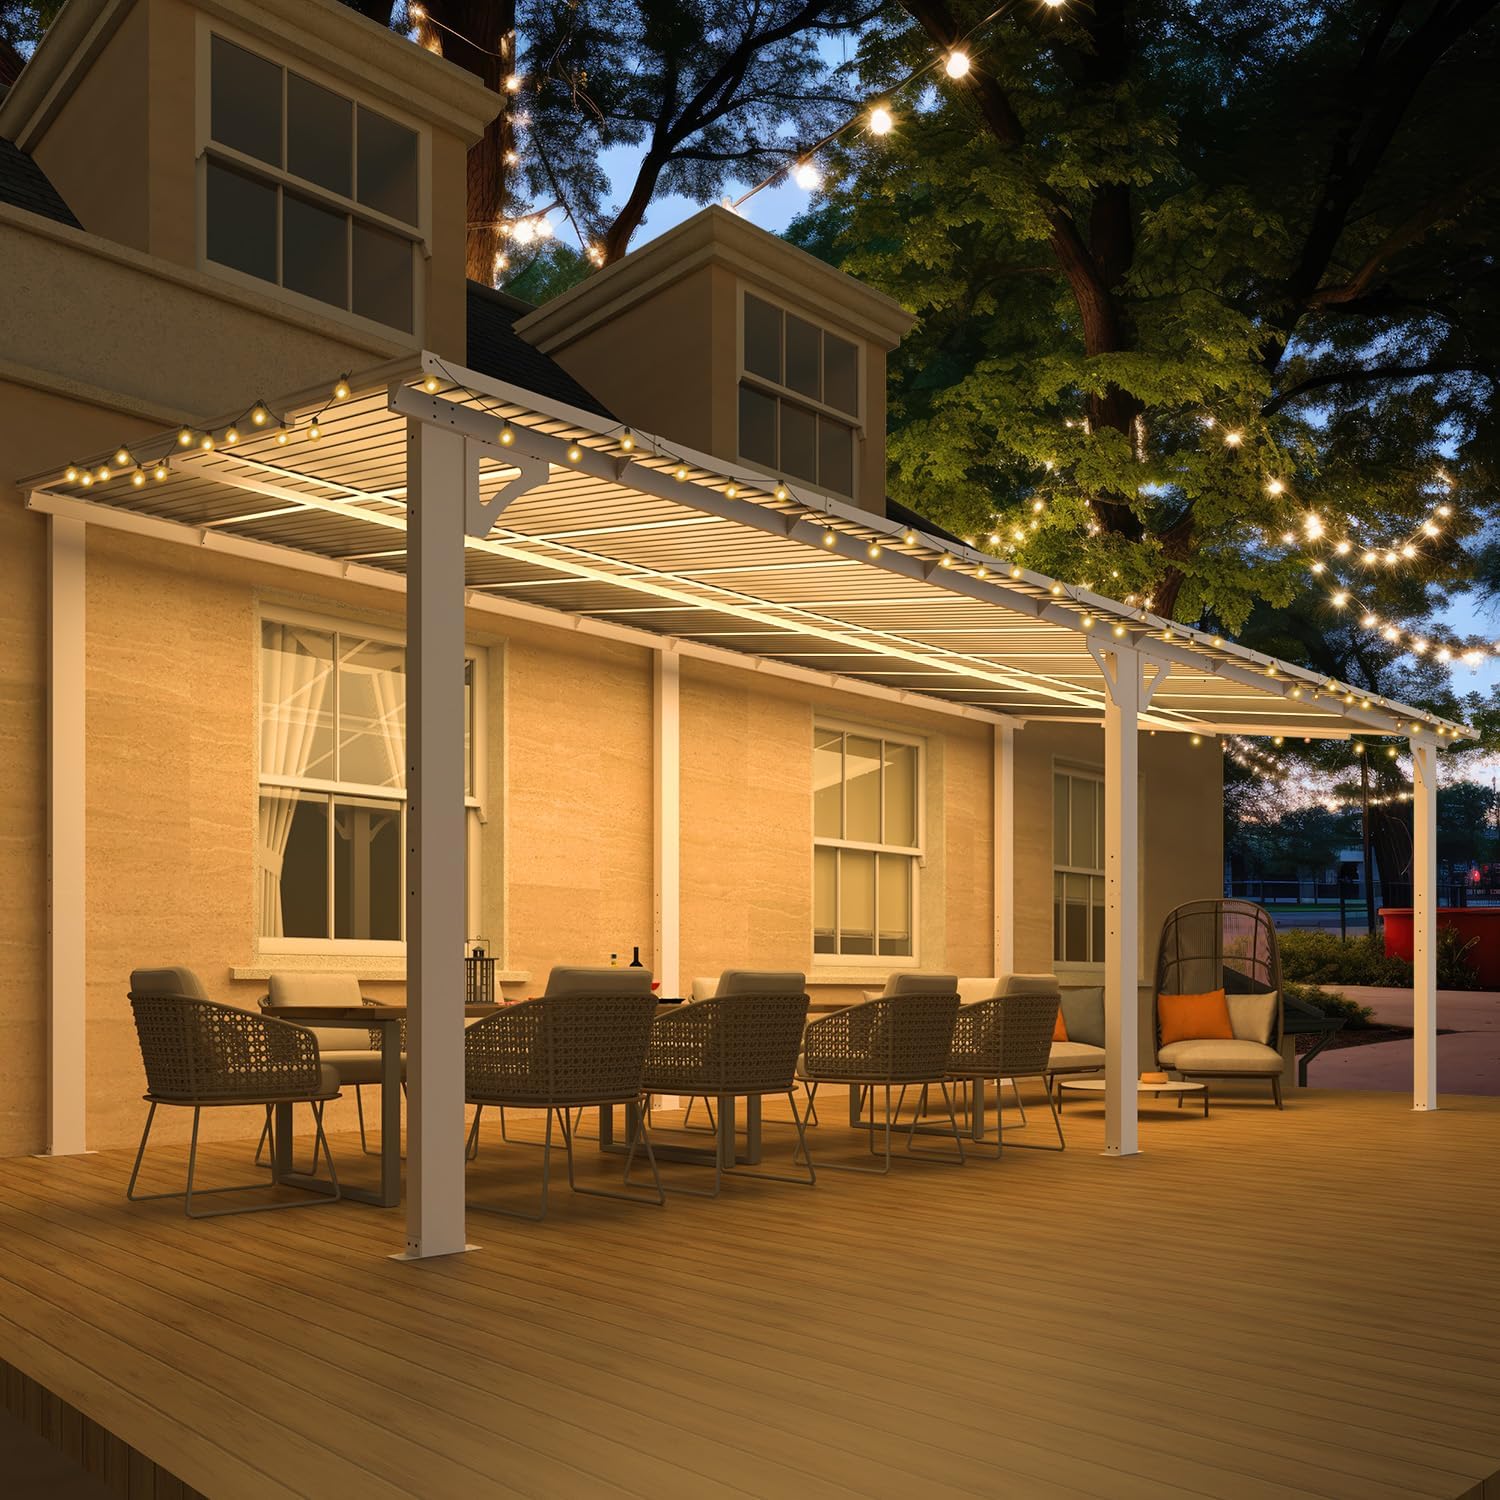
Figure 4: Diagram showing how to attach the gazebo legs (A1-A4, B1-B4) to the base plates (I1) with screws (S).
- Step 3: Connect the Main Beams to the Legs
Attach the assembled main beams from Step 1 to the top of the leg assemblies from Step 2 using bolts (M). This forms the main rectangular frame of the gazebo.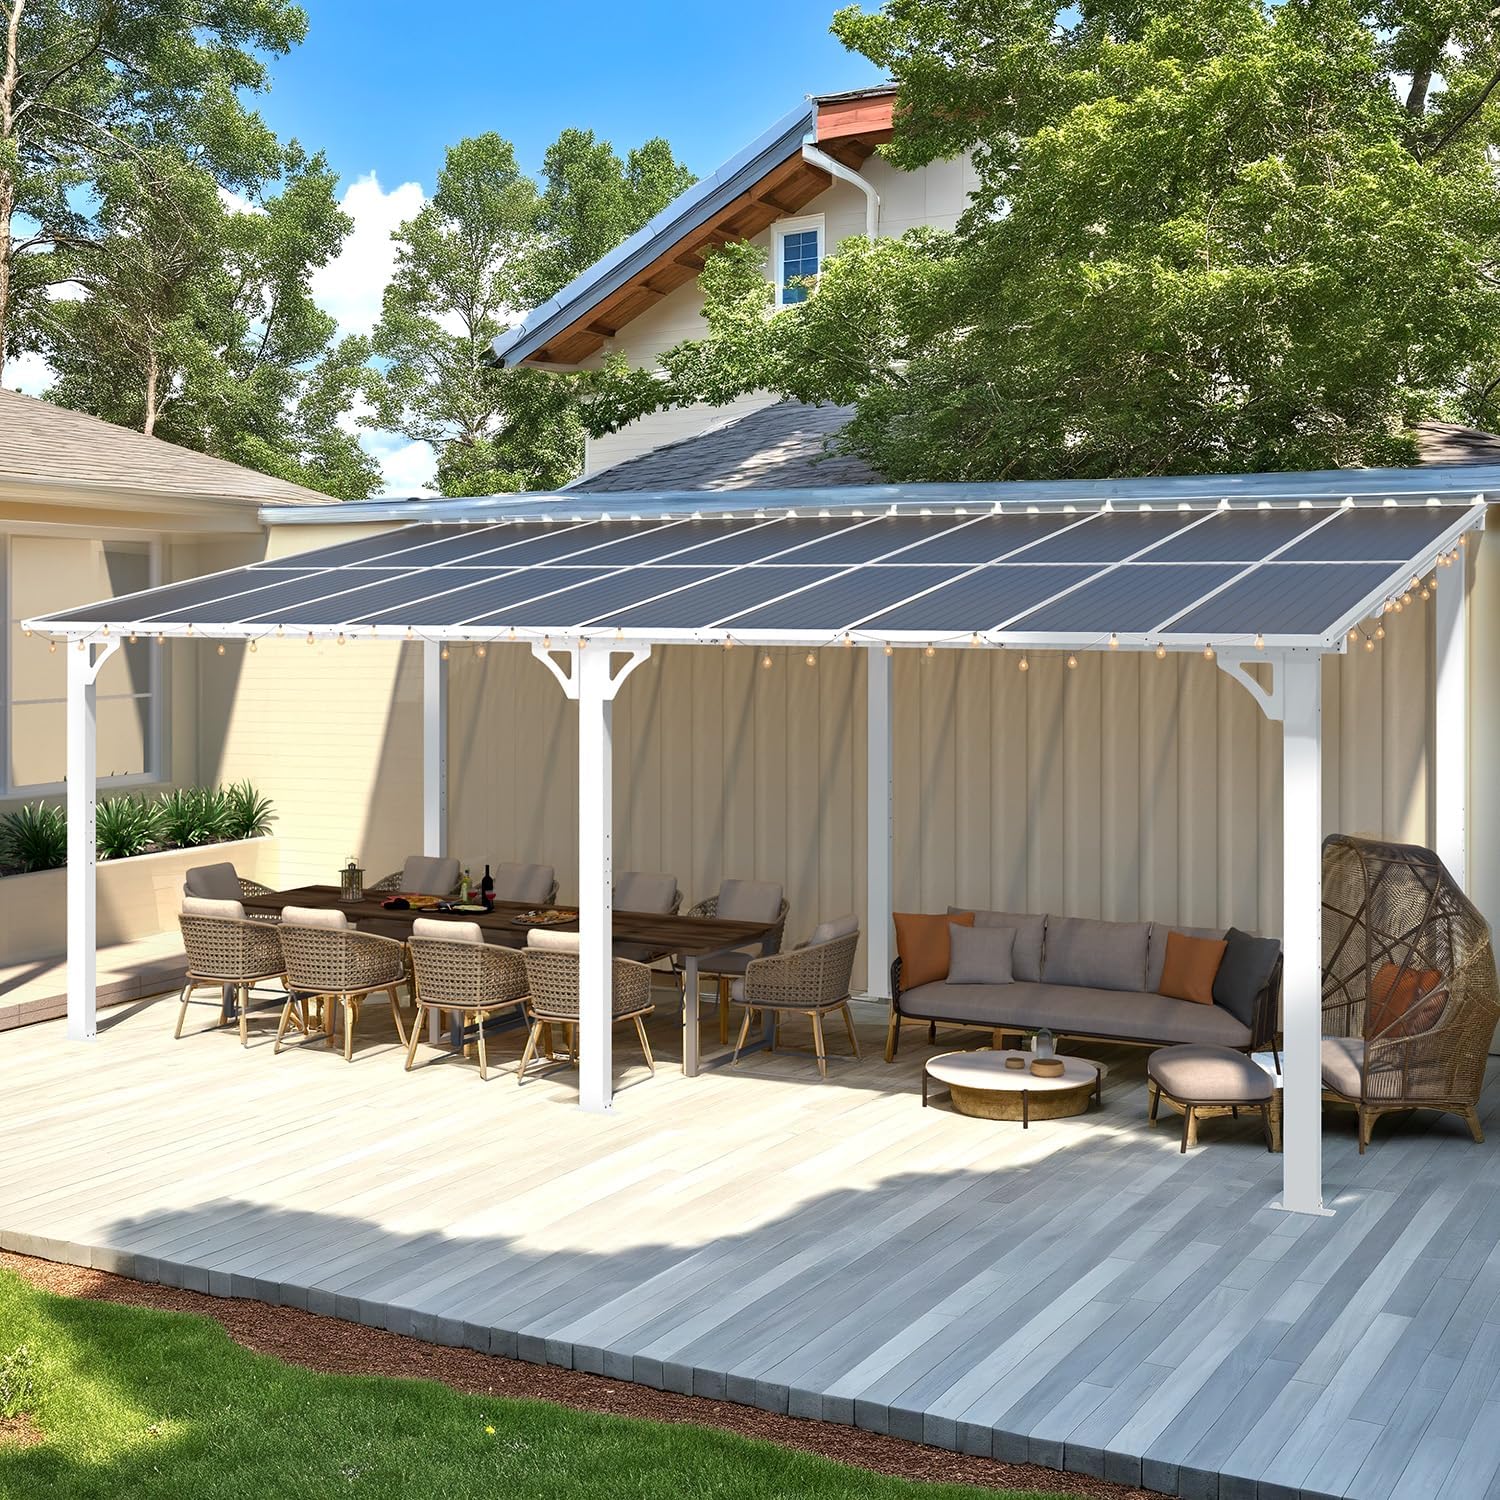
Figure 5: Diagram detailing the connection of the main beam structure to the leg assemblies using bolts (M).
- Step 4: Install Corner Brackets
Secure the corner brackets (G5, G6) to the frame using screws (S). These brackets provide additional stability to the structure.
Figure 6: Diagram for installing corner brackets (G5, G6) with screws (S) to reinforce the gazebo frame.
- Step 5: Assemble Roof Support Beams
Connect the roof support beams (C1-C5, E1, E2) using bolts (Q). These form the framework for the roof panels.
Figure 7: Diagram showing the assembly of roof support beams (C1-C5, E1, E2) using bolts (Q).
- Step 6: Attach Roof Support Brackets
Install the roof support brackets (G1-G4) to the main frame using screws (S). These brackets will hold the roof panels in place.Figure 8: Diagram for attaching roof support brackets (G1-G4) to the main frame with screws (S).
- Step 7: Install Roof Panel Supports
Secure the roof panel supports (K1, K2) using bolts (P). These provide the final support for the roof panels.Figure 9: Diagram showing the installation of roof panel supports (K1, K2) using bolts (P).
- Step 8: Secure Additional Roof Supports
Fasten any remaining roof supports using bolts (P) as indicated in the diagram.Figure 10: Diagram for securing additional roof supports with bolts (P).
- Step 9: Install Roof Panels (E5, E6, L)
Carefully slide the roof panels (E5, E6) into the designated channels and secure them with the retaining strips (L) and screws (V). Ensure the correct side of the panel faces outwards (as indicated by markings).Figure 11: Diagram illustrating the installation of roof panels (E5, E6) into the frame and securing them with retaining strips (L) and screws (V).
- Step 10: Install Remaining Roof Panels (E4, E5, E6, L)
Continue installing the remaining roof panels (E4, E5, E6) and secure them with retaining strips (L) and screws (V).Figure 12: Diagram for installing the remaining roof panels (E4, E5, E6) and securing them with retaining strips (L) and screws (V).
- Step 11: Final Roof Panel Securing
Ensure all roof panels are properly seated and secured with the final set of screws (O) and retaining strips (L).Figure 13: Diagram showing the final securing of all roof panels using screws (O) and retaining strips (L).
- Step 12: Install Gutter System
Attach the gutter components (F1, F2, J1, J2, J3, W) to the edges of the roof structure using the provided screws (P). Ensure proper alignment for effective water drainage.Figure 14: Diagram for installing the gutter system components (F1, F2, J1, J2, J3, W) with screws (P).
- Step 14: Wall Mounting and Sealing
Secure the gazebo to the wall using the wall brackets (I2) and expansion bolts (U). Apply the sealing strip (B3) along the wall connection to ensure a waterproof seal.Figure 15: Diagram showing the final steps of wall mounting using brackets (I2) and expansion bolts (U), and applying the sealing strip (B3).
Operating Guidelines
Your AECOJOY gazebo is designed for year-round outdoor use, providing protection and comfort.
- Shade and UV Protection: The hardtop roof effectively blocks harmful UV rays, creating a comfortable shaded area for relaxation or dining.
- Rain Protection: The inclined roof design and integrated drainage system ensure rainwater flows smoothly, keeping your patio dry.
- Snow Capacity: The robust hardtop is built to withstand up to 7 inches of heavy snow, equivalent to 6 lbs/sq.ft. While designed for snow, it is advisable to clear excessive accumulation to prolong product life.
- Wind Resistance: When securely fixed to the wall and ground as instructed, the gazebo can confidently withstand winds of around 70 mph.
Maintenance
Regular maintenance will ensure the longevity and optimal performance of your gazebo.
- Cleaning: Clean the roof panels and frame periodically with mild soap and water. Avoid abrasive cleaners or tools that could scratch the surfaces.
- Seasonal Checks: Before and after seasons with harsh weather (heavy rain, snow, strong winds), inspect all bolts and connections to ensure they remain tight. Re-tighten if necessary.
- Snow Removal: While the roof is designed to handle snow, it is recommended to gently remove heavy snow accumulation to prevent excessive stress on the structure.
- Drainage System: Keep gutters and drainage channels clear of debris (leaves, twigs) to ensure efficient water runoff.
Troubleshooting
Here are solutions to common issues you might encounter:
- Water Leaks: If you notice minor leaks, especially where panels join, check that all screws are tightened and that the sealing strips are properly installed and intact. Reapply sealant if necessary.
- Instability/Wobbling: Ensure all ground anchors are securely fastened and wall mounts are properly installed. Check all frame connections for tightness.
- Missing Parts: If any parts are missing upon delivery, please contact customer support immediately with your purchase details.
- Difficulty during Assembly: Refer to the detailed video tutorials and diagrams. If issues persist, contact our technical support team for remote assistance.
Specifications
| Feature | Detail |
|---|---|
| Brand | AECOJOY |
| Model Number | 16412WH |
| Product Dimensions | 240"L x 120"W x 96"H (20'L x 10'W x 8'H) |
| Item Weight | 246.4 Pounds |
| Material | Aluminum, Metal, Sun Panels |
| Frame Material | Aluminum, Metal |
| Color | White |
| Water Resistance Level | Waterproof |
| Ultraviolet Light Protection | Yes |
| Snow Capacity | 6 lbs/sq.ft (approx. 7" of heavy snow) |
| Wind Resistance | Up to 70 mph (when securely fixed) |
| Assembly Required | Yes |
Warranty and Support
AECOJOY stands behind its products, offering comprehensive support and a worry-free experience.
- Warranty: The product comes with a one-year warranty.
- Customer Support: A professional team is available 24/7 to address any concerns related to installation, usage, maintenance, and replacements.
- Contact: For assistance, please refer to the contact information provided in your product packaging or visit the official AECOJOY store.


