
1. Introduction
The SinLoon M.2 NGFF Key A+E to PCIe X16 Extender Cable is designed to convert an M.2 Key A+E slot into a full-sized PCIe X16 slot. This allows for the connection of various PCIe X16 devices, such as graphics cards, and is also compatible with PCIe X8, X4, and X1 devices. This manual provides essential information for proper installation, operation, and maintenance of your extender cable.
2. Safety Information and Important Warnings
- Correct Installation Direction: To prevent damage to your device, always ensure that the installation direction of the cable is correct before applying force.
- Handling During Disassembly: When disassembling the product, hold the PCB hardware part firmly. Avoid pulling the wire body directly, as this can damage the internal magnetic core.
- No Hot-Plugging: This product does not support hot-plugging. Always ensure that the motherboard is powered off and disconnected from the power source before installing or removing the extender cable.
- Power Connection: The 12V power is only available when the SATA power cable is properly connected.
3. Package Contents
Please verify that all items are present in your package:
- 1 x SinLoon M.2 NGFF Key A+E to PCIe X16 Extender Cable
- 1 x SATA Power Cord
4. Setup and Installation
Follow these steps to properly install your M.2 to PCIe X16 Extender Cable:
- Power Off System: Before beginning installation, ensure your computer system is completely powered off and unplugged from the electrical outlet.
- Locate M.2 Slot: Identify an available M.2 Key A+E slot on your motherboard. This cable is designed for 2230 size M.2 slots.
- Connect M.2 End: Carefully insert the M.2 Key A+E connector end of the extender cable into the corresponding M.2 slot on your motherboard. Ensure it is seated correctly and securely.
- Connect PCIe Device: Insert your desired PCIe X16 device (e.g., graphics card) into the PCIe X16 female slot on the extender cable. This cable supports PCIe X16, X8, X4, and X1 devices.
- Connect SATA Power: Attach the included SATA power cord to the extender cable's power input and connect the other end to an available SATA power connector from your power supply unit (PSU). This provides the necessary 12V power for the connected PCIe device.
- Secure Components: Ensure all connections are firm. If necessary, use screws to secure the PCIe device to your chassis.
- Power On System: Once all connections are secure, you may plug in and power on your computer system.

Figure 1: M.2 Key A+E Connector. This image shows the M.2 'A+E' Key Connector end of the extender cable, highlighting its compatibility with 2230 size M.2 slots.

Figure 2: PCIe X16 Slot. This image illustrates the PCIe X16 slot on the extender cable and its compatibility with various PCIe lane configurations (X1, X4, X8, X16).
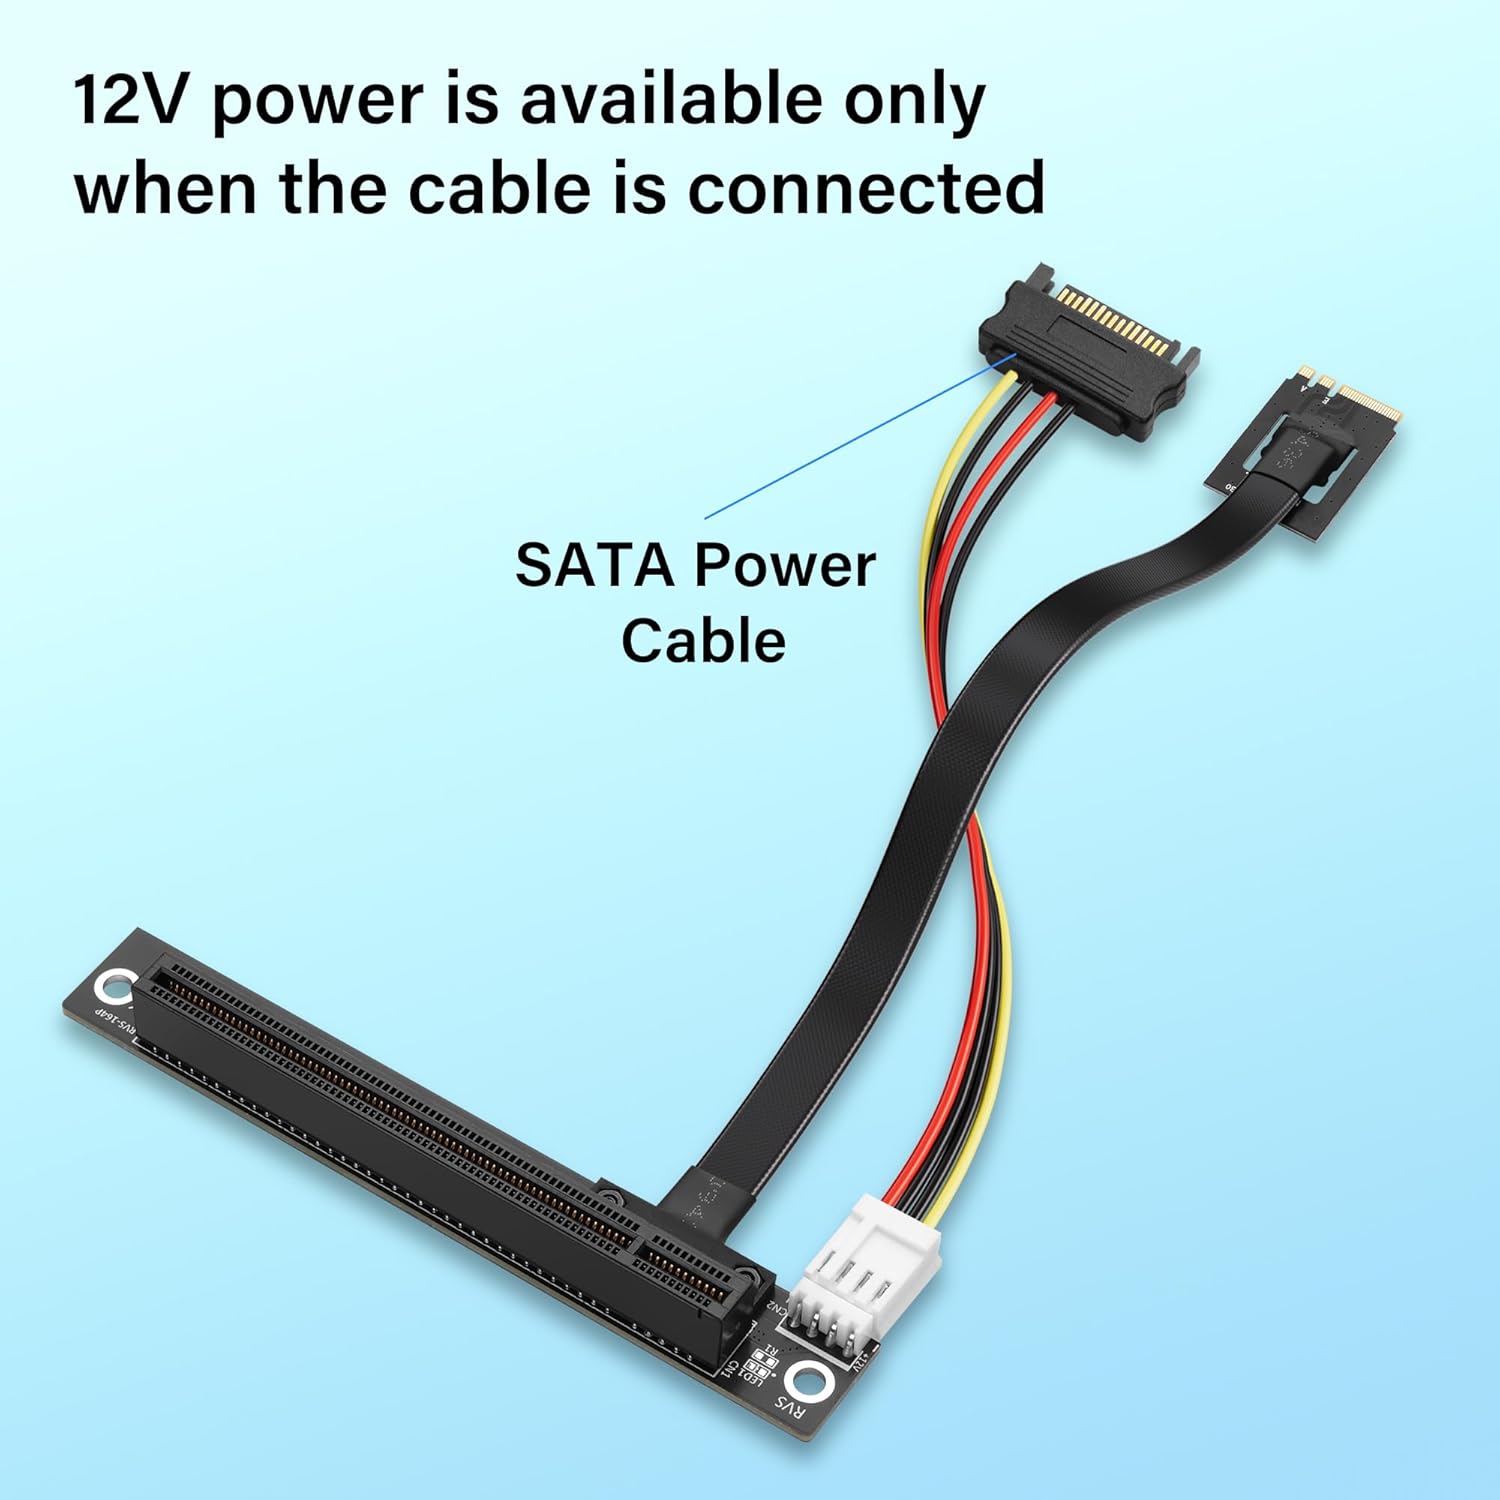
Figure 3: SATA Power Connection. This image shows the SATA power cable connected to the extender, indicating that 12V power is supplied only when this connection is made.
5. Operating Instructions
The SinLoon M.2 to PCIe X16 Extender Cable operates passively once correctly installed. Its primary function is to provide a physical extension and conversion for your PCIe device. The actual data transfer speed of the PCIe X16 slot will be limited by the speed of the M.2 interface on your motherboard.
- Ensure your operating system and drivers for the connected PCIe device are up-to-date for optimal performance.
- Monitor system temperatures, especially when using high-power PCIe devices like graphics cards, to ensure adequate cooling within your chassis.
6. Product Features
- Universal Compatibility: Converts M.2 Key A+E slot to PCIe X16, supporting various PCIe X16, X8, X4, and X1 devices.
- High-Quality Construction: Features 1 ounce thickened copper wire and gold-plated fingers for enhanced signal transmission stability and wear resistance.
- Durable and Flexible Cable: The cable body is made of ultra-thin, flexible, and durable TPE material, allowing for bending to optimize internal space and airflow without compromising data transmission efficiency.
- Optimized PCB Design: High-quality PCB boards with high-frequency, low-resistance material and high TG board ensure excellent electrical conductivity and reduce the risk of system instability.

Figure 4: TPE Flexible Cord Body. This image highlights the flexible and durable TPE material of the cable, designed for efficient data transmission and easy routing within a computer chassis.
7. Specifications
| Feature | Detail |
|---|---|
| Brand | SinLoon |
| Model | B0F245FW8V |
| Connector Type (Input) | M.2 Key A+E |
| Connector Type (Output) | PCIe X16 Female Slot |
| Supported PCIe Devices | PCIe X16, X8, X4, X1 |
| Cable Type | PCIE Extender |
| Power Supply | 12V via SATA Power Cord (included) |
| Cable Material | TPE (Thermoplastic Elastomer) |
| PCB Features | High frequency, low resistance, 1 ounce thickened copper wire, gold plated fingers |
| Dimensions (Approximate) | 20cm / 7.9in (cable length) |

Figure 5: Product Dimensions. This image provides a visual representation of the cable's length and connector dimensions for planning installation.
8. Troubleshooting
- Device Not Detected:
- Ensure the motherboard was powered off during installation.
- Verify that the M.2 connector is fully and correctly seated in the motherboard slot.
- Check that the PCIe device is properly inserted into the extender cable's slot.
- Confirm the SATA power cable is securely connected to both the extender and the PSU.
- Update or reinstall drivers for the connected PCIe device.
- System Instability/Blue Screen:
- Ensure all connections are firm and correct.
- Verify that your power supply unit (PSU) has sufficient wattage to power both your system and the connected PCIe device.
- Check for proper ventilation within your computer case to prevent overheating.
- Slow Data Transfer:
- The actual speed is dependent on the M.2 interface speed of your motherboard. Ensure your motherboard's M.2 slot supports the required bandwidth for your PCIe device.
9. Maintenance
The SinLoon M.2 to PCIe X16 Extender Cable requires minimal maintenance. To ensure longevity and optimal performance:
- Keep the cable and connectors free from dust and debris. Use compressed air or a soft, dry cloth for cleaning.
- Avoid excessive bending or sharp folds of the cable, despite its flexible design, to prevent internal damage.
- Store the cable in a cool, dry place when not in use.
10. Warranty and Support
For warranty information or technical support, please refer to the product's purchase page or contact SinLoon customer service directly. Keep your proof of purchase for any warranty claims.