1. Introduction
This manual provides essential information for the safe and efficient use of your new AEG TO63IQ0BIB 60cm Induction Hob. Please read these instructions carefully before installation and use, and keep them for future reference. This induction hob features three cooking zones, including a flexible bridge function, PowerBoost, a pause function, and the Hob2Hood system for automatic ventilation control.
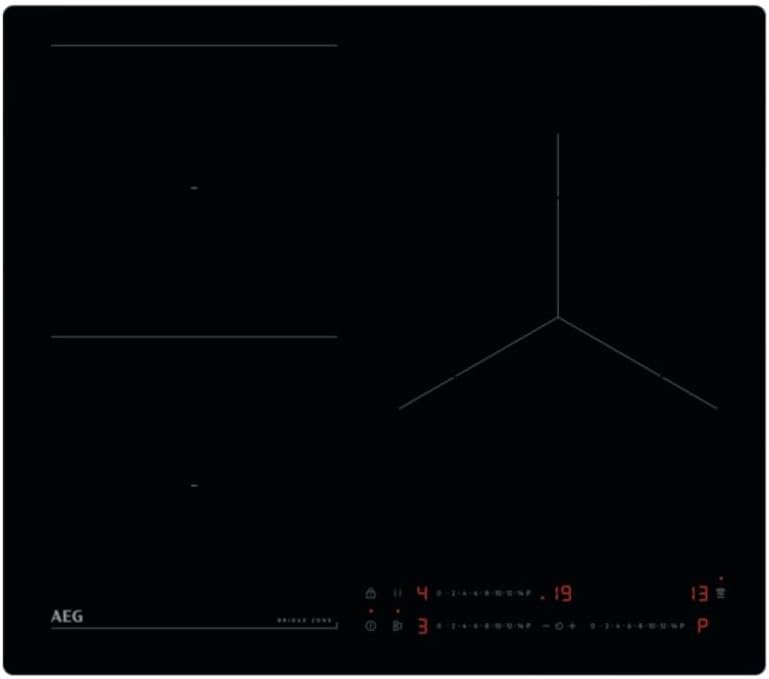
This image displays the top view of the AEG TO63IQ0BIB induction hob. It features a sleek black frameless glass ceramic surface. On the left, two rectangular cooking zones are visible, designed for the FlexiPowder bridge function. On the right, a larger, circular cooking zone is present. Below the cooking zones, the touch control panel is visible, showing power level indicators, a timer display, and various function icons including PowerBoost and Pause.
2. Safety Information
Always prioritize safety when operating electrical appliances. Failure to follow these instructions may result in electric shock, fire, or injury.
- Electrical Connection: Ensure the hob is correctly installed by a qualified electrician in accordance with local regulations. The power supply must match the specifications of the appliance.
- Hot Surfaces: Although induction hobs heat cookware directly, the hob surface can become hot from residual heat. Avoid touching hot surfaces.
- Suitable Cookware: Use only ferromagnetic cookware suitable for induction cooking. Non-induction cookware will not heat.
- Children and Pets: Keep children and pets away from the appliance during operation and when it is cooling down.
- Cleaning: Disconnect the appliance from the power supply before cleaning. Do not use abrasive cleaners or steam cleaners.
- Ventilation: Ensure adequate ventilation around the appliance as specified in the installation instructions.
3. Setup and Installation
The AEG TO63IQ0BIB induction hob is designed for flush-mounted installation. Professional installation is highly recommended to ensure proper electrical connection and fit.
3.1 Unpacking
Carefully remove the hob from its packaging. Inspect for any damage during transit. Retain packaging materials for potential future transport or service.
3.2 Placement
The hob must be installed into a countertop opening that meets the specified dimensions. Ensure sufficient clearance for ventilation beneath the appliance.
3.3 Electrical Connection
This appliance requires a dedicated electrical circuit. The electrical connection must be performed by a qualified technician, adhering to all local electrical codes and regulations. Refer to the wiring diagram provided with the appliance for specific connection details.
4. Operating Instructions
Familiarize yourself with the touch control panel for efficient operation of your induction hob.
4.1 Power On/Off
- To turn on: Touch the main power symbol.
- To turn off: Touch and hold the main power symbol until the display turns off.
4.2 Selecting a Cooking Zone and Adjusting Power
- Place suitable cookware on the desired cooking zone.
- Touch the control for the specific cooking zone.
- Use the independent slider control (0-14) to set the desired power level. Slide your finger along the scale or touch the specific point.
4.3 Bridge Function (FlexiPowder)
The bridge function allows two cooking zones to be combined into a larger single zone, ideal for griddles or large pots.
- Activate the two adjacent zones you wish to bridge.
- Touch the bridge function symbol (often indicated by two linked rectangles).
- Adjust the power level for the combined zone using its dedicated slider.
4.4 PowerBoost Function
The PowerBoost feature provides a rapid burst of heat for quick boiling or searing.
- Select a cooking zone and set a power level.
- Touch the PowerBoost symbol (often 'P' or a similar icon). The zone will operate at maximum power for a limited time.
4.5 Pause Function
The pause function temporarily reduces all active cooking zones to a low keep-warm setting, allowing you to briefly step away without turning off the hob.
- Touch the pause symbol (often two vertical bars). All active zones will switch to a low power setting.
- Touch the pause symbol again to resume cooking at the previous power settings.
4.6 Timer Function
The individual timer allows you to set a cooking duration for each zone.
- Select the desired cooking zone.
- Touch the timer symbol.
- Use the +/- controls or slider to set the desired cooking time.
- The zone will automatically switch off when the timer expires.
4.7 Hob2Hood System
The Hob2Hood feature automatically controls a compatible cooker hood based on the hob's cooking activity.
- Ensure your cooker hood is Hob2Hood compatible and correctly paired with the hob.
- When cooking starts, the hob will send signals to the hood to adjust the extraction rate automatically.
- Manual override is possible on the cooker hood if desired.
5. Maintenance and Cleaning
Regular cleaning and maintenance will prolong the life and appearance of your induction hob.
- Daily Cleaning: After each use, allow the hob to cool. Wipe the glass ceramic surface with a damp cloth and a small amount of mild detergent. Dry thoroughly with a clean cloth.
- Stubborn Stains: For burnt-on food or stubborn stains, use a specialized ceramic hob scraper or cleaner. Follow the product instructions carefully.
- Avoid Abrasives: Do not use abrasive sponges, scouring pads, or harsh chemical cleaners, as these can scratch or damage the hob surface.
- Control Panel: Wipe the control panel gently with a damp cloth. Ensure it is dry before operating the hob.
6. Troubleshooting
If you encounter issues with your hob, refer to the following common problems and solutions before contacting service.
| Problem | Possible Cause | Solution |
|---|---|---|
| Hob does not turn on. | No power supply; control panel locked. | Check circuit breaker. Ensure the child lock is not active. |
| Cooking zone not heating. | Incorrect cookware; cookware not centered; zone not activated. | Use induction-compatible cookware. Center the pot. Activate the zone and set power. |
| Display shows 'E' or error code. | Internal fault; overheating. | Turn off the hob, wait a few minutes, then restart. If the error persists, contact service. |
| Unusual noises during operation. | Normal induction hum; fan noise. | Light humming or buzzing is normal for induction technology. The cooling fan may also produce noise. |
7. Specifications
Detailed technical specifications for the AEG TO63IQ0BIB Induction Hob.
| Feature | Specification |
|---|---|
| Brand | AEG |
| Model Number | TO63IQ0BIB |
| Product Dimensions (D x W x H) | 20.08" x 22.83" x 1.93" (51cm x 58cm x 4.9cm) |
| Item Weight | 26.7 pounds (12.1 kg) |
| Heating Elements | 3 Induction Zones (2 x 21 cm, 1 x 28 cm) |
| Control Type | Touch and Slider |
| Power Source | Electric (Induction) |
| Heater Surface Material | Glass Ceramic |
| Material | Tempered Glass |
| Special Features | FlexiPowder (Bridge Function), Hob2Hood System, PowerBoost, Pause Function, Individual Timer, Safety Lock |
8. Warranty and Support
Your AEG TO63IQ0BIB Induction Hob comes with a manufacturer's warranty. Please refer to the warranty card included with your appliance for specific terms and conditions, including coverage duration and what to do in case of a claim.
For technical assistance, spare parts, or service requests, please contact AEG customer support. Have your model number (TO63IQ0BIB) and serial number ready when contacting support.
You can find contact information for AEG customer service on the official AEG website or in the documentation provided with your product.


