
1. Introduction
This manual provides instructions for the proper installation, operation, and maintenance of your HOLMES 9-Inch CleanBreeze Digital Window Fan. This fan is designed to enhance airflow in your home with features such as twin high-performance blades, automatic reversible functionality, a programmable thermostat, and remote control. Please read this manual thoroughly before use and retain it for future reference.
2. Safety Information
To reduce the risk of fire, electric shock, or injury, observe the following safety precautions:
- Always unplug the fan before cleaning or performing any maintenance.
- Do not operate the fan with a damaged cord or plug. If the cord or plug is damaged, contact customer service.
- Keep fingers and other objects away from the fan blades during operation.
- Do not immerse the fan in water or other liquids.
- This fan is designed for indoor use. While it features a water-resistant design, avoid direct exposure to heavy rain.
- Ensure the fan is securely installed in the window opening to prevent it from falling.
- Do not run the power cord under carpeting or cover it with throw rugs, runners, or similar coverings. Arrange the cord away from traffic areas where it will not be tripped over.
- This appliance has a polarized plug (one blade is wider than the other). To reduce the risk of electric shock, this plug is intended to fit in a polarized outlet only one way. If the plug does not fit fully in the outlet, reverse the plug. If it still does not fit, contact a qualified electrician. Do not attempt to defeat this safety feature.
3. Package Contents
Verify that all components are present:
- HOLMES 9-Inch CleanBreeze Digital Window Fan
- Remote Control (includes 2 AAA batteries)
- Built-in Extender Panels

4. Setup and Installation
Follow these steps to install your window fan:
- Prepare the Window: Open the window to the desired width. Ensure the window sill is clean and clear of obstructions.
- Position the Fan: Place the fan unit into the window opening. The fan is designed to fit most double-hung and slider windows.
- Extend Panels: Adjust the built-in extender panels on both sides of the fan to securely fit the window frame. The panels expand up to 35.5 inches to fill larger window openings. Ensure a snug fit to prevent air leakage and secure the fan in place.
- Secure the Fan: Lower the window sash until it rests firmly on top of the fan unit, further securing it.
- Plug In: Plug the fan into a standard 120V electrical outlet.

5. Operating Instructions
5.1 Control Panel and Remote Control
The fan can be operated using the digital control panel located on the unit or the included remote control. The remote control requires 2 AAA batteries (included).

5.2 Power On/Off
- Press the Power button (
 ) on the control panel or remote to turn the fan on or off.
5.3 Fan Speed Settings
The fan offers three speed settings: Low, Medium, and High.
- Press the Speed button () repeatedly to cycle through the speed options.
5.4 Airflow Modes (Reversible Airflow)
The fan features automatic reversible airflow, allowing it to operate in three modes:
- Intake: Draws fresh air into the room.
- Exhaust: Expels warm, stale air from the room.
- Exchange: Alternates between intake and exhaust to circulate air.
- Press the Mode button () to select the desired airflow mode.

5.5 Programmable Thermostat
The integrated thermostat allows the fan to operate automatically based on a set temperature.
- Press the Thermostat button () to activate the thermostat function.
- Use the Up/Down arrows to set the desired temperature. The fan will turn on or off to maintain this temperature.
6. Maintenance
Regular cleaning ensures optimal performance and extends the life of your fan.
6.1 Cleaning the Fan Blades and Grille
- Unplug the fan from the power outlet before cleaning.
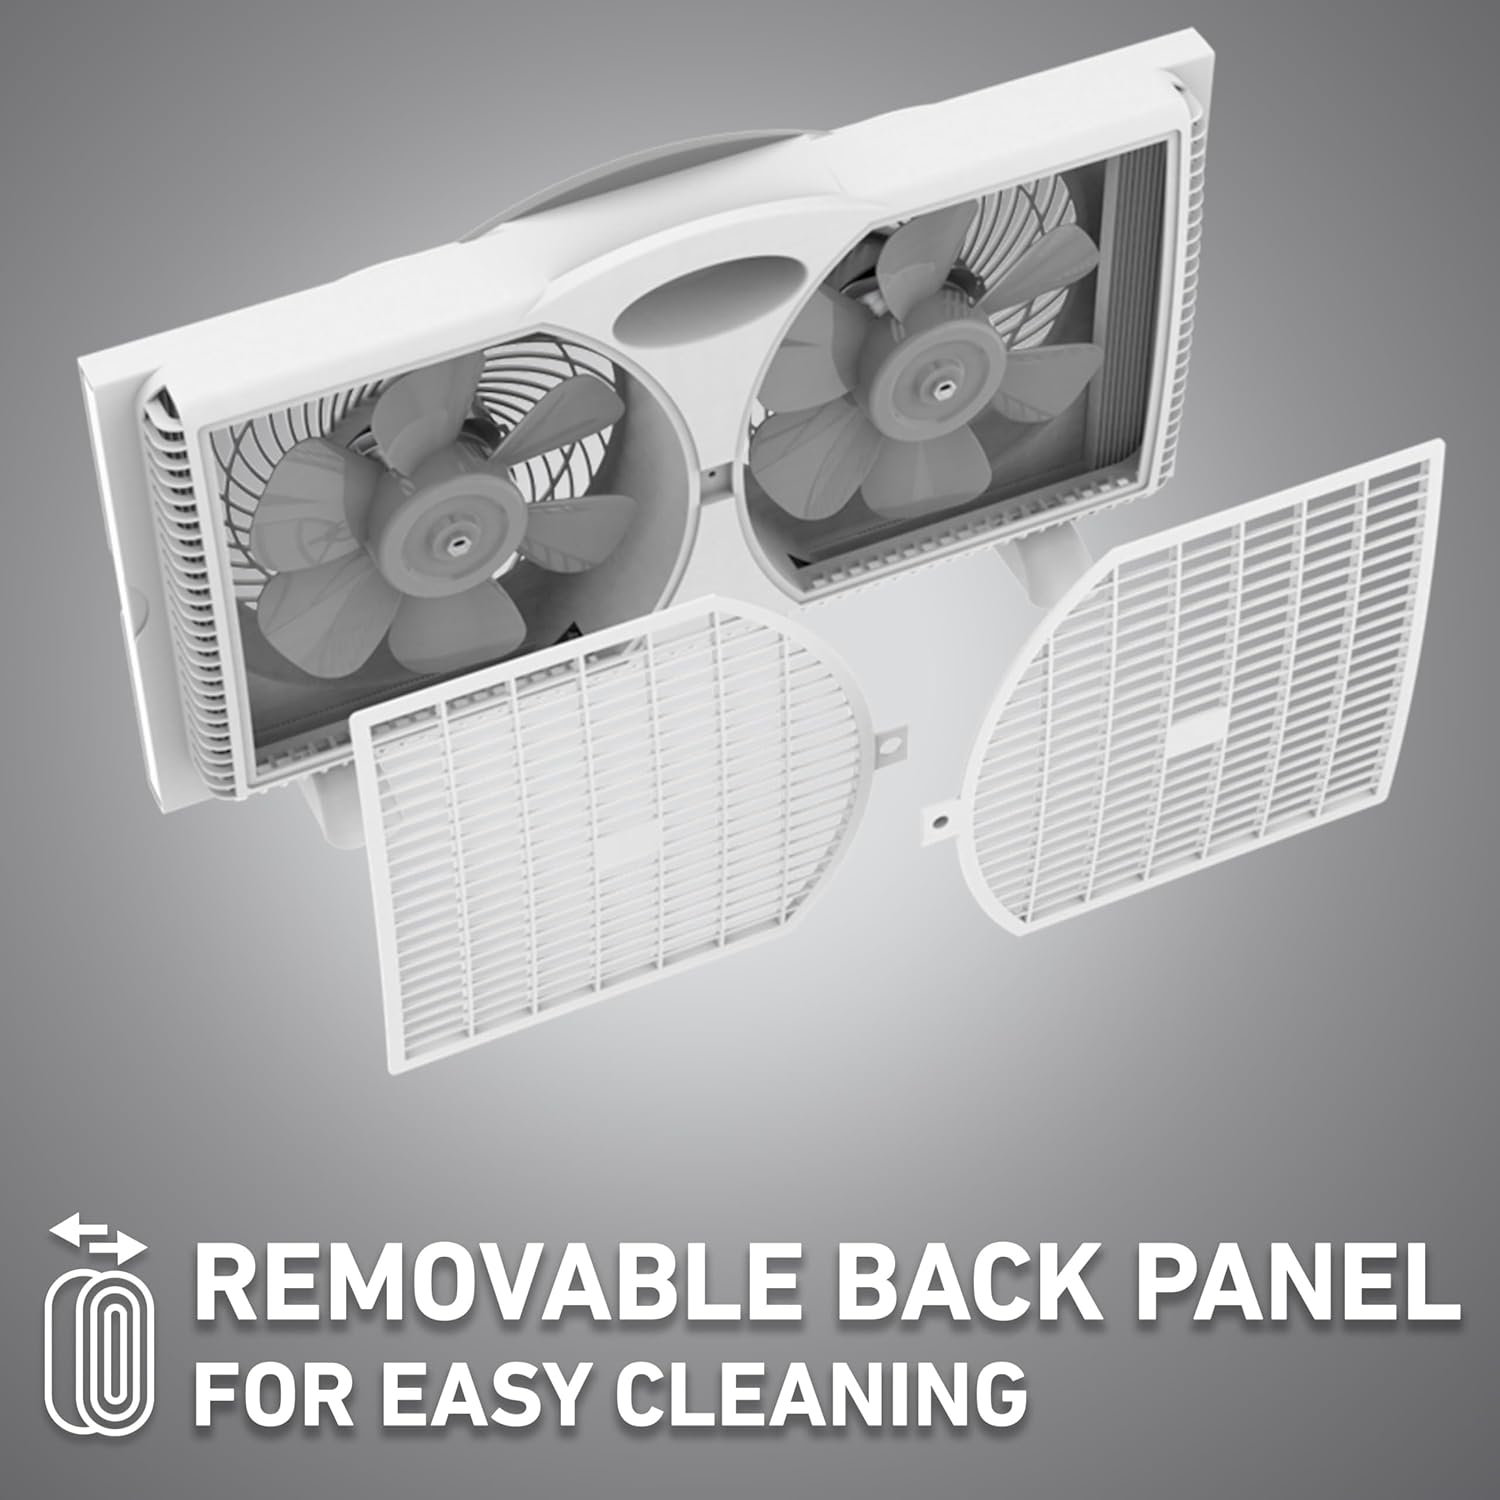
- The fan features Clean Breeze Technology with a removable back panel for easy access to the blades. Gently unclip and remove the back panel.
- Use a soft cloth or vacuum cleaner with a brush attachment to remove dust and debris from the fan blades and grilles.
- Do not use abrasive cleaners or solvents, as these may damage the fan's surface.
- Once clean, reattach the back panel securely.
6.2 Exterior Cleaning
- Wipe the exterior surfaces of the fan with a soft, damp cloth.
- Ensure the fan is completely dry before plugging it back in.
7. Troubleshooting
If your fan is not operating as expected, refer to the following common issues and solutions:
| Problem | Possible Cause | Solution |
|---|---|---|
| Fan does not turn on. | No power supply. | Ensure the fan is securely plugged into a working electrical outlet. Check the circuit breaker. |
| Fan operates but airflow is weak. | Fan blades or grilles are dirty. | Unplug the fan and clean the blades and grilles as described in the Maintenance section. |
| Fan is noisy. | Loose components or debris. | Unplug the fan and inspect for any loose parts or foreign objects. Clean the fan thoroughly. Ensure the back panel is securely attached. |
| Remote control is not working. | Dead batteries or obstruction. | Replace the 2 AAA batteries in the remote control. Ensure there is no obstruction between the remote and the fan's sensor. |
8. Specifications
Technical details for the HOLMES 9-Inch CleanBreeze Digital Window Fan:
- Model Name: Holmes Digital Window Fan
- Model Number: 32510557
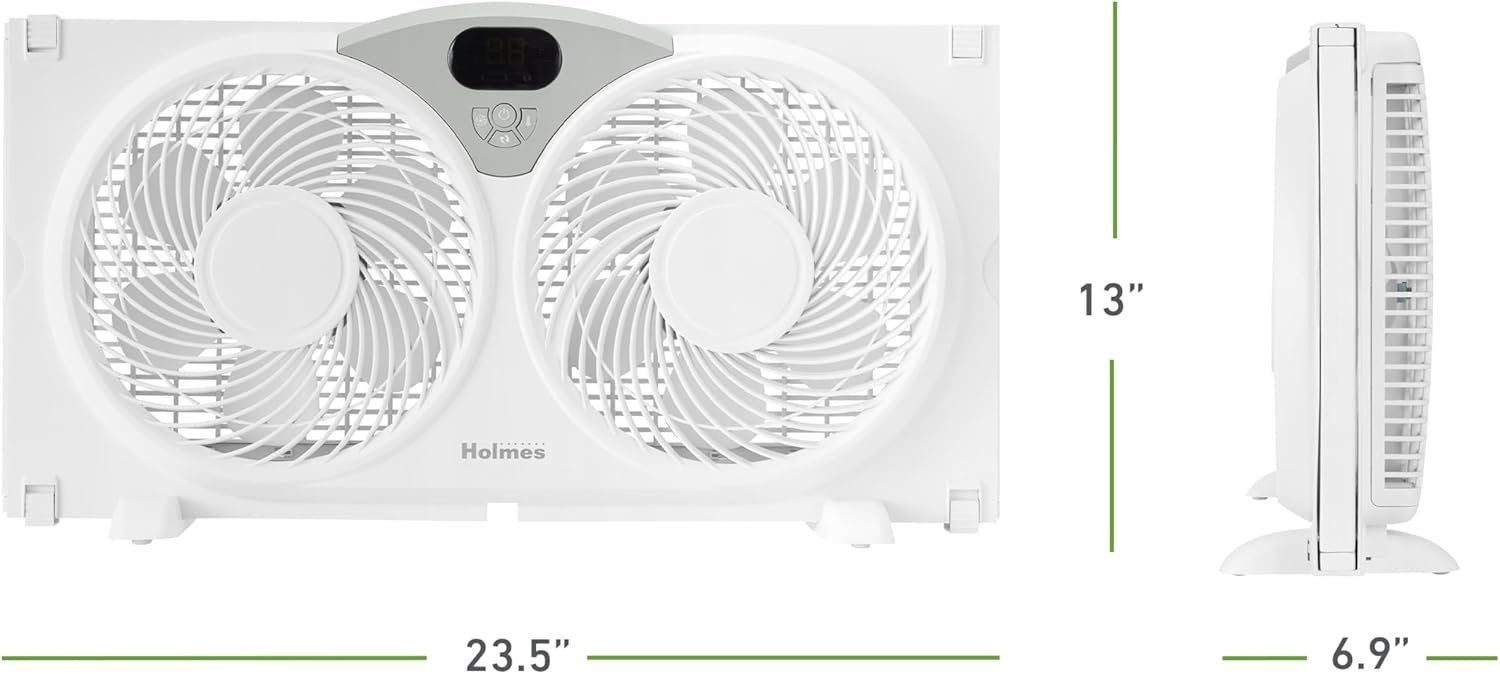
- Product Dimensions: 4.92"D x 23.46"W x 12.24"H
- Adjustable Width: Up to 35.5 inches (with extender panels)
- Item Weight: 6.2 Pounds
- Electric Fan Design: Window Fan
- Power Source: Standard 120V Outlet
- Voltage: 120V
- Wattage: 60 watts
- Number of Power Levels: 3 (Fan Speeds)
- Air Flow Capacity: Up to 1896 Cubic Feet Per Minute (CFM)
- Air Velocity: 14.4 ft/sec
- Noise Level: 47 Decibels (on low setting)
- Control Method: Push Button, Remote, Touch
- Special Feature: Remote Controlled, Programmable Thermostat, Reversible Airflow, Water-Resistant Design, Removable Back Panel
- Certification: ETL Certified
9. Warranty and Support
The HOLMES 9-Inch CleanBreeze Digital Window Fan is backed by a 3-year limited warranty. This warranty covers defects in material and workmanship under normal household use.
For warranty claims, technical support, or replacement parts, please contact HOLMES customer service. Keep your proof of purchase for warranty validation.


