
1. Introduction
Thank you for choosing the ieGeek Solar Cam S1. This wireless outdoor security camera system is designed to provide reliable home security with its integrated solar panel, eliminating the need for constant power cable management. It features 2K resolution, advanced motion detection, and flexible storage options to keep your property secure day and night. This manual will guide you through the installation, operation, and maintenance of your new security camera.
2. What's in the Box
- Solar security camera
- Type-C cable
- Mount
- Instruction manual
- Security sticker
- Screws
- Plugs
3. Product Overview
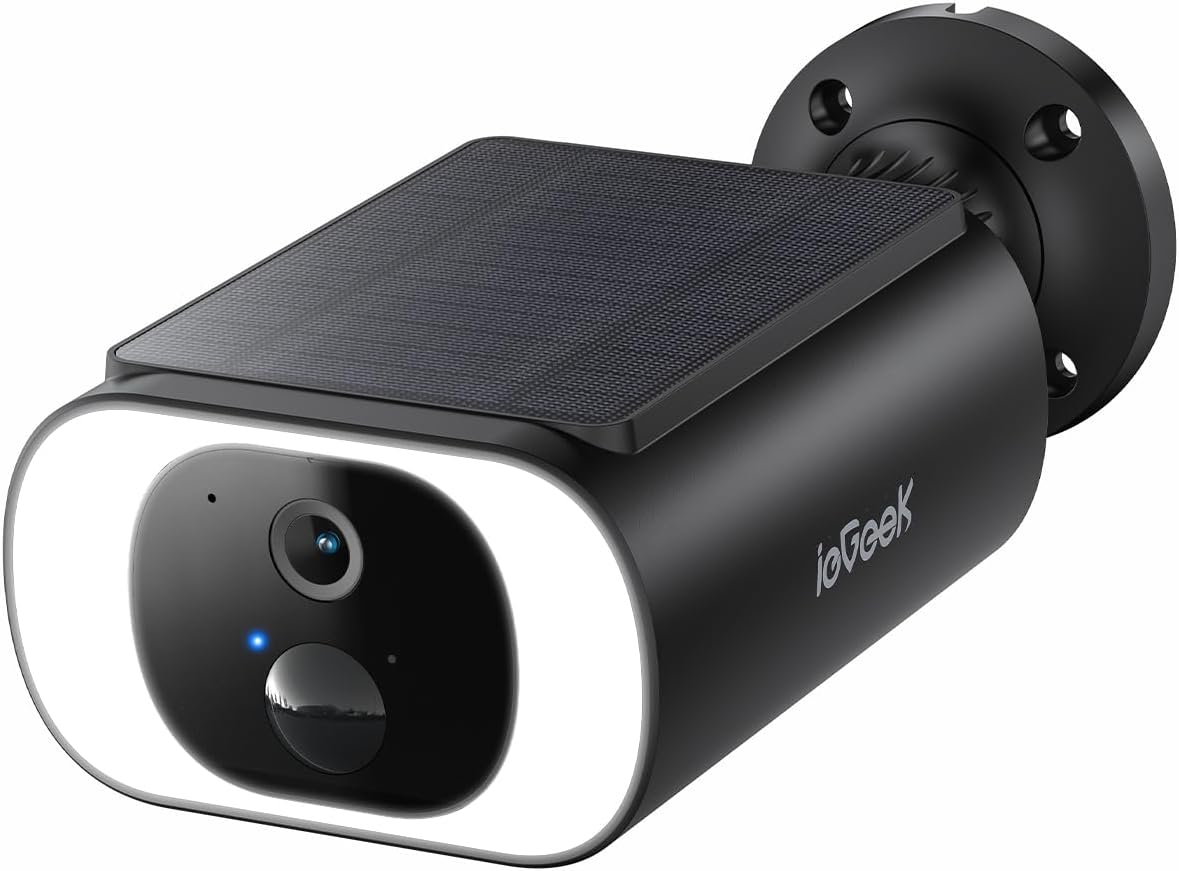
Figure 3.1: ieGeek Solar Cam S1 Wireless Outdoor Security Camera with integrated solar panel and mounting bracket.
The ieGeek Solar Cam S1 features an all-in-one design, integrating a solar panel on top for continuous power. The front face includes the camera lens, a light sensor, and a PIR motion sensor. A bright LED ring surrounds the camera face, providing illumination for color night vision. The camera body is designed for outdoor use, and it comes with a robust mounting bracket for wall or ceiling installation. The ieGeek logo is visible on the side of the camera body.
4. Setup Guide
4.1 Initial Charging
Before first use, fully charge the camera's internal battery using the provided Type-C cable. Connect the cable to the camera's charging port and a standard USB power adapter (not included). The solar panel will maintain the charge once installed outdoors with sufficient sunlight.
4.2 App Installation and Account Creation
Download the "ieGeek Cam" app from your smartphone's app store (iOS App Store or Google Play Store). Follow the on-screen instructions to create an account and log in.
4.3 Network Connection
- Open the ieGeek Cam app and tap "Add Device" or the "+" icon.
- Select your camera model from the list.
- Follow the in-app instructions to connect the camera to your 2.4GHz Wi-Fi network. Ensure your Wi-Fi signal is strong at the installation location.
- Important Note on Connectivity: The camera connects via 2.4GHz Wi-Fi. Avoid installing the camera in corners, load-bearing walls, or near large appliances (such as TVs) that may interfere with the signal. Factors like the number and thickness of walls, house size, and other wireless interference can affect connection stability. If the signal is unstable, consider changing the camera's installation location or contacting support.
4.4 Mounting the Camera
The camera supports wall or ceiling mounting using the provided screws and plugs.
- Choose a location that provides a clear view of the area you wish to monitor and receives ample direct sunlight for the solar panel.
- Mark the drill holes using the mounting bracket as a template.
- Drill holes and insert the wall plugs.
- Secure the mounting bracket to the wall or ceiling with the screws.
- Attach the camera to the mounting bracket and adjust its angle for optimal coverage.
5. Operation
5.1 Live View and Playback
Access the live video feed from your camera anytime through the ieGeek Cam app. You can also review recorded footage stored on the micro memory card (up to 128GB, not included) or the complimentary lifetime cloud storage service (records 6 seconds with a 7-day looping coverage).
5.2 Motion Detection and Notifications
The camera is equipped with an advanced PIR motion sensor and a human shape database to accurately distinguish people from other objects. When motion is detected, you will receive instant notifications on your ieGeek Cam app. You can customize detection zones and sensitivity settings within the app.
5.3 Two-Way Audio
Utilize the built-in microphone and speaker for two-way communication. This allows you to hear visitors or activate the siren and bright spotlights to deter intruders directly from your smartphone.
5.4 Night Vision
The camera provides clear 2K video even in total darkness. Its bright spotlights enable full-color night vision, capturing detailed images at night. The night vision range is up to 15 meters.
5.5 Smart Home Integration
The ieGeek Solar Cam S1 is compatible with Alexa, allowing for voice control and integration into your smart home ecosystem.
6. Maintenance
- Cleaning: Regularly clean the camera lens and solar panel with a soft, damp cloth to ensure optimal performance and charging efficiency. Avoid abrasive cleaners.
- Solar Panel Exposure: Ensure the solar panel remains unobstructed by leaves, dirt, or snow to maximize sunlight absorption.
- Firmware Updates: Check the ieGeek Cam app periodically for firmware updates to ensure your camera has the latest features and security enhancements.
7. Troubleshooting
| Problem | Possible Solution |
|---|---|
| Camera frequently disconnects from Wi-Fi. |
|
| Battery not charging via solar panel. |
|
| Motion detection not working or too sensitive. |
|
| No image or poor image quality. |
|
8. Specifications
| Feature | Detail |
|---|---|
| Model Name | ieGeek S1 |
| Indoor/Outdoor Usage | Outdoor |
| Power Source | Battery & Solar Powered |
| Video Capture Resolution | 2K |
| Connectivity Technology | Wi-Fi 6 Technology |
| Connectivity Protocol | 2.4GHz Wi-Fi |
| Compatible Devices | Alexa, Tablet, Smartphone, Smartwatch |
| Controller Type | CloudEdge, Amazon Alexa, ieGeek Cam |
| Mounting Type | Wall /Ceiling Mount |
| Viewing Angle | 130 Degrees |
| Night Vision Range | 15 Meters |
| Item Dimensions (L x W x H) | 4.5 x 3.7 x 2.2 inches |
| Item Weight | 1.15 Pounds |
| Low Light Technology | Night Color |
| Zoom Type | Digital Zoom (4x) |
| Alert Type | Audio and Motion |
| Video Capture Format | MP4 |
| Number of IR LEDs | 4 |
| Special Feature | AI motion detection, Color night vision, 2K FHD, Works with Alexa, Wi-Fi 6 network |
9. Warranty and Support
ieGeek offers a 2-year warranty on the outdoor solar camera. If you encounter any issues during the use of your camera, please do not hesitate to contact ieGeek customer support. They are committed to providing the best solution and assistance.
For support, please refer to the contact information provided in the product packaging or visit the official ieGeek website.


