1. Introduction
This manual provides detailed instructions for the safe and effective operation, setup, maintenance, and troubleshooting of the ANCEL L8000 Automotive Smoke Machine and the ANCEL AD610 PRO OBD2 Scanner. These devices are designed to assist in diagnosing various automotive system issues, including leaks and electronic control unit (ECU) faults.
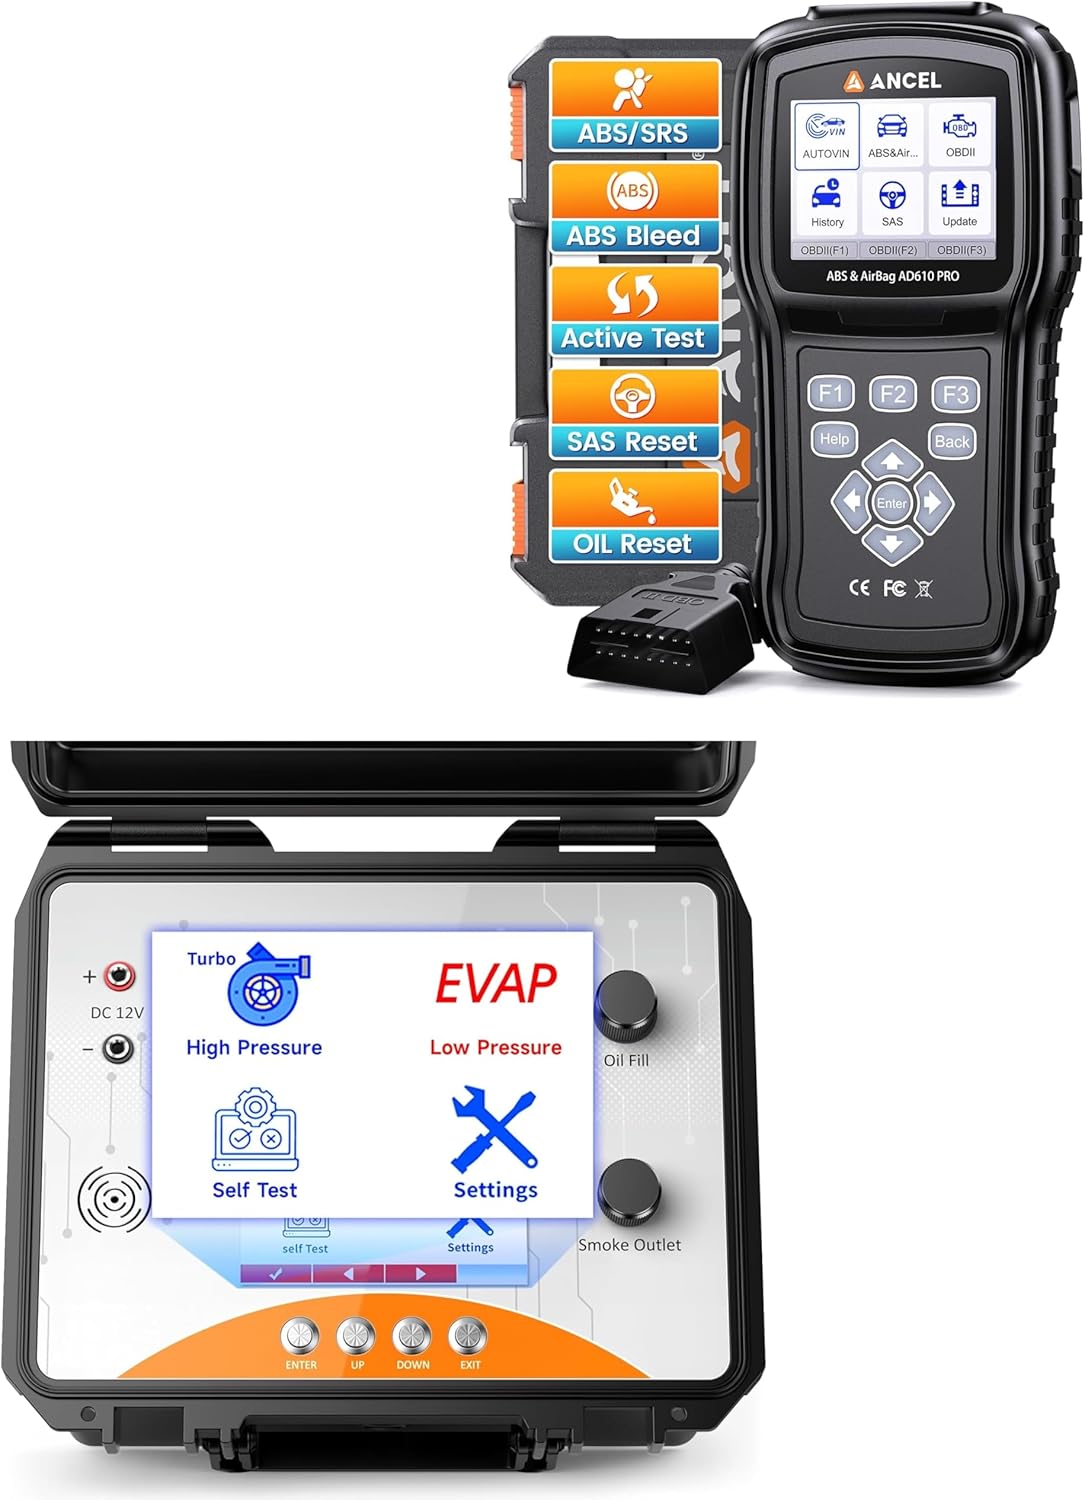
Image 1.1: The ANCEL L8000 Automotive Smoke Machine and the ANCEL AD610 PRO OBD2 Scanner. The L8000 is a robust, portable unit for leak detection, while the AD610 PRO is a handheld diagnostic scanner for vehicle electronic systems.
2. Safety Information
Always observe the following safety precautions to prevent personal injury or damage to the equipment or vehicle:
- Wear appropriate personal protective equipment (PPE), including eye protection and gloves, when operating the smoke machine.
- Ensure adequate ventilation when using the smoke machine, as smoke may irritate respiratory passages.
- Do not operate the smoke machine near open flames or sources of ignition.
- Use only the specified smoke fluid. Other fluids may damage the machine or produce hazardous fumes.
- Keep the smoke machine and scanner away from water and moisture.
- Do not attempt to disassemble or modify either device. Refer all servicing to qualified personnel.
- Ensure the vehicle's ignition is off before connecting or disconnecting the OBD2 scanner, unless otherwise instructed by the scanner.
3. Package Contents
Verify that all items are present in the package:
- ANCEL L8000 Automotive Smoke Machine
- ANCEL AD610 PRO OBD2 Scanner
- Power Cable for L8000
- OBD2 Connection Cable for AD610 PRO
- Smoke Fluid Bottle (empty or pre-filled, check packaging)
- Various adapters and cones for smoke machine (e.g., intake adapter, EVAP service port adapter)
- User Manual (this document)
4. ANCEL L8000 Smoke Machine
4.1. Setup
- Fill Smoke Fluid: Open the oil fill port on the L8000 and carefully pour the specified smoke fluid into the reservoir. Do not overfill.
- Power Connection: Connect the L8000 to a 12V DC power source using the provided power cable. Ensure a secure connection.
- Initial Warm-up: Allow the machine to warm up for a few minutes after powering on.
4.2. Operation
4.2.1. Dual Mode Leak Detection
The L8000 features dual modes for leak detection: High-Pressure (for boosted systems) and Low-Pressure (for EVAP systems).
- Select Mode: Use the controls on the L8000 to switch between 'High Pressure' (Turbo icon) and 'Low Pressure' (EVAP icon) modes.
- Connect to System: Attach the appropriate adapter and hose to the vehicle system you intend to test (e.g., intake manifold, exhaust system, EVAP line).
- Initiate Test: Activate the smoke generation. Observe for smoke escaping from any leak points.

Image 4.1: The ANCEL L8000 display showing the selection between High-Pressure (Turbo) and Low-Pressure (EVAP) modes for different types of leak detection.
4.2.2. Using the Built-in Air Pump
The L8000 includes an internal air pump, eliminating the need for an external air compressor.
- The built-in air pump automatically provides the necessary pressure for smoke generation in both modes.
- Ensure the machine is powered on for the air pump to function.

Image 4.2: An illustration highlighting the ANCEL L8000's internal air pump system, which provides air pressure for smoke generation without requiring an external compressor.
4.3. Maintenance
- Fluid Level Check: Regularly check the smoke fluid level and refill as needed.
- Cleaning: Wipe down the exterior of the machine with a damp cloth. Keep the smoke outlet clear of obstructions.
- Storage: Store the L8000 in a clean, dry, and protected environment. The unit is designed to be portable and protective.

Image 4.3: The ANCEL L8000 in its portable and protective case, designed for easy transport and durability in various working conditions.
5. ANCEL AD610 PRO OBD2 Scanner
5.1. Setup
- Connect to Vehicle: Locate the vehicle's 16-pin OBD-II diagnostic port (usually under the dashboard). Connect the AD610 PRO's OBD2 cable to this port.
- Power On: The scanner will typically power on automatically once connected to the vehicle's OBD-II port.
5.2. Basic Operation
- Auto-VIN Function: The scanner can automatically identify the vehicle's make, model, and year, streamlining the diagnostic process. Select the 'Auto-VIN' option from the main menu.
- Read/Clear Codes: Navigate to the 'Read Codes' function to retrieve Diagnostic Trouble Codes (DTCs) from the vehicle's ECU. Use 'Clear Codes' to erase DTCs after repairs are completed.
5.3. Advanced Diagnostic Functions
5.3.1. ABS Diagnosis & Reset
The AD610 PRO can diagnose and reset issues related to the Anti-lock Braking System (ABS).
- Diagnosis: Access the ABS menu to read fault codes, view live data from ABS sensors (e.g., wheel speed sensors), and identify system malfunctions.
- Reset: After repairs, use the reset function to clear ABS warning lights and restore system functionality.

Image 5.1: An illustration demonstrating the ANCEL AD610 PRO's capability to perform ABS and SRS diagnostics, showing how ABS assists in maintaining vehicle control during braking and the function of airbags in an SRS system.
5.3.2. SRS Diagnosis & Reset
The scanner supports diagnosis and reset for the Supplemental Restraint System (SRS), commonly known as the airbag system.
- Diagnosis: Access the SRS menu to detect issues such as airbag ECU failures, sensor malfunctions, or wiring problems.
- Reset: Clear SRS warning lights and restore the system to proper working order after necessary repairs.
5.3.3. ABS Bleeding
The AD610 PRO can perform automated ABS bleeding procedures on compatible vehicles.
- Follow the on-screen prompts to initiate and complete the ABS bleeding process, which helps remove air from the brake lines and restore proper brake pedal feel.

Image 5.2: A visual guide illustrating the steps involved in ABS bleeding, including component repair/replacement, brake fluid replenishment, and the resulting improved braking performance.
5.3.4. Full OBD2 Functions
The scanner provides comprehensive OBD2 functionality:
- Live Data: View real-time sensor data from the vehicle.
- On-board Monitor Test: Check the status of various emission-related components.
- I/M Readiness: Determine if the vehicle is ready for an emissions inspection.
- Freeze Frame: Capture a snapshot of vehicle conditions when a fault code was set.
- EVAP Test: Perform tests on the evaporative emission control system.
- DTC Library: Look up definitions for diagnostic trouble codes.
- Vehicle Info: Retrieve vehicle identification number (VIN) and calibration IDs.
- Component Test: Activate specific components for diagnostic purposes.

Image 5.3: The ANCEL AD610 PRO displaying its full suite of OBD2 functions, including Live Data, On-board Monitor Test, I/M Readiness, Read Codes, Clear Codes, Freeze Frame, EVAP Test, DTC Library, Vehicle Info, and Component Test.

Image 5.4: The ANCEL AD610 PRO performing an I/M Readiness self-check, displaying the status of various emission monitors to indicate if the vehicle is ready for an emissions inspection.
5.3.5. Bidirectional Control & Active Test
This function allows the scanner to send commands to vehicle systems and components to perform specific tests.
- Active Test: Directly control components like ABS solenoids, fuel pumps, or cooling fans to verify their functionality.
- Bidirectional Control: Interact with the vehicle's ECUs to perform advanced diagnostics and component verification.

Image 5.5: A diagram illustrating the ANCEL AD610 PRO's bidirectional control and active test capabilities for ABS and SRS systems, showing how the scanner can send commands and receive feedback from various vehicle components.
5.4. Software Updates
Regularly check the ANCEL official website for software updates for the AD610 PRO. Updates can improve performance, add new vehicle coverage, and fix bugs. Follow the instructions provided on the website for downloading and installing updates.
6. Troubleshooting
- No Power (L8000): Ensure the 12V DC power cable is securely connected to both the machine and the power source. Check the vehicle's battery voltage.
- No Smoke (L8000): Verify that the smoke fluid reservoir is adequately filled. Allow sufficient warm-up time. Check for blockages in the smoke outlet hose.
- Scanner Not Connecting (AD610 PRO): Ensure the OBD2 cable is firmly connected to both the scanner and the vehicle's OBD-II port. Verify the vehicle's ignition is on (if required for communication).
- Error Messages (AD610 PRO): Note the error code or message displayed. Refer to the scanner's internal DTC library or ANCEL's support resources for specific interpretations and solutions.
- Inaccurate Readings: Ensure all connections are secure and clean. For smoke tests, ensure the system being tested is properly sealed. For scanner functions, ensure the correct vehicle profile is selected (if not using Auto-VIN).
7. Specifications
- Brand: ANCEL
- Models: L8000 (Smoke Machine), AD610 PRO (OBD2 Scanner)
- L8000 Power Supply: 12V DC
- L8000 Modes: High-Pressure, Low-Pressure (EVAP)
- AD610 PRO Connectivity: Standard 16-pin OBD-II
- AD610 PRO Functions: Full OBD2, ABS Diagnosis & Reset, SRS Diagnosis & Reset, ABS Bleeding, Bidirectional Control, Active Test, Auto-VIN
8. Warranty and Support
ANCEL products are covered by a limited warranty. For specific warranty terms, please refer to the warranty card included with your product or visit the official ANCEL website. For technical support, troubleshooting assistance, or to inquire about replacement parts, please contact ANCEL customer service through their official website or the contact information provided in your product packaging.


