
1. Introduction
This manual provides detailed instructions for the installation, operation, and maintenance of your darkFlash L280M MATX Gaming PC Case. Please read this manual thoroughly before beginning assembly to ensure proper setup and safe usage. The darkFlash L280M is a Micro-ATX case featuring a three-sided glass design, a curved full view panel, and a digital display for real-time system monitoring.
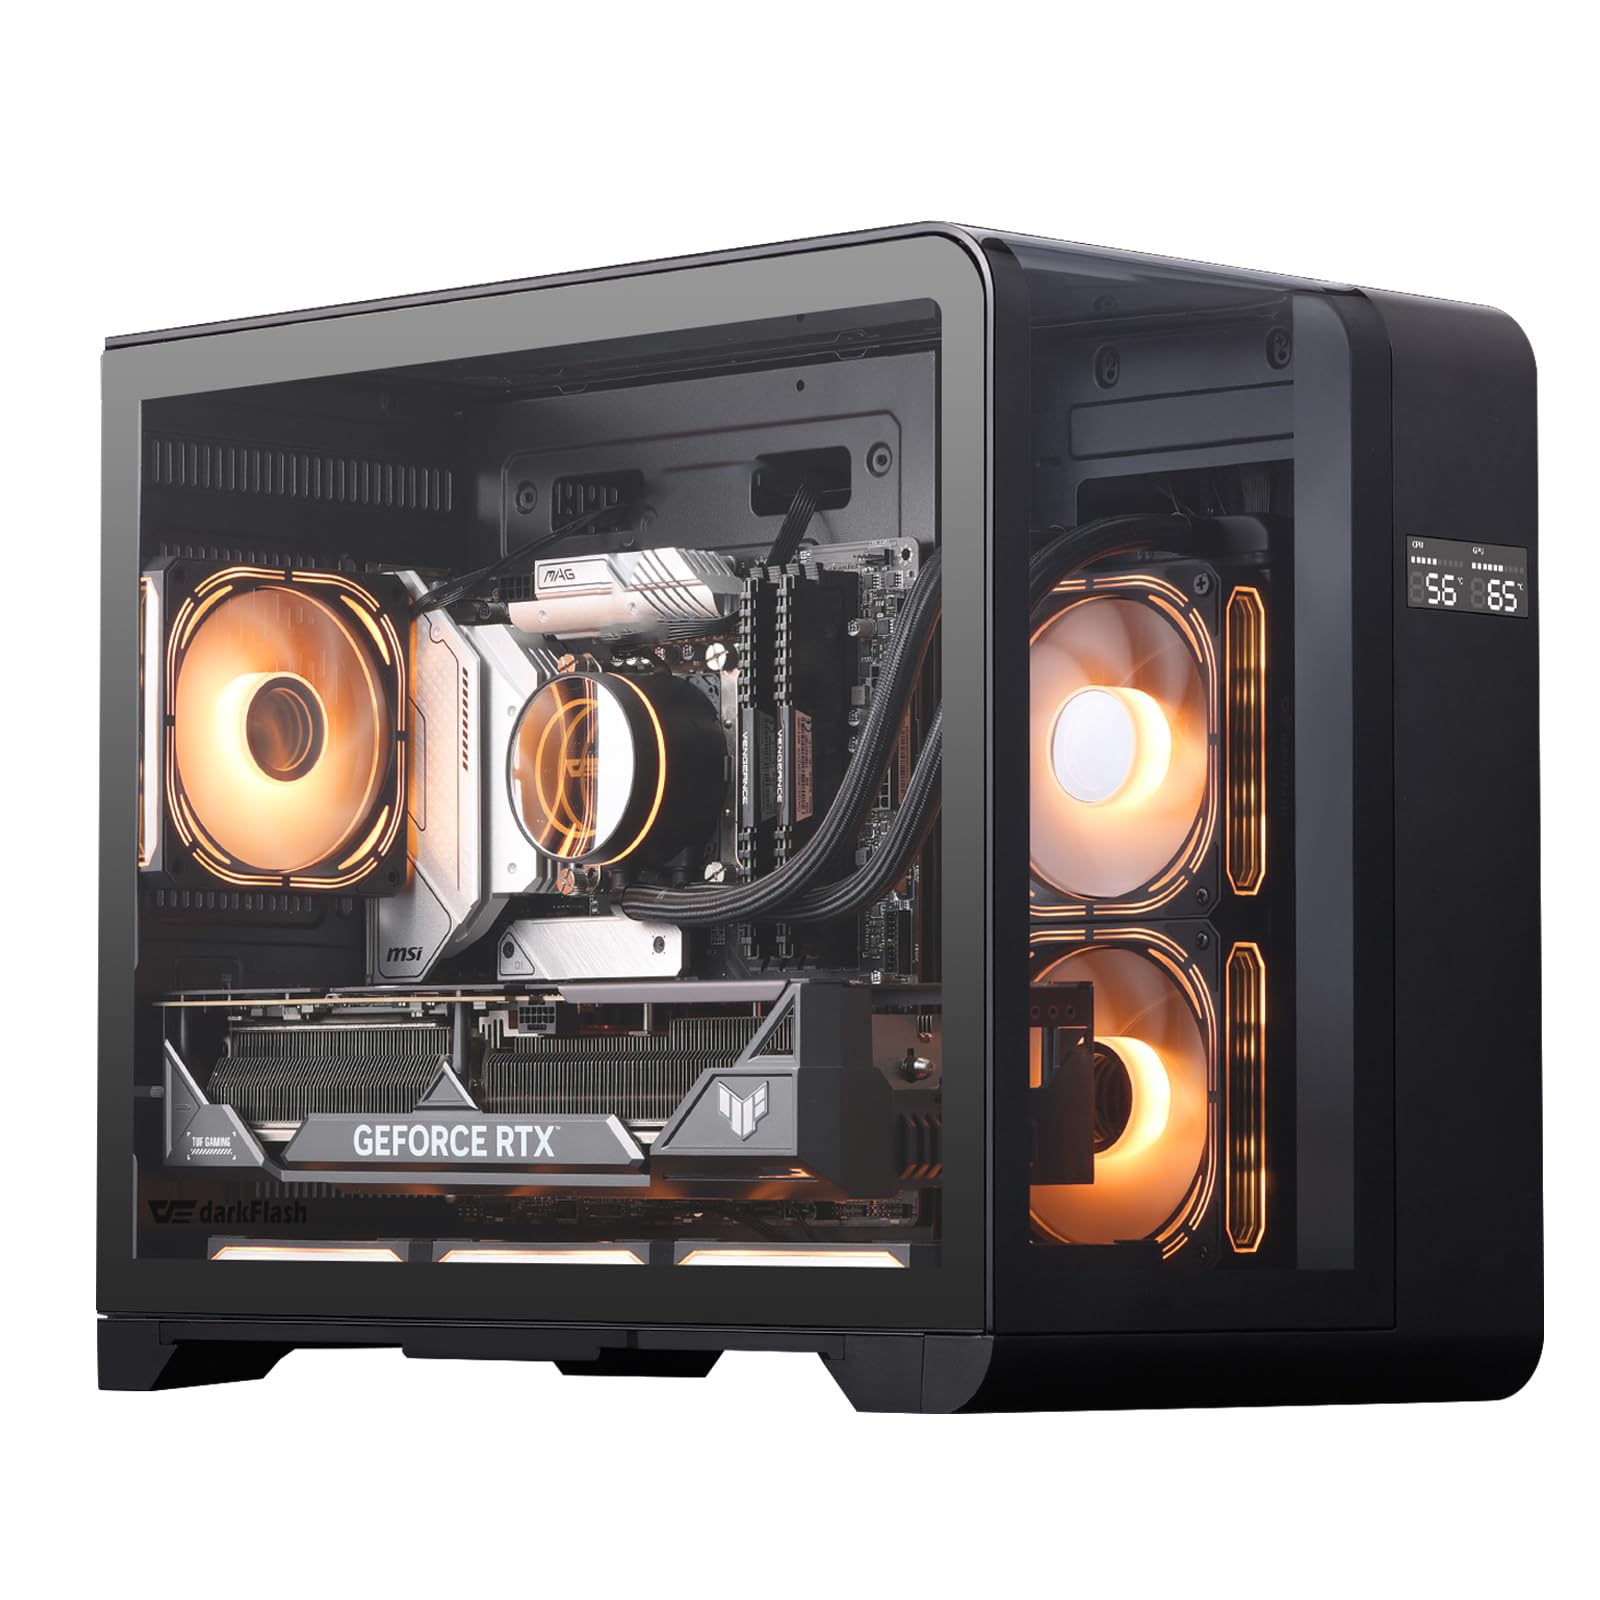
Image 1.1: The darkFlash L280M MATX Gaming PC Case, showcasing its three-sided glass and digital display.
2. Safety Guidelines
- Always disconnect the power supply from the wall outlet before installing or servicing any components inside the PC case.
- Handle tempered glass panels with care. Although durable, they can break if subjected to sharp impacts or excessive force.
- Wear anti-static gloves or use an anti-static wrist strap when handling internal components to prevent electrostatic discharge (ESD) damage.
- Keep small parts and screws away from children.
- Ensure proper ventilation around the PC case to prevent overheating.
3. Package Contents
Verify that all components are present in the package:
- darkFlash L280M MATX PC Case
- 3 x 120mm PWM ARGB Fans (pre-installed)
- Accessory box (containing screws, cable ties, and other small parts)
- User Manual (this document)
4. Setup and Installation
4.1 Preparing the Case
The darkFlash L280M case features removable panels for easy access during installation. Carefully remove the glass side panels and the rear panel to begin component installation.

Image 4.1: The case with its three glass panels and bottom dust filter removed, illustrating access points for component installation.
4.2 Component Installation Guidelines
- Motherboard: The case supports Micro-ATX motherboards. Align the motherboard with the standoffs and secure it with screws.
- CPU Cooler: Accommodates CPU air coolers up to 157mm in height.
- Graphics Card (GPU): Supports GPUs up to 410mm in length.
- Power Supply Unit (PSU): The case supports PSUs up to 200mm in length, mounted at the bottom.
- Radiators: Supports 240mm radiators or two 120mm fans on the side.
- Storage: The chassis supports up to 3 SSDs and 2 HDDs.
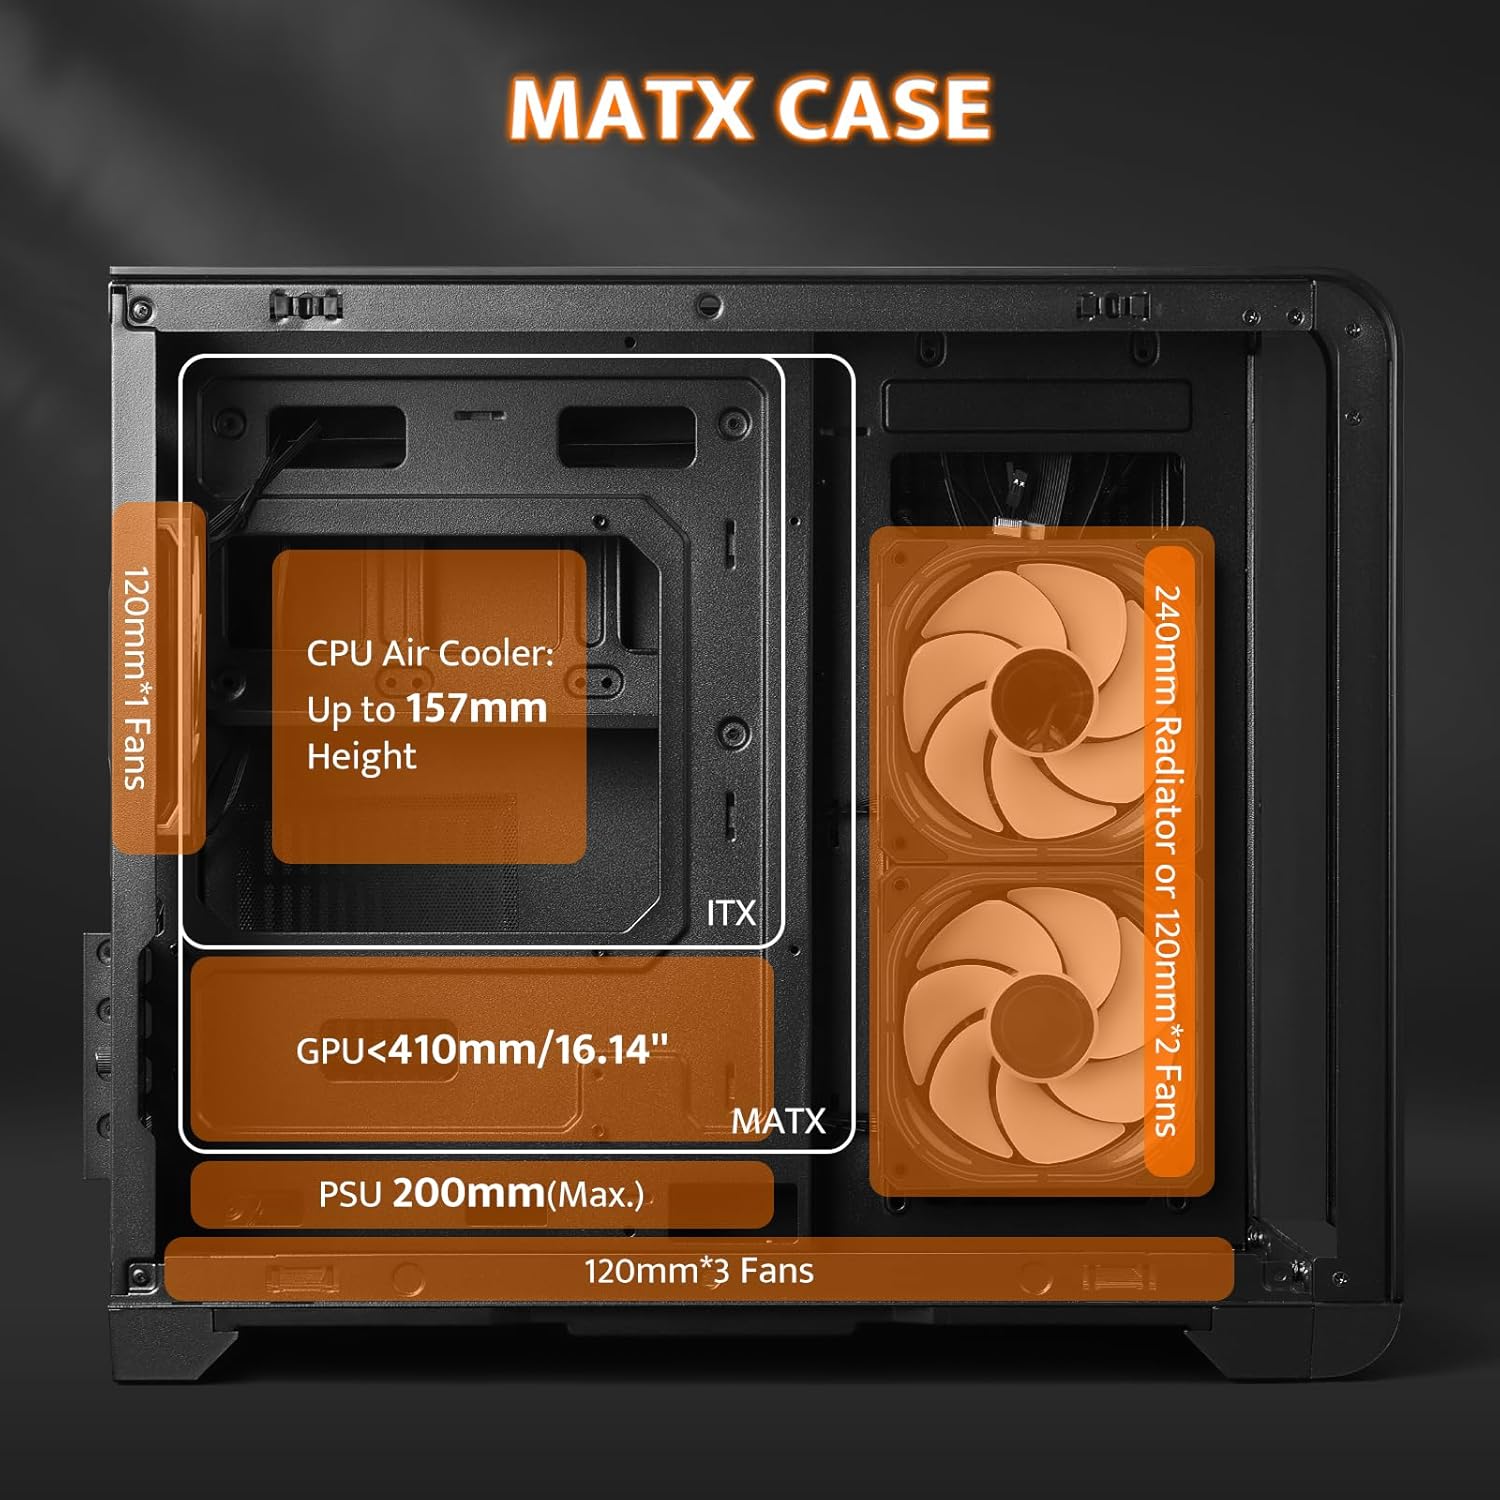
Image 4.2: Internal clearances for various components within the MATX case, including CPU cooler height, GPU length, PSU length, and radiator/fan placement.
4.3 Fan Installation and Cable Management
The case comes with three 120mm PWM ARGB fans pre-installed. Additional fans can be installed as needed. The chassis features a snap-on design and dedicated back positioning holes for efficient cable management, optimizing airflow and stability.
Video 4.3: This video demonstrates the installation of fans and connection of internal cables to the motherboard, including the USB 2.0 header for the digital display.

Image 4.4: An internal view highlighting the back positioning holes for cable management and the drive bays for SSDs and HDDs.
5. Operation
5.1 Digital Display
The integrated digital display provides real-time monitoring of CPU and GPU temperature and usage. To enable this feature, connect the display's USB 2.0 cable to a compatible header on your motherboard. Software installation may be required for full functionality.

Image 5.1: The digital display showing CPU and GPU temperature and usage, along with the USB 2.0 connector required for its operation.
5.2 Front I/O Panel
The front I/O panel provides convenient access to various ports and controls:
- Power Button: To turn the system on or off.
- Reset Button: To restart the system.
- LED Button: Controls the lighting effects of compatible LEDs. Note that this may require a dedicated ARGB hub or controller for full functionality.
- USB 3.0 Ports: For high-speed data transfer.
- USB 2.0 Ports: For standard USB devices.
- Type-C Port: For modern USB-C devices.
- HD Audio Jacks: For headphones and microphones.

Image 5.2: The front I/O panel detailing the power, reset, and LED buttons, along with USB Type-C, USB 3.0, USB 2.0, and HD audio ports.
6. Maintenance
6.1 Dust Filter Cleaning
The case includes a dust filter at the bottom to help prevent dust accumulation inside the system. Regularly clean this filter to maintain optimal airflow and component longevity.
- Gently pull out the dust filter from the bottom of the case.
- Clean the filter using compressed air or by rinsing it with water. Ensure it is completely dry before reinserting.
- Slide the clean filter back into its position.
6.2 General Cleaning
Use a soft, dry cloth to wipe down the exterior of the case. For glass panels, a microfiber cloth and a mild glass cleaner can be used. Avoid abrasive cleaners or solvents.
7. Troubleshooting
7.1 Digital Display Not Functioning
- Ensure the USB 2.0 cable from the display is securely connected to a USB 2.0 header on your motherboard.
- Check the manufacturer's website for any required software or drivers for the digital display. Install any necessary software.
- Verify that the software is running correctly in your operating system.
7.2 LED/ARGB Lighting Issues
- Confirm that the ARGB fan cables are correctly connected to your motherboard's ARGB header or a dedicated ARGB controller/hub.
- The LED button on the front I/O panel may require a compatible 2-pin controller or a fan with a 2-pin interface to function. If your setup uses a different ARGB control method (e.g., motherboard software), the case's LED button might not be active.
- Consult your motherboard manual for ARGB header locations and software control.
7.3 General System Instability/Overheating
- Ensure all fans are spinning correctly and are not obstructed.
- Verify that cables are neatly managed and not impeding airflow.
- Clean dust filters and internal components regularly.
8. Specifications
| Feature | Detail |
|---|---|
| Brand | darkFlash |
| Model Name | L280M |
| Case Type | Midi Tower (Micro ATX) |
| Motherboard Compatibility | Micro ATX |
| Color | Black |
| Material | Metal, Tempered Glass |
| Item Dimensions (D x W x H) | 11.02"D x 16.22"W x 14.96"H |
| Item Weight | 16.5 pounds |
| GPU Clearance | Up to 410mm |
| CPU Cooler Height | Up to 157mm |
| PSU Length | Up to 200mm (Bottom Mount) |
| Radiator Support | 240mm (Side) |
| Pre-installed Fans | 3 x 120mm PWM ARGB Fans |
| Drive Bays | 3 x SSD, 2 x HDD |
| Expansion Slots | 7 |
| Front I/O | 1 x Type-C, 1 x USB 3.0, 2 x USB 2.0, HD Audio, Power, Reset, LED Control |
| Special Features | Built-In Digital Display, Full View Curved Glass, Dust Filter |

Image 8.1: Detailed dimensions of the darkFlash L280M case and pre-installed fan configuration.

Image 8.2: Visual comparison illustrating the size difference between ATX and MATX versions of darkFlash cases.
9. Warranty and Support
9.1 Warranty Information
The darkFlash L280M MATX Gaming PC Case comes with a 1-year warranty from the date of purchase. This warranty covers manufacturing defects and ensures product quality. Please retain your proof of purchase for warranty claims.
9.2 Customer Support
For technical assistance, troubleshooting, or warranty inquiries, please visit the official darkFlash website or contact their customer support. Refer to the product packaging or the official darkFlash website for the most current contact information.


