
1. Introduction
This manual provides essential instructions for the safe assembly, operation, and maintenance of your Rockland 750 LBS Steel Foldable Cargo Carrier. Please read this manual thoroughly before installation and use to ensure proper function and safety.
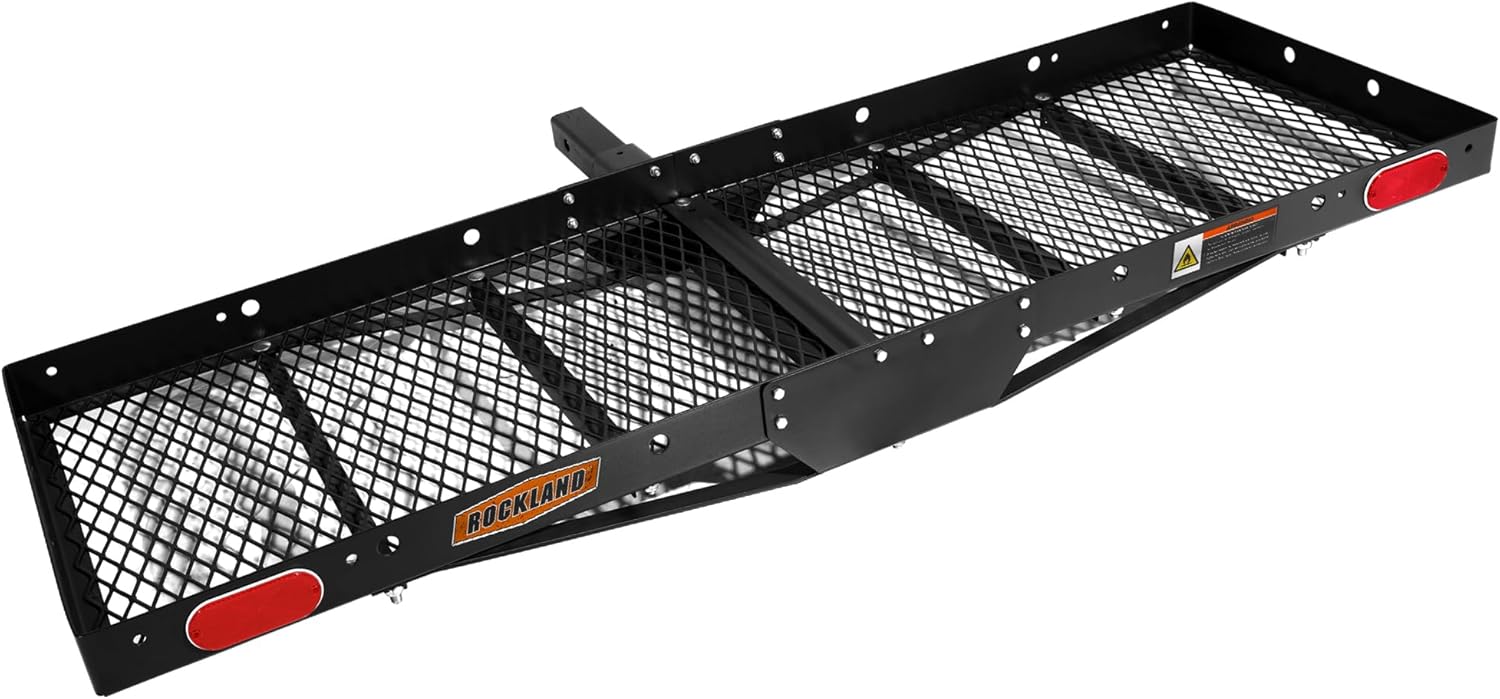
Image 1.1: The Rockland 750 LBS Steel Foldable Cargo Carrier.
2. Safety Information
WARNING: Failure to follow these safety instructions may result in serious injury or property damage.
- Weight Capacity: The maximum weight capacity for this cargo carrier is 750 LBS. However, the actual weight capacity is dependent on your vehicle's hitch class.
- For Class III hitches (500 lbs tongue weight), the capacity is 450 LBS.
- For Class IV hitches (800 lbs tongue weight), the capacity is 750 LBS.
Do not exceed the lowest rated component's capacity (vehicle, hitch, or carrier).
- Hitch Compatibility: This carrier is designed for vehicles with a 2-inch hitch receiver, compatible with Class III and Class IV hitches. Ensure your vehicle's hitch is properly installed and rated for the intended load.
- Secure Loads: Always secure cargo properly using tie-downs, straps, or cargo nets to prevent shifting or falling during transit. Utilize the integrated tie-down holes.
- Visibility: Ensure the cargo carrier and its contents do not obstruct your vehicle's taillights, brake lights, or license plate. The integrated reflectors enhance visibility, especially at night or in low-light conditions.
- Driving Adjustments: Driving with a loaded cargo carrier may affect vehicle handling, braking, and fuel economy. Drive cautiously and adjust speed as necessary.
- Assembly: Follow all assembly instructions carefully. Ensure all bolts and fasteners are tightened securely before use.
- Regular Inspection: Periodically inspect the carrier for any signs of wear, damage, or loose fasteners. Do not use if damaged.
3. Package Contents
Verify that all components are present before beginning assembly:
- Cargo Carrier (main assembly)
- 2 Reflectors
- Assembly Hardware (bolts, nuts, washers, hitch pin, clip) - Note: Specific hardware details may vary, refer to included hardware pack.
4. Setup and Assembly
Assembly is designed to be straightforward. It is recommended to have a second person assist with lifting and positioning the carrier during installation.
- Unpack Components: Carefully remove all parts from the packaging and lay them out on a clean, flat surface.
- Attach Reflectors: Secure the two reflectors to the designated locations on the cargo carrier frame using the provided hardware. Ensure they are facing outwards for maximum visibility.
- Assemble Carrier Sections (if applicable): If the carrier comes in multiple sections, connect them according to the included diagrams, ensuring all bolts are securely fastened. The design features a folding tilt shank.
- Insert into Hitch Receiver: Slide the carrier's hitch shank into your vehicle's 2-inch hitch receiver. Align the hitch pin holes.
- Secure with Hitch Pin: Insert the hitch pin through the aligned holes in the receiver and the carrier shank. Secure it with the provided clip.
- Final Check: Double-check all connections and fasteners to ensure they are tight and secure before loading any cargo.

Image 4.1: The cargo carrier is designed to fit a standard 2-inch hitch receiver without drilling.
5. Operating Instructions
5.1 Loading Cargo
- Distribute weight evenly across the carrier surface.
- Place heavier items towards the center and closer to the vehicle.
- Utilize the integrated tie-down points on the carrier's walls to secure cargo with ropes, bungee cords, or cargo nets.
- Ensure no items protrude excessively from the sides or rear, obstructing visibility or creating a hazard.

Image 5.1: Example of cargo loading on the carrier, demonstrating its 750 LBS capacity.
5.2 Folding Mechanism
The carrier features a folding design for compact storage when not in use. To fold the carrier:
- Ensure the carrier is empty and clear of any obstructions.
- Locate the folding pins or release mechanism (refer to specific diagrams if provided with the product).
- Release the mechanism and carefully fold the carrier upwards towards the vehicle.
- Secure the folded position with the designated locking pin or latch.

Image 5.2: The cargo carrier in its folded position, demonstrating the 90-degree tilt.
6. Maintenance
- Cleaning: Clean the cargo carrier regularly with mild soap and water. Rinse thoroughly and allow to air dry.
- Inspection: Before each use, inspect the carrier for any signs of damage, cracks, bends, or loose components. Pay close attention to welds, bolts, and the hitch connection.
- Rust Prevention: The carrier features a powder coating finish to resist rust and corrosion. If the coating is scratched or damaged, touch up with rust-inhibiting paint to prevent further corrosion.
- Storage: When not in use, store the carrier in a dry place to prolong its lifespan. The folding design allows for more compact storage.

Image 6.1: Detail of the heavy-duty steel construction and powder coating for durability.
7. Troubleshooting
This section addresses common concerns. For issues not listed, contact customer support.
| Problem | Possible Cause | Solution |
|---|---|---|
| Carrier wobbles or rattles during transit. | Loose hitch connection or assembly bolts. | Ensure the hitch pin is fully inserted and secured. Tighten all assembly bolts. Consider using an anti-rattle hitch device (not included). |
| Cargo shifts during transit. | Improperly secured cargo. | Always use appropriate tie-downs, straps, or cargo nets. Distribute weight evenly. |
| Difficulty folding the carrier. | Obstruction or stiff mechanism. | Ensure no cargo is on the carrier. Check for debris in the folding mechanism. Apply a small amount of lubricant to pivot points if stiff. |
8. Specifications
| Feature | Detail |
|---|---|
| Model Number | 10101112 |
| Material | Steel |
| Color | Black |
| Load Capacity | 750 LBS (Class IV hitch), 450 LBS (Class III hitch) |
| Vehicle Hitch Receiver Size | 2 inches (Universal Fit for Class III & IV) |
| Overall Dimensions (L x W x H) | 60 x 20 x 2.5 inches |
| Item Weight | 48.8 pounds |
| Reflectors | Integrated for high visibility |
| Design | Foldable with tilt shank |

Image 8.1: Detailed dimensions of the cargo carrier.
9. Warranty and Support
9.1 Warranty Information
Rockland provides a 1-Year Warranty on this cargo carrier against defects in materials and workmanship under normal use. This warranty does not cover damage due to misuse, improper installation, accidents, or unauthorized modifications. Please retain your proof of purchase for warranty claims.

Image 9.1: Rockland 1-Year Warranty.
9.2 Customer Support
For technical assistance, warranty inquiries, or to order replacement parts, please contact Rockland customer support. Refer to the product packaging or the official Rockland website for the most current contact information.

Image 9.2: Rockland Customer Support.