Introduction
This manual provides comprehensive instructions for the 8Bitdo Ultimate 2 Bluetooth Controller. Designed for enhanced gaming experiences, this controller features TMR Joysticks, switchable Hall Effect/Tactile Triggers, vibration, motion control, RGB Fire Ring, and programmable back buttons. It is compatible with Nintendo Switch/Switch 2 and Windows PC.
Key Features
- TMR Joysticks: Featuring market-leading TMR joysticks, offering higher sensitivity, greater precision, and enhanced durability.

Image: TMR Joysticks with blue illumination, highlighting their precision and durability.
- Switchable Triggers: Easily switch between linear Hall Effect triggers and non-linear tactile triggers for optimal control across different gaming scenarios.

Image: Trigger mode switch on the side of the controller, allowing selection between Hall Effect and tactile feedback.
- Extra Bumpers (R4 and L4 buttons): Remappable Fast Bumpers are designed for personalized configuration to help you react faster in games. No software required for basic remapping.

Image: Rear view of the controller, showing the additional R4 and L4 bumper buttons for custom assignments.
- RGB Fire Ring: Fun and interactive. Adjust between multiple light modes. Interactive Light-tracing provides enhanced real-time visual effects while gaming.
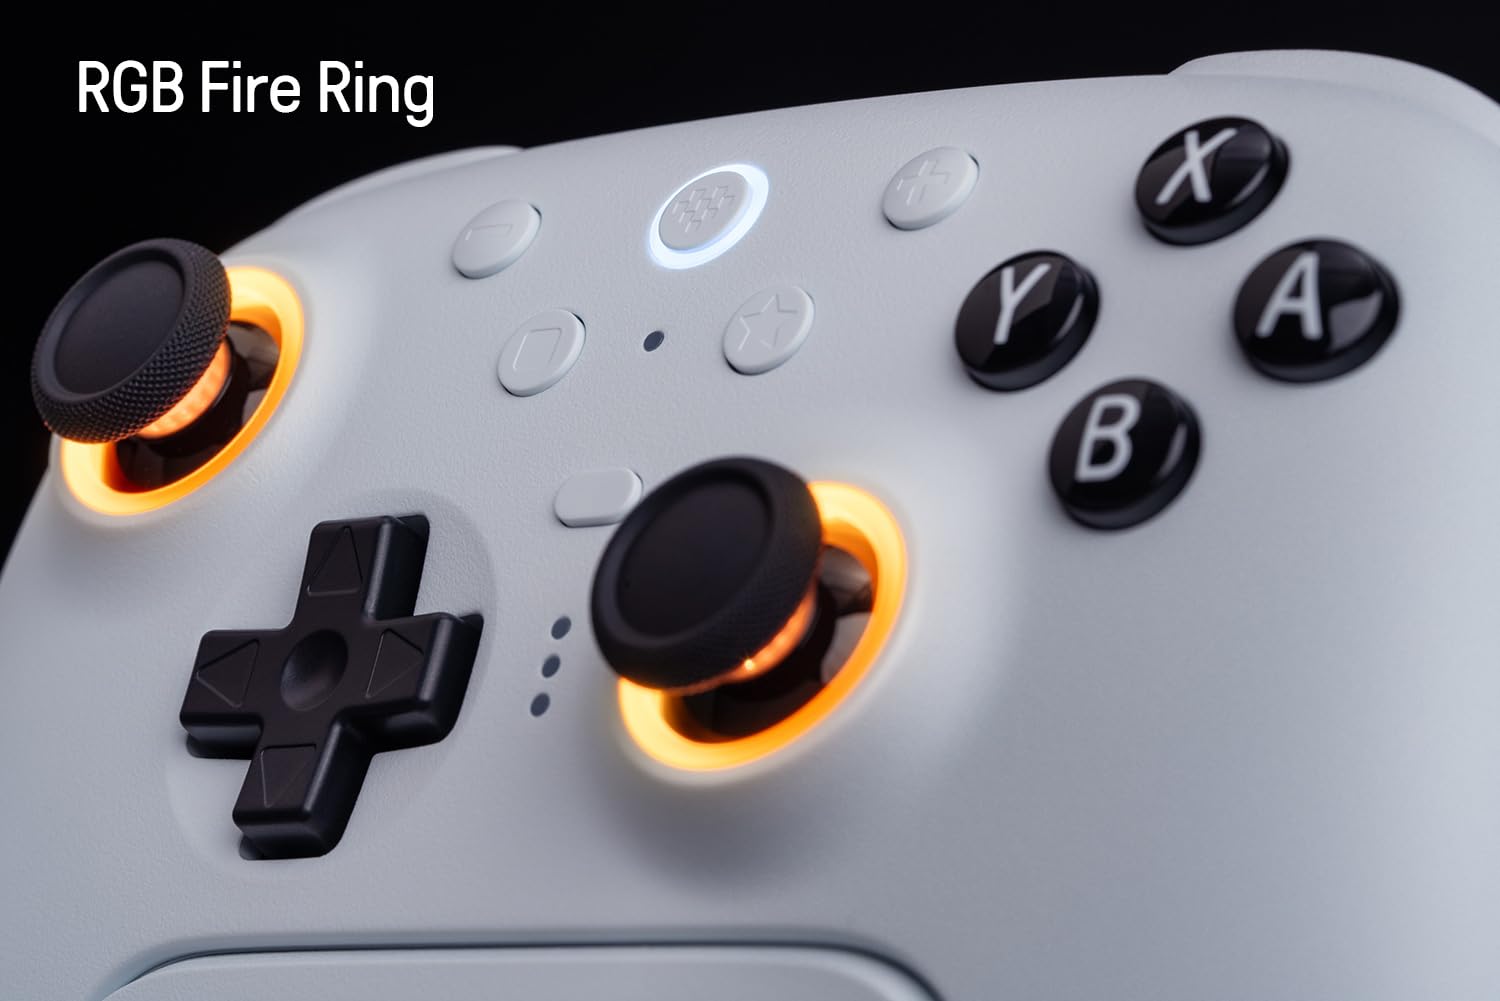
Image: The controller's joysticks with customizable RGB lighting, offering various visual effects.
- 8BitDo Ultimate Software V2: Provides elite control over every piece of your controller. Customize button mapping, adjust joystick & trigger sensitivity, vibration control, and create macros with any button combination. Create controller profiles and switch between them at any time with the custom profile switch button. (Connect the controller to the Ultimate Software using a wired USB or 2.4G connection on Windows or macOS.)
- Integrated Charging Dock: A seamlessly integrated charging dock keeps your controller always charged and ready to play. Automatically reconnects when removed from the dock.

Image: The controller docked in its charging station, ready for use.
- Wake-on-shake: (Not supported on Switch 2)
- Motion Control: (For Switch only)

Image: Controller in use with a Nintendo Switch, demonstrating motion control capability.
- USB-C Adapter: For uninterrupted 2.4G connection.
- Tactile bumpers and D-pad.
- Turbo function.
- Vibration.
Setup
1. Initial Charging
Before first use, fully charge the controller using the included USB-C cable or by placing it on the charging dock. The LED indicators on the controller will show charging status.
2. Connecting to Nintendo Switch/Switch 2
The controller supports Bluetooth and 2.4G wireless connections for Nintendo Switch. For Switch 2 compatibility, ensure both the controller and adapter are updated to the latest firmware.
- Bluetooth Connection:
- On your Switch, go to System Settings > Controllers and Sensors > Disconnect Controllers.
- Hold the Pair button on the top of the 8Bitdo controller until the LEDs start flashing.
- On your Switch, select "Change Grip/Order" and wait for the controller to appear and connect.
- 2.4G Wireless Connection:
- Insert the 2.4G USB-C adapter into a free USB port on your Switch dock or directly into the Switch via a USB-C to USB-A adapter (if needed).
- Turn on the controller. It should automatically connect to the adapter.
3. Connecting to Windows PC
The controller supports Bluetooth, 2.4G wireless, and wired USB connections for Windows PC.
- Bluetooth Connection:
- On your PC, go to Bluetooth & other devices settings and turn on Bluetooth.
- Hold the Pair button on the top of the 8Bitdo controller until the LEDs start flashing.
- Select "Add Bluetooth or other device" and choose "Bluetooth". Select "8Bitdo Ultimate 2" from the list.
- 2.4G Wireless Connection:
- Insert the 2.4G USB-C adapter into a free USB port on your PC.
- Turn on the controller. It should automatically connect to the adapter.
- Wired USB Connection:
- Connect the controller to your PC using the included USB-C cable.
- The controller will be recognized automatically.
4. Firmware Update
It is highly recommended to update the controller's firmware to the latest version for optimal performance and compatibility, especially for Switch 2. Visit the official 8Bitdo support website for the latest firmware and update instructions.
Image: The controller is compatible with Switch 2, but requires a firmware update.
Operating Instructions
1. Button Layout
Familiarize yourself with the controller's button layout:
- Left Analog Stick (L3 when pressed)
- D-Pad
- Right Analog Stick (R3 when pressed)
- A, B, X, Y Buttons
- L1, R1 Bumpers
- L2, R2 Triggers (Switchable Hall Effect/Tactile)
- R4, L4 Back Buttons (Programmable)
- Home Button
- Select/Minus Button
- Start/Plus Button
- Star Button (Profile Switch)
- Pair Button (Top)
- USB-C Port (Top)
- Mode Switch (Bottom)
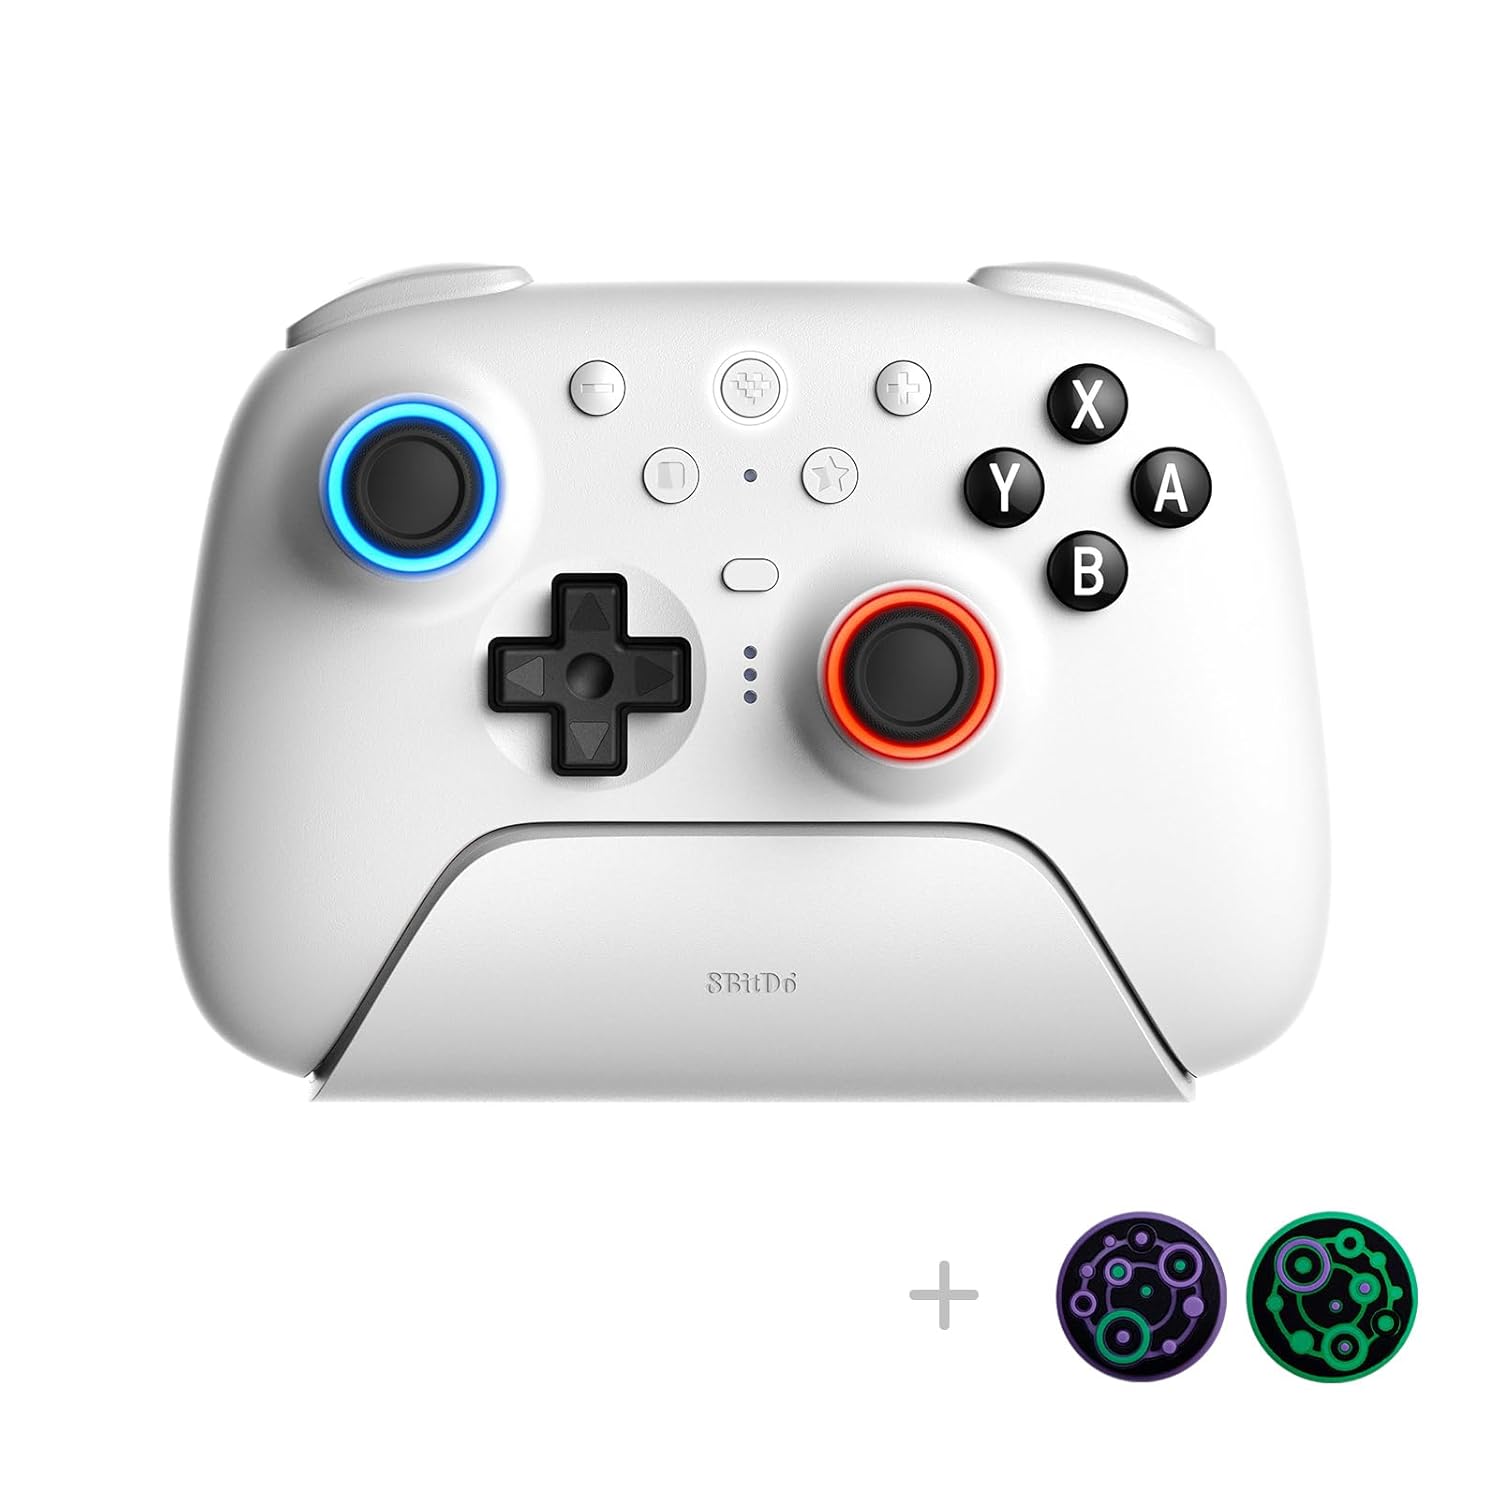
Image: Front view of the controller, illustrating the standard button layout.

Image: Back view of the controller, showing the programmable back buttons and the mode switch.
2. Switching Modes
The controller features a physical switch on the bottom to select between different connection modes (Bluetooth, 2.4G, Wired). Ensure the correct mode is selected for your desired device.
3. Using 8BitDo Ultimate Software V2
For advanced customization, download the 8BitDo Ultimate Software V2 from the official 8Bitdo website. Connect your controller via wired USB or 2.4G to access features such as:
- Custom button remapping.
- Adjusting joystick and trigger sensitivity.
- Vibration intensity control.
- Creating and assigning macros.
- Managing multiple controller profiles.
4. RGB Fire Ring Customization
The RGB Fire Ring around the joysticks can be customized. Use the 8BitDo Ultimate Software V2 to select from various lighting modes, including Fire Ring Mode, Light-tracing Mode, and Rainbow Ring Mode.
5. Programmable Back Buttons (R4, L4)
The R4 and L4 buttons on the back of the controller can be remapped to other buttons for quick access during gameplay. This can be done directly on the controller or through the Ultimate Software for more complex configurations.
6. Turbo Function
Activate the Turbo function for rapid button presses. Refer to the detailed instructions within the Ultimate Software or the quick start guide for specific button combinations to enable/disable Turbo for individual buttons.
Maintenance
1. Charging
Always charge the controller using the provided charging dock or USB-C cable. Avoid using third-party chargers that do not meet the specified voltage and current requirements.
2. Cleaning
Wipe the controller with a soft, dry cloth. For stubborn dirt, a slightly damp cloth can be used, but ensure no moisture enters the ports or button crevices. Do not use harsh chemicals or abrasive cleaners.
3. Storage
Store the controller in a cool, dry place away from direct sunlight and extreme temperatures. When not in use for extended periods, it is advisable to fully charge the controller before storage to maintain battery health.
Troubleshooting
- Controller not connecting:
- Ensure the controller is charged.
- Verify the mode switch on the bottom of the controller is set correctly (Bluetooth, 2.4G, or Wired).
- For Bluetooth, ensure your device's Bluetooth is on and the controller is in pairing mode.
- For 2.4G, ensure the USB-C adapter is properly inserted and the controller is in 2.4G mode.
- Try restarting both the controller and the host device (Switch/PC).
- Input lag or disconnections:
- Ensure there are no strong wireless interferences nearby (e.g., other 2.4GHz devices).
- Move closer to the host device or 2.4G adapter.
- Update the controller firmware to the latest version.
- Joystick drift:
The 8Bitdo Ultimate 2 controller features TMR Joysticks, which are designed to significantly reduce or eliminate joystick drift. If you experience any issues, ensure the controller firmware is up to date. If problems persist, contact customer support.
- Buttons not responding:
- Check if the controller is properly connected.
- Test buttons using the 8BitDo Ultimate Software V2 to diagnose hardware issues.
- Ensure no debris is lodged under the buttons.
- Firmware update issues:
- Ensure a stable internet connection.
- Connect the controller directly to your PC via USB for firmware updates.
- Follow the instructions provided by the 8Bitdo firmware update tool precisely.
Specifications
| Feature | Detail |
|---|---|
| Model | Ultimate 2 Bluetooth White |
| Compatibility | Nintendo Switch/Switch 2, Windows PC |
| Connectivity | Bluetooth, 2.4G Wireless (with USB-C adapter), Wired USB |
| Joysticks | TMR Joysticks (Hall Effect) |
| Triggers | Switchable Hall Effect / Tactile |
| Special Features | RGB Fire Ring, Programmable Back Buttons (R4, L4), Motion Control (Switch only), Turbo Function, Vibration, Integrated Charging Dock, 8BitDo Ultimate Software V2 support |
| Power Source | 1 Lithium Polymer battery (included) |
| Item Weight | 1.39 pounds |
| Package Dimensions | 6.5 x 5.39 x 3.35 inches |
| Manufacturer | 8BitDo |
| Country of Origin | China |
Warranty and Support
8Bitdo products come with a standard manufacturer's warranty. For detailed warranty information, technical support, or service inquiries, please visit the official 8Bitdo support website or contact their customer service directly. Keep your proof of purchase for warranty claims.
Official 8Bitdo Website: www.8bitdo.com


