
1. Introduction
This manual provides detailed instructions for the assembly, operation, maintenance, and troubleshooting of your ANKROYU TE-804 PCB Soldering Holder. Please read this manual thoroughly before using the product to ensure safe and efficient operation. This tool is designed to assist with precise positioning and magnification during PCB soldering and repair tasks.
2. Safety Information
- Always ensure the workbench is stable on a flat, non-slip surface before use.
- Avoid direct exposure to excessive heat, as this can compromise the integrity and functionality of the tool.
- While the electrified columns are insulated for safe clamping during debugging, avoid direct contact with solder joints or live circuit lines to prevent potential damage to the PCB or tool.
- Keep the magnifier lens clean and free from debris to maintain clear vision.
- Store the tool in a dry, cool place away from direct sunlight when not in use.
3. Package Contents
Verify that all components are present in the package:
- 1 x Workbench
- 2 x Spring Clips (with universal tubes)
- 1 x Magnifier (with conversion tube)
- 4 x Fixed Columns (2 red, 2 blue)
4. Product Overview and Components
Familiarize yourself with the main parts of the ANKROYU TE-804 PCB Soldering Holder:

Figure 1: Component Diagram of the Soldering Holder. This image labels the Workbench, Magnifier, Conversion tube, Universal tube, Spring Clip, Fixed column, and the Strong magnetic base, illustrating the overall structure of the device.
- Workbench: The main steel base plate (approx. 210 x 145 x 12mm) with a plastic-sprayed finish, providing a stable platform. Features a strong magnetic base for attaching components.
- Spring Clips: Two adjustable clips mounted on universal tubes, designed to securely hold PCBs or other small components.
- Magnifier: A 3x magnification optical lens (approx. 62mm diameter) attached to a flexible conversion tube for detailed inspection of workpieces.
- Fixed Columns: Four magnetic columns (two red, two blue) with a two-color electrochemical treatment. These columns provide additional support and can hold PCBs with thicknesses between 0.2mm and 2mm. The red and blue columns attract each other for stable clamping.
5. Setup Instructions
- Unpack Components: Carefully remove all items from the packaging and verify against the "Package Contents" list.
- Position Workbench: Place the workbench on a clean, stable, and level surface.
- Attach Flexible Arms: Insert the universal tubes (with spring clips) and the conversion tube (with magnifier) into the designated holes on the workbench. The magnetic base will secure them in place. Adjust their positions as needed.
- Prepare Fixed Columns: The red and blue fixed columns are magnetic. They can be placed anywhere on the workbench to provide additional support or to clamp smaller PCBs.

Figure 2: Workbench Dimensions. This image provides the physical dimensions of the workbench (210mm x 145mm) and the magnifier's diameter (62mm), aiding in understanding the tool's footprint.
6. Operating Instructions
- Securing the PCB:
- Use the spring clips to hold the PCB. Adjust the flexible universal tubes to position the clips at the desired angle and height.
- For smaller or irregularly shaped PCBs, utilize the magnetic fixed columns. Place two columns on either side of the PCB. The red and blue columns are designed to attract each other, providing a stable clamp. Ensure the PCB thickness is between 0.2mm and 2mm for optimal fit.

Figure 3: PCB Placement Example. This image demonstrates how to securely position a circuit board using both the spring clips and the magnetic fixed columns on the workbench, with the magnifier ready for use.
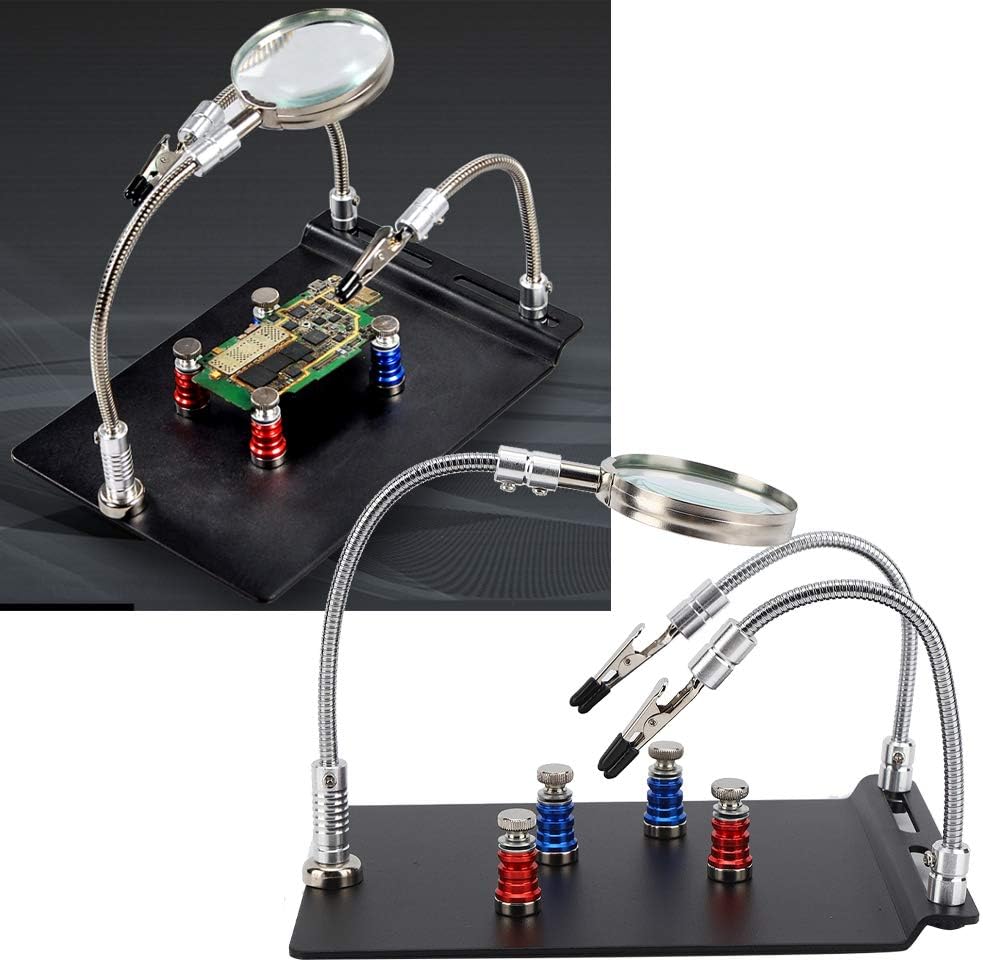
Figure 4: Fixed Column Clamping. A detailed view showing a small circuit board held between a red and a blue magnetic fixed column, highlighting their effective attraction for stable positioning. An inset diagram illustrates the precise clamping of thin boards.
- Using the Magnifier: Adjust the flexible conversion tube to position the magnifier lens directly over your work area. The 3x magnification will provide a clear, enlarged view for intricate soldering or inspection tasks.
- Performing Work: With the PCB securely held and magnified, you can proceed with soldering, inspection, or repair tasks.
7. Maintenance
- Cleaning:
- Wipe the workbench and metal components with a dry or slightly damp cloth. Avoid abrasive cleaners.
- Clean the magnifier lens with a soft, lint-free cloth specifically designed for optical surfaces. Do not use harsh chemicals.
- Storage: Store the unit in a clean, dry environment away from direct sunlight and extreme temperatures.
- Inspection: Periodically check all flexible arms and clips for any signs of wear or damage. Ensure magnetic components retain their strength.
8. Troubleshooting
| Problem | Possible Cause | Solution |
|---|---|---|
| PCB not held securely by fixed columns. | PCB thickness outside 0.2-2mm range; columns not properly aligned. | Ensure PCB thickness is within the specified range. Reposition columns to ensure proper magnetic attraction and clamping. |
| Magnifier view is blurry or unclear. | Lens is dirty; magnifier is not positioned correctly. | Clean the magnifier lens with a soft, lint-free cloth. Adjust the flexible arm to bring the lens into optimal focus with your workpiece. |
| Flexible arms do not hold position. | Loose connection at the base; excessive weight on the arm. | Ensure the flexible arm is fully inserted and seated in its magnetic base. Avoid placing heavy objects on the arms. |
9. Specifications
| Model | TE-804 |
| Material | Steel (Workbench), Acrylic Optical Lens (Magnifier) |
| Workbench Size | Approx. 210 x 145 x 12mm (8.3 x 5.7 x 0.5in) |
| Magnifier Diameter | Approx. 62mm (2.4in) |
| Magnification | x3 |
| Supported PCB Thickness | 0.2 – 2mm (0.008 – 0.08in) |
| Item Weight | Approx. 1.99 pounds |
10. Warranty and Support
ANKROYU products are manufactured to high-quality standards. For any questions regarding product operation, maintenance, or potential issues not covered in this manual, please contact ANKROYU customer support. Please refer to your purchase documentation for specific warranty terms and contact information.
You can visit the ANKROYU store for more information: ANKROYU Store