1. Introduction
The MiBOXER TRI-C1WR is a versatile AC Triac Dimmer designed for controlling dimmable LED lighting systems. It offers multiple control options including WiFi, 2.4G RF, and traditional push-button functionality. This manual provides detailed instructions for installation, operation, and maintenance to ensure optimal performance and safety.
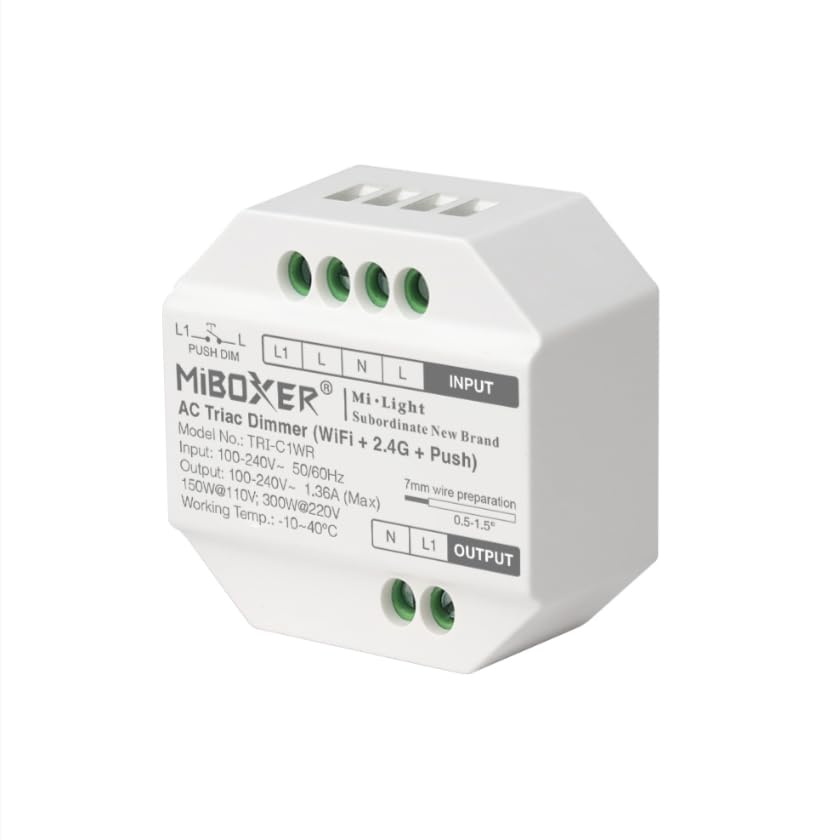
Image: Front view of the MiBOXER TRI-C1WR AC Triac Dimmer, showing input/output terminals and model information.
2. Key Features
- Triac Dimming: Ensures smooth and flicker-free dimming for dimmable LED lights and other compatible fixtures.
- Multiple Control Options: Operate via smartphone app for remote access and smart home integration (WiFi Control). Compatible with Miboxer remotes for wireless control up to 30 meters (2.4GHz RF Wireless). Manual control with a standard wall switch (Push-Button).
- Wide Voltage Range: Supports 100-240V AC input for universal compatibility.
- Smart Home Ready: Works with Amazon Alexa and Google Assistant for voice-controlled lighting.
- Precision Dimming: Adjust brightness levels from 0-100% without flicker or delay.
- Compact Design: Easy to install and suitable for various lighting environments.
- High Power Output: Supports up to 400W load, depending on the type of lighting.
- Durable Construction: Made from high-quality, fire-resistant materials for added safety.
- Energy Efficient: Designed for optimal performance with minimal energy waste.
3. Specifications
| Parameter | Value |
|---|---|
| Product Dimensions | 2 x 1 x 2 inches; 2.08 ounces |
| Operation Mode | ON-OFF |
| Current Rating | 1.36 Amps |
| Operating Voltage | AC 100-240V |
| Contact Type | Normally Closed |
| Connector Type | Plug In |
| Terminal | Through Hole |
| Circuit Type | 1-way |
| Contact Material | Metal |
| Manufacturer | Miboxer |
4. Package Contents
- 1 x MiBOXER TRI-C1WR AC Triac Dimmer
5. Safety Information
- Always disconnect power at the circuit breaker before installing or servicing the dimmer.
- Installation should be performed by a qualified electrician or in accordance with local electrical codes.
- Do not exceed the maximum load rating of 400W.
- Ensure all wire connections are secure and properly insulated.
- This device is designed for indoor use only.
- Do not use with non-dimmable light sources.

Image: Illustration of trailing edge (ELV) phase-cut technology and overheat/load protection features of the dimmer.
6. Installation
6.1 Wiring Diagram
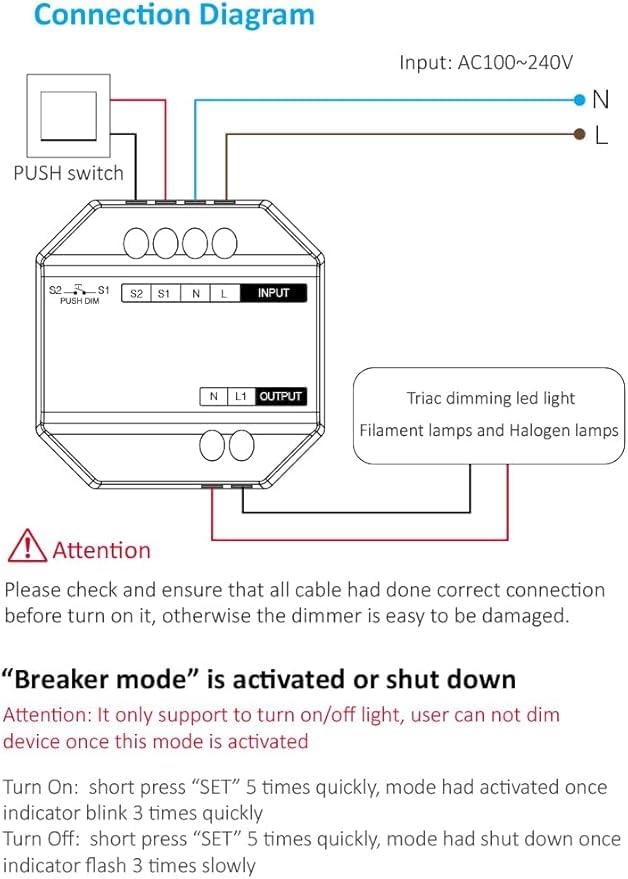
Image: Detailed connection diagram showing input (AC100~240V L and N), output (N and L1 to Triac dimming LED light), and push switch connections (S1, S2, L1, L).
6.2 Wiring Instructions
- Power Off: Before starting, ensure the main power supply to the circuit is turned off at the circuit breaker.
- Input Connection: Connect the AC 100-240V Live (L) and Neutral (N) wires to the corresponding "INPUT" terminals on the dimmer.
- Output Connection: Connect the Neutral (N) and Live (L1) wires from the dimmer's "OUTPUT" terminals to your dimmable LED light or compatible fixture.
- Push Switch Connection (Optional): For push-button control, connect your push switch to the S1 and S2 terminals. The L1 and L terminals are also available for push dimming.
- Secure Connections: Ensure all wires are stripped approximately 7mm and securely fastened into their respective terminals.
- Power On: Once all connections are verified and secure, restore power at the circuit breaker.
Attention: Please check and ensure that all cables are correctly connected before turning on the power. Incorrect wiring can damage the dimmer.
7. Operation
7.1 Control Methods
- WiFi Control: Use the MiBOXER or Tuya Smart app on your smartphone for remote control, scheduling, and smart home integration.
- 2.4GHz RF Wireless Control: Compatible with MiBOXER 2.4G RF remotes (sold separately) for wireless dimming and control within a range of up to 30 meters.
- Push-Button Control: A momentary push switch can be used for basic ON/OFF and dimming functions.

Image: Overview of control options, including Tuya Smart app interface for brightness adjustment, stepless dimming via remote, and push dimming functionality.
7.2 Breaker Mode
The dimmer features a "Breaker Mode" which allows it to function purely as an ON/OFF switch, disabling dimming capabilities. This mode is useful for specific applications where only switching is required.
- Activate Breaker Mode: Short press the "SET" button 5 times quickly. The indicator will blink 3 times quickly to confirm activation.
- Deactivate Breaker Mode: Short press the "SET" button 5 times quickly again. The indicator will flash 3 times slowly to confirm deactivation.
Attention: In Breaker Mode, the device only supports turning the light ON/OFF. Dimming functionality is disabled.

Image: Visual representation of Breaker Mode, showing a light fixture and a smartphone interface with an ON/OFF toggle, indicating that dimming is not available in this mode.
8. Maintenance
- Clean the dimmer with a soft, dry cloth. Do not use abrasive cleaners or solvents.
- Ensure proper ventilation around the dimmer to prevent overheating.
- Regularly check wiring connections for tightness, especially after initial installation.
- If the dimmer is not functioning correctly, refer to the troubleshooting section before attempting any repairs.
9. Troubleshooting
| Problem | Possible Cause | Solution |
|---|---|---|
| Light does not turn on. | No power, incorrect wiring, faulty bulb, dimmer in Breaker Mode (OFF). | Check circuit breaker. Verify wiring connections. Replace bulb. Check Breaker Mode status. |
| Light does not dim. | Non-dimmable bulb, dimmer in Breaker Mode, incorrect dimmer settings, incompatible load. | Ensure dimmable bulbs are used. Deactivate Breaker Mode. Check app settings. Verify load compatibility. |
| Flickering lights. | Incompatible bulb, minimum load not met, loose wiring. | Use compatible dimmable LED bulbs. Ensure total load meets minimum requirements. Check wiring. |
| Dimmer not responding to WiFi/RF. | Out of range, network issue, pairing issue. | Ensure dimmer is within WiFi/RF range. Check router/network. Re-pair the device with the app or remote. |
10. Warranty and Support
The MiBOXER TRI-C1WR AC Triac Dimmer comes with a standard manufacturer's warranty. For specific warranty details, please refer to the product packaging or contact MiBOXER customer support.
For technical assistance, troubleshooting, or further inquiries, please visit the official MiBOXER website or contact their customer service department.
Manufacturer: Miboxer
Date First Available: December 5, 2024


