
Sekey 4-Tier Mini Greenhouse
Sekey 4-Tier Mini Greenhouse Instruction Manual
Model: 4-Tier Mini Greenhouse
1. Introduction
Thank you for choosing the Sekey 4-Tier Mini Greenhouse. This manual provides essential information for the safe assembly, operation, and maintenance of your new greenhouse. Please read these instructions thoroughly before use and retain them for future reference.
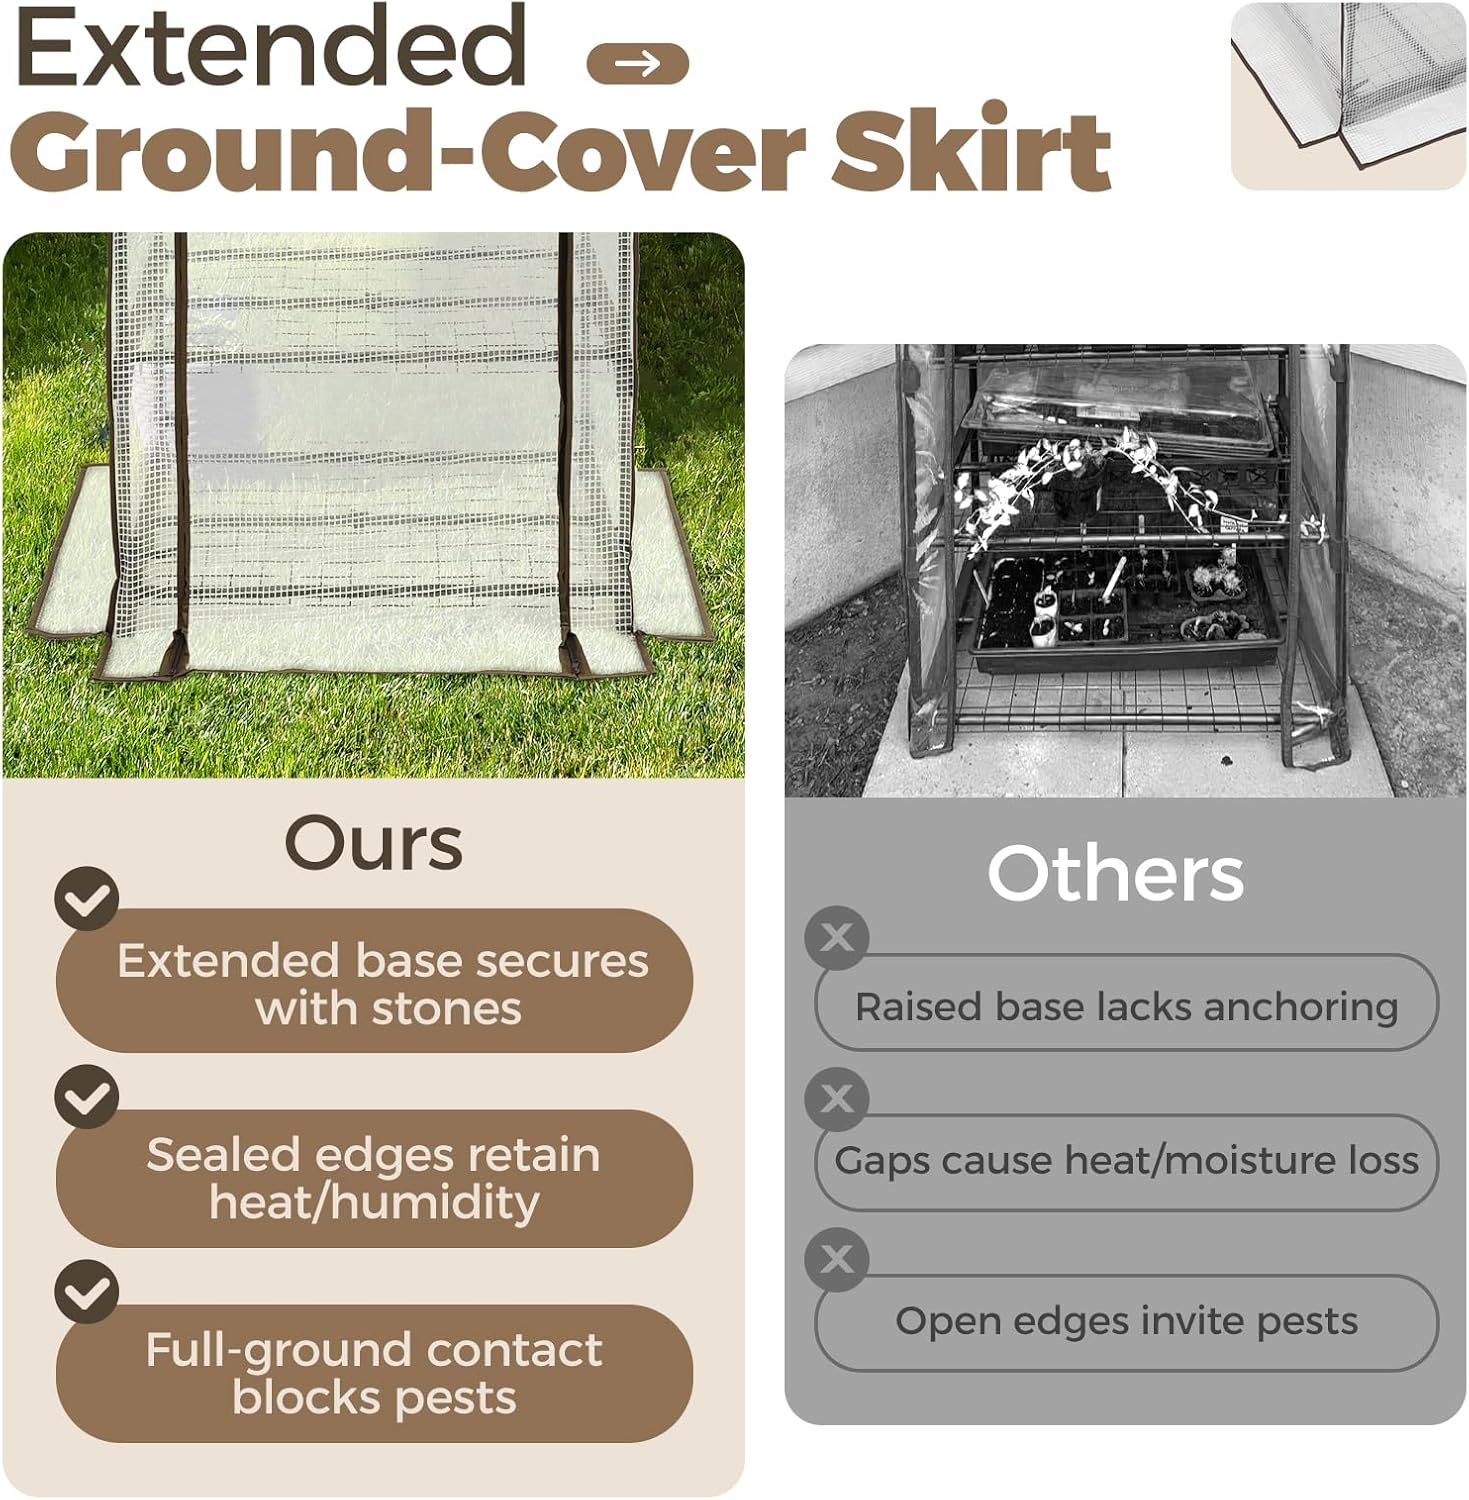
Image 1.1: Fully assembled Sekey 4-Tier Mini Greenhouse, showcasing its compact design and capacity for various plants.
2. Safety Information
WARNING: Failure to follow these safety instructions may result in injury or damage to the product.
- Always assemble and disassemble with care to avoid injury from sharp edges and heavy components.
- Ensure the greenhouse is properly anchored to prevent it from being blown over in strong winds. Use the integrated adjustable straps and weighted skirt for ground seal.
- Keep children and pets away from the greenhouse when in use, especially during assembly or when handling plants and tools.
- Always follow local regulations and building codes for greenhouse installation and maintenance.
- Do not overload shelves. Each shelf can hold up to 22 pounds (10 kg).
3. Package Contents
Before assembly, verify that all components listed below are present and undamaged. If any parts are missing or damaged, please contact Sekey customer support.

Image 3.1: Exploded view of the greenhouse components, including frame tubes, connectors, shelves, and the transparent cover.
Components List:
- Top Frame Arches (x2)
- Horizontal Tubes (x10)
- Vertical Tubes (x16)
- Base Frame Pieces (x4)
- Plastic Connectors (various types, x12)
- Wire Shelves (x4)
- Waterproof PE Cover (x1)
4. Assembly Instructions
The Sekey Mini Greenhouse is designed for easy assembly without the need for additional tools. Follow these steps:
- Prepare the Area: Choose a flat, stable surface for assembly. Ensure adequate space around the greenhouse for access.
- Assemble the Base Frame: Connect the base frame pieces using the appropriate plastic connectors.
- Install Vertical Supports: Insert the vertical tubes into the base frame connectors.
- Add Shelves: Slide the wire shelves onto the vertical supports at desired heights. Ensure they are level and secure.
- Construct Upper Frame: Attach the remaining horizontal and vertical tubes, forming the upper structure and roof arches.
- Drape the Cover: Carefully place the waterproof PE cover over the assembled frame. Ensure the zippers are aligned with the front opening.
- Secure the Cover: Fasten the integrated adjustable straps to the frame for a snug fit. Ensure the extended ground-cover skirt is spread out around the base.
- Anchor the Greenhouse: Place heavy objects (e.g., stones, bricks) on the extended ground-cover skirt to secure the greenhouse against wind and drafts. This also helps retain heat and humidity and blocks pests.

Image 4.1: Detail of the extended ground-cover skirt, designed to be secured with weights for stability and improved insulation.

Image 4.2: Illustration of the sturdy design features, including reinforced coated steel tubes and secure plastic-to-steel joints.
5. Operating Instructions
5.1 Plant Placement and Shelf Adjustment
The 4-tier design allows for organized plant placement. Shelves can be adjusted or removed to accommodate plants of varying heights as they grow.

Image 5.1: Examples of shelf configurations to support plant growth at different stages.
5.2 Ventilation and Temperature Control
The roll-up door provides essential ventilation. Open the door during warmer periods to prevent overheating and ensure air circulation. Close it to retain heat and humidity, especially during cooler temperatures or at night.
Image 5.2: The roll-up door can be secured open for ventilation or zipped closed for warmth.
5.3 Seasonal Use
The greenhouse offers protection for plants across seasons. It can provide shade from intense summer heat and shield plants from frost during colder months.

Image 5.3: The greenhouse adapts to different weather conditions, offering protection from both heat and frost.

Image 5.4: The greenhouse can be used indoors to protect plants during colder seasons.
6. Maintenance
- Cleaning the Cover: Regularly wipe down the PE cover with a damp cloth to remove dust, dirt, and algae buildup. Avoid abrasive cleaners that could damage the material.
- Frame Inspection: Periodically check the metal frame and plastic connectors for any signs of wear, rust, or damage. Replace any compromised parts to maintain structural integrity.
- Zipper Care: Keep the zipper clean and free of debris. Lubricate with a silicone-based spray if it becomes stiff.
- Anchoring Check: Ensure the greenhouse remains securely anchored, especially after strong winds or heavy rain. Re-adjust weights on the ground-cover skirt as needed.
- Seasonal Storage: If storing the greenhouse for an extended period, clean all components thoroughly, disassemble if desired, and store in a dry, protected area away from direct sunlight.

Image 6.1: The durable PE cover is designed to be UV-resistant and tear-proof, requiring minimal maintenance.
7. Troubleshooting
- Greenhouse Instability: If the greenhouse feels unstable, ensure it is placed on a level surface and that the ground-cover skirt is fully extended and weighted down with sufficient heavy objects. Check all frame connections for tightness.
- Cover Not Fitting Properly: Ensure the frame is assembled correctly according to the instructions. The cover should be draped evenly. If the cover is too tight or loose, re-check frame dimensions and connections.
- Zipper Issues: If the zipper is stiff or stuck, clean any debris from the teeth and apply a small amount of zipper lubricant. Avoid forcing the zipper, as this can cause damage.
- Water Accumulation: Ensure the cover is taut to prevent water pooling. Check for any tears or punctures in the cover and repair them promptly to maintain waterproofing.
- Shelf Sagging: Ensure shelves are correctly seated on the frame. Do not exceed the maximum weight capacity of 22 pounds (10 kg) per shelf. Distribute weight evenly.
8. Specifications
| Feature | Detail |
|---|---|
| Model | 4-Tier Mini Greenhouse |
| Brand | Sekey |
| Product Dimensions (L x W x H) | 27.16 x 19.29 x 62.99 inches (approx. 69 x 49 x 160 cm) |
| Item Weight | 10.68 pounds (approx. 4.84 kg) |
| Frame Material | Reinforced Coated Steel Tube |
| Cover Material | Polyethylene (PE) |
| Number of Tiers/Shelves | 4 |
| Max. Shelf Capacity | 22 pounds (10 kg) per shelf |
| Color | White (Cover) |

Image 8.1: Detailed dimensions and individual shelf weight capacity of the greenhouse.
9. Warranty and Support
For warranty information, replacement parts, or technical support, please contact Sekey customer service directly. Refer to your purchase documentation for specific contact details or visit the official Sekey website.
Please note: This manual is for informational purposes only. The manufacturer reserves the right to make changes to the product without prior notice.
Ask a question about this manual
Ask about setup, troubleshooting, compatibility, parts, safety, or missing instructions. Manuals+ will review the question and use this page’s manual context to help answer it.