
1. Introduction and Overview
Thank you for choosing the Cumbor 29.2-43" No Bottom Bar Baby Gate. This gate is designed to provide a safe and secure barrier for children and pets in various areas of your home, such as doorways, stairways, and hallways. Its unique no-bottom-bar design minimizes tripping hazards, while the hardware-mounted installation ensures maximum stability and safety.

Figure 1.1: Cumbor Baby Gate in use, separating a baby and a dog at the top of a staircase.
2. Important Safety Information
WARNING: Failure to follow these instructions could result in serious injury or death.
- Always install the gate securely using the provided hardware mounting kit. This gate is not suitable for pressure-mounted installation.
- When mounting to drywall, always anchor the screws into a stud for a secure and safe installation. Use a stud finder to locate studs.
- This gate is designed for openings between 29.2 and 43 inches wide. Measure your opening accurately before installation.
- Regularly check all hardware and mounting points to ensure they are tight and secure.
- Never leave children unattended near the gate.
- Ensure the double-lock safety system is engaged after closing the gate.
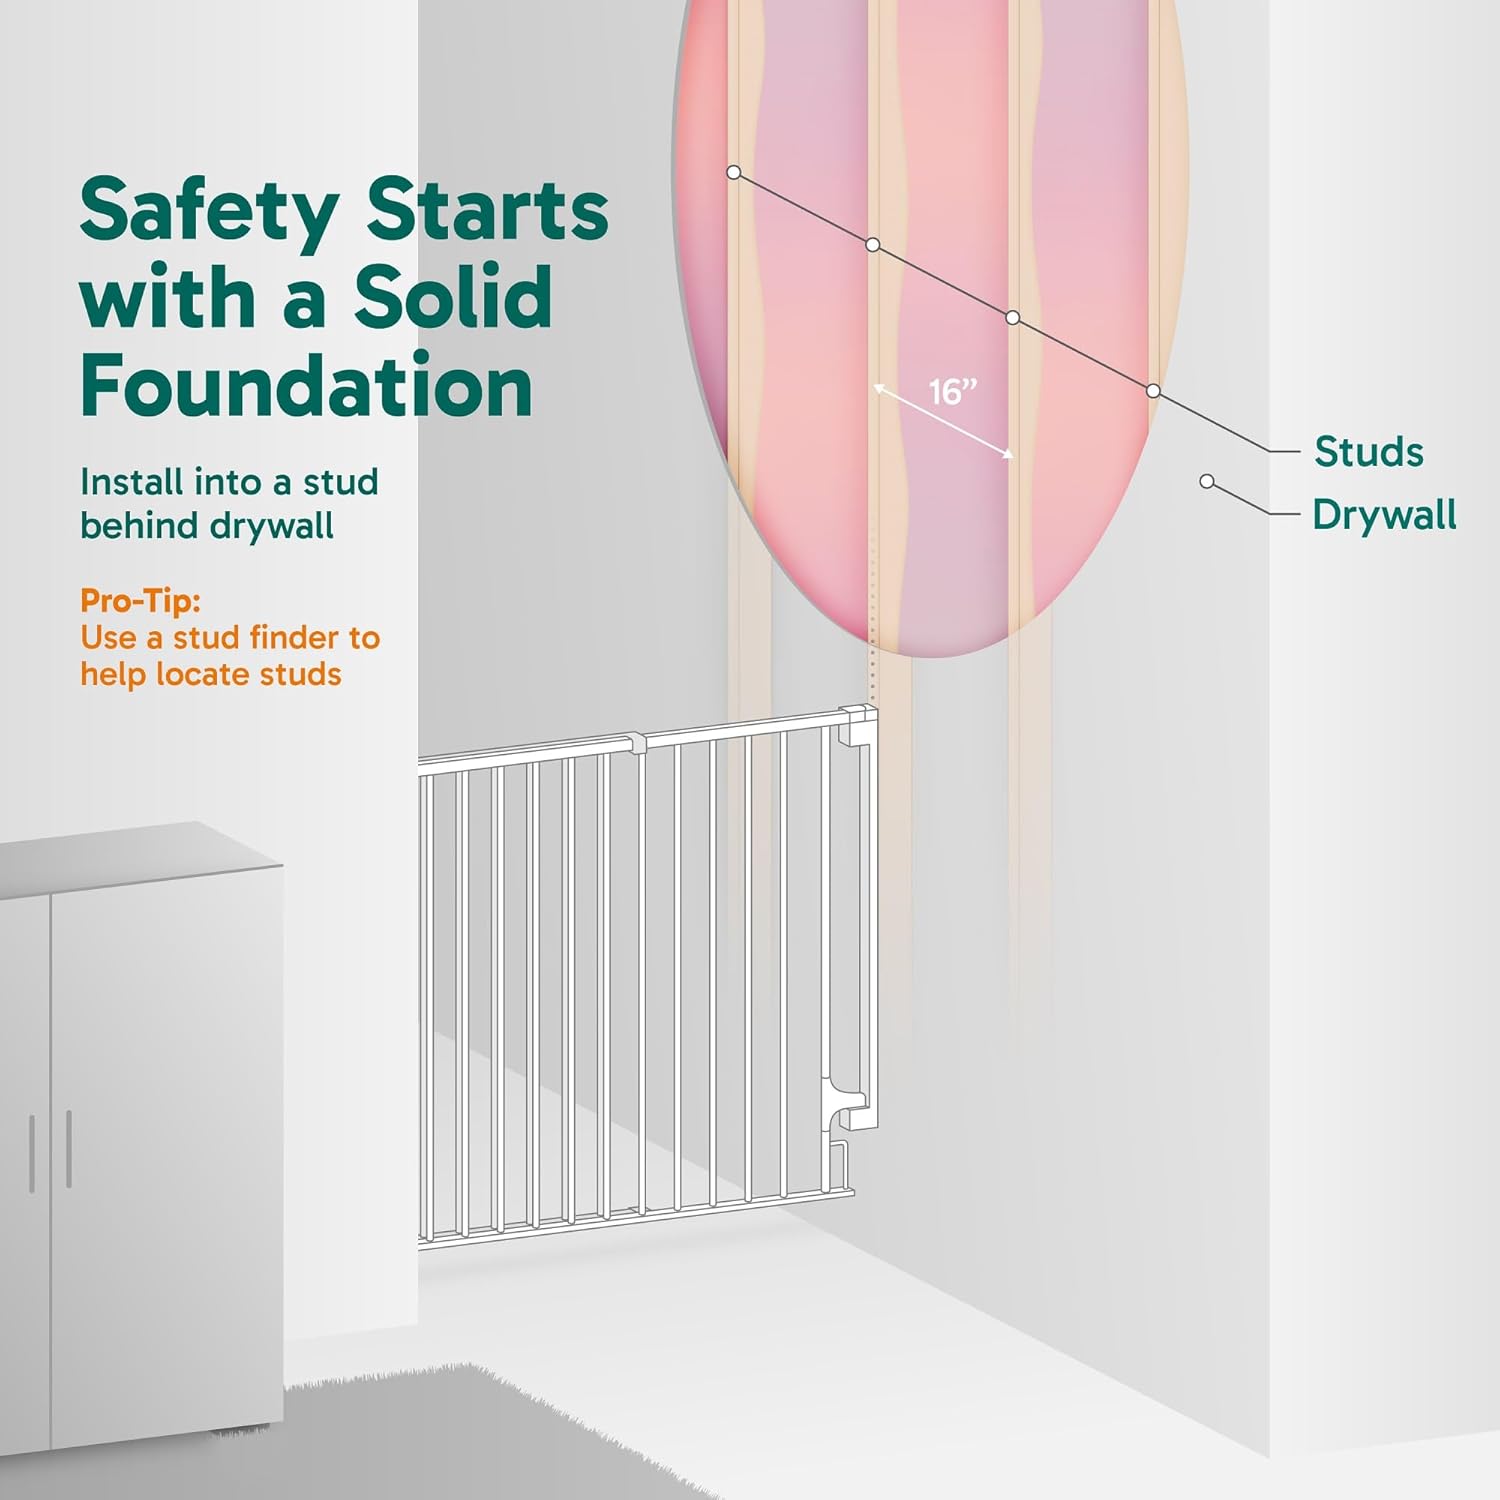
Figure 2.1: Importance of installing into a wall stud for secure mounting.

Figure 2.2: The double-lock design ensures child and pet safety.
3. Product Features
- No Bottom Bar Design: Eliminates tripping hazards, providing a smooth and easy walk-through access. Ideal for high-traffic areas and for use with strollers or vacuum robots.
- Adjustable Width: Fits openings from 29.2 to 43 inches wide, offering flexibility for various doorways, stairways, and hallways.
- One-Handed Operation: Allows for convenient opening and closing while holding a child or carrying items.
- Auto-Close and Two-Way Door Opening: The gate automatically closes behind you and can open in either direction for added convenience.

Figure 3.1: The no-bottom-bar design allows for smooth and easy access.

Figure 3.2: Wide passageway access, suitable for strollers.

Figure 3.3: Easily adjustable width to fit various spaces.

Figure 3.4: Easy one-handed use for busy parents.
Video 3.1: Demonstrates the auto-close and two-way door opening features of the Cumbor gate.
4. Package Contents
Please verify that all components are present before beginning installation:

Figure 4.1: All components included in the package.
| Item | Description | Quantity |
|---|---|---|
| A | Main Gate | 1 |
| B | Gate Accessory | 1 |
| C | Positioning Plate | 2 |
| D | Short Screw | 12 |
| E | Long Screw | 12 |
| F | Wall Anchor | 12 |
| G | Hexagon Screw | 2 |
| H | Allen Key | 1 |
5. Setup and Installation
The Cumbor gate is designed for quick and easy installation, typically within 40 minutes. Ensure you have the necessary tools for your wall type.
5.1. Prepare for Installation
- Measure the Opening: Use a tape measure to confirm the width of your desired installation area. The gate fits openings between 29.2 and 43 inches.
- Positioning Plates: Tear off the sticker behind the positioning plates (C). Place two positioning plates perpendicular to the floor and attach them to the wall at the desired height. These plates will guide your drilling.

Figure 5.1: Initial steps for quick installation.
5.2. Hardware Mount Installation - Tool Selection
Select the appropriate tools based on your home's wall material. Always ensure screws are anchored into a stud when installing on drywall for maximum security.

Figure 5.2: Tools for concrete and brick walls.

Figure 5.3: Tools for drywall with wood stud backing and wooden walls.
5.3. Main Gate Installation
- Secure the Main Gate: With assistance, lift the main gate (A) and align it with the marked spots created by the positioning plates. Drill securely into the wall using the appropriate screws (D or E) for your wall type.

Figure 5.4: Securing the main gate to the wall.
5.4. Secure Metal Pipe Installation
- Align and Drill: Align the screws in the metal pipe's slots and drill securely.
- Adjust Height: Adjust the gate height to match the pipe, ensuring both are level.
- Lock Latches: Lock the upper and lower latches firmly in place.

Figure 5.5: Steps for securing the metal pipe and adjusting gate height.
6. Operating Instructions
To open the Cumbor gate, simply press the release button on the top latch and lift the gate slightly to disengage the bottom latch. The gate can swing open in either direction. When released, the gate will automatically swing back and close securely, engaging both the top and bottom double-lock mechanisms. For one-handed operation, use your thumb to press the release button while simultaneously lifting the gate handle.
7. Maintenance and Care
To maintain your Cumbor baby gate, regularly wipe it down with a damp cloth and mild soap. Avoid using abrasive cleaners or harsh chemicals, as these can damage the finish. Periodically check all screws and mounting points to ensure they remain tight and secure. Lubricate hinges if necessary to ensure smooth operation.
8. Troubleshooting
8.1. Gate Does Not Close Properly
- Ensure the gate is installed level and plumb. Adjust the mounting points if necessary.
- Check for any obstructions in the gate's path or near the latching mechanisms.
- Verify that all screws are tightened securely.
8.2. Gate Feels Loose After Installation
- Re-check all mounting screws and ensure they are fully tightened.
- If installed on drywall, confirm that the screws are anchored into a wall stud. If not, relocate the mounting points to a stud.
8.3. Difficulty Opening/Closing the Latch
- Ensure the gate is not misaligned.
- Check for any debris or foreign objects in the latch mechanism.
- Apply a small amount of silicone lubricant to the moving parts of the latch if it feels stiff.
9. Specifications
| Feature | Detail |
|---|---|
| Brand | Cumbor |
| Model Number | CP7V1 |
| Product Dimensions | 43"W x 28"H (Adjustable width: 29.2"-43") |
| Item Weight | 9.58 pounds |
| Material | Metal |
| Color | White |
| Mounting Type | Hardware Mounted |
| Closure Type | Latch (Double-Lock Safety System) |
| Target Species | Baby, Dogs, Pets, Cats, Child |
| UPC | 850055912311 |
10. Warranty and Support
For detailed warranty information and customer support, please refer to the official Cumbor User Guide PDF available for download. You can typically find this document on the product's purchase page or by visiting the Cumbor official website.
For further assistance, please contact Cumbor customer service directly. Contact information can usually be found on the product packaging or the official brand website.
Download User Guide (PDF): Click Here

