1. Product Overview
The AsperX AX160 is a versatile and powerful device designed to provide essential roadside assistance. It combines a 3000A portable car jump starter, a 150PSI cordless tire inflator, a power bank for electronic devices, and a 400LM emergency LED light. This multi-functional tool is suitable for a wide range of 12V vehicles, including cars, trucks, motorcycles, RVs, and more, capable of starting up to 9.0L gas and 7.0L diesel engines.

Figure 1: AsperX AX160 Jump Starter with included accessories.
2. What's in the Box
- 1 x Jump Starter with Air Compressor (AsperX AX160)
- 1 x Smart Jumper Cable
- 1 x USB-A to USB-C Cable
- 1 x Carrying Bag
- 1 x Pump Tube
- 3 x Air Nozzles
- 1 x User Manual
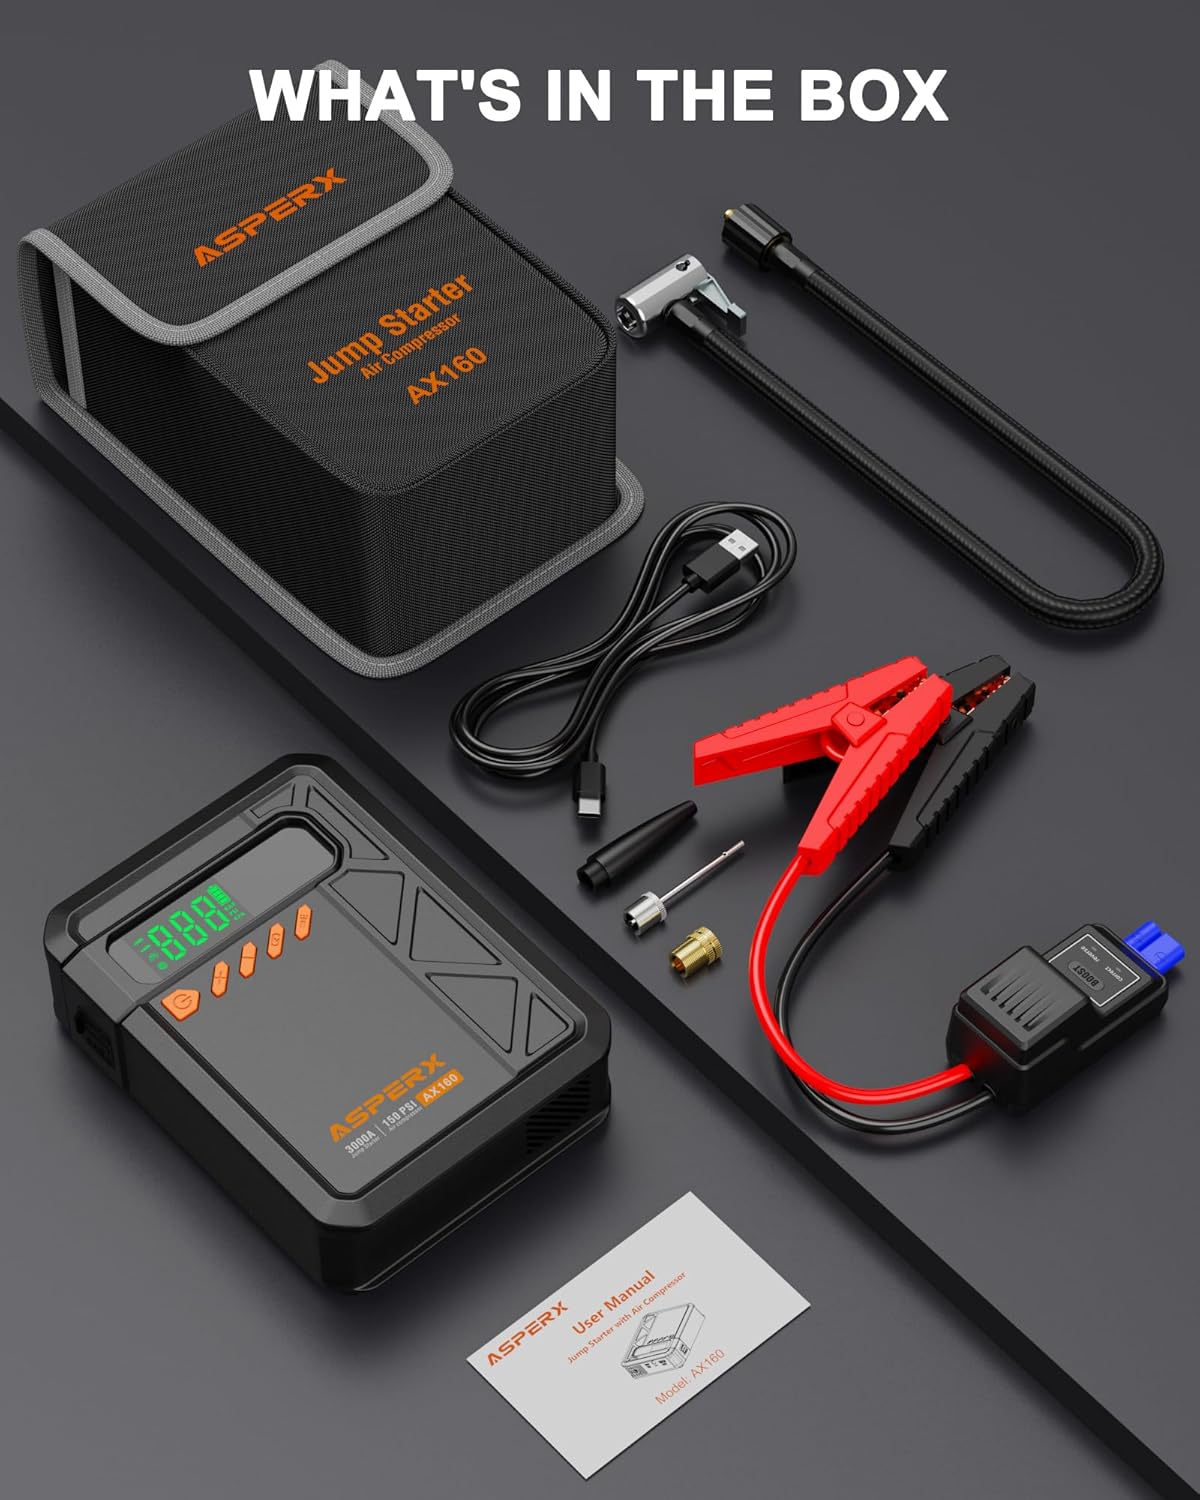
Figure 2: All items included in the AsperX AX160 package.
3. Safety Precautions
Always read and understand all safety information before using this product.
- The AsperX AX160 meets national standard UL & FCC Certifications.
- The shell is made of high-standard V0-level fireproof material for enhanced safety.
- Features 10 built-in safety protection technologies: reverse polarity, anti-spark, short circuit, overcharge, overcurrent, low temperature, high temperature, overvoltage, overload, and reverse charge.
- Do not use the air pump function continuously for extended periods. If the unit gets seriously hot, allow it to cool down for a few minutes before resuming inflation.
- Charge the jumper fully upon first receipt, even if it shows full power.
- It is suggested to start the car when the power level is greater than 75%.
- Recharge the car jump pack every 2-3 months to activate the battery and prolong its lifespan.
- When using the jump starter function, remove the clips immediately after the car starts. The product will automatically shut down; do not shut it down manually.
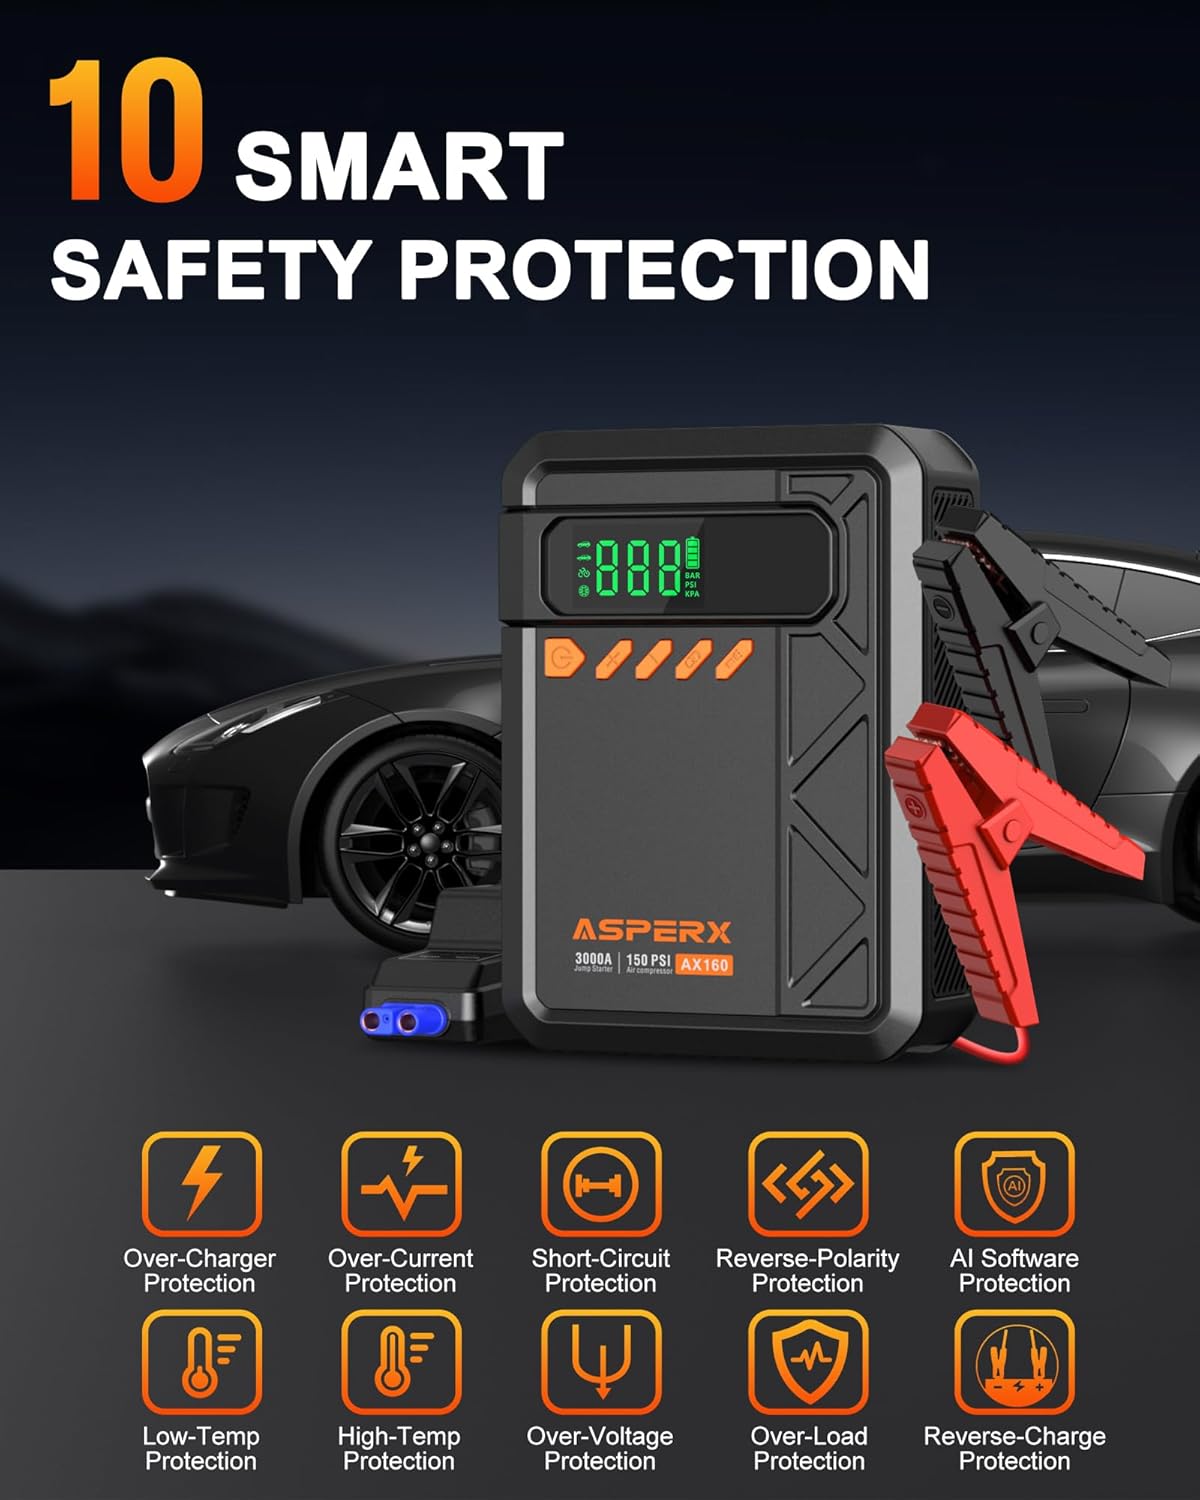
Figure 3: The AsperX AX160 features 10 smart safety protections.
4. Setup
4.1 Initial Charging
Before first use, ensure the AsperX AX160 is fully charged. Connect the provided USB-A to USB-C cable to the device and a suitable USB power adapter (not included). The smart screen will indicate the battery level during charging.
4.2 Connecting the Smart Jumper Cable
To prepare for jump starting, open the protective cap on the jump starter and firmly insert the blue end of the smart jumper cable into the corresponding port on the device. Ensure a secure connection.

Figure 4: Securely connect the smart jumper cable to the jump starter unit.
5. Operating Instructions
5.1 Jump Starting a Vehicle
- Step 1: Insert the Smart Clip into the Jump Starter. Ensure the smart jumper cable is securely plugged into the jump starter unit.
- Step 2: Connect the clamps to your car battery. Attach the red (positive) clamp to the positive (+) terminal of your car battery and the black (negative) clamp to the negative (-) terminal. The LED indicator on the smart cable should turn green, indicating a correct connection.
- Step 3: Start the car. Once the clamps are correctly connected and the indicator is green, attempt to start your vehicle. If the screen lights up during this process, you can ignore it.
- Step 4: Remove the jumper clamps. Immediately after the car starts, disconnect the clamps from the car battery terminals. The product will automatically shut down.

Figure 5: Proper connection for jump starting a vehicle.
Video 1: Official demonstration of the AsperX AX160 jump starter in action.
5.2 Using the Air Compressor (Tire Inflator)
- Step 1: Connect the air hose and tighten it. Screw the pump tube securely into the air output port on the jump starter.
- Step 2: Connect the tube to the tire valve. Attach the other end of the pump tube to the tire valve. Ensure it is tightly screwed on to prevent air leakage.
- Step 3: Select inflation mode and set pressure. Long press the power button to turn on the device. Short press the 'M' key to switch between inflation modes (SUV, Car, Bike, Ball, Customizable). Use the '+' and '-' buttons to adjust the desired air pressure (PSI, Bar, Kpa). The LCD display will show real-time tire pressure.
- Step 4: Press and hold the power button to start inflation. The compressor will automatically stop once the preset pressure is reached.
The AsperX AX160 can quickly inflate car tires from 29 PSI to 36 PSI in approximately 1 minute. It comes with 3 different nozzles for various inflation needs (motorcycle, bicycle, basketball, swimming ring, etc.).

Figure 6: The cordless tire inflator in use.
Video 2: Official video demonstrating the 150PSI air compressor function.
5.3 Using as a Portable Power Bank
The AsperX AX160 features a power bank function to charge your electronic devices. Simply connect your phone, tablet, or other USB-powered device to the USB-A output port (5V/2.1A) or the USB-C input/output port (5V/2A) using a compatible cable. The device provides a reliable power supply on the go.

Figure 7: The AsperX AX160 functioning as a portable power bank.
5.4 Using the Emergency LED Light
The built-in 400LM LED light offers three modes for various situations:
- Flashlight: Provides steady illumination for general use.
- SOS: Emits a Morse code SOS signal for emergency situations.
- Strobe: Produces a rapid flashing light for signaling or attracting attention.
Press the light button to cycle through the modes. This feature is a lifesaver for camping, outdoor activities, emergencies, and travel.

Figure 8: The emergency LED light providing illumination.
6. Maintenance
- To prolong the lifespan of the portable jump starter, recharge it every 2-3 months, even if not in use. This helps activate the battery.
- Store the device in its carrying bag in a cool, dry place, away from direct sunlight and extreme temperatures. The V0-level fireproof material allows safe storage even in hot summer car environments.
- Keep the device clean and free from dust and debris. Use a soft, dry cloth for cleaning.
7. Troubleshooting
- Device not turning on/responding: Ensure the device is fully charged. If it shows full power but doesn't work, try charging it again to activate the battery.
- Jump start not working: Ensure the smart jumper cable clamps are correctly connected to the battery terminals (red to positive, black to negative). The LED indicator on the smart cable should be green. If the battery is completely dead, you may need to use the 'Boost' function (refer to the Quick Start Guide for specific instructions on your smart cable).
- Air compressor overheating: If the air pump gets seriously hot during continuous use, stop operation and allow it to cool down for several minutes before continuing. This prevents damage to the unit.
- Inflation value deviation: Slight deviations in inflation values may occur due to environmental factors. Always cross-reference with a reliable tire pressure gauge if precise measurement is critical.
8. Specifications
| Feature | Specification |
|---|---|
| Brand | AsperX |
| Model | AX160 |
| Peak Output Current | 3000 Amps |
| Amperage | 3000 Amps |
| Product Dimensions | 2.15"D x 3.5"W x 7.1"H |
| Item Weight | 1.69 Pounds |
| Inflation Pressure Range | 4-150 PSI |
| Operating Temperature | -4°F to 140°F (-20°C to 60°C) |
| Power Bank Output | 5V/2.1A (USB-A), 5V/2A (USB-C) |
| LED Light Output | 400LM |
| Certifications | UL, FCC |
9. Warranty & Support
The AsperX AX160 Jump Starter with Air Compressor comes with an 18-month warranty. If you have any after-sales questions or require technical assistance, please feel free to contact AsperX customer support through the retailer where you purchased the product or visit the official AsperX website for contact information.
For additional resources and product information, you may visit the AsperX Store on Amazon.


