
1. Introduction
This manual provides instructions for the safe and effective use of the IWISS IWS-FACL Angle Head PEX Crimping Tool Kit. This kit is designed for creating secure connections with copper crimp rings on PEX pipes, meeting ASTM F1807 standards. Its angle head design facilitates access in tight spaces, making PEX pipe installation more efficient.
2. Kit Contents
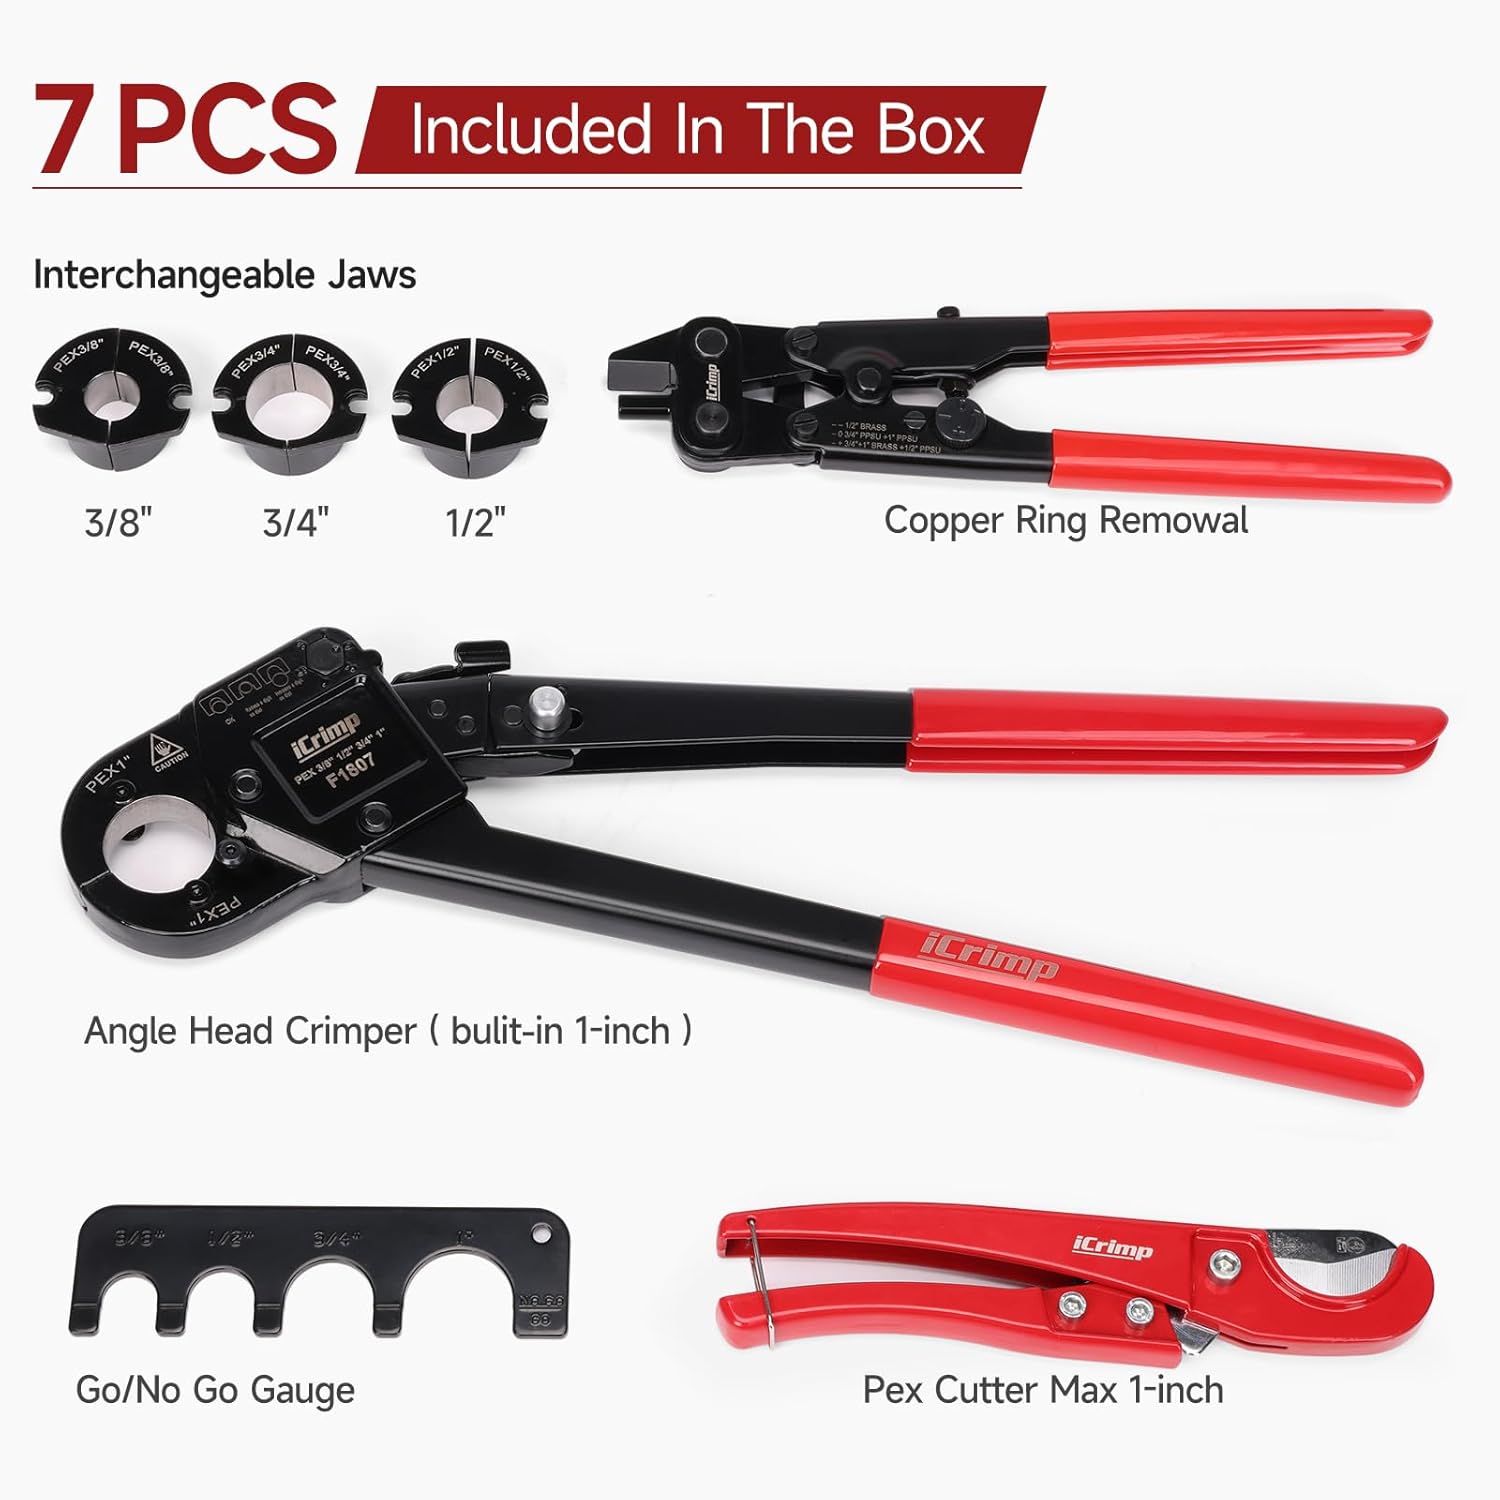
The IWISS IWS-FACL kit includes the following components:
- Angle Head PEX Crimping Tool (built-in 1-inch jaw)
- Interchangeable Jaw Set (3/8-inch, 1/2-inch, 3/4-inch)
- PEX Pipe Cutter (Max 1-inch)
- Go/No Go Gauge
- Copper Ring Removal Tool
3. Setup
3.1 Changing Interchangeable Jaws
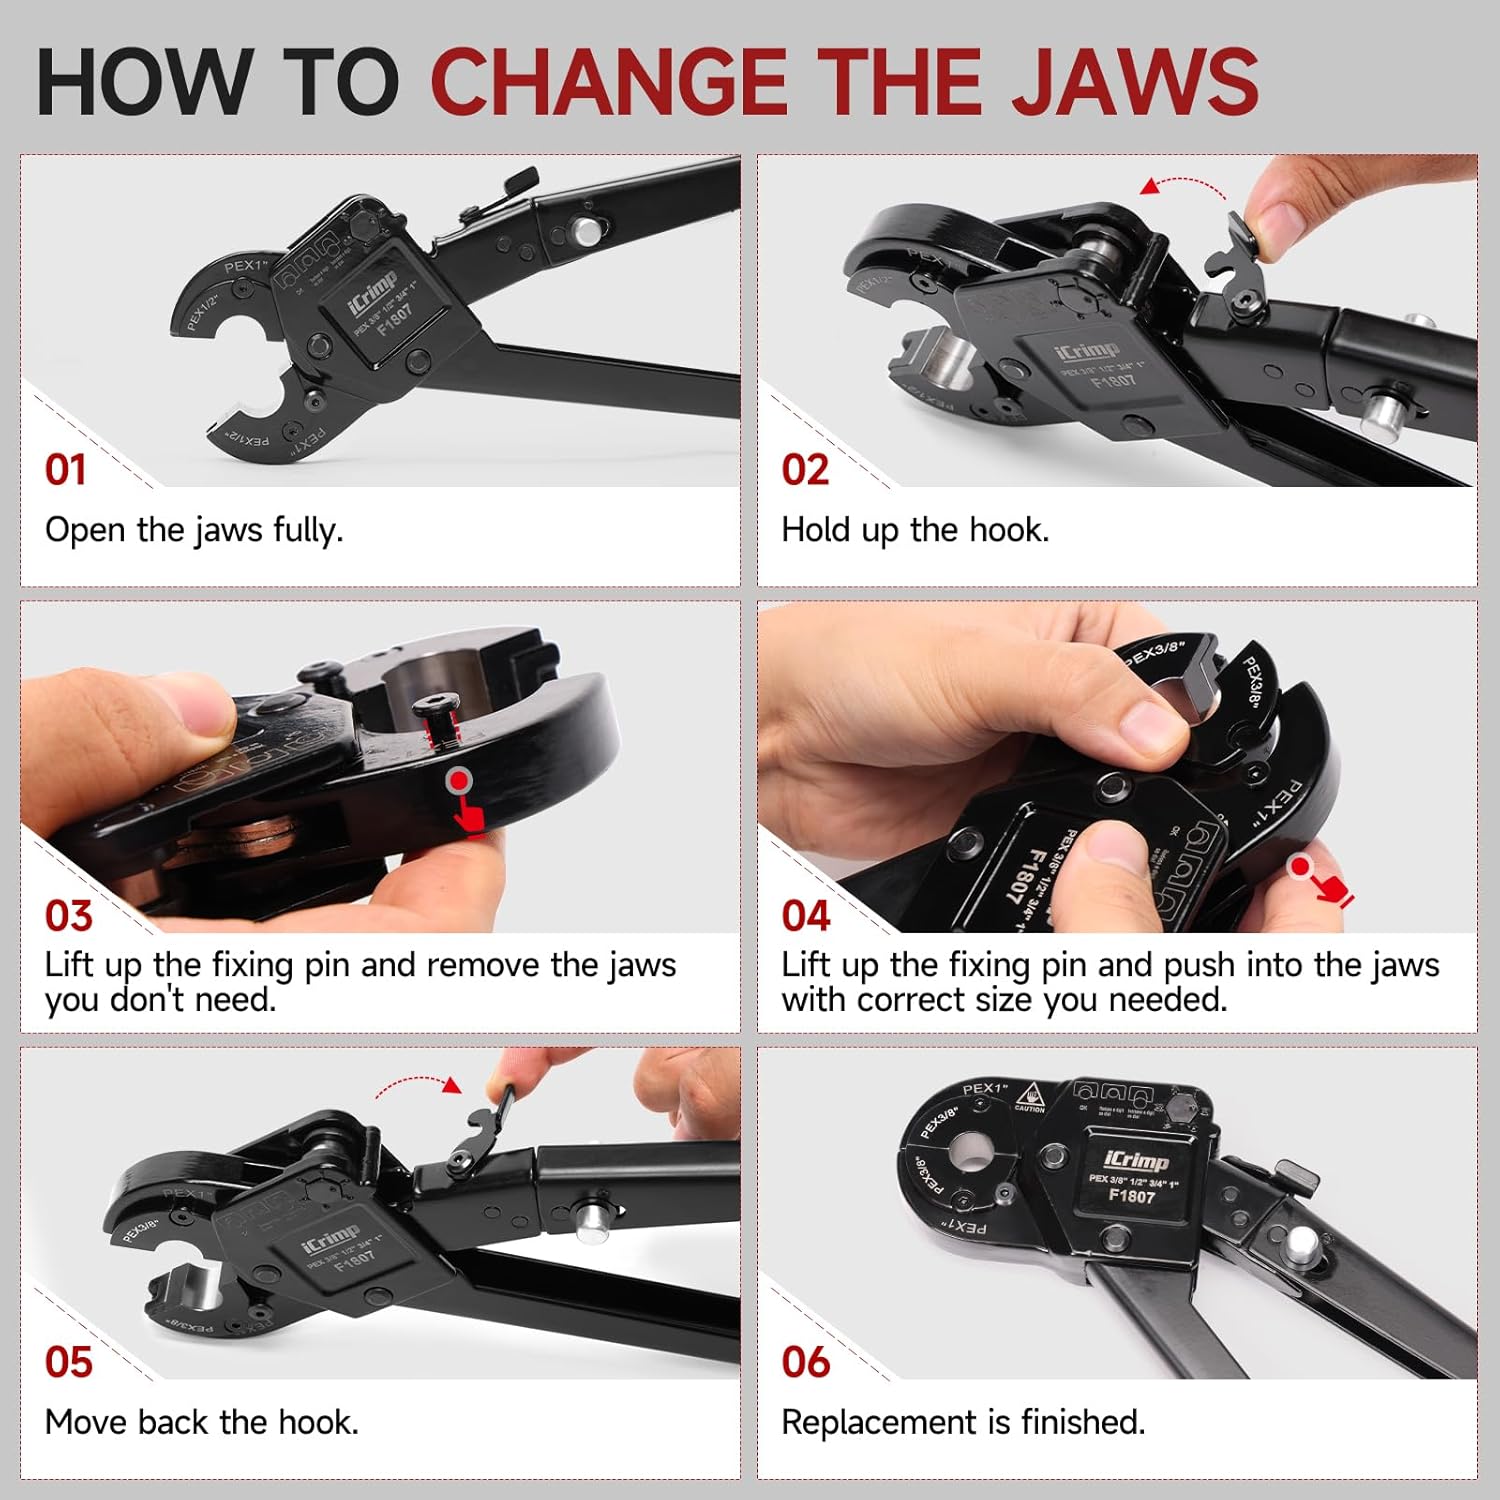
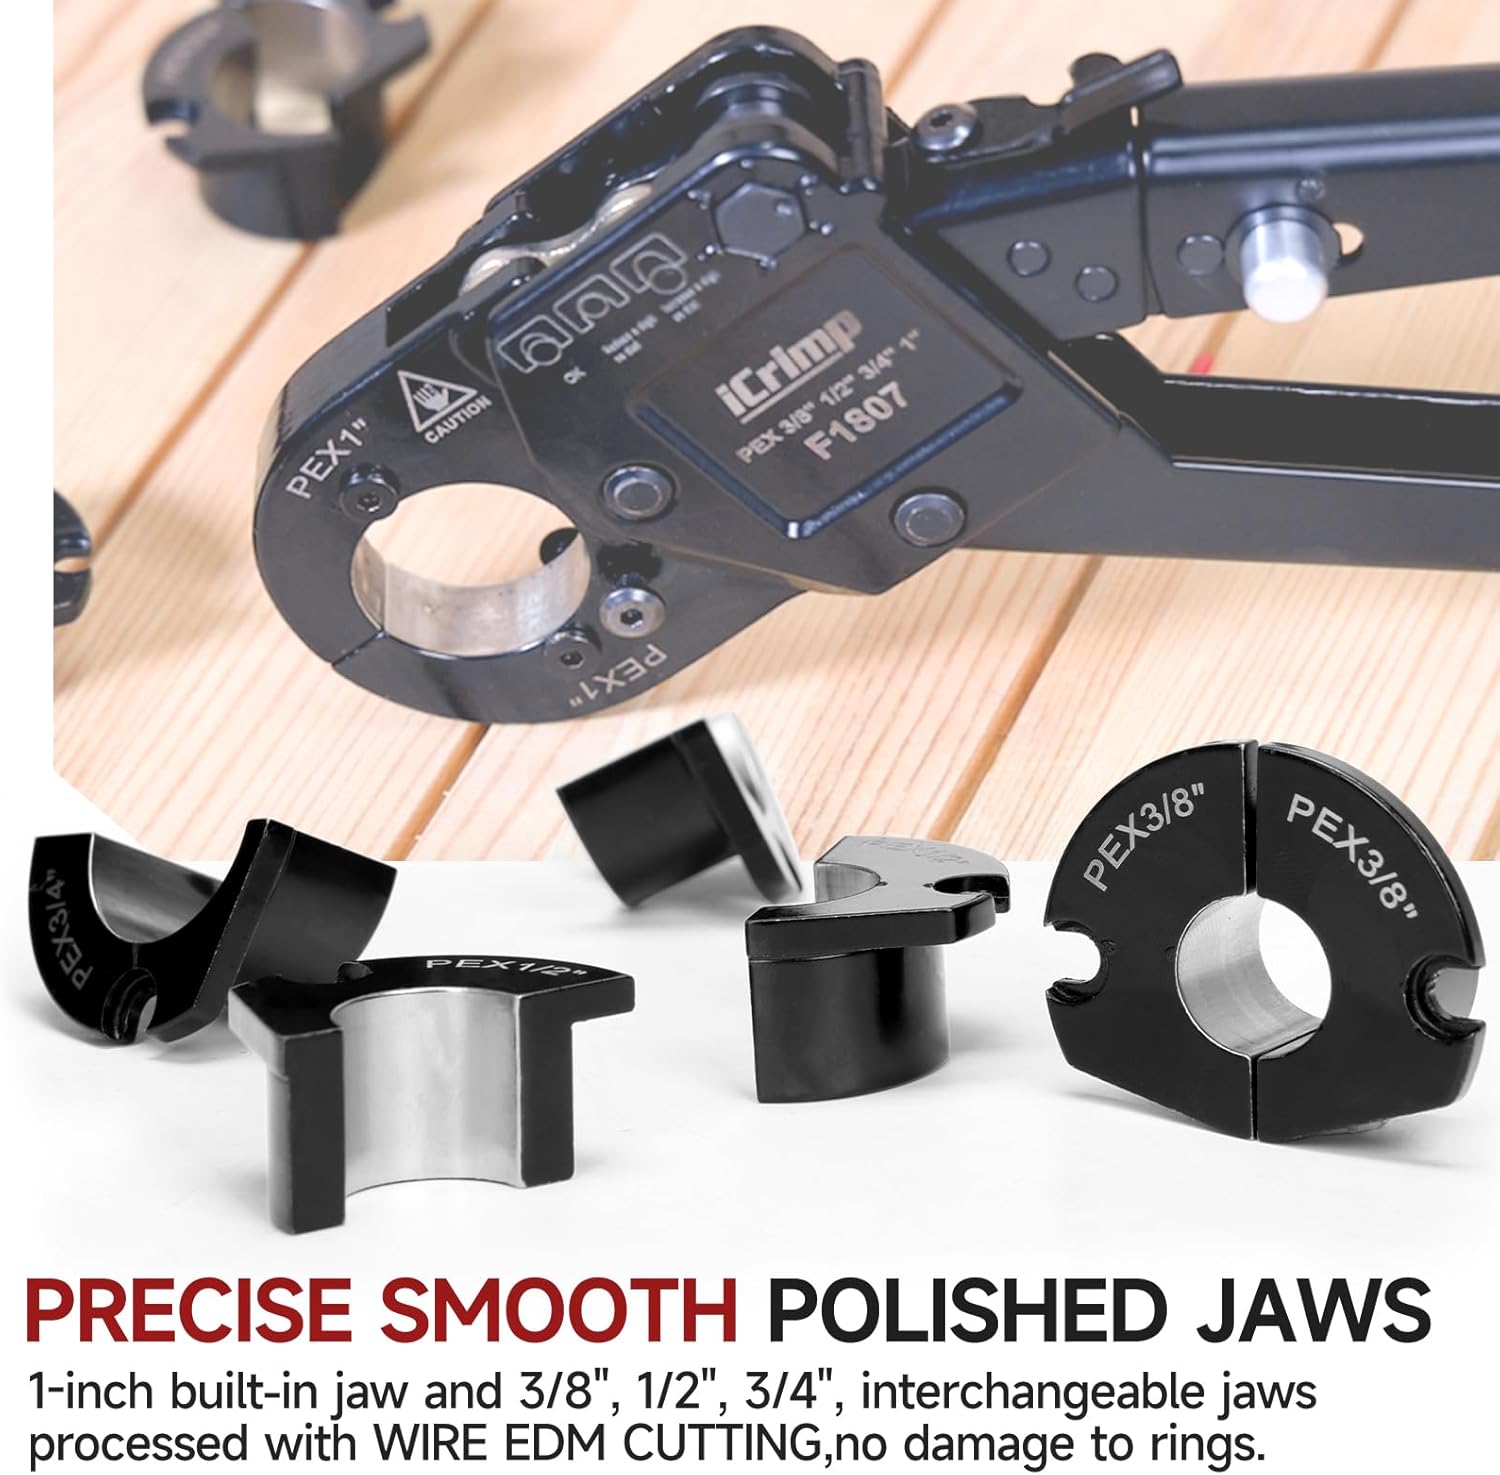
The crimping tool comes with a built-in 1-inch jaw and includes interchangeable jaws for 3/8, 1/2, and 3/4 inch PEX pipes. Follow these steps to change the jaws:
- Open the jaws of the crimping tool fully.
- Hold up the hook mechanism.
- Lift the fixing pin and remove the currently installed jaw.
- Lift the fixing pin again and insert the desired size jaw into the tool.
- Move the hook mechanism back into place to secure the jaw.
4. Operating Instructions
4.1 Preparing for Crimping
Ensure the PEX pipe is cut cleanly and squarely using the provided PEX pipe cutter. Place the copper crimp ring over the PEX pipe, followed by the PEX fitting. Position the crimp ring approximately 1/8 to 1/4 inch from the end of the PEX pipe, over the barb of the fitting.
4.2 Performing a Crimp
To perform a crimp, position the crimping tool jaws around the copper crimp ring. Ensure the jaws are centered over the ring. Apply firm, steady pressure to the handles until the crimping mechanism fully engages and releases. The angle head design allows for easier access in confined spaces.

4.3 Opening the Jaws Fully
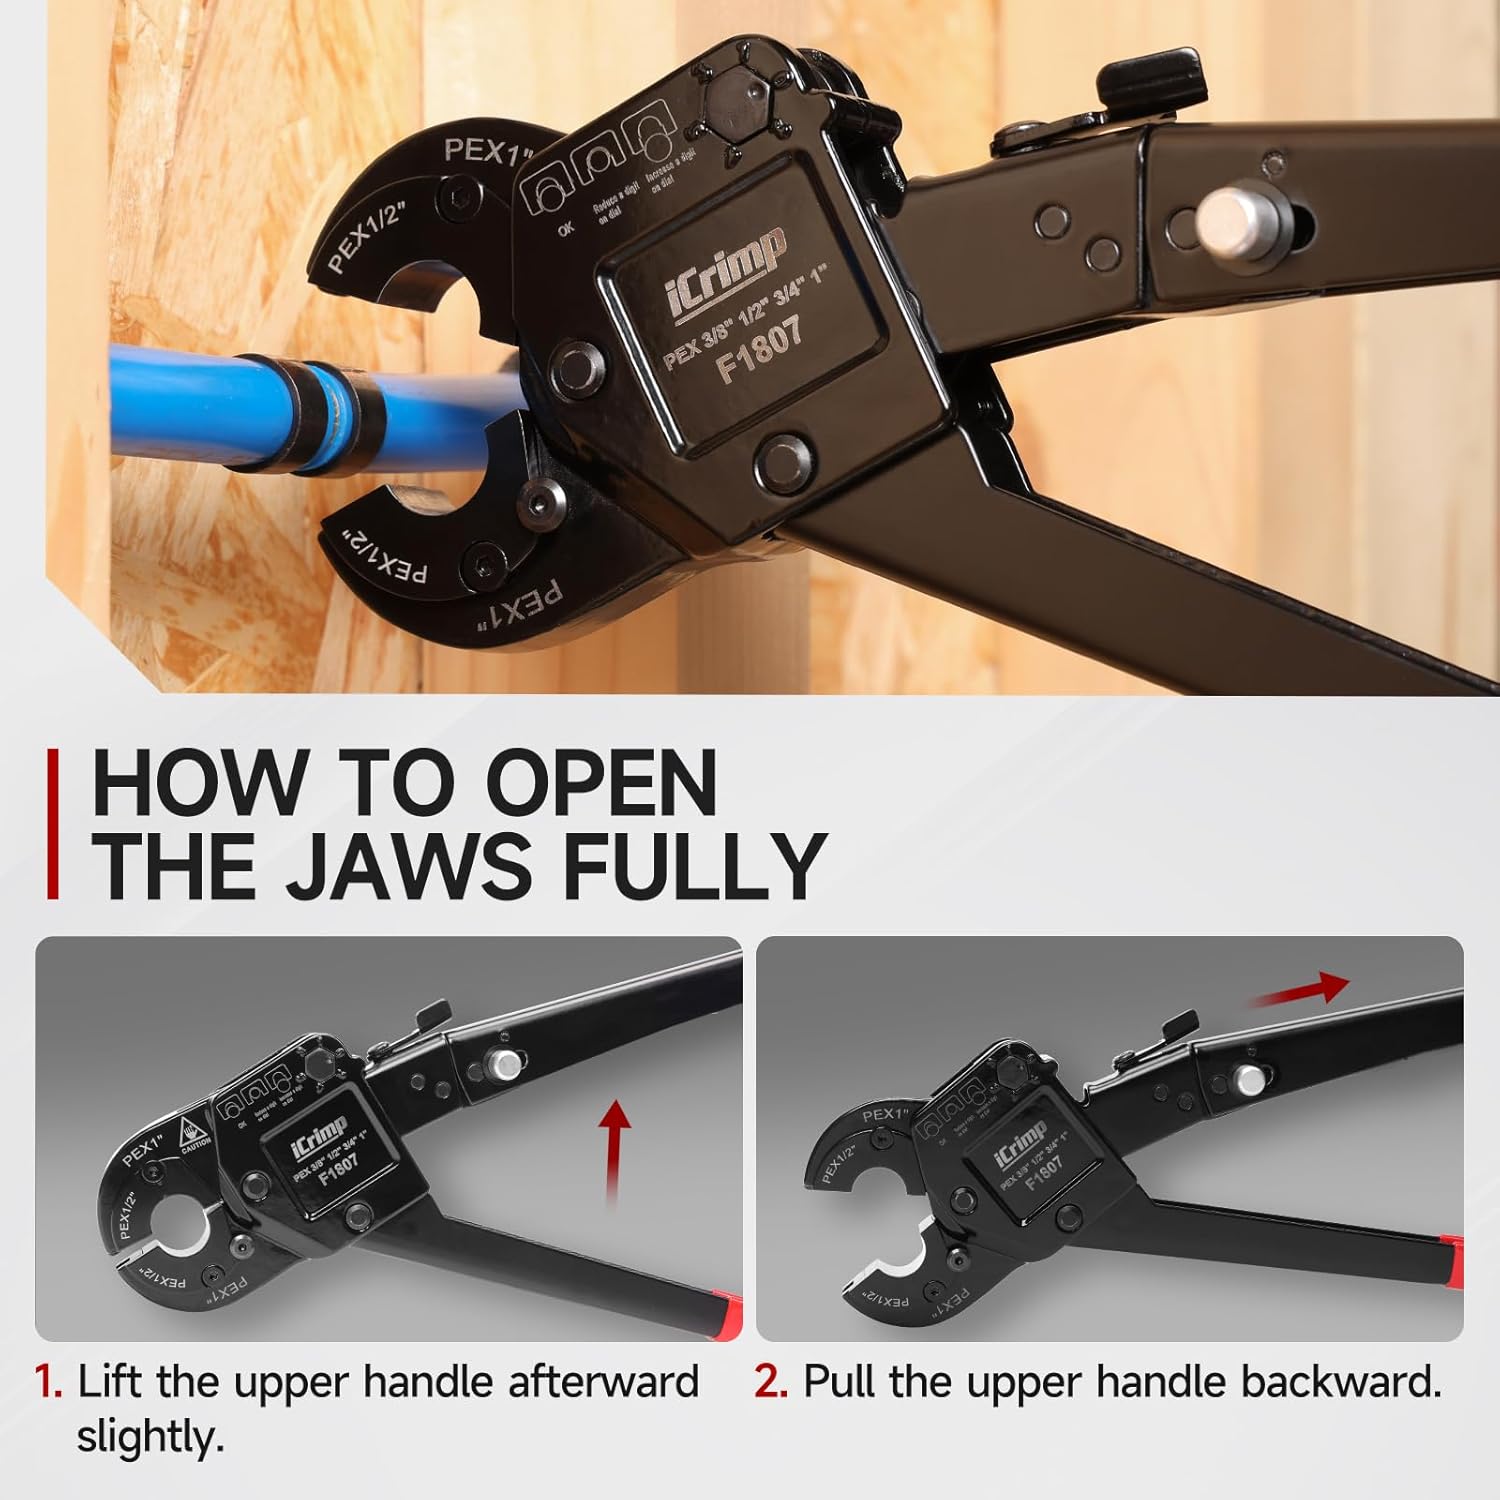
If the jaws are not fully open, or to reset the tool, follow these steps:
- Lift the upper handle slightly upward.
- Pull the upper handle backward to fully open the jaws.
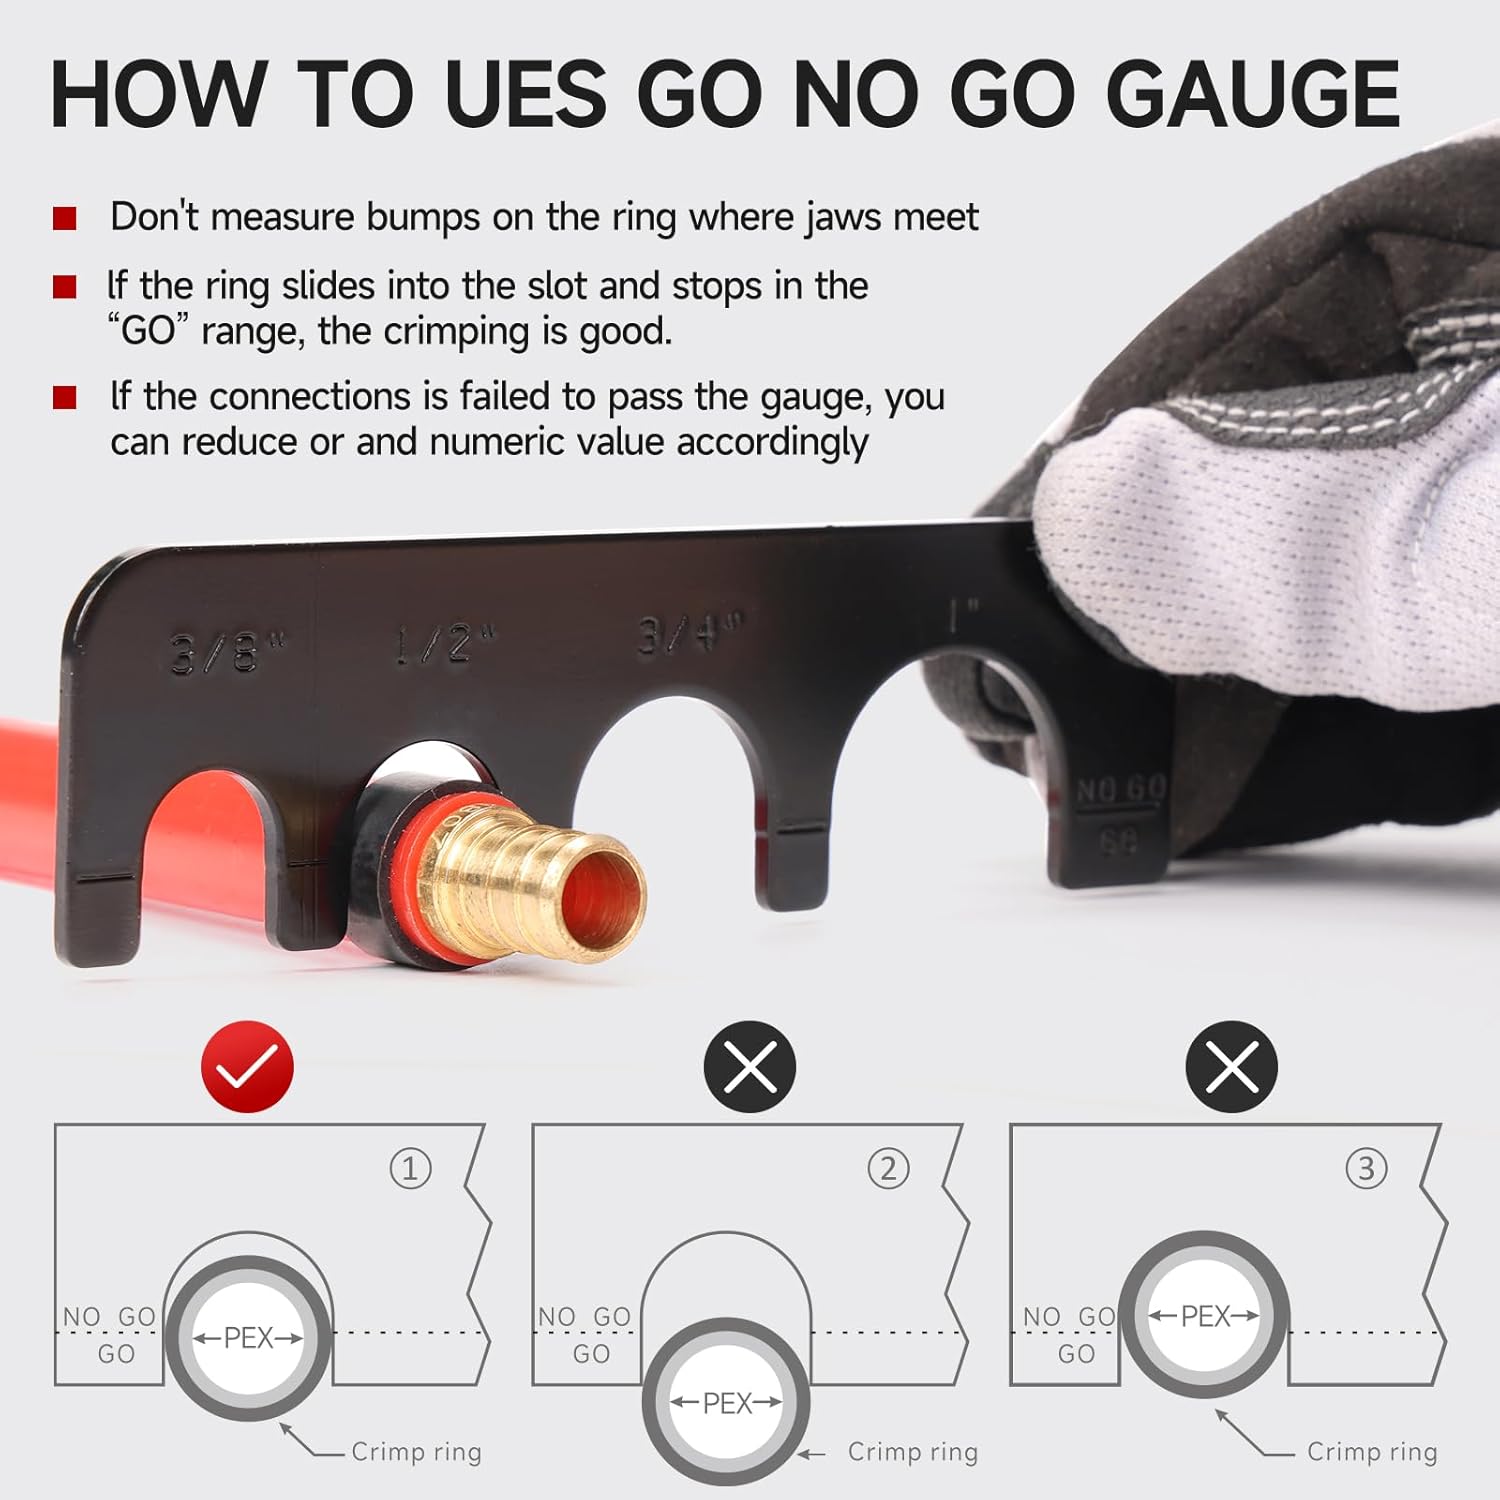
4.4 Using the Go/No Go Gauge
After crimping, use the Go/No Go gauge to verify the connection. The gauge ensures the crimp ring has been compressed to the correct diameter for a secure, leak-free seal.
- Do not measure bumps on the ring where the jaws meet.
- If the ring slides into the "GO" slot and stops, the crimping is correct.
- If the connection fails to pass the "GO" side of the gauge, the crimp is incorrect and must be redone.
4.5 Official Product Video: Crimping Tool Kit Overview
Video 4.1: This video provides a comprehensive overview of the IWISS Angle Head PEX Crimping Tool Kit, demonstrating its components and basic operation for 3/8, 1/2, 3/4, and 1-inch PEX connections.
5. Maintenance
5.1 Cleaning and Storage
After each use, clean the crimping tool jaws and other components to remove any debris or residue. Store the tool kit in its original case in a dry environment to prevent corrosion and damage.
5.2 Copper Ring Removal Tool
The included copper ring removal tool is designed to efficiently remove improperly crimped copper rings from PEX connections without damaging the barb fittings. This allows for correction of errors without replacing the entire fitting.

6. Troubleshooting
If you encounter issues during operation, consider the following:
- Incomplete Crimp: Ensure the correct jaw size is installed for the PEX pipe and crimp ring. Apply full, firm pressure until the tool's mechanism completes its cycle.
- Leaking Connection: Verify the crimp with the Go/No Go gauge. If it fails, remove the crimp ring using the removal tool and re-crimp with a new ring. Ensure the PEX pipe is fully seated on the fitting barb before crimping.
- Difficulty in Tight Spaces: Utilize the angle head design by positioning the tool appropriately. If space is extremely limited, consider pre-assembling sections where possible.
7. Specifications
| Feature | Detail |
|---|---|
| Brand | IWISS |
| Model Number | IWS-FACL |
| Compatible PEX Sizes | 3/8, 1/2, 3/4, 1-inch |
| Specification Met | ASTM F1807 |
| Handle Material | Alloy Steel |
| Grip Type | Ergonomic |
| Color | Red and Black |
| Specific Uses | Automotive, farm machinery, indoor plumbing, tight spaces |
8. Warranty and Support
Specific warranty information for the IWISS IWS-FACL Angle Head PEX Crimping Tool Kit is not provided in this manual. Please refer to the product packaging or contact IWISS customer support for detailed warranty terms and conditions. For technical assistance or inquiries, please visit the official IWISS website or contact their customer service department.