1. Introduction
This manual provides essential instructions for the safe and effective use of your VEVOR 16.7 FT Telescoping A-Frame Ladder, Model KMP405C. This multi-function aluminum extension ladder is designed for various tasks, offering versatility as an A-frame ladder or a straight extension ladder. Please read this manual thoroughly before initial use and retain it for future reference.
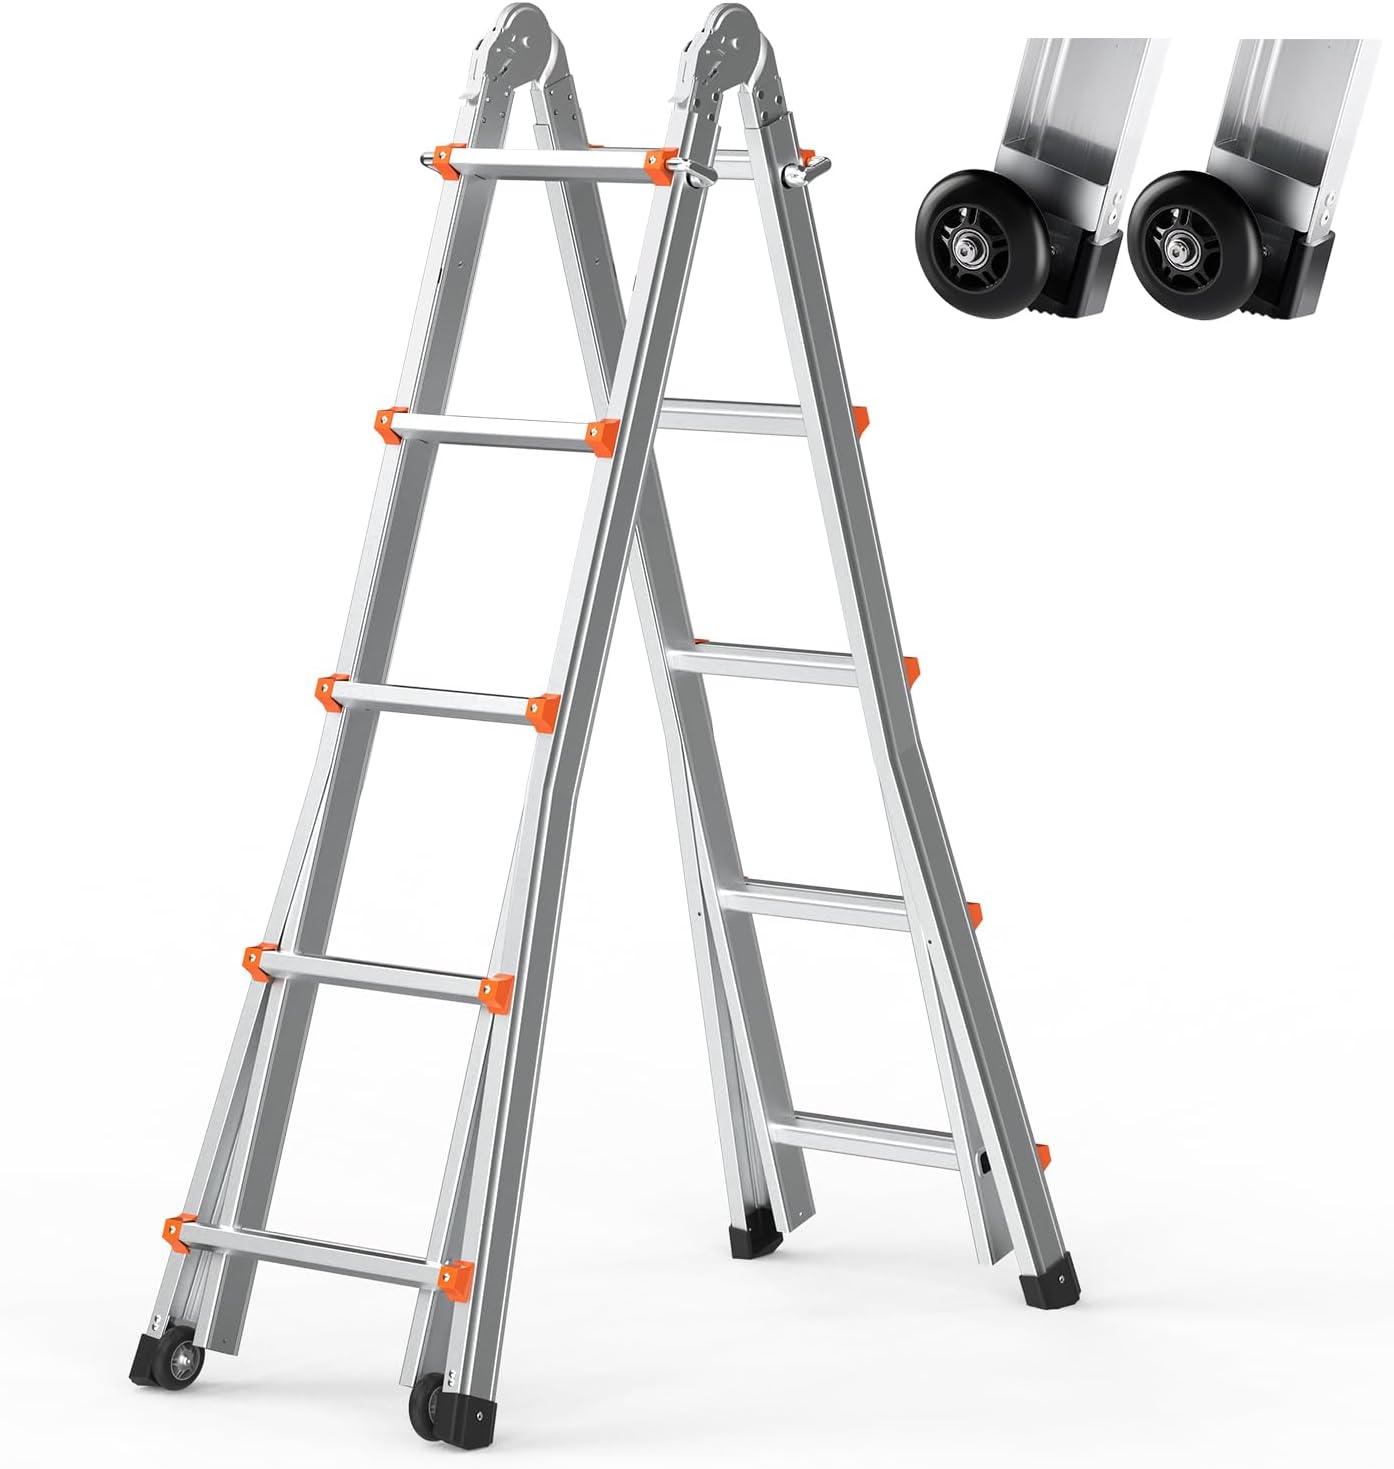
Image 1.1: The VEVOR Telescoping A-Frame Ladder in its A-frame configuration.
2. Safety Information
WARNING: Failure to follow these safety instructions may result in serious injury or death.
- Always inspect the ladder for damage or defects before each use. Do not use a damaged ladder.
- Ensure all locking mechanisms are fully engaged and secure before climbing.
- Place the ladder on a firm, level, and non-slip surface. Avoid soft ground or uneven terrain.
- Maintain three points of contact (two hands and one foot, or two feet and one hand) while climbing or descending.
- Do not overreach. Keep your body centered between the side rails.
- Do not exceed the maximum load capacity of 330 lbs (149.7 kg). This includes the user and any tools or materials.
- Avoid using the ladder in windy conditions or near electrical wires.
- Ensure the ladder is clean and free of oil, grease, or other slippery substances.
- Never stand on the top rung or the top cap of an A-frame ladder.
- When using as an extension ladder, ensure the top is securely supported and extends at least 3 feet (0.9 meters) above the landing surface.
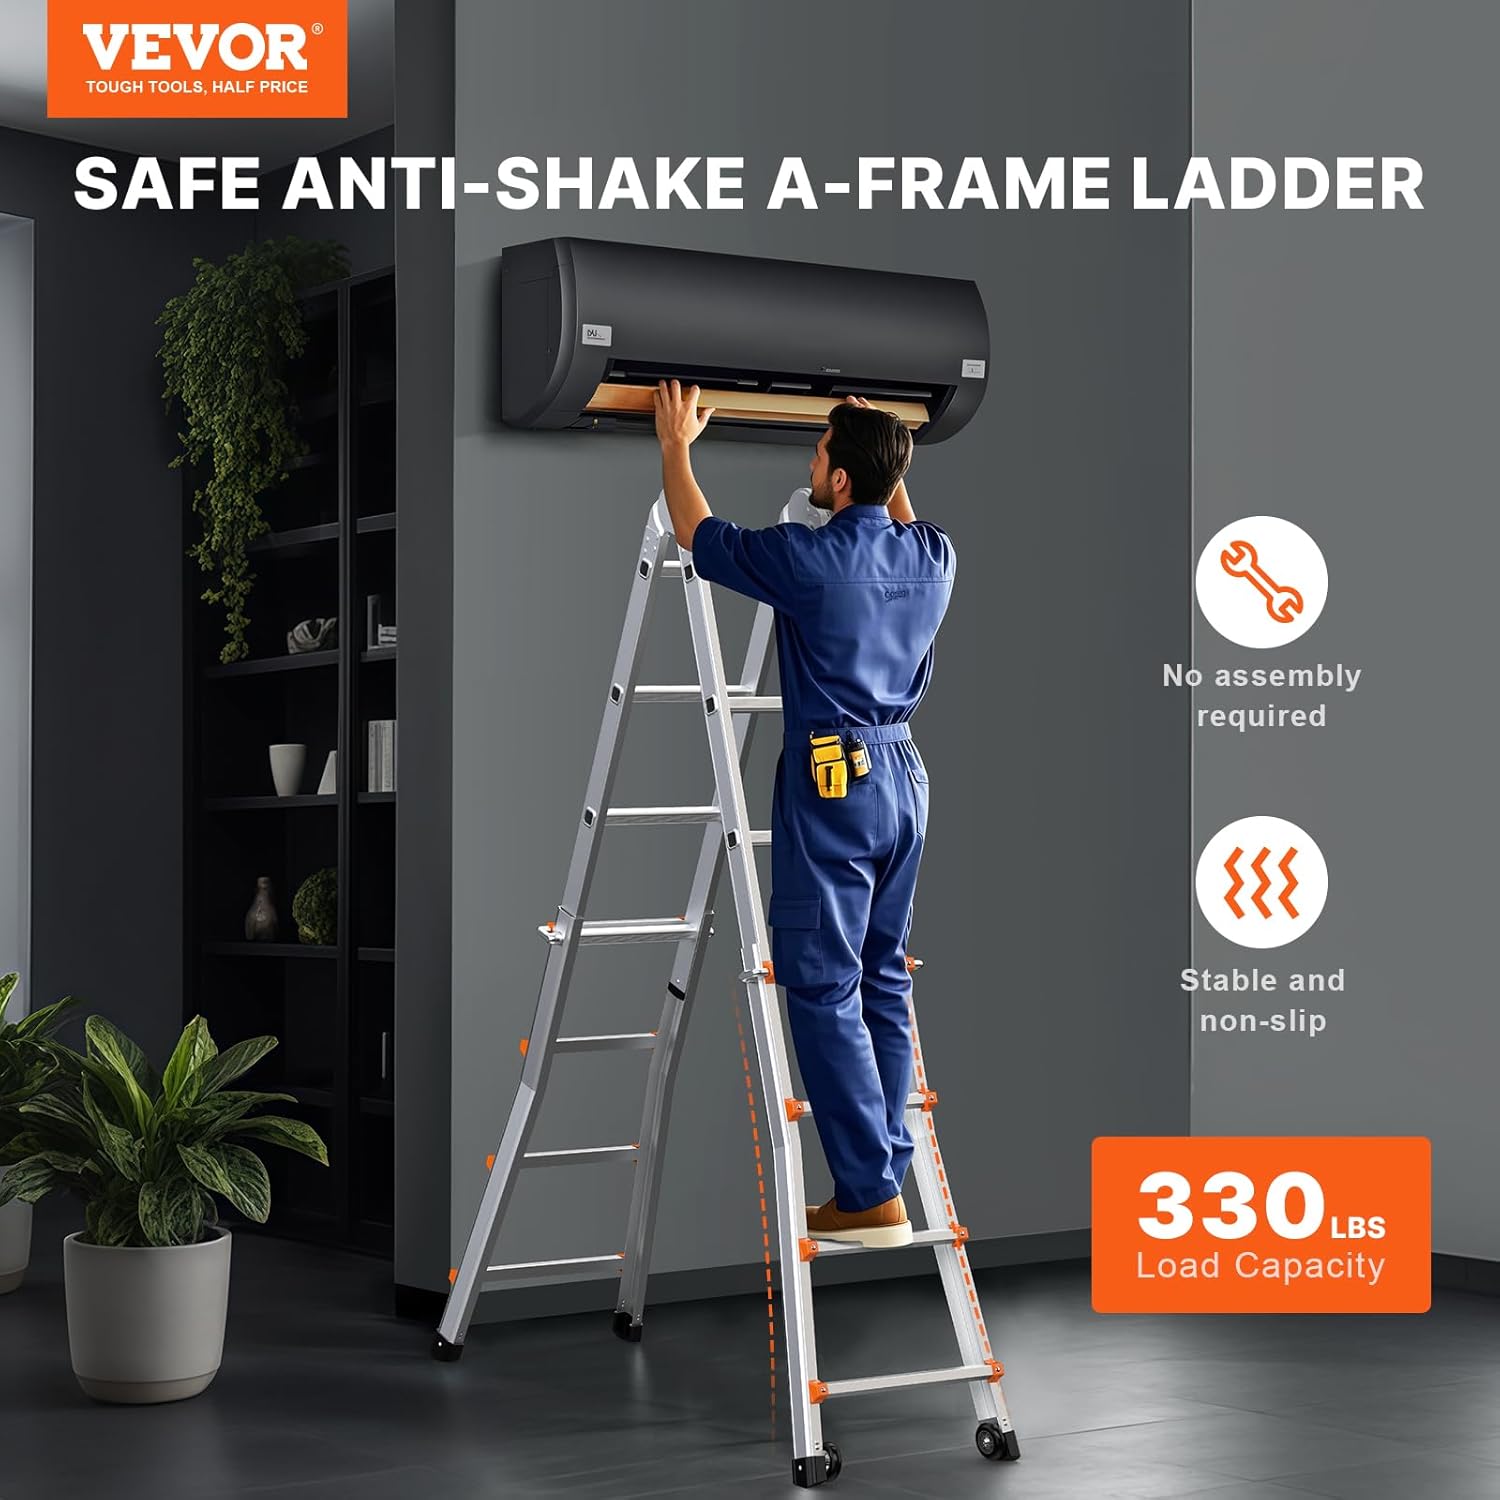
Image 2.1: Proper and safe usage of the A-frame ladder, emphasizing stability and load capacity.
3. Product Components
The VEVOR Telescoping A-Frame Ladder consists of the following main components:
- Aluminum Alloy Frame: Lightweight yet durable construction.
- Telescoping Rungs: Extendable sections for adjustable height.
- Locking Mechanisms: Secure each rung in place during extension and retraction.
- Adjustable Locking Key: Allows for angle adjustment between A-frame and straight configurations.
- Anti-Slip Foot Pads: Provide stability and prevent sliding on various surfaces.
- Transport Wheels: Located at the base for easy portability.
4. Setup and Configuration
4.1. Unfolding the Ladder
- Place the folded ladder on a flat, stable surface.
- Carefully extend the ladder sections one by one from the bottom, ensuring each rung's locking mechanism clicks into place.
- To form the A-frame, open the two sides of the ladder until the central hinge locks securely.
4.2. Adjusting Height and Configuration
The ladder can be configured as an A-frame or a straight extension ladder. The adjustable locking key allows for angle adjustments up to 180 degrees.
- To Extend Rungs: Pull the locking buttons outwards on both sides of a rung, then extend the section upwards. Release the buttons to lock the rung in the desired position. Ensure both buttons are fully engaged. Repeat for each section.
- To Retract Rungs: Pull the locking buttons outwards on both sides of a rung, then gently push the section downwards. Release the buttons. Retract from the top down.
- To Change Angle (A-frame to Straight): Locate the adjustable locking key at the hinge. Unscrew the locking key on one side, adjust the ladder to the desired angle (e.g., 180 degrees for a straight ladder), and then re-secure the locking key. Ensure it is fully tightened before use.
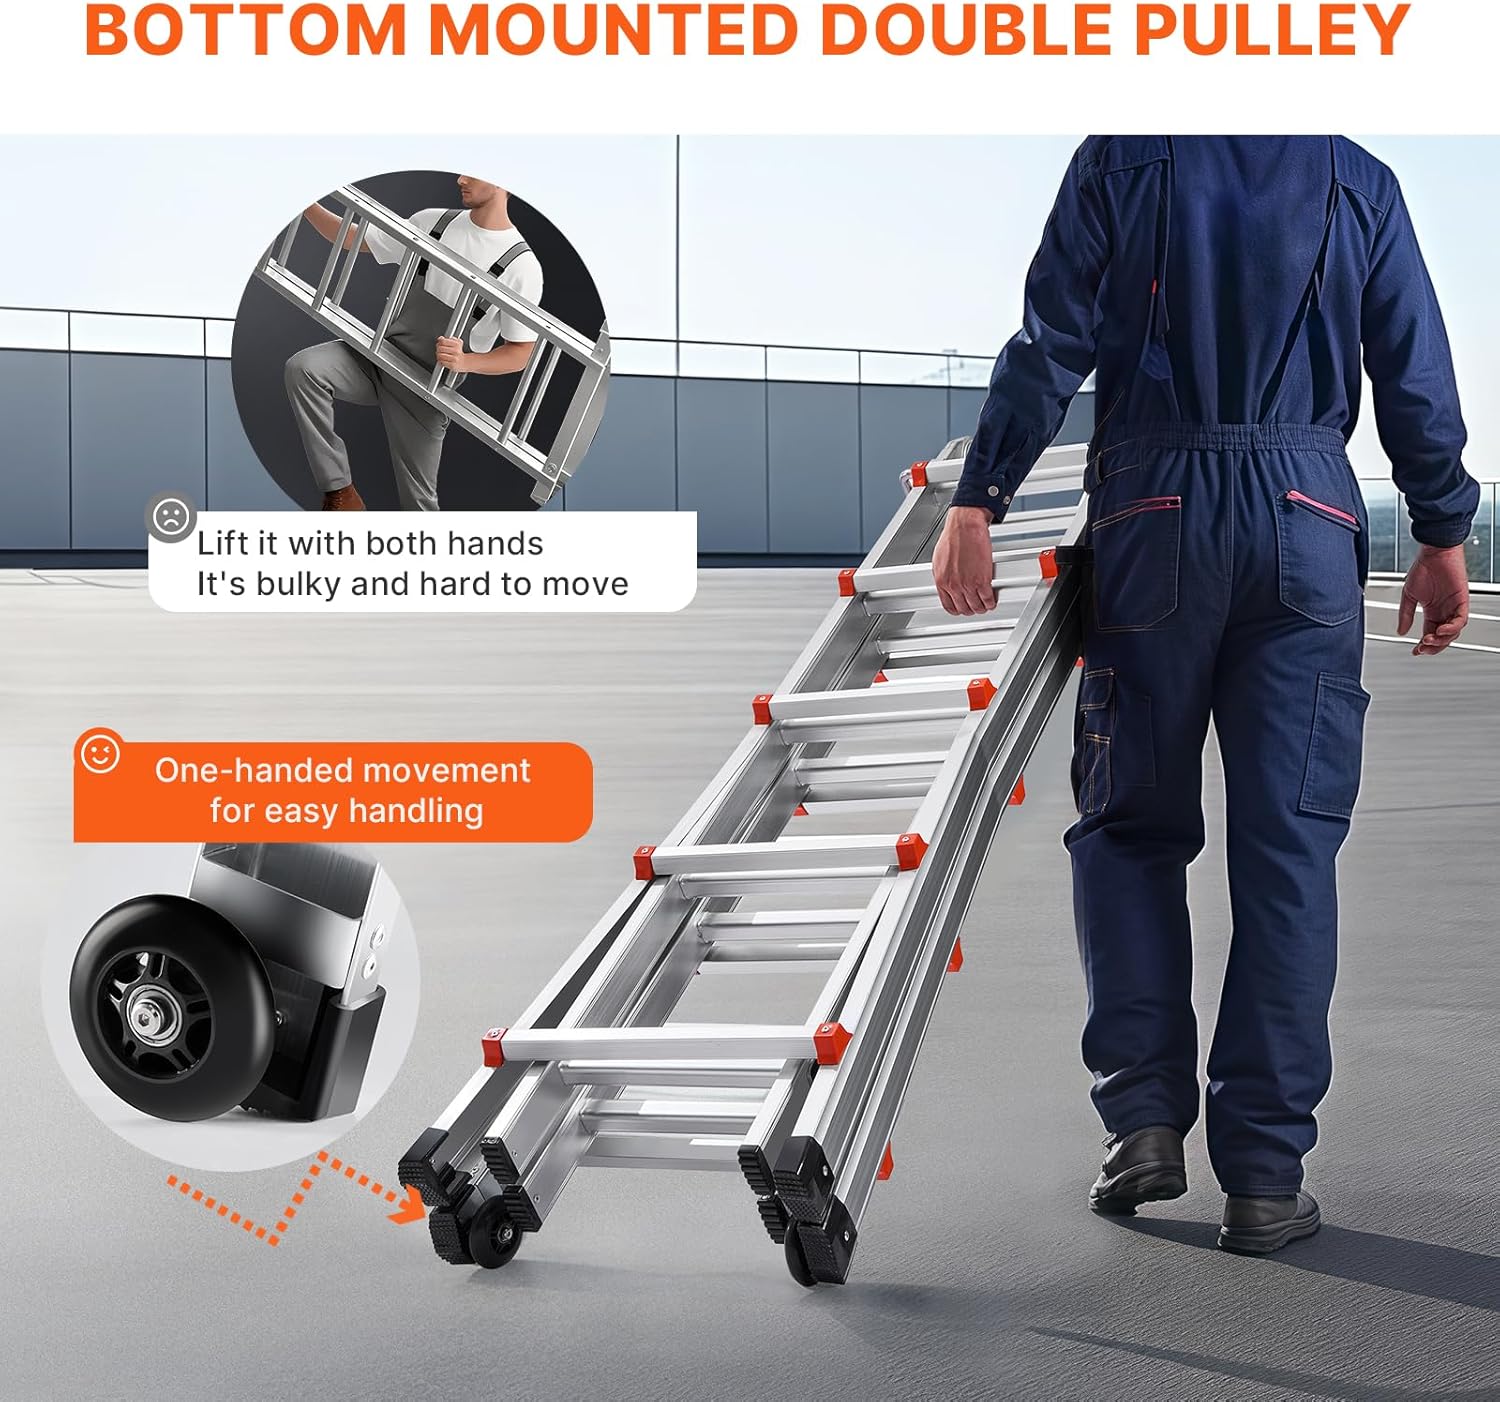
Image 4.1: Detail of the adjustable locking key for changing ladder configurations.
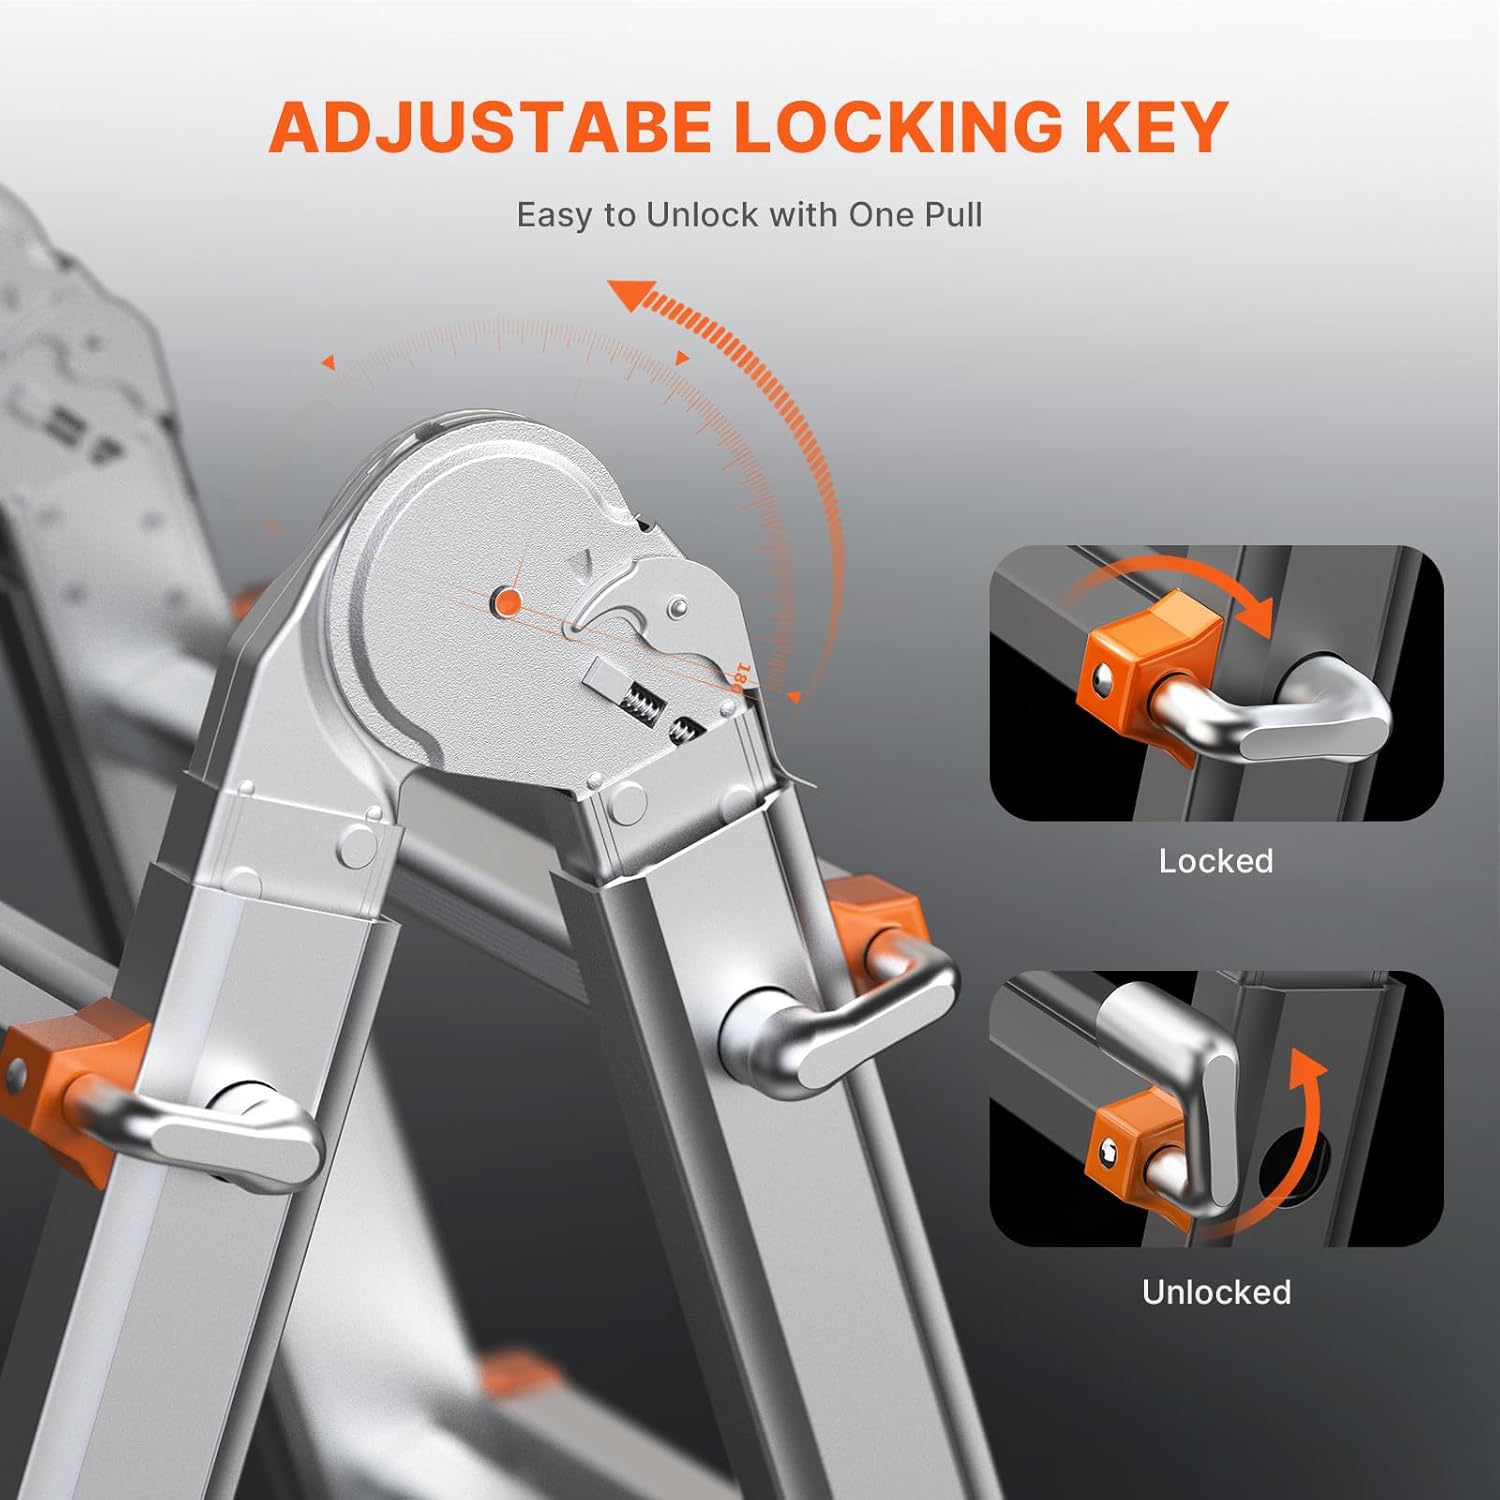
Image 4.2: Visual guide to different ladder configurations and dimensions.
5. Operating Instructions
5.1. General Use
- Always face the ladder when climbing or descending.
- Wear appropriate footwear with good grip.
- Ensure the area around the base and top of the ladder is clear of obstructions.
- For A-frame use, ensure the spreaders are fully locked.
- For extension ladder use, ensure the ladder is angled correctly (approximately 75 degrees from the horizontal).
5.2. Portability
The ladder is equipped with dual wheels at the base for easy transportation.
- Ensure the ladder is fully retracted and folded for transport.
- Tilt the ladder slightly to engage the wheels.
- Roll the ladder to the desired location.
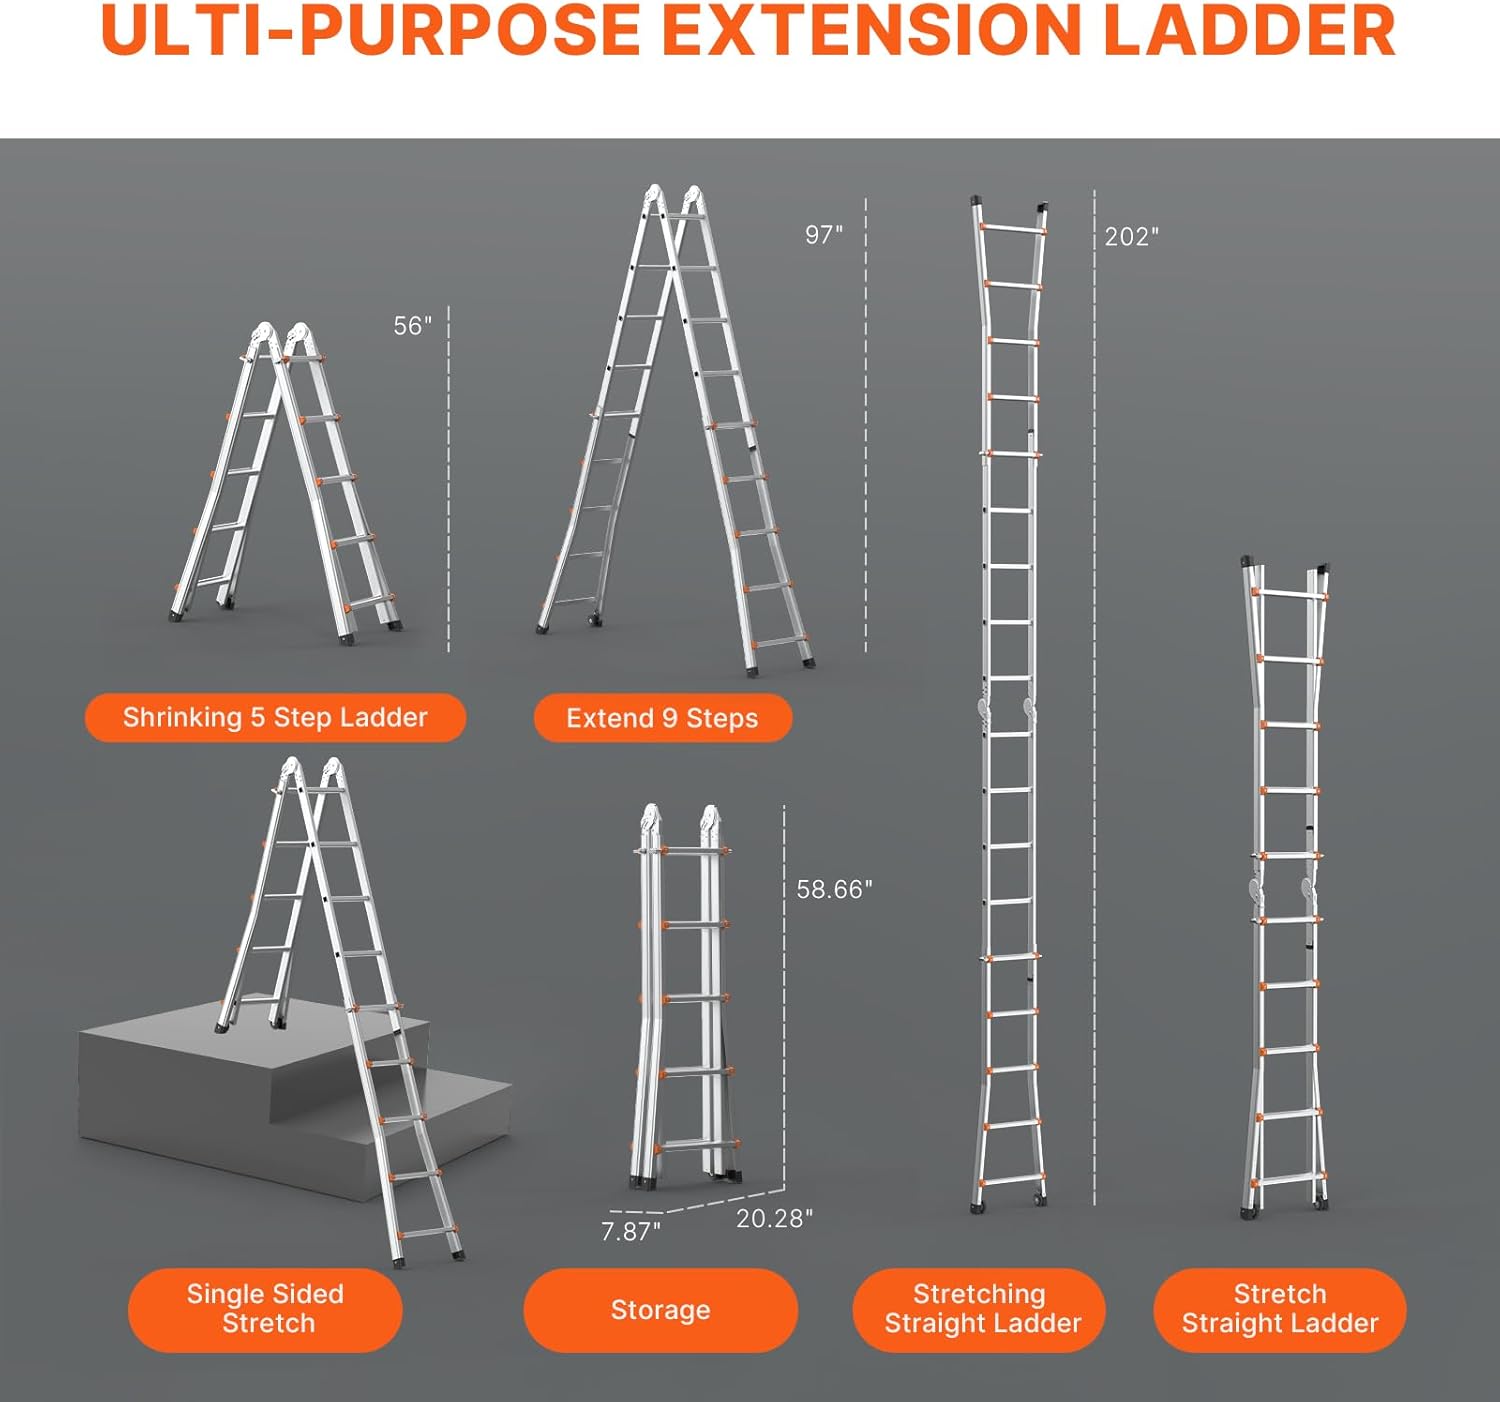
Image 5.1: Demonstrating the ease of moving the ladder with its integrated wheels.
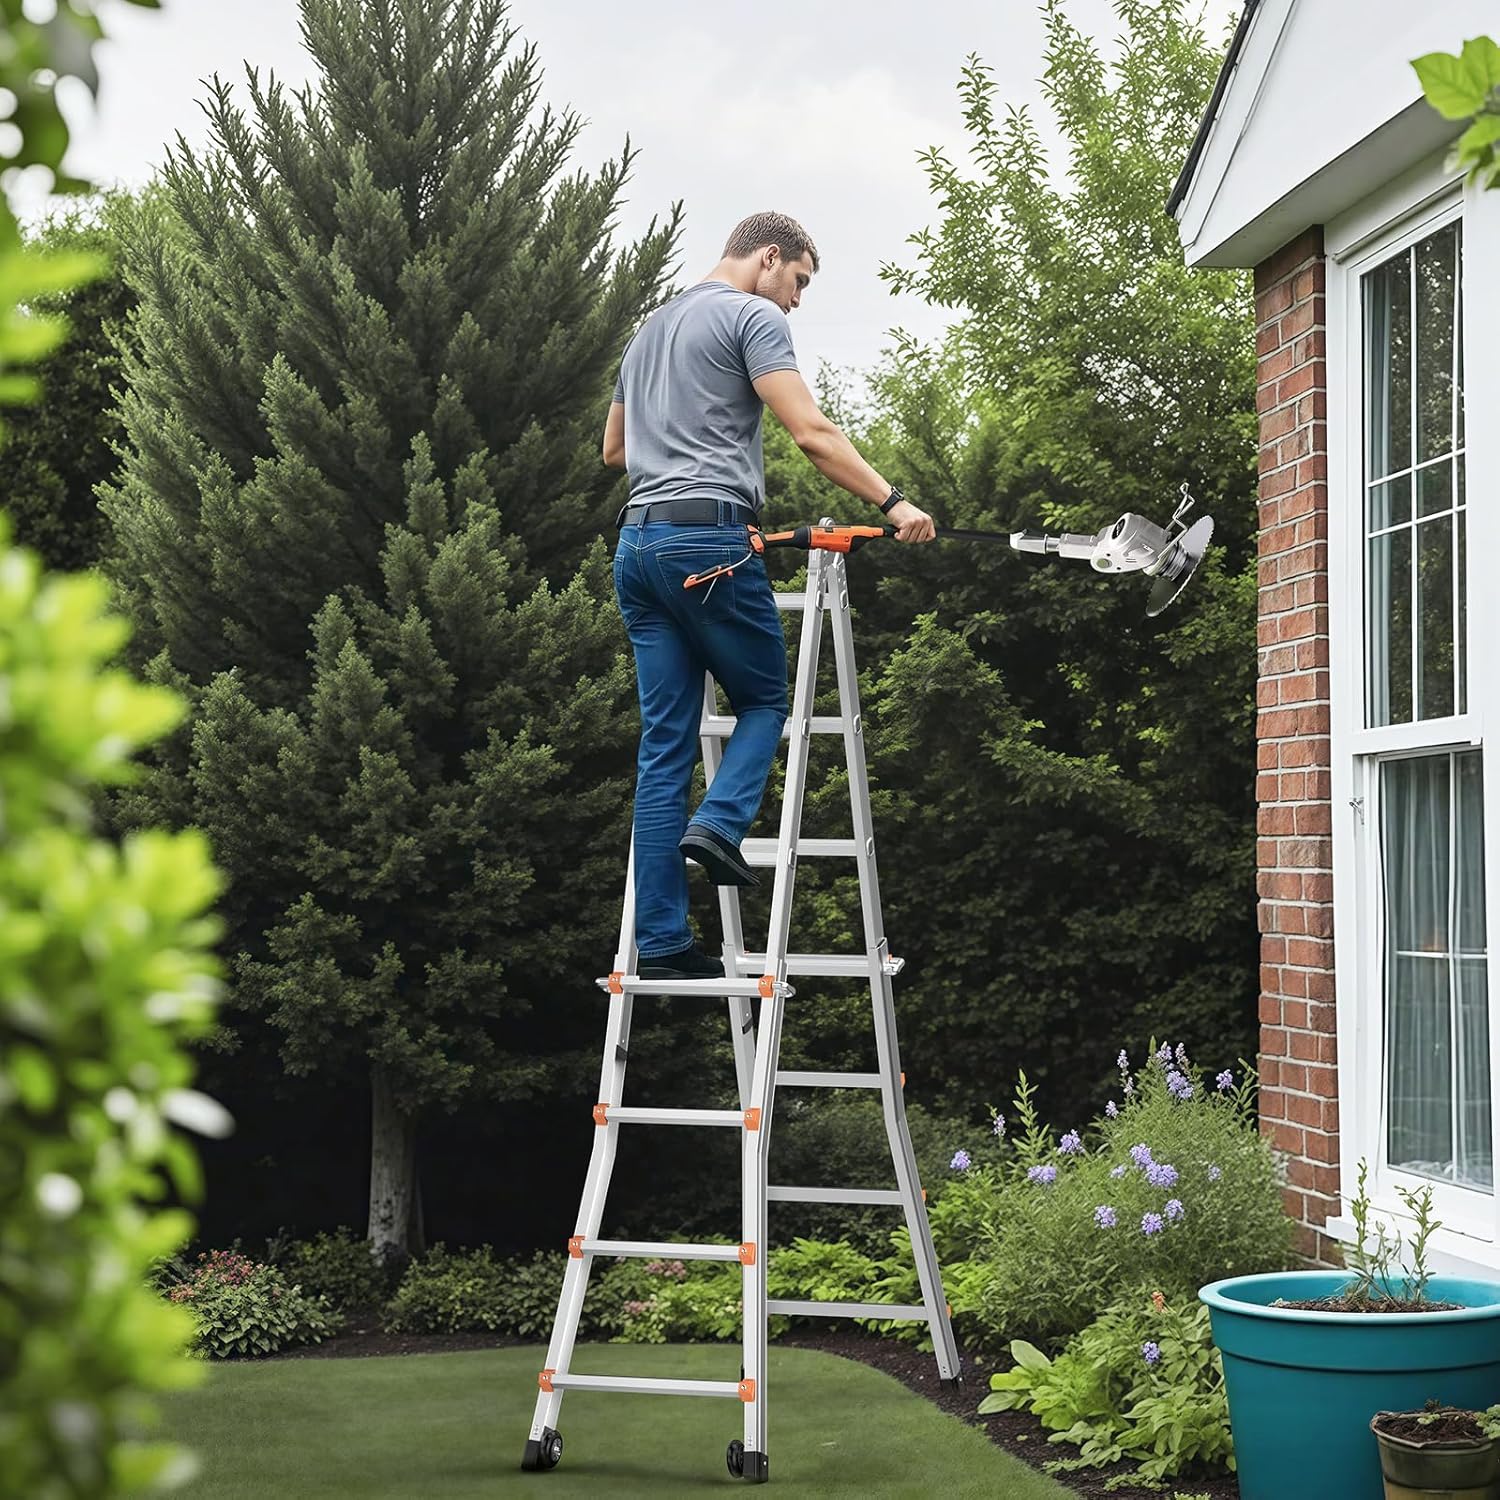
Image 5.2: Example of the ladder in use for outdoor tasks.
6. Maintenance
- Cleaning: Clean the ladder regularly with a damp cloth and mild detergent. Avoid abrasive cleaners or solvents that could damage the aluminum or plastic components.
- Inspection: Periodically inspect all parts for wear, damage, or loose fasteners. Pay close attention to rungs, locking mechanisms, foot pads, and hinges.
- Lubrication: Apply a silicone-based lubricant to the telescoping mechanisms and locking pins if they become stiff. Do not over-lubricate, as this can attract dirt.
- Storage: Store the ladder in a dry, protected area, away from extreme temperatures and direct sunlight. Ensure it is fully retracted and secured to prevent accidental opening.
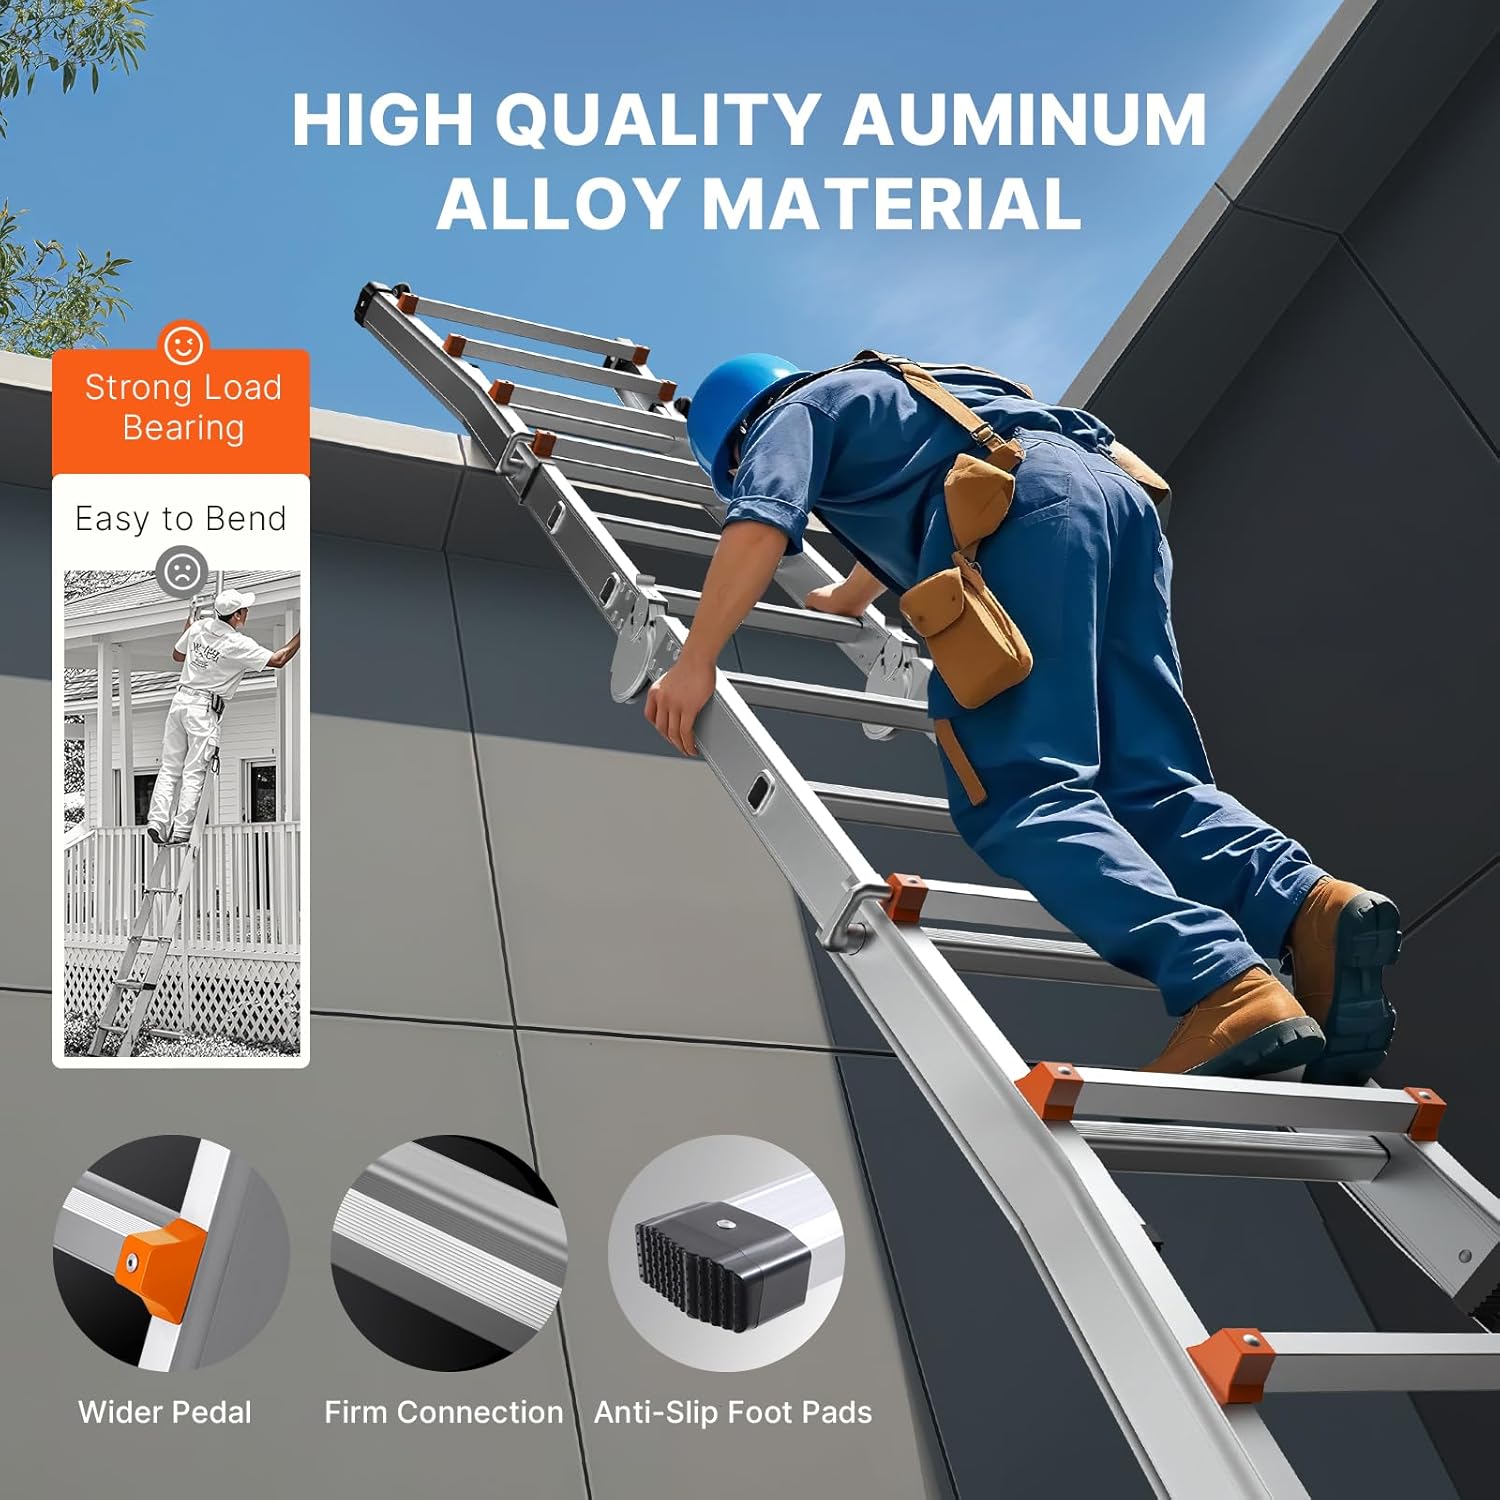
Image 6.1: Highlighting the durable construction and anti-slip features that require periodic inspection.
7. Troubleshooting
- Ladder sections not extending/retracting smoothly: Clean the sections and apply a silicone lubricant. Ensure no debris is obstructing the mechanism.
- Locking mechanisms not engaging: Check for dirt or damage. Ensure the buttons are fully released after extending/retracting. Do not force the mechanism.
- Ladder feels unstable: Verify that all rungs are fully locked and the ladder is placed on a firm, level surface. Check foot pads for wear.
If you encounter issues not listed here or if problems persist, contact VEVOR customer support for assistance.
8. Specifications
| Feature | Specification |
|---|---|
| Model Number | KMP405C |
| Material | Aluminum Alloy |
| Maximum Load Capacity | 330 lbs (149.7 kg) |
| Maximum Height (Fully Extended) | 16.7 ft (5120 mm / 202 inches) |
| Number of Steps | 12 (Total) |
| Step Distance | 11 inches (280 mm) |
| Product Dimensions (Folded) | 58.66"H x 20.28"W x 7.87"D (1490 x 515 x 200 mm) |
| Item Weight | 25.8 lbs (11.68 kg) |
| Special Features | Extendable, Wheels, A-Frame/Extension Convertible |
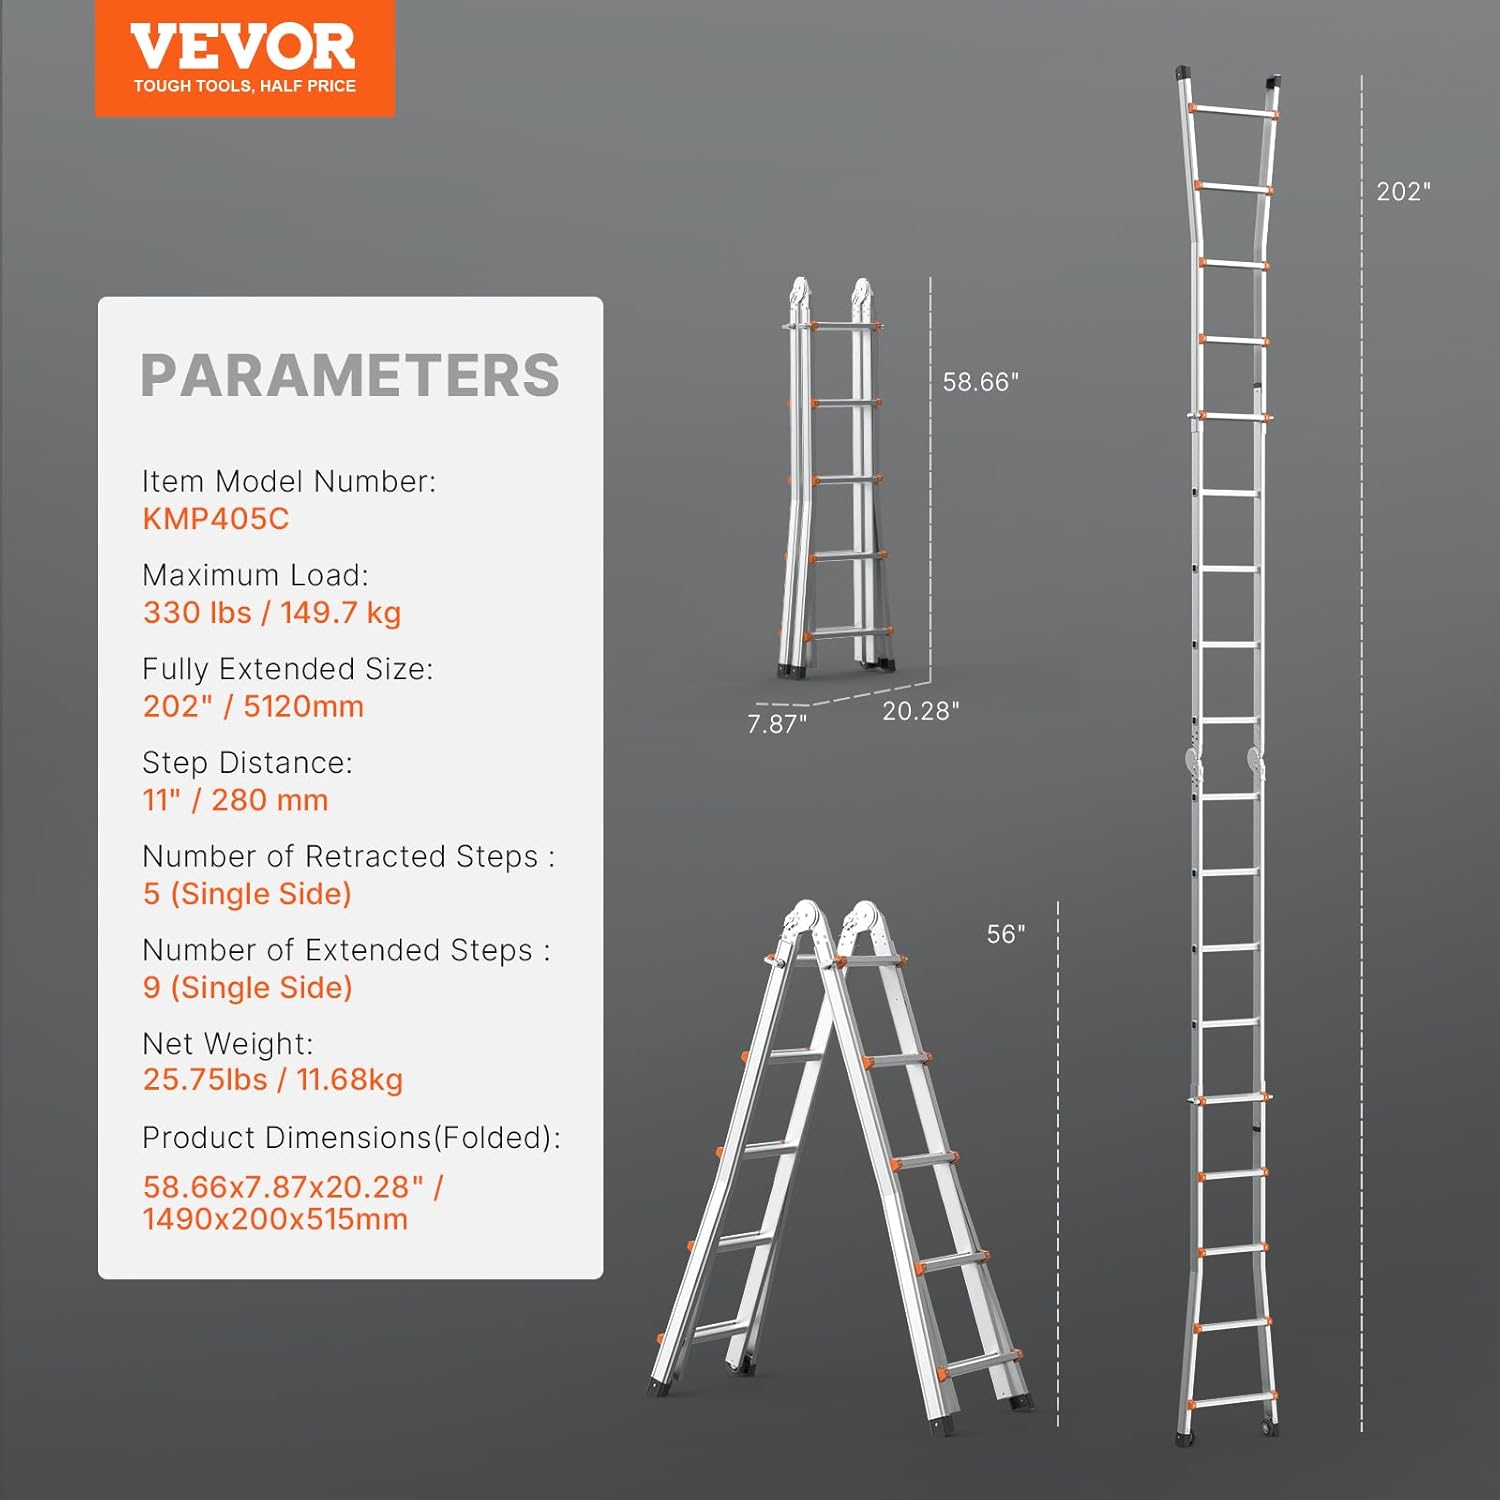
Image 8.1: Detailed product parameters and dimensions.
9. Warranty and Support
For warranty information, technical support, or service inquiries, please refer to the official VEVOR website or contact their customer service department. Keep your purchase receipt as proof of purchase.
For further assistance, visit: www.vevor.com


