Introduction
This manual provides comprehensive instructions for the setup, operation, and maintenance of your groov e Cuties Sleep Trainer Alarm Clock with LED Night Light. Please read this manual thoroughly before using the product to ensure proper function and longevity.

Image 1: Front view of the groov e Cuties Sleep Trainer Alarm Clock, illuminated, displaying the time and sleep/wake indicators.
Product Features
The groov e Cuties Sleep Trainer Alarm Clock is designed to assist children with sleep routines and provide a comforting night light. Key features include:
- LED Night Light: Offers 9 vibrant color options and 5 light modes. Tap the device to change colors.
- Alarm Clock: Features 6 preset alarm sounds for wake-up.
- White Noise & Soothing Sounds: Includes 6 soothing sounds, such as white noise, to aid sleep.
- Sleep Trainer: Visual cues (sun/moon icons) help children understand when it's time to sleep and wake up.
- Safe Material: Constructed from safe silicone material.
- Snooze Function: Allows for temporary delay of the alarm.
- Time Display: 12/24 hour clock format.
- Timer Settings: Includes 30 and 60-minute timer options.
- Adjustable Brightness: 5 levels of display brightness.
- Adjustable Volume: 5 levels of sound volume.
- Rechargeable Battery: Built-in 1800mAH rechargeable battery with USB-C charging.
Setup
1. Initial Charging
Before first use, fully charge the device. Connect the included USB-C charging cable to the charging port on the back of the unit and plug the other end into a compatible USB power adapter (not included).
- A charging indicator light will typically show the charging status.
- The device can also be operated while connected to a USB power source.

Image 2: Rear view of the alarm clock, highlighting control buttons and the USB-C charging port.
2. Powering On/Off
Press and hold the Power button (usually located on the back) to turn the device on or off.
Operating Instructions
1. Setting the Time
- Press the TIME button (refer to Image 2 for button location).
- Use the Up and Down arrow buttons to adjust the hour. Press TIME again to confirm.
- Use the Up and Down arrow buttons to adjust the minute. Press TIME again to confirm.
- To switch between 12-hour and 24-hour format, typically this is done during the time setting process or via a dedicated button/menu option. Consult the quick start guide if available for specific button combinations.
2. Setting the Alarm
- Press the ALARM button (refer to Image 2).
- Use the Up and Down arrow buttons to set the desired alarm hour. Press ALARM again.
- Use the Up and Down arrow buttons to set the desired alarm minute. Press ALARM again.
- To select an alarm sound (from 6 preset options), use the Music Note button or arrow buttons during the alarm setting process. Press ALARM to confirm.
- To activate/deactivate the alarm, there is usually a dedicated switch or a long press on the ALARM button.
3. Sleep Trainer Function
The sleep trainer uses visual cues to indicate sleep and wake times. The display will show a moon icon during sleep time and a sun icon during wake time.
- Access the sleep trainer settings (specific button combination may vary, often involves holding the TIME or ALARM button).
- Set the desired "sleep time" (when the moon icon appears).
- Set the desired "wake time" (when the sun icon appears).
- Confirm settings. The device will then visually guide your child.
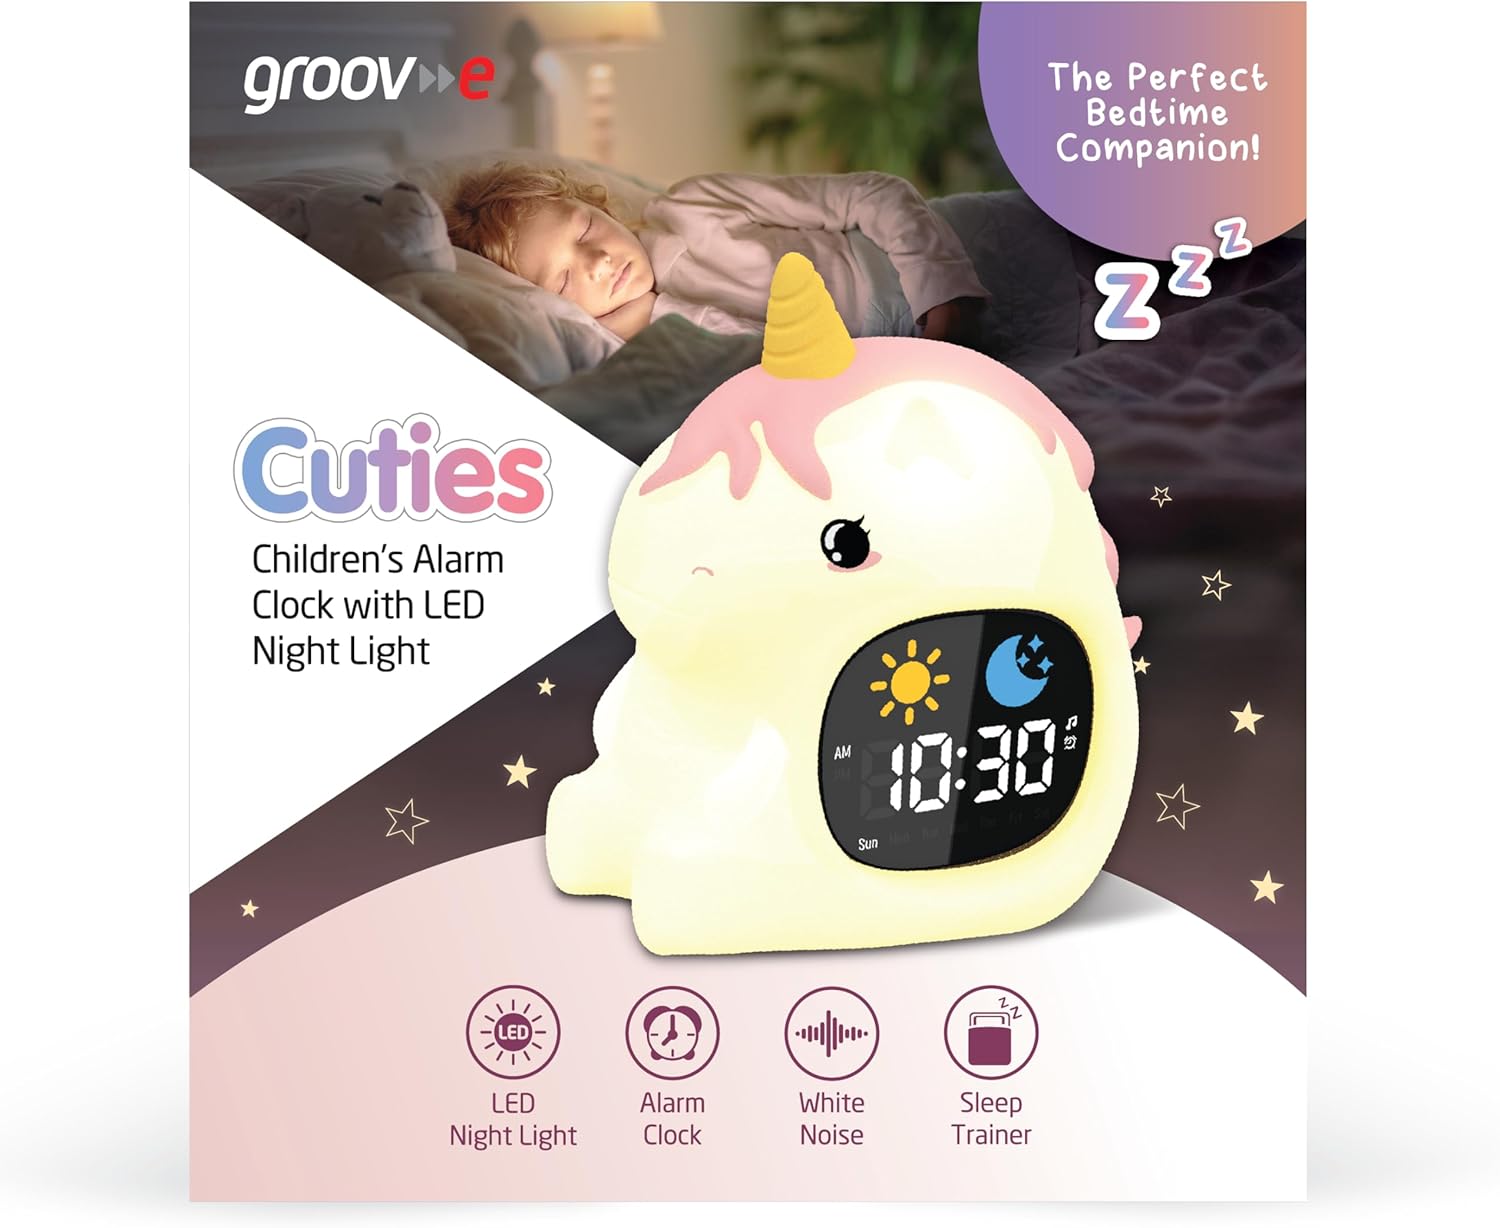
Image 3: The alarm clock functioning as a sleep trainer, displaying the sun icon for wake-up.
4. LED Night Light
The device features an integrated LED night light with multiple color and brightness options.
- Changing Colors: Tap the silicone body of the device to cycle through 9 vibrant colors and 5 light modes.
- Adjusting Brightness: Use dedicated brightness buttons (if available) or a combination with the TIME button to adjust between 5 brightness levels.
5. White Noise and Soothing Sounds
To activate soothing sounds:
- Press the Music Note button (refer to Image 2) to cycle through the 6 available soothing sounds, including white noise.
- Adjust the volume using the Up and Down arrow buttons (5 volume levels available).
6. Snooze Function
When the alarm sounds, press any button (other than the power button) or tap the device to activate the snooze function. The alarm will temporarily pause and sound again after a set interval (e.g., 9 minutes).
7. Timer Settings
The device includes 30 and 60-minute timer settings, useful for short sleep cycles or quiet time.
- Consult the quick start guide for specific button presses to activate and select timer durations.
Maintenance
- Cleaning: Wipe the device with a soft, damp cloth. Do not use abrasive cleaners or immerse the device in water.
- Storage: Store the device in a cool, dry place when not in use for extended periods.
- Battery Care: To prolong battery life, avoid fully discharging the battery frequently. Recharge when the low battery indicator appears.
Troubleshooting
| Problem | Possible Cause | Solution |
|---|---|---|
| Device does not turn on. | Battery is depleted. | Connect the device to a USB power source using the provided USB-C cable and allow it to charge for at least 30 minutes before attempting to power on. |
| Alarm does not sound. | Alarm is not activated or volume is too low. | Ensure the alarm is set and activated. Check the volume level and adjust if necessary. |
| Night light is not changing colors. | Incorrect tapping or mode selection. | Ensure you are tapping the silicone body firmly. Check if the device is in a specific light mode that prevents color changes. |
| Device is not charging properly. | Faulty cable, adapter, or charging port. | Try using a different USB-C cable and/or a different USB power adapter. Ensure the cable is securely connected to both the device and the power source. If the issue persists, contact customer support. |
Specifications
| Brand | groov e |
| Model | Cuties Sleep Trainer Alarm Clock |
| Item Weight | 0.34 Kilograms |
| Battery | 1800mAH Rechargeable Battery (USB-C charging) |
| Display Type | Digital |
| Special Feature | Sleep Trainer, LED Night Light, White Noise |
Warranty and Support
For warranty information or technical support, please refer to the documentation included with your purchase or visit the official groov e website. Keep your proof of purchase for warranty claims.
Manufacturer: Rashmian Ltd.


