
1. Safety Information
Always follow the instructions provided with this product. This tent is designed for commercial use and may require two or three people to install and secure properly. Always ensure the tent is securely anchored to the ground using the provided sandbags, ropes, and stakes, especially in windy conditions. Do not attempt to install or use this tent in hazardous weather conditions. Always inspect the tent and its components before each use and store it properly when not in use to prevent damage or potential hazards.
2. Package Contents
Verify that all components are present before beginning assembly:
- 1x 10'x20' Commercial grade Pop up canopy frame
- 1x 10'x20' Canopy Top
- 6x PA coated Panels (4x Sidewalls with Window and 2x Sidewalls with Zipper)
- 1x Tent bag with wheels
- 4x Sandbags
- 8x Ground Pegs
- 4x Wind Ropes
- 1x Manual

Image: All components included in the package.
3. Setup Instructions
Step-by-Step Guide
- Unfold the Frame: With 2-3 people, remove the pre-assembled frame from the wheeled bag and partially unfold it.
- Attach Canopy Top: Place the canopy fabric over the partially opened frame. Secure the canopy top to the frame using the integrated Velcro straps or buckle designs at the corners.
- Extend Legs: Lift the frame and fully extend the legs. Press the upgraded thumb buttons on the legs to adjust the height to your desired level (118, 122, or 126 inches). Ensure all legs are locked into place.
- Install Sidewalls (Optional): Attach the PA coated sidewalls using the full strip of Velcro along the top edge of the frame. Install as many sidewalls as needed.
- Secure the Canopy: Fill the four sandbags with sand and attach them to the canopy legs. Use the provided ground pegs and wind ropes to anchor the canopy securely to the ground, especially in windy conditions.
Image: Visual guide for quick setup.
Setup Video Guide
Video: Detailed instructions on how to install the COBIZI Commercial Grade Pop up Canopy.
4. Operating the Canopy
Height Adjustment
The canopy offers three adjustable height settings: 118 inches, 122 inches, and 126 inches. To adjust, locate the upgraded thumb button on each leg. Press the button and slide the leg to the desired height, ensuring it locks securely into place at each setting. This system is designed to prevent pinched fingers during adjustment.
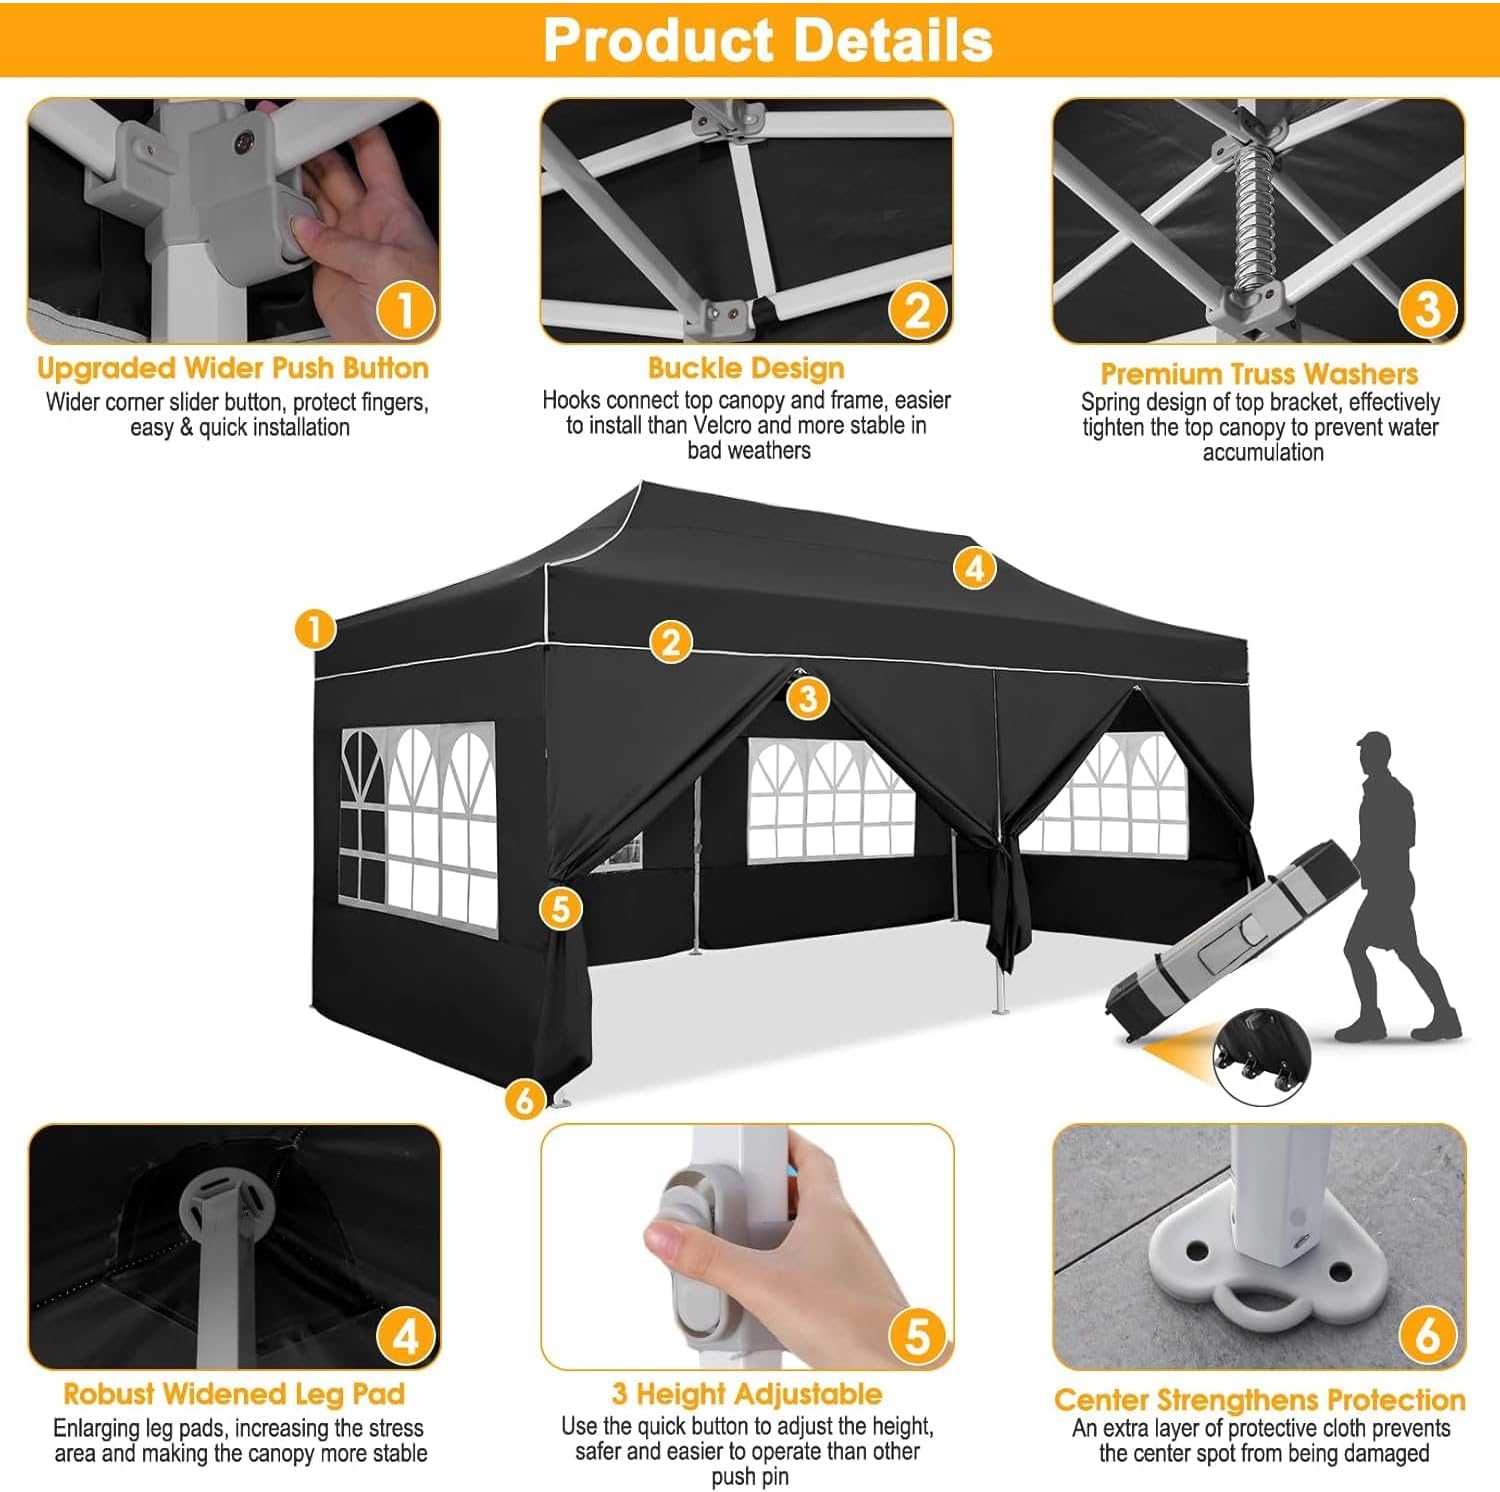
Image: Detail of the upgraded thumb button for height adjustment.
Sidewall Usage
The canopy includes six removable sidewalls: four with windows and two with zippers. These sidewalls attach to the frame using a full strip of Velcro, providing a secure and customizable enclosure. Install or remove sidewalls as needed for weather protection or privacy.
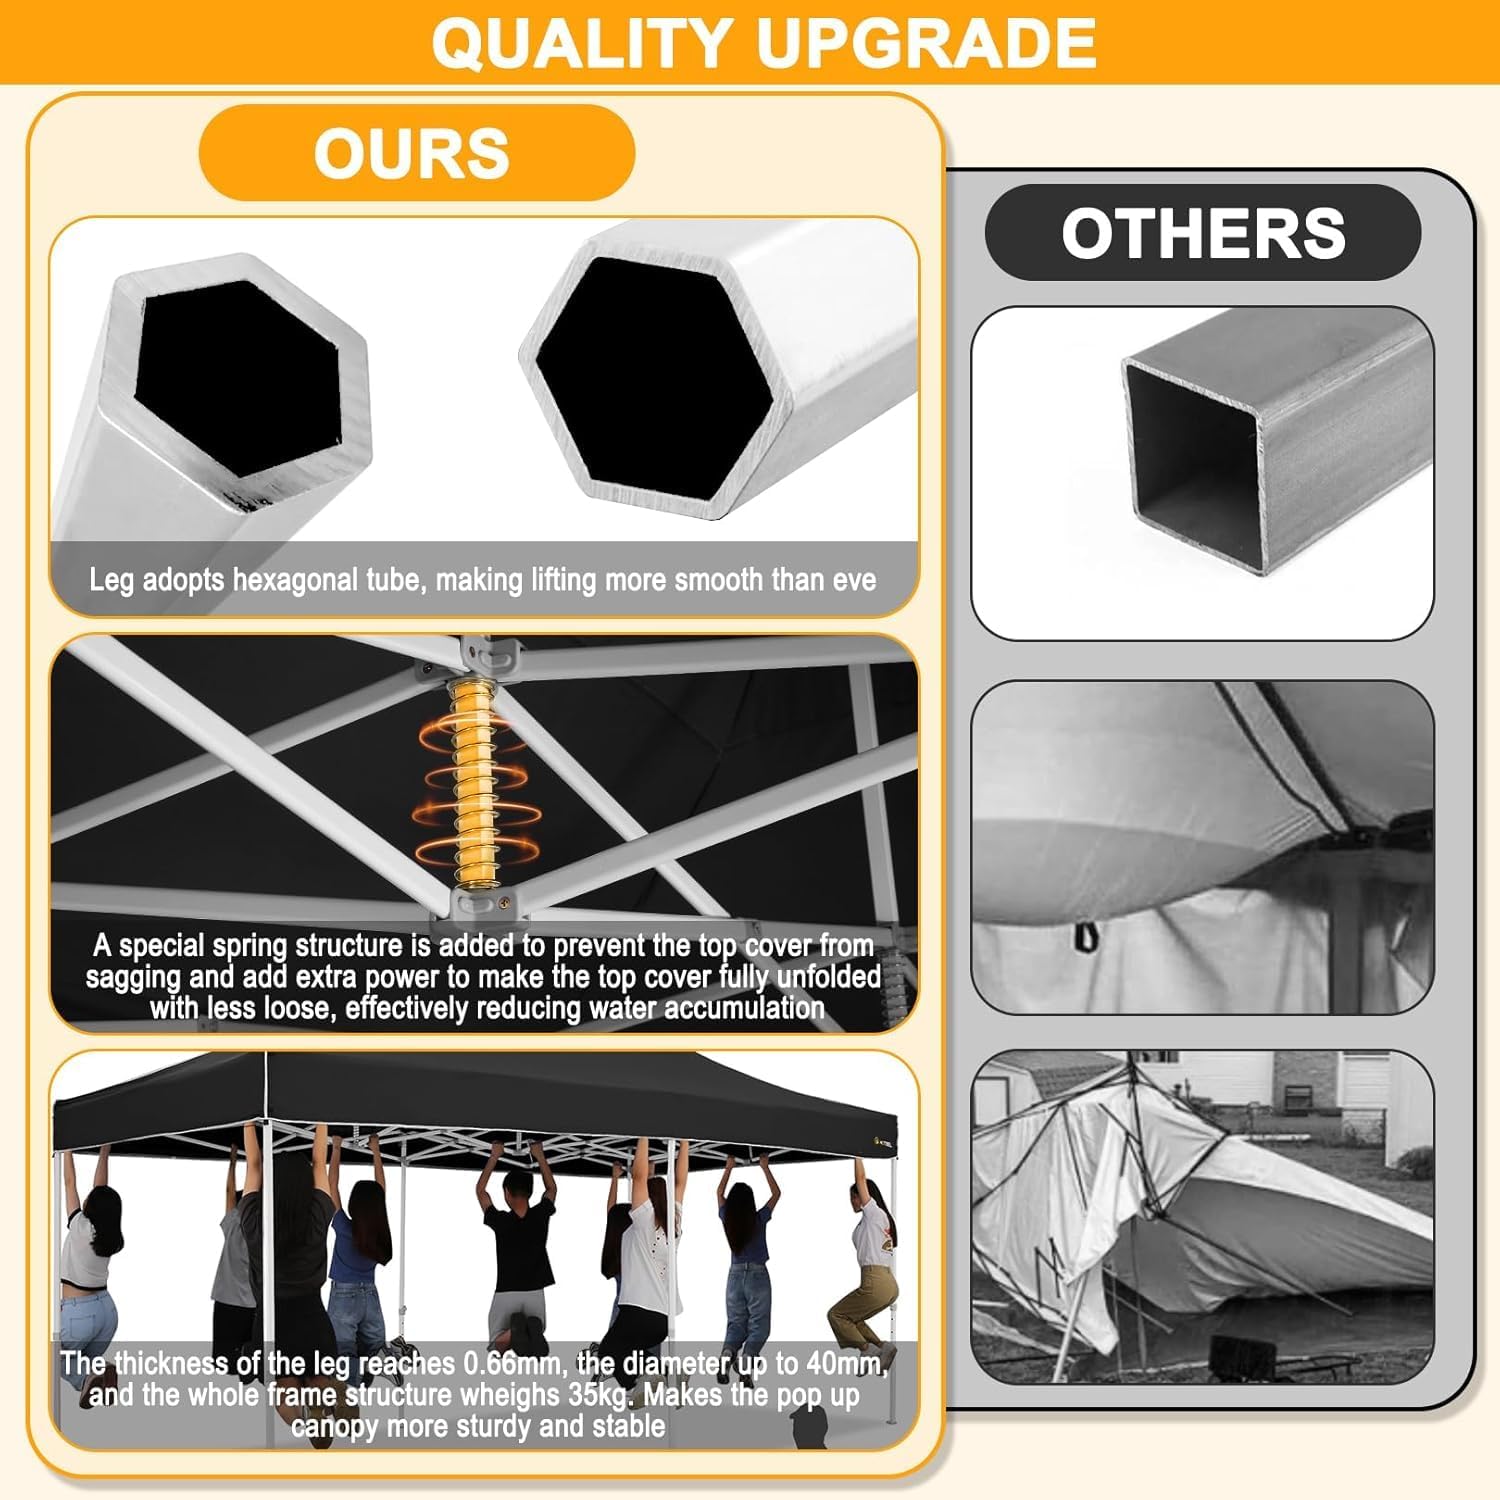
Image: Canopy with sidewalls installed, demonstrating weather protection.
5. Maintenance
- Cleaning: Clean the canopy top and sidewalls with mild soap and water. Do not use harsh chemicals or abrasive cleaners, as this may damage the fabric's waterproof and UV-protective coatings. Allow all fabric components to dry completely before storage.
- Frame Care: Inspect the thickened alloy steel frame regularly for any signs of damage or rust. Clean any dirt or debris from the frame.
- Storage: When not in use, disassemble the canopy and store all components in the provided wheeled bag in a dry, cool place. Proper storage helps prevent damage and prolongs the product's lifespan.
- Inspection: Before each use, inspect all parts, including the frame, canopy top, sidewalls, sandbags, ground pegs, and ropes, for wear or damage. Replace any damaged parts immediately to ensure safe operation.
6. Troubleshooting
Water Accumulation on Canopy Top
The canopy features a peak tensioner structure designed to prevent water pooling. If water accumulates, ensure the canopy top is properly stretched and secured to the frame. Adjust the height settings if necessary to maintain proper tension and slope for water runoff.
Canopy Instability in Wind
The canopy is designed with thickened hexagonal legs and a robust frame for stability. To maximize stability, always use the included sandbags, ground pegs, and wind ropes. Ensure sandbags are filled adequately and ropes are tautly secured to the ground. Avoid using the canopy in strong winds or severe weather conditions.
Frame Durability Demonstration
Video: Demonstration of the heavy-duty solid structure of the canopy frame.
Video: Load test demonstrating the strength and stability of the 10x20 Commercial Grade Canopy Tent.
7. Specifications
| Feature | Detail |
|---|---|
| Brand | COBIZI |
| Model Number | 83b-1 |
| Material | Thickened Alloy Steel (Frame), 2*2 PVC Oxford Fabric (Canopy Top) |
| Color | Black |
| Item Weight | 115 pounds |
| Dimensions (L x W x H) | 236"L x 118"W x 126"H (10x20 ft) |
| Size | 10x20 |
| Occupancy | 15-20 people |
| Coverage | Water-resistant fabric with detachable side curtains, UPF 50+ UV protection |
| Frame Material | Thickened Steel Frame, Upgrade Hexagonal Legs |
| Water Resistance Level | Waterproof |
| Ultraviolet Light Protection | Yes (UPF 50+) |

Image: Dimensions and key features overview.
8. Warranty and Support
This product is typically covered by a 30-day return policy. For specific warranty details or if you encounter any problems or have questions regarding your COBIZI Heavy Duty 10x20 Pop Up Canopy Tent, please contact COBIZI Direct customer support. Contact information can usually be found on the seller's page or through your purchase platform.


