1. Introduction
This manual provides detailed instructions for the ESSLNB ES1108 Night Vision Monocular. This device is designed for both day and night observation, featuring 6x optical magnification, up to 18x digital zoom, and 1080P Full HD photo and video recording capabilities. It is equipped with a 5-level adjustable infrared illuminator for clear viewing in complete darkness. The monocular is suitable for various outdoor activities such as camping, hunting, surveillance, and wildlife observation.

Figure 1: ESSLNB ES1108 Night Vision Monocular and accessories.
2. Product Components
2.1 Device Structure

Figure 2: ESSLNB ES1108 Monocular Structure Analysis.
| No. | Component | No. | Component |
|---|---|---|---|
| 1 | Eyepiece | 10 | Battery Compartment |
| 2 | Power/Function Check /Video Playing/Pause | 11 | Picatinny Rail |
| 3 | Function Selection | 12 | Tripod Interface |
| 4 | Up Key | 13 | Illuminator |
| 5 | Down Key | 14 | Objective Focusing Handwheel |
| 6 | Hand Strap | 15 | USB 2.0 Interface (Charging) |
| 7 | Objective | 16 | Video Output Interface |
| 8 | Eyecup | 17 | TF Card Slot |
| 9 | Diopter |
2.2 Included Accessories

Figure 3: Included Accessories.
- Night Vision Monocular
- Storage Bag
- 32GB TF Card
- Cleaning Cloth
- Hand Grip Strap
- AV Video Cable
- USB Cable
- Operating Instruction Manual (this document)
3. Setup
3.1 Battery Installation
- Locate the battery compartment (10) on the side of the monocular.
- Open the battery compartment cover.
- Insert 3 AA batteries, ensuring correct polarity (+/-) as indicated inside the compartment.
- Close the battery compartment cover securely.
Note: Always use fresh batteries for optimal performance. Remove batteries if the device will not be used for an extended period.
3.2 TF Card Installation
- Locate the TF Card Slot (17) on the side of the monocular.
- Gently insert the included 32GB TF card into the slot until it clicks into place. Ensure the card is oriented correctly.
- To remove the card, press it gently inward until it springs out.
Note: The device supports TF cards up to 64GB. Ensure the card is formatted before first use if not already pre-formatted.
4. Operation
4.1 Power On/Off
- To power on, press and hold the Power/Function Check button (2) until the screen illuminates.
- To power off, press and hold the Power/Function Check button (2) again until the screen turns off.
4.2 Basic Viewing and Focusing
- Look through the Eyepiece (1).
- Adjust the Diopter (9) on the Eyecup (8) to achieve a clear view of the internal display for your eyesight.
- Rotate the Objective Focusing Handwheel (14) to bring the target into sharp focus.
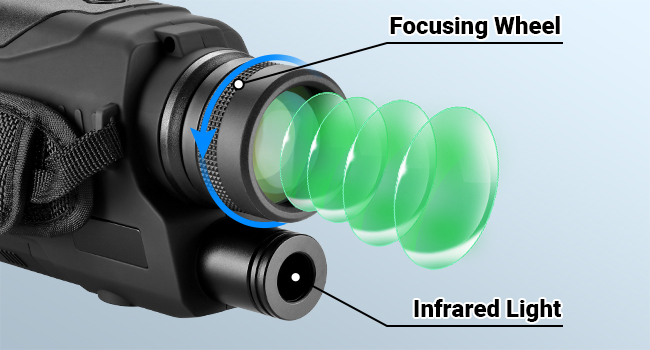
Figure 4: Focusing Wheel and Infrared Light.
4.3 Day and Night Mode
The monocular is designed for use in both daylight and complete darkness. The infrared illuminator is primarily used for night vision.
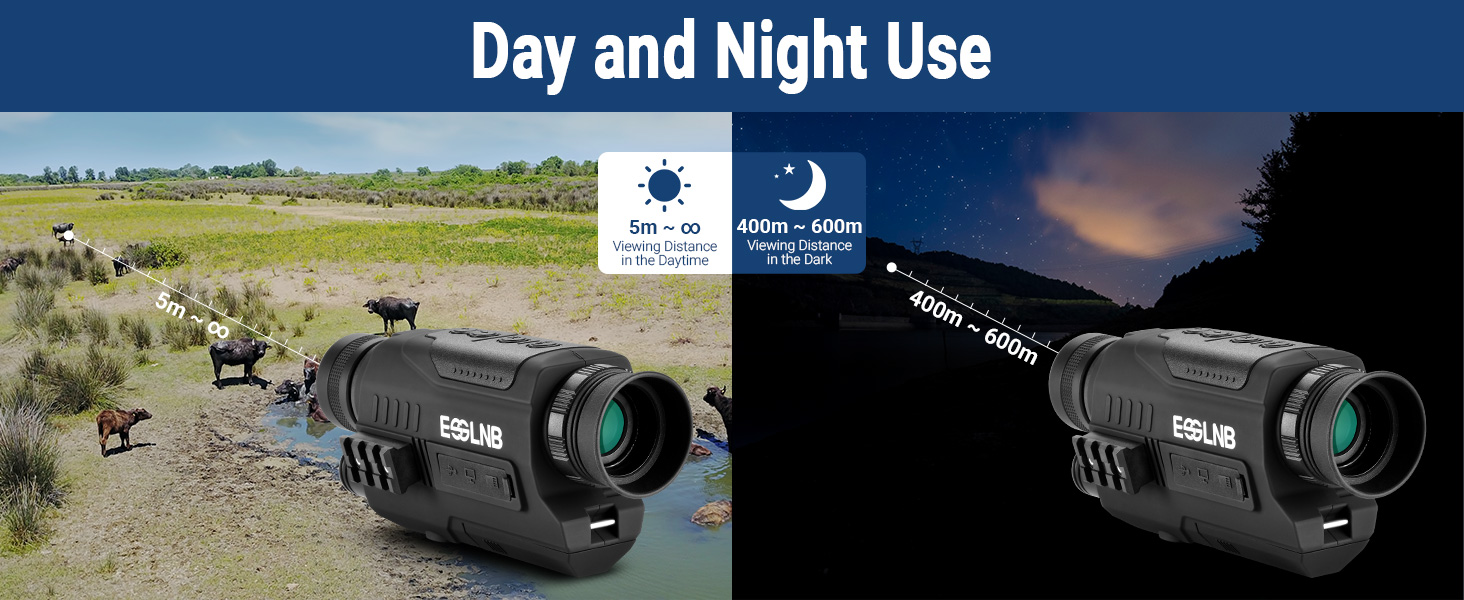
Figure 5: Day and Night Use Capabilities.
4.4 Infrared (IR) Setting
The monocular features a 5-level adjustable infrared illuminator to enhance visibility in low-light or total darkness conditions. Higher IR levels provide clearer images but may consume more battery power.
- While in night mode, press the Function Selection button (3) to cycle through IR levels.
- Observe the screen to select the appropriate IR level for your viewing environment.

Figure 6: 5-Level Infrared Setting Example.
4.5 Zoom Function
The device offers 6x optical magnification and up to 18x digital zoom.
- Use the Up Key (4) and Down Key (5) to adjust the digital zoom level.
- The current zoom level will be displayed on the screen.

Figure 7: Optical and Digital Zoom Magnification.
4.6 Photo and Video Recording
The monocular can capture 1080P Full HD photos and videos.
- To switch between photo and video mode, press the Function Selection button (3) until the desired icon appears on the screen.
- In photo mode, press the Power/Function Check button (2) to take a picture.
- In video mode, press the Power/Function Check button (2) to start recording. Press it again to stop recording.
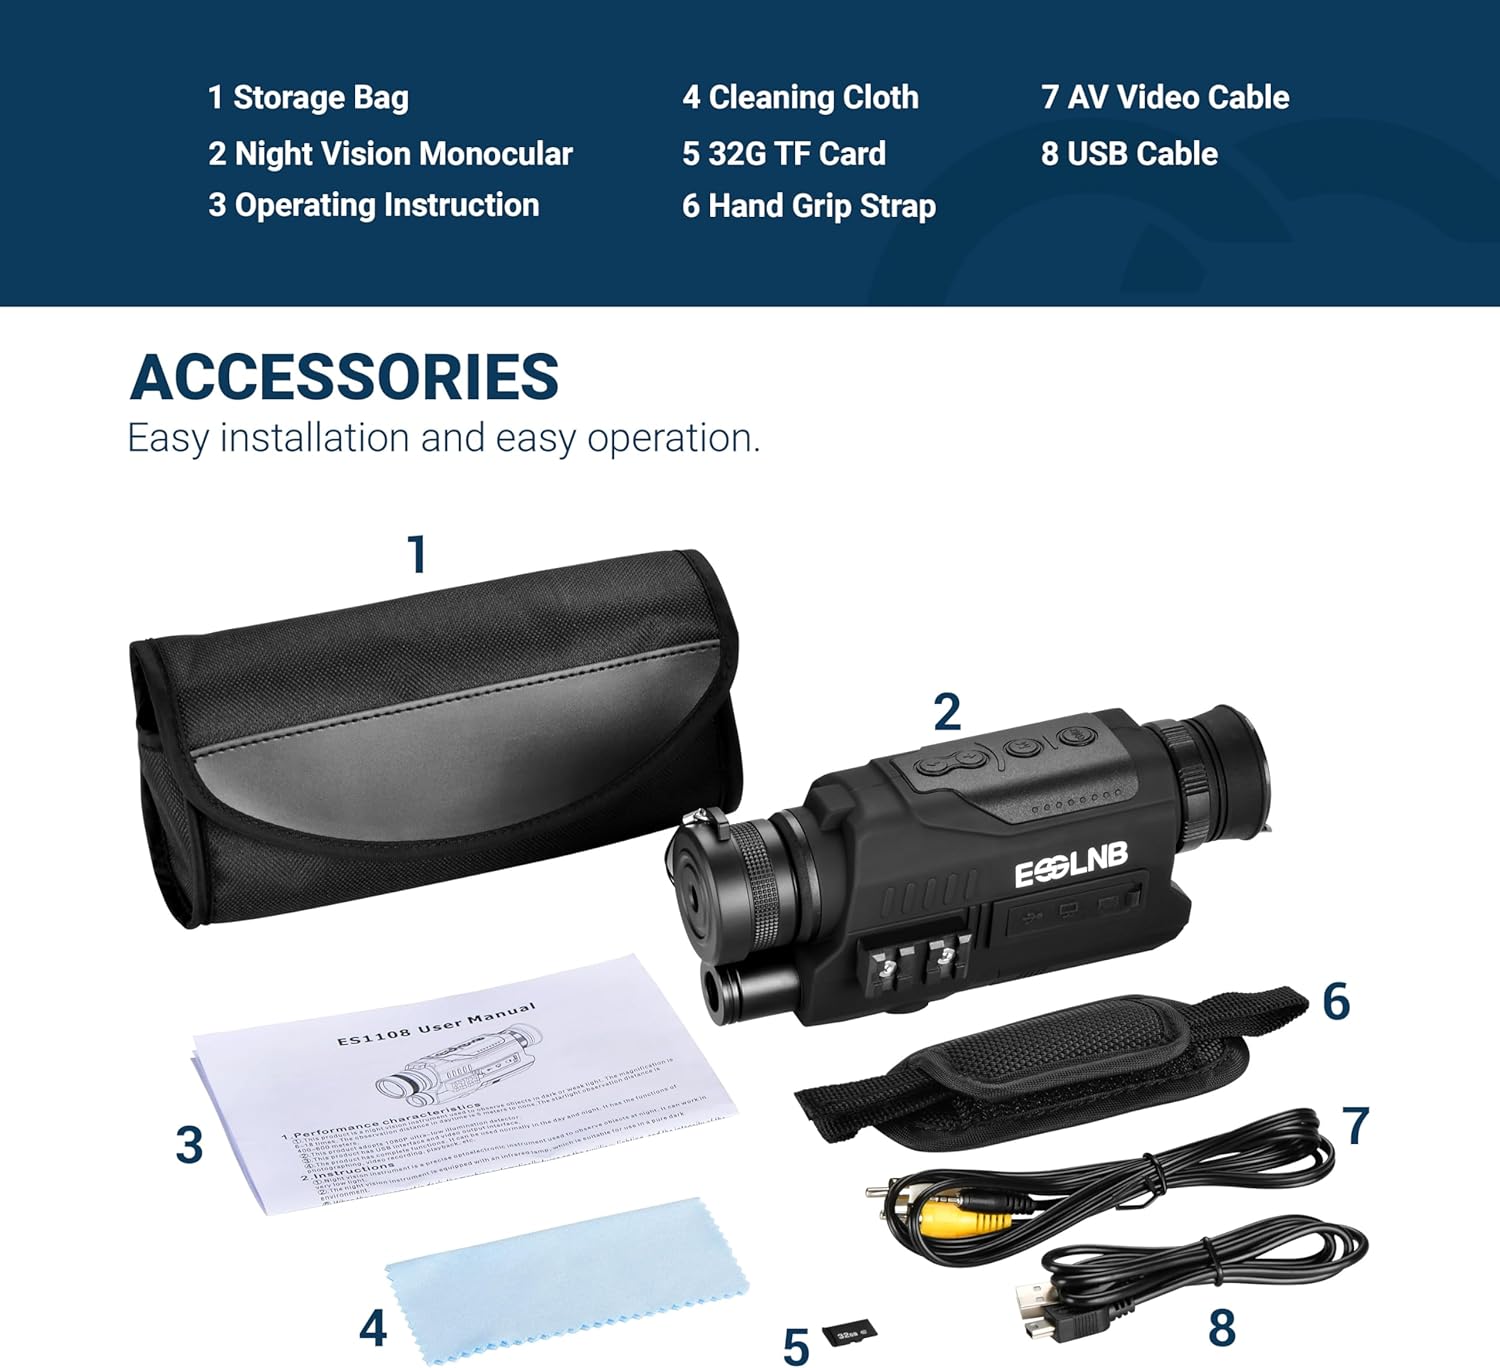
Figure 8: 1080P FHD Photo and Video Recording.
4.7 Playback
To review captured photos and videos:
- Enter playback mode by pressing the Function Selection button (3) until the playback icon is visible.
- Use the Up Key (4) and Down Key (5) to navigate through your recorded files.
- Press the Power/Function Check button (2) to play a video or view a photo.
4.8 Screen Brightness Adjustment
The 1.6-inch TFT LCD display screen brightness can be adjusted in 8 levels for comfortable viewing in various lighting conditions.
- Access the brightness setting through the device's menu (refer to on-screen prompts).
- Use the Up Key (4) and Down Key (5) to increase or decrease the screen brightness.
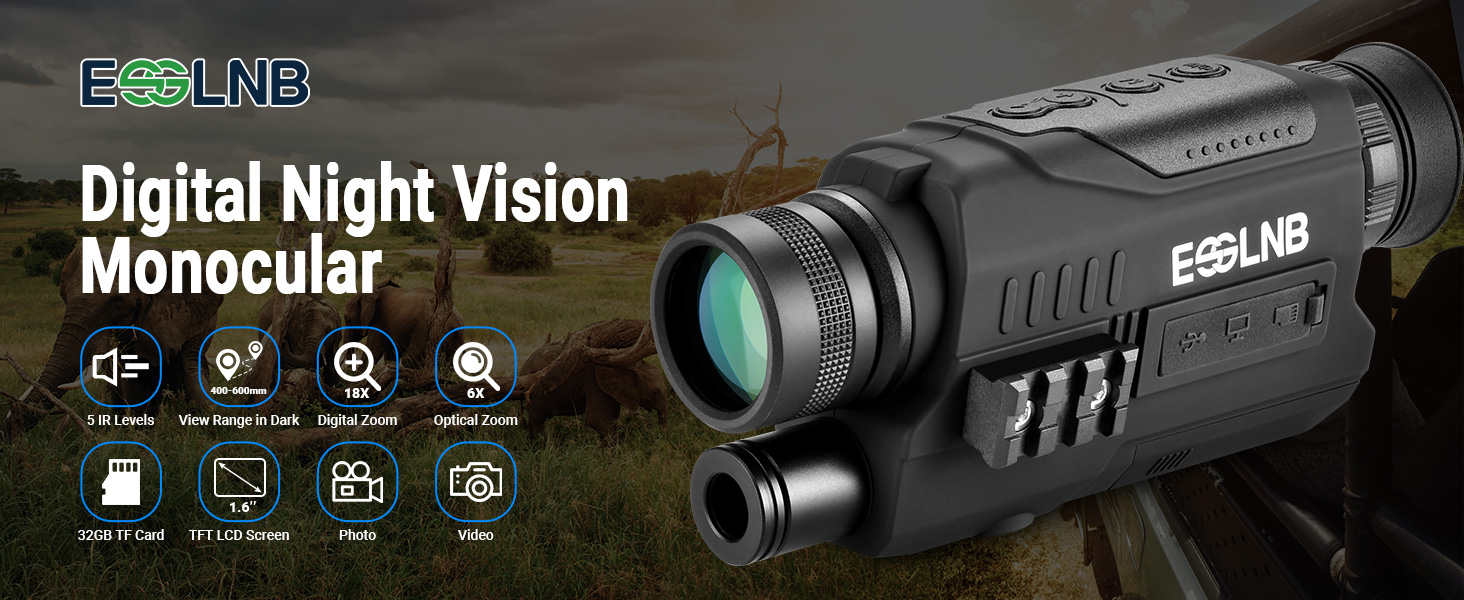
Figure 9: Screen Brightness Levels.
5. Maintenance
5.1 Cleaning
- Use the provided cleaning cloth to gently wipe the lenses and screen.
- For stubborn smudges, use a lens cleaning solution specifically designed for optics. Apply to the cloth, not directly to the lens.
- Wipe the body of the monocular with a soft, dry cloth. Do not use abrasive cleaners or solvents.
5.2 Storage
- Store the monocular in its storage bag in a cool, dry place away from direct sunlight.
- Remove batteries if the device will not be used for an extended period to prevent leakage.
5.3 Battery Care
- Replace all 3 AA batteries at the same time. Do not mix old and new batteries or different battery types.
- Dispose of used batteries responsibly according to local regulations.
6. Troubleshooting
| Problem | Possible Cause | Solution |
|---|---|---|
| Device does not power on. | Low or dead batteries; incorrect battery installation. | Replace with fresh AA batteries, ensuring correct polarity. |
| Image is blurry or out of focus. | Improper focus adjustment; dirty lens. | Adjust the Objective Focusing Handwheel (14) and Diopter (9). Clean lenses with the provided cloth. |
| Cannot see clearly in darkness. | IR illuminator off or set too low. | Increase the Infrared (IR) setting level (up to 5). |
| Cannot record photos/videos. | No TF card inserted; TF card full; TF card error. | Insert a TF card. Delete old files or replace with a new TF card. Format the TF card if necessary. |
| Screen is too bright/dim. | Screen brightness setting is incorrect. | Adjust the screen brightness through the device menu using the Up/Down keys. |
7. Specifications
| Feature | Detail |
|---|---|
| Model Number | ES1108 |
| Optical Magnification | 6x |
| Digital Zoom | 18x |
| Objective Lens Diameter | 32 Millimeters |
| Infrared Illuminator | 850nm, 5 Levels Adjustable |
| Viewing Range (Full Dark) | Up to 1968 feet (600 meters) |
| Viewing Distance (Daytime) | 5m to infinity |
| Photo Resolution | 1080P Full HD |
| Video Resolution | 1080P Full HD |
| Display Screen | 1.6-inch TFT LCD, 8 Levels Brightness |
| Storage | Supports up to 64GB TF card (32GB included) |
| Power Source | 3 AA batteries (required) |
| Item Weight | 1.12 pounds |
| Package Dimensions | 8.86 x 5.59 x 3.11 inches |
| Focus Type | Manual Focus |
| Lens Coating | Fully Multi-Coated |
| Compatible Devices | Smartphone, Tablet, Computer (for data transfer) |
8. Warranty Information
ESSLNB products are manufactured to high-quality standards. For specific warranty terms and conditions, please refer to the warranty card included with your product packaging or visit the official ESSLNB website. Keep your purchase receipt as proof of purchase for any warranty claims.
9. Customer Support
If you encounter any issues or have questions regarding your ESSLNB ES1108 Night Vision Monocular, please contact ESSLNB customer support. You can find contact information and additional resources on the official ESSLNB store page:


