
ATTACK SHARK X87
ATTACK SHARK X87 Wireless Tri-Mode Mechanical Gaming Keyboard User Manual
Model: X87 | Brand: ATTACK SHARK
1. Introduction
Thank you for choosing the ATTACK SHARK X87 Wireless Tri-Mode Mechanical Gaming Keyboard. This manual provides detailed instructions for setting up, operating, and maintaining your keyboard to ensure optimal performance and longevity. The X87 features a compact 87-key TKL layout, gasket mount design, hot-swappable switches, customizable RGB lighting, and versatile tri-mode connectivity (Bluetooth 5.0, 2.4GHz wireless, and USB-C wired).
2. Package Contents
Before you begin, please ensure all items are present in the package:
- ATTACK SHARK X87 Mechanical Gaming Keyboard
- USB-C to USB-A Cable
- 2.4GHz Wireless Receiver (stored in the keyboard)
- Keycap Puller
- Switch Puller
- Spare Switches (if included with your model)
- User Manual (this document)
3. Setup
3.1. Initial Charging
For optimal performance, it is recommended to fully charge the keyboard before first use. Connect the provided USB-C cable to the keyboard's USB-C port and the other end to a powered USB port on your computer or a USB wall adapter. The keyboard features a 4000mAh battery.

3.2. Connection Modes
The ATTACK SHARK X87 supports three connection modes: 2.4GHz Wireless, Bluetooth 5.0, and USB-C Wired. A switch on the back of the keyboard allows you to select the desired mode.

3.2.1. 2.4GHz Wireless Mode
- Locate the 2.4GHz USB receiver, usually stored in a slot on the back of the keyboard.
- Plug the receiver into an available USB port on your computer.
- Set the mode switch on the back of the keyboard to "2.4G".
- The keyboard should automatically connect.
3.2.2. Bluetooth Mode
- Set the mode switch on the back of the keyboard to "BT".
- On your device (computer, tablet, smartphone), enable Bluetooth and search for new devices.
- The keyboard will appear as "ATTACK SHARK X87" (or similar). Select it to pair.
- The keyboard can connect to up to five devices simultaneously. Switch between paired devices using FN and key combination keys (refer to the Operating section for specific key combinations).
3.2.3. USB-C Wired Mode
- Connect the provided USB-C cable to the keyboard's USB-C port.
- Connect the other end of the cable to a USB port on your computer.
- Set the mode switch on the back of the keyboard to "USB".
- The keyboard will function as a wired keyboard and charge simultaneously.
4. Operating Instructions
4.1. Key Functions and Layout
The ATTACK SHARK X87 features an 87-key Tenkeyless (TKL) layout. Many functions are accessed via the FN key in combination with other keys.
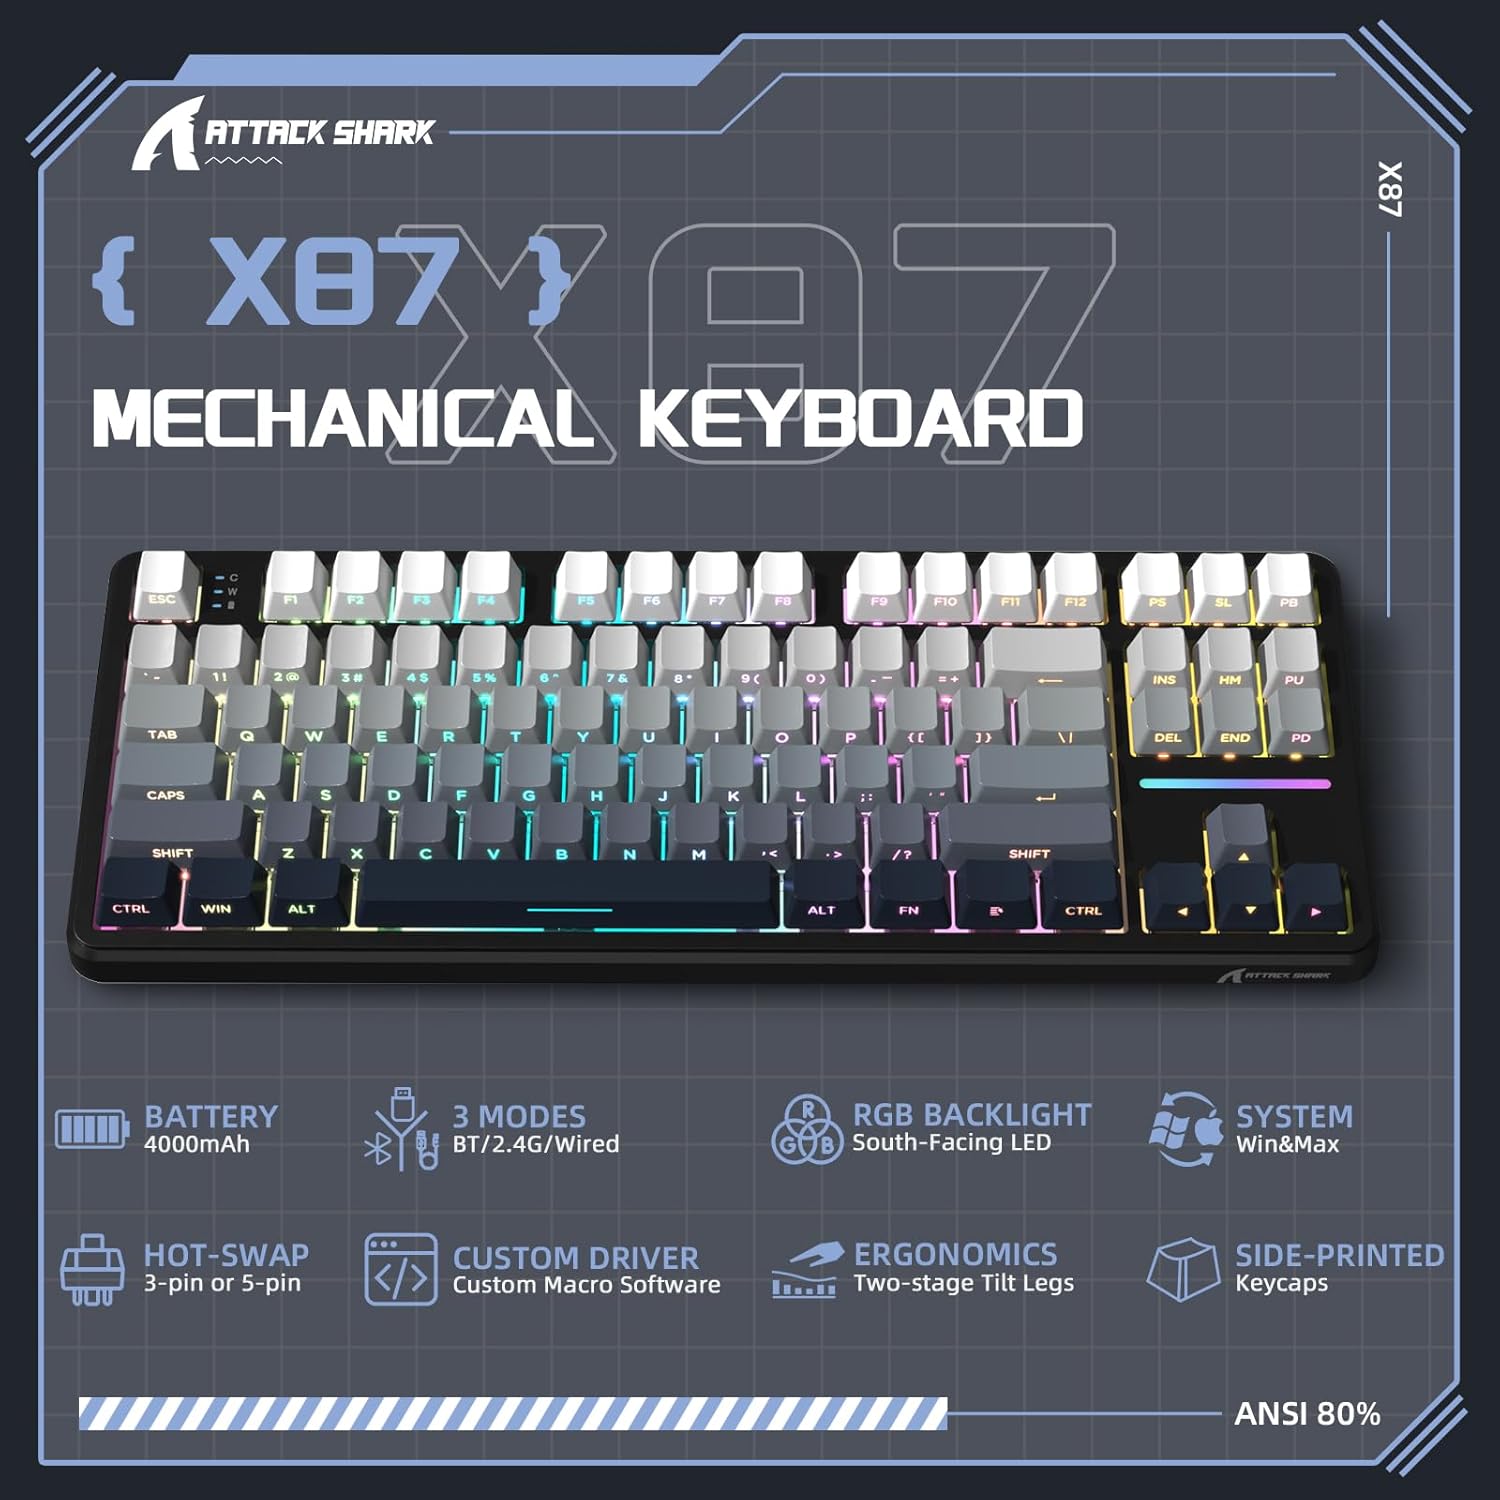
4.1.1. Multimedia Keys (FN + F-keys)
- FN + F1: My Computer
- FN + F2: Search
- FN + F3: Calculator
- FN + F4: Media Player
- FN + F5: Previous Track
- FN + F6: Next Track
- FN + F7: Play/Pause
- FN + F8: Stop
- FN + F9: Mute
- FN + F10: Volume Down
- FN + F11: Volume Up
- FN + F12: Lock Screen
4.1.2. System Switching (FN + Specific Keys)
- FN + Q: Switch to Android system
- FN + W: Switch to Windows system
- FN + E: Switch to Mac system
4.1.3. Bluetooth Device Switching (FN + 1/2/3/4/5)
When in Bluetooth mode, press FN + 1/2/3/4/5 to switch between up to five paired Bluetooth devices.
4.2. RGB Backlighting Control
The keyboard features 15 stunning RGB lighting effects and 10 unique music rhythm lighting effects. Control these using the FN key combinations:
- FN + \ |: Switch lighting effect mode
- FN + ↑: Increase backlight brightness
- FN + ↓: Decrease backlight brightness
- FN + ←: Decrease backlight speed
- FN + →: Increase backlight speed
- FN + ESC: Restore to factory lighting settings
- FN + X: Toggle lighting on/off

4.3. Battery Status Check
To check the current battery level, press FN + Backspace. The indicator lights on the keyboard will show the approximate battery percentage.

4.4. Customization Software
The ATTACK SHARK X87 supports programmable drivers for advanced customization. This software allows you to:
- Set shortcut keys and key combinations.
- Record and edit macros for enhanced gaming and work efficiency.
- Customize backlight colors and effects.
Please visit the official ATTACK SHARK website to download the latest driver software for your keyboard. The software is compatible with Windows and Mac operating systems.

5. Maintenance
5.1. Cleaning the Keyboard
To maintain the appearance and functionality of your keyboard:
- Disconnect the keyboard from all power sources before cleaning.
- Use a soft, lint-free cloth slightly dampened with water or a mild cleaning solution to wipe the keycaps and chassis.
- Avoid using harsh chemicals, abrasive cleaners, or excessive moisture.
- For cleaning between keycaps, use compressed air or a small brush.
5.2. Hot-Swappable Switches
The ATTACK SHARK X87 features a hot-swappable PCB, allowing you to easily change switches without soldering. It supports both 3-pin and 5-pin mechanical switches.

5.2.1. Replacing Switches
- Use the provided keycap puller to gently remove the desired keycap.
- Use the provided switch puller to carefully grip the switch from the top and bottom clips.
- Pull the switch straight up to remove it from the PCB.
- Align the pins of the new switch with the holes on the PCB. Ensure the pins are straight to avoid bending.
- Gently push the new switch down until it clicks into place. Do not force it.
- Replace the keycap.
5.3. Gasket Mount Structure
The X87 utilizes a gasket mount structure with five layers of sound-absorbing material, including PORON, to reduce noise and vibration, optimizing typing sound and feel. This design requires no special maintenance from the user.

6. Troubleshooting
| Problem | Possible Cause | Solution |
|---|---|---|
| Keyboard not responding (Wired Mode) | Loose cable connection, incorrect mode switch setting, driver issue. | Ensure USB-C cable is securely connected. Set mode switch to "USB". Try a different USB port. Reinstall keyboard drivers if necessary. |
| Keyboard not responding (2.4GHz Wireless) | Receiver not plugged in, incorrect mode switch setting, low battery. | Ensure 2.4GHz receiver is plugged in. Set mode switch to "2.4G". Charge the keyboard. |
| Keyboard not responding (Bluetooth Mode) | Not paired, incorrect mode switch setting, low battery, interference. | Set mode switch to "BT". Ensure Bluetooth is enabled on your device and re-pair if necessary. Charge the keyboard. Move closer to the device or reduce interference. |
| RGB lighting not working or incorrect | Lighting turned off, incorrect setting, software conflict. | Press FN + X to toggle lighting. Use FN + ESC to restore factory settings. Check customization software for settings. |
| Keys not registering or double-typing | Faulty switch, debris under keycap/switch. | Remove keycap and switch. Clean any debris. Reinstall switch or replace with a spare/new switch. |
| Cannot connect to multiple Bluetooth devices | Incorrect switching method. | Ensure you are using FN + 1/2/3/4/5 to switch between paired devices. |
7. Specifications
| Feature | Detail |
|---|---|
| Model | X87 |
| Layout | 87-Key Tenkeyless (TKL) |
| Connectivity | Tri-Mode: Bluetooth 5.0, 2.4GHz Wireless, USB-C Wired |
| Switch Type | Pre-lubed Linear Switches (Strawberry Switches) |
| Hot-Swappable | Yes, supports 3-pin and 5-pin switches |
| Keycaps | Side-Printed PBT, OEM Profile |
| Mounting Style | Gasket Mount (5-layer sound-absorbing material) |
| Backlighting | Full Key RGB (15 effects, 10 music rhythm effects) |
| Battery Capacity | 4000mAh |
| Compatible OS | Windows, macOS, Android, iOS |
| Dimensions | 15.75 x 7.56 x 1.97 inches (approx.) |
| Weight | 2.4 pounds (approx.) |
8. Warranty and Support
8.1. Warranty Information
The ATTACK SHARK X87 keyboard comes with a standard manufacturer's warranty. Please refer to the warranty card included in your package or visit the official ATTACK SHARK website for detailed warranty terms and conditions. Keep your purchase receipt as proof of purchase for warranty claims.
8.2. Customer Support
If you encounter any issues or have questions not covered in this manual, please contact ATTACK SHARK customer support. You can typically find contact information on the official ATTACK SHARK website or through your retailer. When contacting support, please provide your product model (X87) and a detailed description of the issue.
For driver downloads and further assistance, please visit: www.attackshark.com
Related documentsX87


Ask a question about this manual
Ask about setup, troubleshooting, compatibility, parts, safety, or missing instructions. Manuals+ will review the question and use this page’s manual context to help answer it.