1. Product Overview
The VINGLI Record Player Stand is designed to provide organized storage for vinyl records and support for a record player. It features integrated LED lighting and a convenient power outlet with USB ports.

Image 1.1: The VINGLI Record Player Stand, illustrating its overall dimensions: 15.75 inches (D) x 27.56 inches (W) x 29.53 inches (H). The top shelf has a height of 9 inches, and the lower vinyl storage compartments are 12.5 inches high, with the left compartment being 13 inches wide and the two right compartments being 3.5 inches wide each.
2. Safety Information
- Ensure all components are securely fastened during assembly to prevent instability.
- Do not overload the stand. Refer to specifications for weight limits.
- Keep electrical components (power outlets, LED lights) away from liquids.
- Place the stand on a flat, stable surface to prevent tipping.
- Use the included anti-tipping device to secure the stand to a wall, especially in households with children or pets.
3. Package Contents
Verify that all parts are present before beginning assembly. If any parts are missing or damaged, contact VINGLI customer support.
- Record Player Stand Panels (various sizes)
- Legs (4 units)
- Metal Dividers (for vinyl storage)
- Power Outlet Unit with USB Ports
- LED Light Strip
- Wireless Remote Control for LED Lights
- Assembly Hardware (screws, dowels, etc.)
- Installation Tool (e.g., Allen wrench)
- Assembly Guide
4. Assembly Instructions
Follow these steps carefully to assemble your record player stand. It is recommended to have a second person assist with assembly.
- Unpack all components and lay them out on a clean, soft surface to prevent scratches. Identify each part using the provided assembly guide.
- Attach the side panels to the base and top panels using the designated hardware. Ensure all connections are snug but do not overtighten.
- Insert the middle shelf and vertical dividers into their respective slots. The metal dividers for vinyl storage are detachable and can be placed as desired within the lower compartments.
- Secure the four solid wood legs to the bottom of the stand.
- Install the power outlet unit into the pre-drilled opening on the top surface of the stand. Route the power cord through the back cable routing hole for neat management.
- Adhere the RGB LED light strip to the underside of the top shelf or within the open compartment as desired. Connect it to the power source.
- Attach the anti-tipping device to the back of the stand and secure it to a wall stud according to the separate instructions provided with the device.

Image 4.1: Detailed view of key features including detachable metal dividers for vinyl organization, the waterproof surface, integrated USB ports and AC outlets, and the RGB LED lighting strips.
5. Operating Instructions
5.1 Power Outlet and USB Ports
The stand includes a built-in power strip with 2 AC outlets (125V/12A) and 2 USB ports (5V/2A). This allows for convenient powering of your record player, charging devices, or other electronics.
- Plug the stand's main power cord into a standard wall outlet.
- Connect your record player or other devices to the AC outlets.
- Use the USB ports to charge compatible electronic devices.

Image 5.1: The integrated charging station on the VINGLI Record Player Stand, featuring two AC outlets and two USB ports, with a 5.38-foot power cord.
5.2 LED Lighting System
The integrated RGB LED lighting system offers customizable ambiance for your listening space.
- Ensure the LED light strip is properly connected to the power outlet unit.
- Use the provided wireless remote control to operate the LED lights.
- The remote allows you to select from 17 light colors, adjust brightness, and choose dynamic modes with adjustable speed.

Image 5.2: The VINGLI Record Player Stand showcasing its RGB LED lighting feature, controlled by a wireless remote, offering dynamic modes, 17 light colors, and adjustable brightness.
6. Maintenance and Care
Proper care will ensure the longevity and appearance of your record player stand.
- Cleaning: The stand features a waterproof surface for easy cleaning. Wipe surfaces with a soft, damp cloth. Avoid abrasive cleaners or harsh chemicals that may damage the finish.
- Spills: Immediately wipe up any spills to prevent water damage, despite the waterproof surface.
- Protection: The surface is designed to be wear and scratch-proof, but using coasters for drinks and felt pads under heavy items is recommended to maintain its condition.
- Hardware: Periodically check and tighten all assembly hardware to ensure stability.
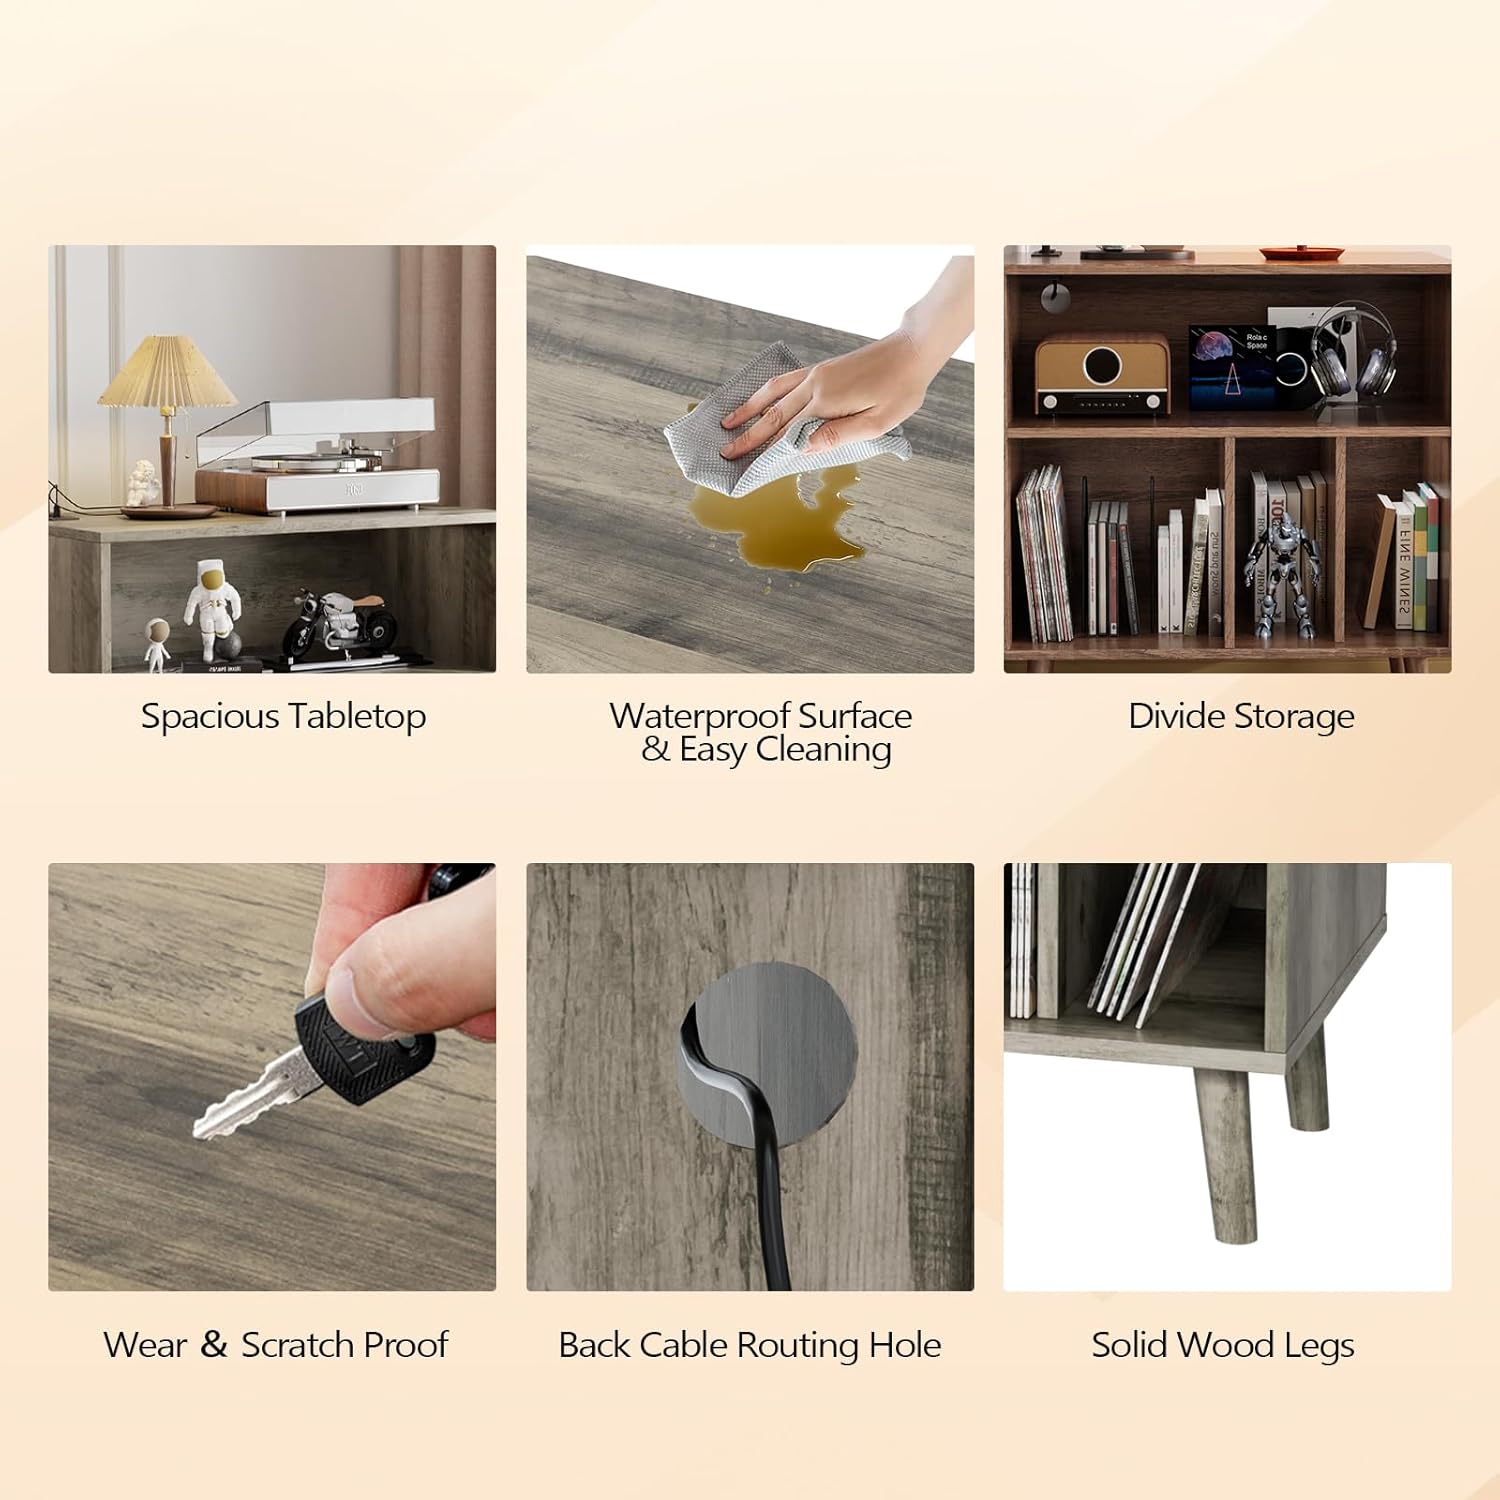
Image 6.1: A collage highlighting various features of the stand, including the spacious tabletop, waterproof surface for easy cleaning, divided storage, wear and scratch-proof material, back cable routing hole, and solid wood legs.
7. Troubleshooting
This section addresses common issues you might encounter.
- Stand is wobbly: Ensure all screws and fasteners are tightened. Verify the stand is on a level surface. Adjust leg levelers if present.
- LED lights not working: Check if the LED strip is securely plugged into the power outlet unit. Ensure the power outlet unit is plugged into a functional wall outlet. Replace remote control batteries if necessary.
- Power outlets/USB ports not functioning: Confirm the stand's main power cord is plugged into a live wall outlet. Test the wall outlet with another device. Check for any tripped circuit breakers.
- Difficulty with assembly: Review the assembly guide carefully. Ensure you are using the correct hardware for each step. Do not force parts together; if they don't fit, re-check the instructions.
8. Specifications
| Feature | Specification |
|---|---|
| Model Number | CP0DJSX |
| Product Dimensions | 15.75"D x 27.56"W x 29.53"H |
| Material | Engineered Wood |
| Color | Rustic Grey |
| Item Weight | 39.2 pounds |
| Number of Shelves | 3 |
| Number of Compartments | 3 (lower section) |
| Power Outlets | 2 AC Outlets (125V/12A) |
| USB Ports | 2 USB Ports (5V/2A) |
| LED Lighting | RGB, 17 Colors, Dynamic Modes, Adjustable Brightness/Speed |
| Assembly Required | Yes (Assembly Guide & Tool Included) |
9. Warranty and Support
For warranty information, product support, or to report missing/damaged parts, please contact VINGLI customer service. Refer to your purchase documentation for specific warranty terms and contact details.
You can typically find support information on the VINGLI official website or through the retailer where the product was purchased.


