1. Introduction
Thank you for choosing the Geevon DCF Wireless Weather Station. This device provides accurate indoor and outdoor temperature and humidity readings, weather forecasts, time, date, and alarm functions. It features DCF radio-controlled time reception for automatic time synchronization and supports up to three external sensors. Please read this manual carefully before use to ensure proper operation and maintenance.
2. Package Contents
- 1 x Geevon DCF Wireless Weather Station (Main Unit)
- 1 x Outdoor Sensor
- 1 x User Manual
Note: Batteries are not included. The main unit requires 3 x AAA batteries, and the outdoor sensor requires 2 x AA batteries.
3. Product Overview
Familiarize yourself with the main unit and outdoor sensor components.

Figure 3.1: Main Unit and Outdoor Sensor
This image shows the main display unit of the Geevon weather station on the left, featuring a large LCD screen displaying indoor and outdoor temperature, humidity, time, and weather forecast icons. On the right is the compact, white outdoor sensor.

Figure 3.2: Main Unit Display and Buttons
This image provides a detailed view of the weather station's display, with labels pointing to various indicators such as weather forecast, outdoor temperature, indoor temperature, time/alarm time, date, day of the week, max/min temperature/humidity records, low battery indicator, RCC symbol, and room humidity. The buttons at the bottom (SET °C/°F, -/MEM RCC, +/CH, ALARM) are also clearly indicated.

Figure 3.3: Main Unit Views
This image displays the main unit from multiple angles: front, back, side, and top. The back view shows the battery compartment and a wall-mounting hole. The top view highlights the SNOOZE/LIGHT button.
4. Setup
4.1 Battery Installation
- Open the battery compartment cover on the back of the main unit.
- Insert 3 x AAA batteries (not included) according to the polarity markings (+/-).
- Close the battery compartment cover.
- Open the battery compartment cover on the back of the outdoor sensor.
- Insert 2 x AA batteries (not included) according to the polarity markings (+/-).
- Close the battery compartment cover.

Figure 4.1: Battery Installation
This image illustrates the battery installation process for both the main display unit (requiring 3 AAA batteries) and the outdoor sensor (requiring 2 AA batteries). The battery compartments are shown open, ready for battery insertion.
4.2 Initial Setup and DCF Reception
After inserting batteries, the main unit will automatically enter DCF reception mode. The reception icon will flash. This process can take up to 7 minutes. The unit will attempt to synchronize the time automatically. Ensure the main unit is placed in an area with good signal reception, away from electronic interference.

Figure 4.2: DCF Automatic Time Synchronization
This image demonstrates the automatic time synchronization feature of the weather station via RCC-DCF. It shows the main unit receiving a signal, indicating that the time is being updated automatically.
4.3 Placement
The main unit can be placed on a tabletop using its integrated stand or mounted on a wall. The outdoor sensor should be placed in a shaded, dry location outdoors, protected from direct sunlight and rain, to ensure accurate temperature and humidity readings.

Figure 4.3: Placement Options
This image illustrates the versatile placement options for the main unit: it can be mounted on a wall using the integrated hanging hole or placed on a flat surface using its foldable stand. The image also provides product dimensions for both the main unit and the outdoor sensor.
5. Operating Instructions
5.1 Display Information
The main display shows the following information:
- Weather Forecast (Sunny, Cloudy, Overcast, Rainy, Snowy)
- Outdoor Temperature and Humidity
- Indoor Temperature and Humidity
- Time and Date
- Day of the Week
- Alarm Time
- Max/Min Temperature and Humidity Records
- Low Battery Indicator
- RCC Signal Indicator

Figure 5.1: Weather Forecast Icons
This image displays the various weather forecast icons used by the weather station, including Sunny, Cloudy, Overcast, Rainy, and Snowy, indicating the predicted weather for the next 12 hours.
5.2 Button Functions
- SET / °C/°F: Press to enter time/date setting mode. Short press to switch between Celsius and Fahrenheit.
- MEM / - / RCC: Press to view Max/Min temperature/humidity. Long press to manually initiate DCF reception.
- CH / +: Press to switch between outdoor sensor channels (CH1, CH2, CH3). In setting mode, press to increase value.
- ALARM: Long press to enter alarm setting mode. Short press to check alarm time.
- SNOOZE / LIGHT: Press to activate backlight for 20 seconds. During alarm, press to snooze for 5 minutes.
5.3 Setting Time and Date
- Long press the SET button to enter time setting mode. The hour digit will flash.
- Use the CH/+ and MEM/- buttons to adjust the hour.
- Press SET again to confirm and move to the next setting (minute, year, month, day, language for day of week).
- Repeat step 2 and 3 until all settings are complete.
- Press SET to exit setting mode, or it will exit automatically after 20 seconds of inactivity.
5.4 Setting the Alarm
- Long press the ALARM button to enter alarm setting mode. The hour digit will flash.
- Use the CH/+ and MEM/- buttons to adjust the hour.
- Press ALARM again to confirm and move to the minute setting.
- Use the CH/+ and MEM/- buttons to adjust the minute.
- Press ALARM to confirm and exit.
- To activate/deactivate the alarm, short press the ALARM button. An alarm icon will appear/disappear on the display.
5.5 Snooze Function and Backlight
When the alarm sounds, press the SNOOZE/LIGHT button to activate the snooze function for 5 minutes. Press any other button to stop the alarm.
To activate the backlight, short press the SNOOZE/LIGHT button. The backlight will illuminate for 20 seconds.

Figure 5.2: Backlight Activation
This image demonstrates the backlight feature of the weather station. It shows the display both unlit and illuminated with a blue backlight after pressing the SNOOZE/LIGHT button, which stays on for 20 seconds.
5.6 Max/Min Temperature and Humidity Records
Press the MEM/- button to cycle through the maximum and minimum recorded values for indoor and outdoor temperature and humidity over the past 24 hours. To clear the records, long press the MEM/- button while viewing the Max/Min values.
5.7 Multiple Sensor Support
The weather station supports up to 3 external sensors. To switch between channels (CH1, CH2, CH3) and view readings from different sensors, short press the CH/+ button in normal display mode.
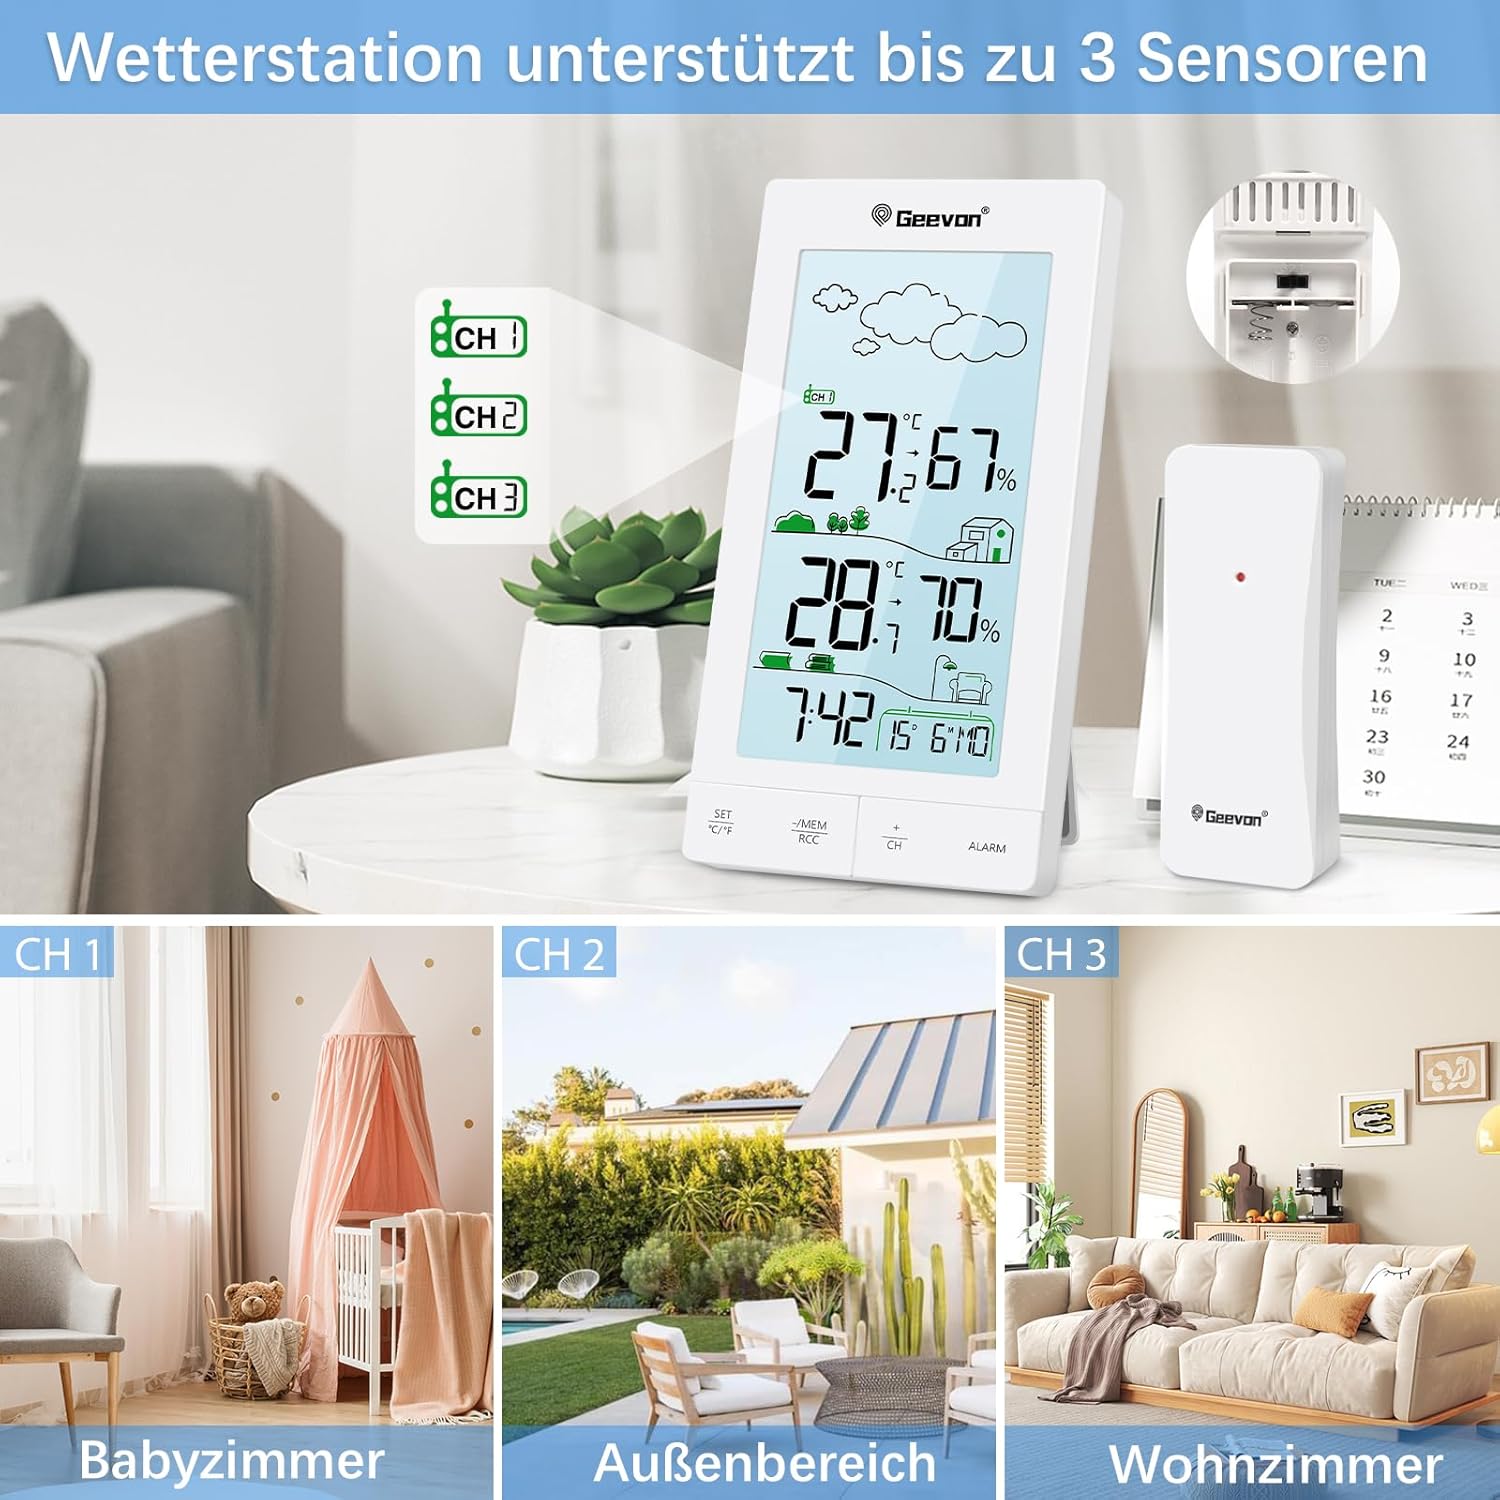
Figure 5.3: Multi-Sensor Support
This image illustrates the weather station's capability to connect with up to three external sensors (CH1, CH2, CH3). It shows the main unit displaying different channel indicators and examples of where additional sensors might be placed, such as a baby room, outdoor area, or living room.
6. Maintenance
- Clean the unit and sensor with a soft, damp cloth. Do not use abrasive cleaners or solvents.
- Do not immerse the main unit or sensor in water.
- If the unit will not be used for a long period, remove the batteries to prevent leakage.
- Avoid exposing the unit to extreme temperatures, direct sunlight, or excessive moisture.
7. Troubleshooting
| Problem | Possible Cause | Solution |
|---|---|---|
| No display on main unit | Batteries are dead or incorrectly inserted. | Replace batteries with new ones, ensuring correct polarity. |
| Outdoor temperature/humidity not displayed or inaccurate | Sensor out of range, low sensor battery, or interference. | Move sensor closer to the main unit. Replace sensor batteries. Avoid placing near large metal objects or electronics. Re-sync sensor by removing batteries from both units, then reinserting into sensor first, then main unit. |
| Time not synchronizing (DCF) | Weak signal, interference, or incorrect time zone setting. | Place unit near a window, away from electronic devices. Manually initiate DCF reception (long press MEM/-). Ensure correct time zone is set if applicable (though this model seems to be DCF only). |
| "LL" or "HH" displayed for temperature | Temperature is outside the measurable range. | This indicates the temperature is below -9.9°C (LL) or above +50°C (HH). This is normal operation for extreme temperatures. |
8. Specifications
| Feature | Detail |
|---|---|
| Model Number | 245593 |
| Indoor Temperature Range | -9.9°C to +50°C (14.2°F to 122°F) |
| Outdoor Temperature Range | -9.9°C to +50°C (14.2°F to 122°F) |
| Humidity Range | 1% to 99% RH |
| Power Supply (Main Unit) | 3 x AAA batteries (not included) |
| Power Supply (Outdoor Sensor) | 2 x AA batteries (not included) |
| DCF Reception | Yes |
| Backlight | Yes (20 seconds) |
| Dimensions (Main Unit) | 16 x 4 x 13.1 cm (approx. 3.8D x 13B x 15.9H cm) |
| Weight | 290 g |
| Material | Acrylonitrile Butadiene Styrene (ABS) |
9. Warranty and Support
Geevon products are designed and manufactured to the highest quality standards. For any questions, technical support, or warranty claims, please contact Geevon customer service through the retailer where you purchased the product or visit the official Geevon website for contact information.
Please retain your proof of purchase for warranty purposes.


