1. Introduction
This manual provides detailed instructions for the assembly, operation, and maintenance of your Fablestoryem S6-PRO Table Tennis Robot. Please read this manual thoroughly before using the product to ensure proper function and safety.

Image 1.1: The Fablestoryem S6-PRO Table Tennis Robot, showing the main unit, ball collection net, remote control, and a table tennis table setup.
2. Safety Instructions
- Ensure the power supply voltage matches the product's requirements (100-240V).
- Keep hands and loose clothing away from moving parts, especially the serving wheels, during operation.
- Do not insert foreign objects into the ball launcher or serving mechanism.
- Use only standard table tennis balls. It is strictly forbidden to mix broken or deformed balls into the machine to prevent damage.
- Clean new balls before use, as they may have powder that can affect performance.
- Place the robot on a stable surface, securely clamped to the table.
- Supervise children during use.
- Unplug the power cord when not in use or before cleaning and maintenance.
3. Package Contents
Verify that all items listed below are included in your package:
- Ping pong robot x 1
- Ball net x 1
- Ping-pong balls x 100
- Control box x 1
- Power supply x 1
- Ball ruler x 1
- Serving wheel x 2 (spare)
- Control box fixings x 1
- Net post x 2
- User Manual x 1

Image 3.1: All components included in the standard package, such as the robot unit, power supply, control box, net posts, and spare serving wheels.
4. Product Overview and Features
The Fablestoryem S6-PRO is an advanced table tennis robot designed for training and practice. It features a clip-on desk design for easy installation and a ball recycling net system.
Key Features:
- Two-Wheel Drive System: Allows separate adjustment of speed and rotation for varied ball effects.
- Adjustable Arc: 7 kinds of adjustment angles to change the firing arc.
- Versatile Spin Control: Capable of serving topspin, backspin, no-spin, left-spin, right-spin, and mixed-spin balls (9 types).
- Adjustable Frequency and Speed: Output frequency of 30-90 balls/minute and ball speed of 4-40m/s (8.9-76 mph).
- Landing Point Control: Fixed point serving or global change of landing point (oscillation).
- Ball Recycling Net: Integrated net system collects balls, accommodating up to 300 balls, for continuous practice.
- Easy Maintenance: Fairway design allows for easy removal and cleaning of dust and foreign objects.
- Support for 40+ Balls: Compatible with standard 40mm and 40+ table tennis balls.
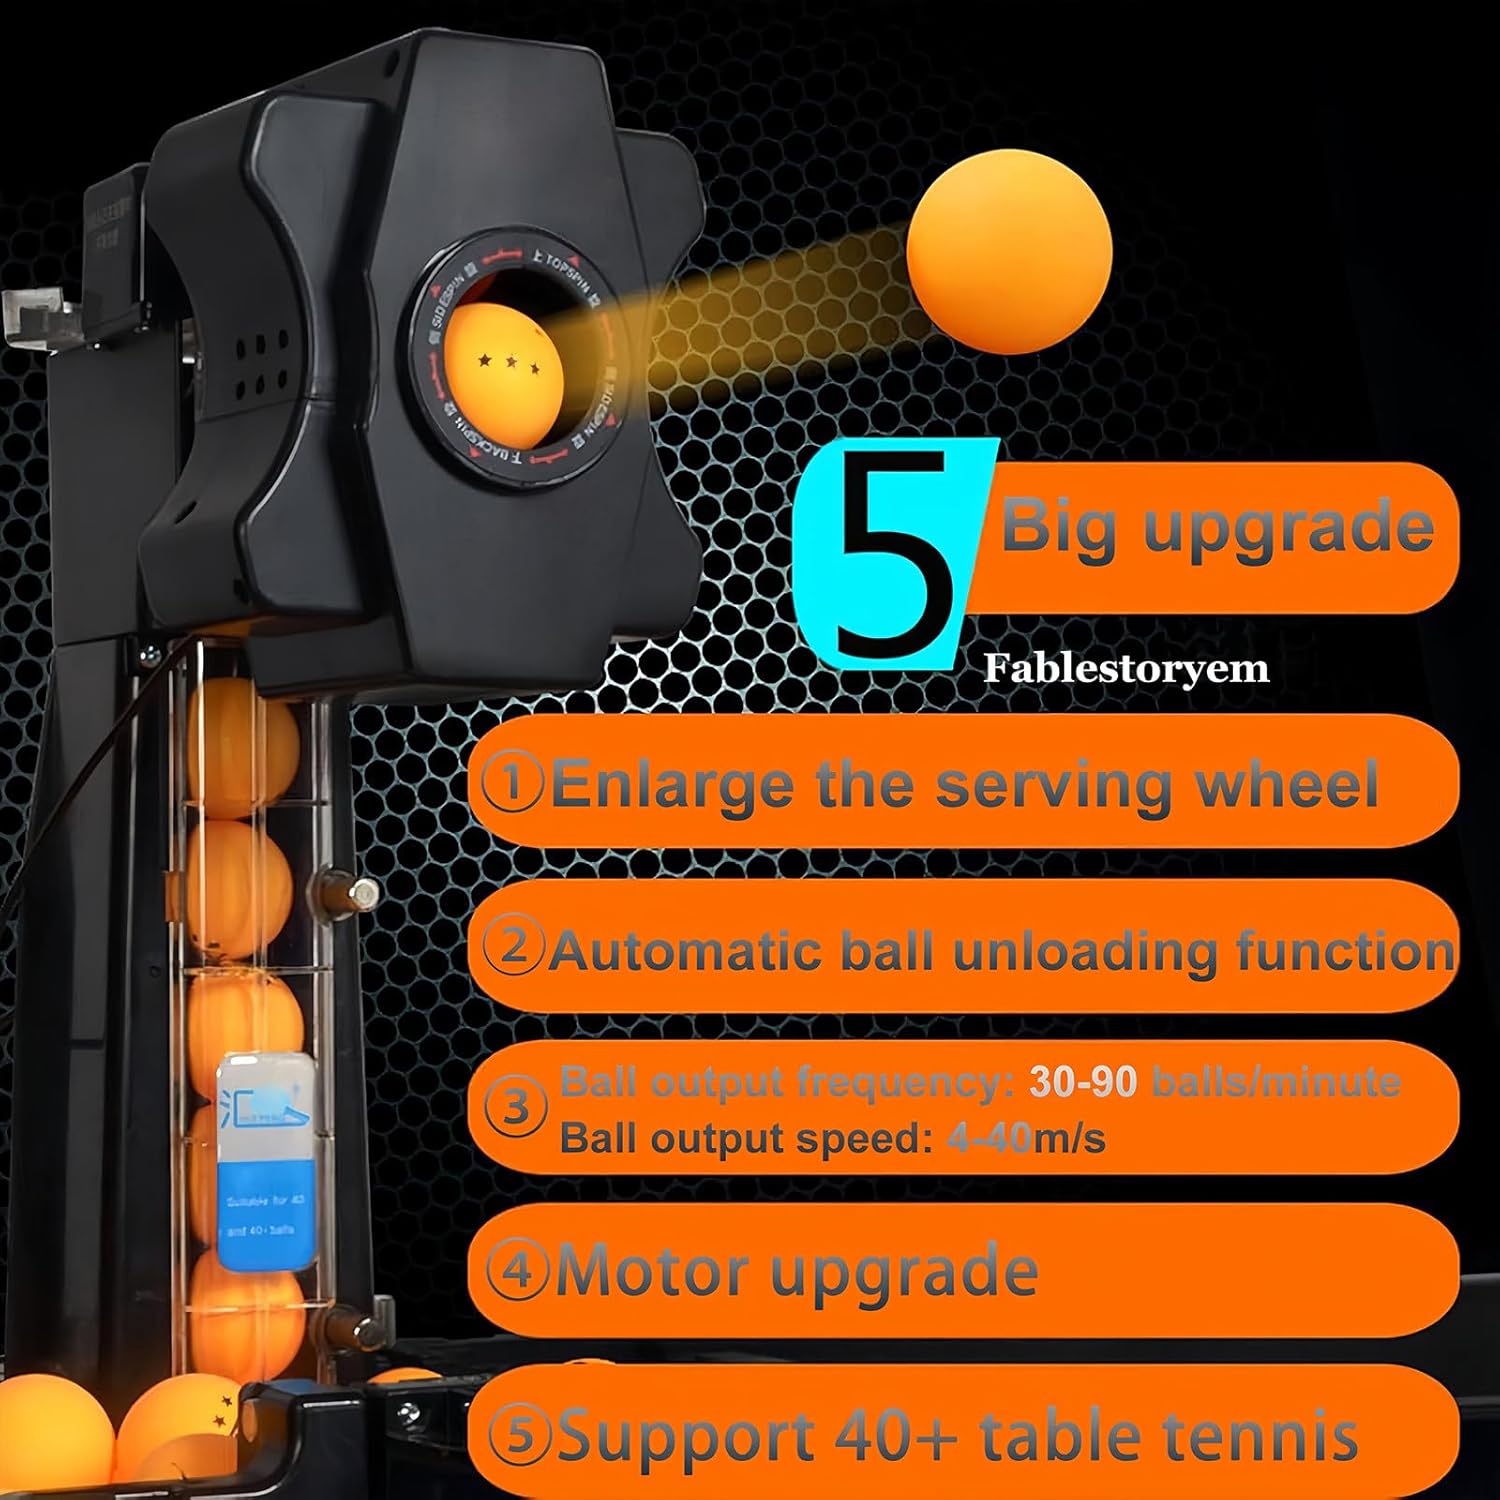
Image 4.1: Illustration of key upgrades and features, including enlarged serving wheel, automatic ball unloading, adjustable frequency/speed, motor upgrade, and 40+ ball support.
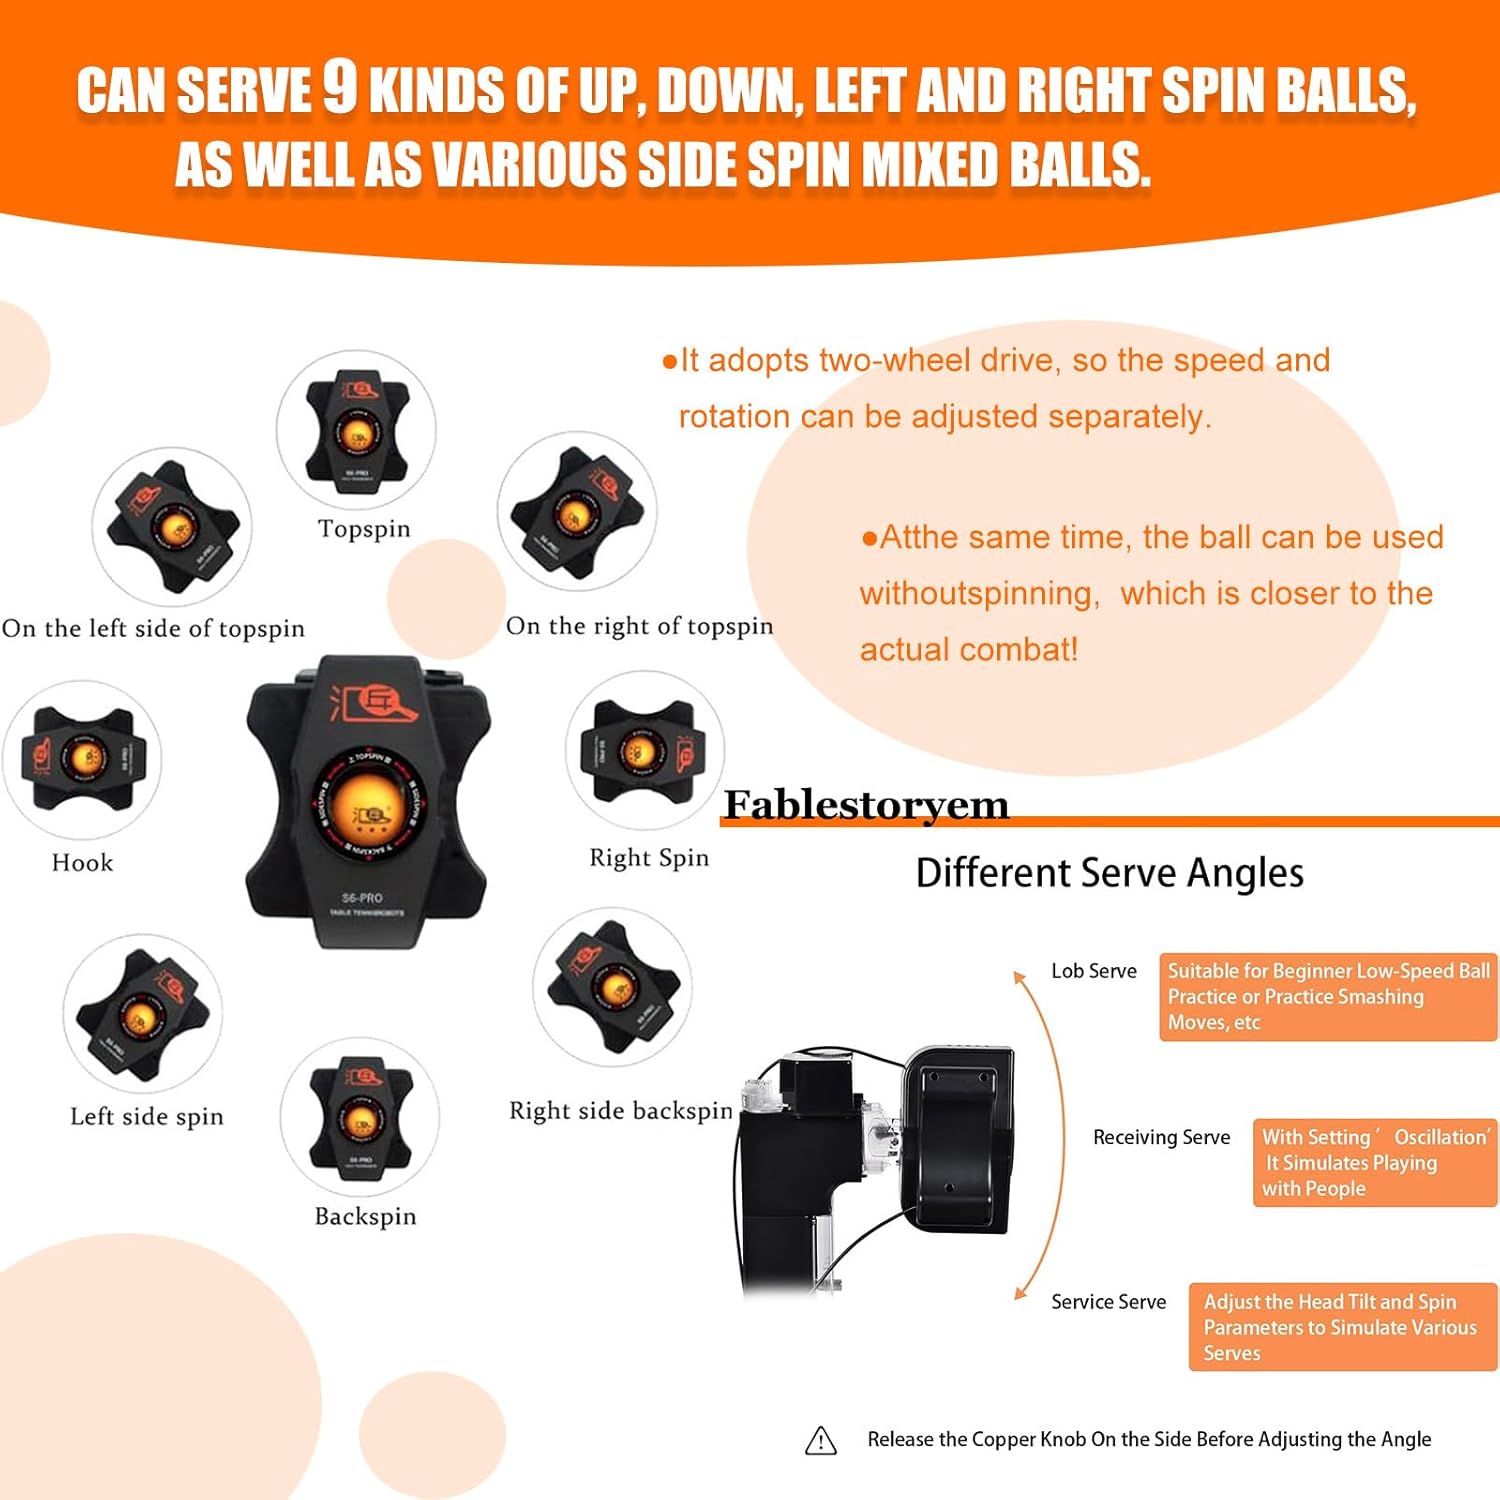
Image 4.2: Visual representation of the 9 types of spin balls (topspin, backspin, left/right spin, hook, etc.) and various serve angles (lob, receiving, service).
5. Setup and Installation
Follow these steps to set up your S6-PRO Table Tennis Robot:
- Step 1: Unpack the Machine. Remove the robot from its packaging and place it on the table tennis table.
- Step 2: Expand the Net. Expand the ball collection net and its recovery slots.
- Step 3: Install Support Rods. Remove the support rods on both sides of the net and install them into their designated slots.
- Step 4: Prop Up the Net. Securely prop up the net structure.
- Step 5: Secure the Machine. Place the robot in the middle area close to the edge of the table or anywhere on the table area. Align it with the locating slot, insert the ball container, and ensure all four sides are locked properly. Secure the machine to the edge of the table using the provided clamps.
- Step 6: Install Side Net Brackets. Install the brackets for the side net and secure the side net.
- Step 7: Install Control Panel. Install the control panel on either the left or right side of the table, as preferred, using the control box fixings.
- Step 8: Connect Power. Connect the power supply to the robot and plug it into an appropriate electrical outlet.

Image 5.1: Visual guide illustrating the 8 steps for installing the robot, net, and control panel on a table tennis table.
Initial Ball Preparation:
The new ping-pong balls included may have a fine powder coating. It is recommended to clean and dry these balls before first use to ensure optimal performance and prevent dust accumulation inside the machine.
6. Operating Instructions
The S6-PRO robot is controlled via a wired control box. Familiarize yourself with the control panel functions:

Image 6.1: Detailed view of the control panel, showing buttons for oscillation, frequency, topspin, backspin, and one-key functions for various spins and ball unloading.
Control Panel Functions:
- Start/Pause Button: Initiates or pauses ball serving.
- Oscillation Frequency: Adjusts the left and right swing speed of the machine head. Higher numbers indicate faster oscillation. "0" means fixed point serving.
- Ball Frequency: Adjusts the number of balls served per minute. Higher numbers mean more frequent serves.
- Top/Back Spin: Adjusts the speed and power of serving, changing the front and rear points of the serve wheels.
- Topspin: Increases topspin strength.
- Backspin: Increases backspin strength.
- If the topspin number is greater than the backspin number, it's a topspin ball.
- If the topspin number is less than the backspin number, it's a backspin ball.
- If both numbers are the same, it's a no-spin serve.
- One-Key Adjusting Top Spin Ball: Pre-sets for topspin.
- One-Key Adjusting Back Spin Ball: Pre-sets for backspin.
- One-Key Adjusting No Spin Ball: Pre-sets for no-spin.
- One-Key Random Serving: Activates random ball serving patterns.
- One-Key Unloading / Auto Unloading Function: Empties balls from the machine.
Adjusting Ball Trajectories and Spin:
The robot can produce various ball movements and spins. Adjust the pitch angle to change the firing arc. The two-wheel drive allows for separate speed and rotation adjustments to create different spin types.
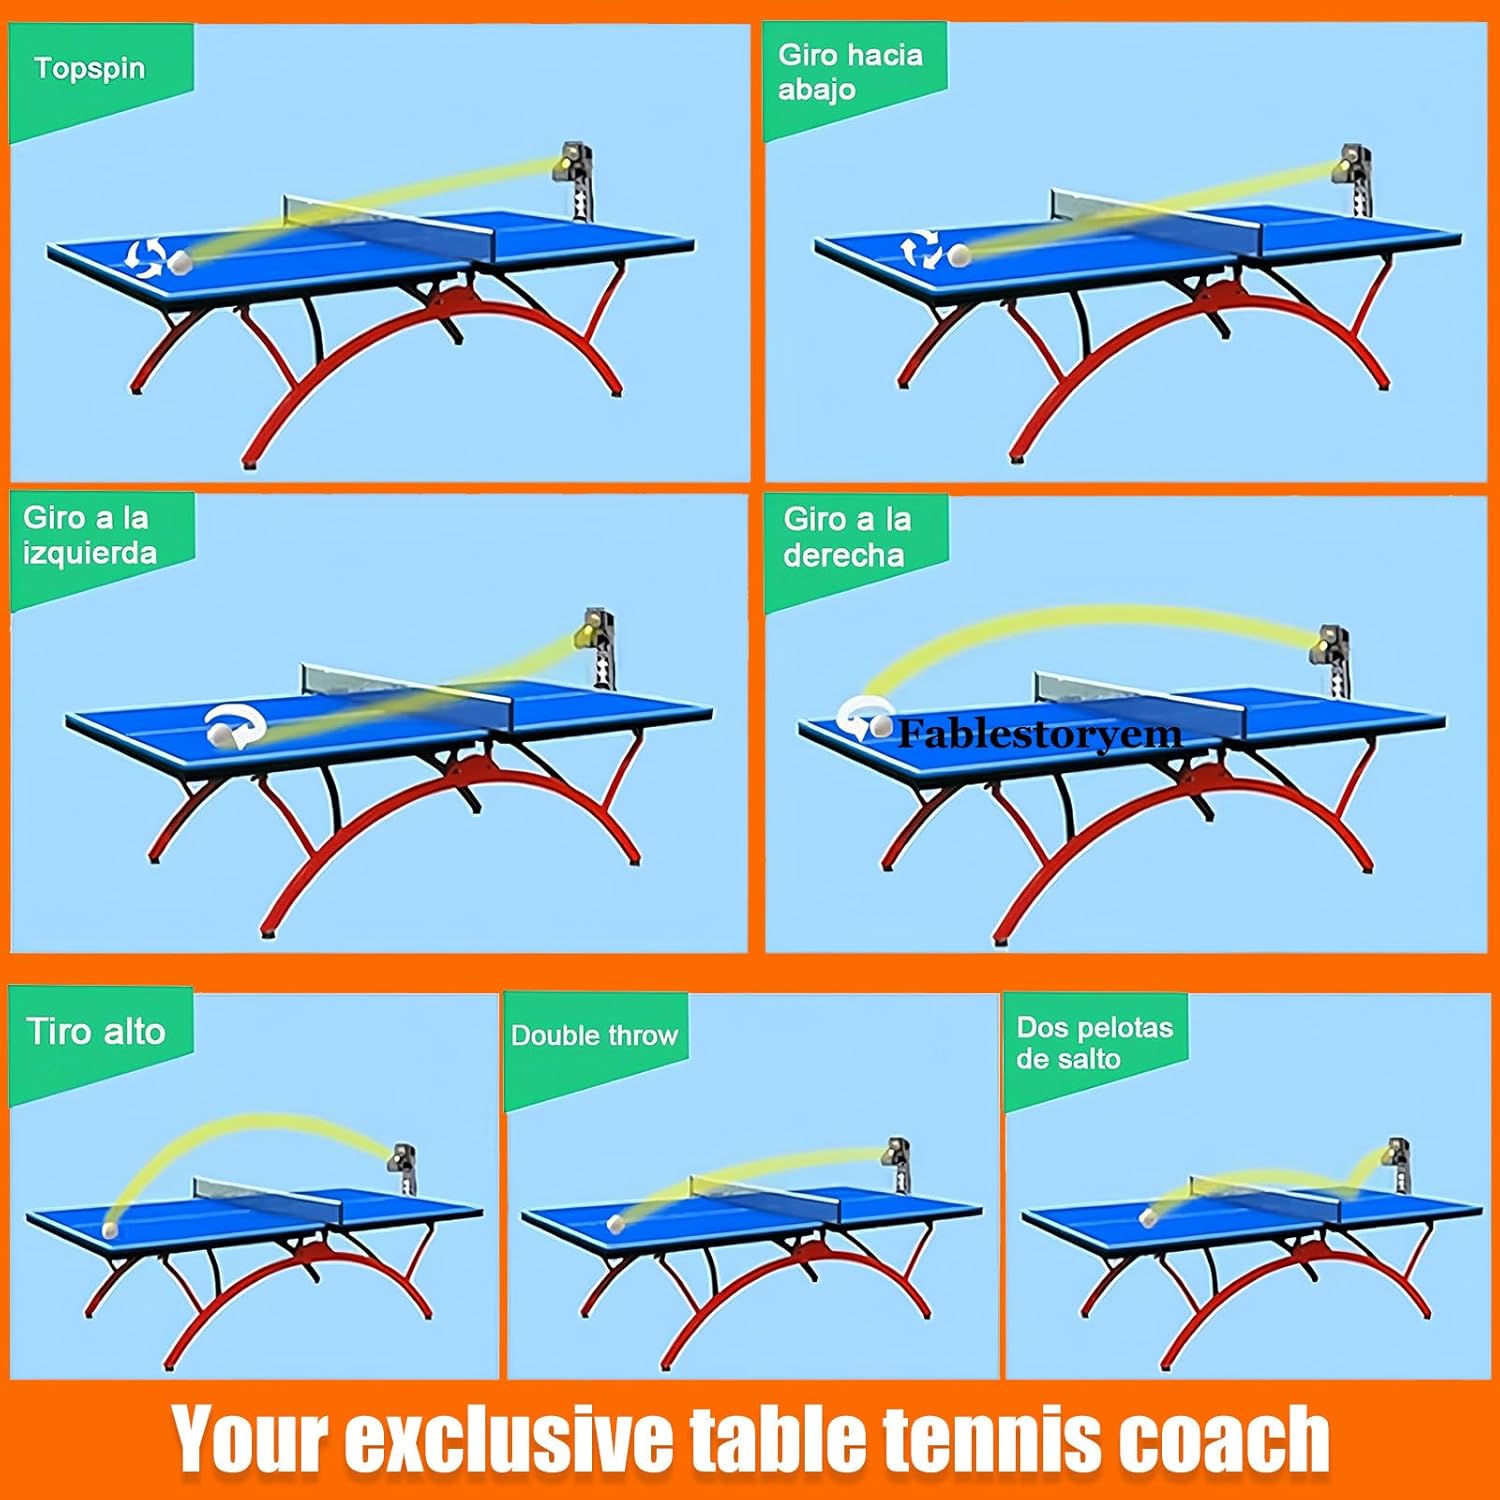
Image 6.2: Examples of ball trajectories including topspin, backspin, left spin, right spin, high throw, and double bounce.
To adjust the angle, release the copper knob on the side of the robot before making adjustments.
7. Maintenance
- Cleaning the Fairway: The robot features an easy-to-remove fairway design. Regularly remove the fairway to clean any accumulated dust or foreign objects that may affect ball feeding.
- Ball Condition: Ensure only clean, undamaged table tennis balls are used. Avoid mixing broken or deformed balls into the machine.
- Storage: When not in use, unplug the robot and store it in a dry, clean environment.
Image 7.1: Illustration of the easy fairway disassembly design, facilitating cleaning of dust and foreign objects.
8. Troubleshooting
| Problem | Possible Cause | Solution |
|---|---|---|
| Balls not launching or launching inconsistently. |
|
|
| Robot not powering on. |
|
|
| Inconsistent spin or ball trajectory. |
|
|
9. Specifications
| Parameter | Value |
|---|---|
| Type | Table tennis robot (Clamp table machine) |
| Color | Black |
| Power | 50W |
| Frequency | 50/60 Hz |
| Ball Speed | 4-40 m/s (approx. 8.9-76 mph) |
| Voltage | 100-240V |
| Net Weight | 6.5 kg (approx. 14.3 lbs) |
| Package Size | 88 x 40 x 41 cm (approx. 34.65 x 15.75 x 16.14 inches) |
| Supported Ball Type | 40+ (compatible with 40mm and 40+ balls) |
| Arc Adjustment | 7 kinds of adjustment angles |
| Spin Types | Up and down spin, left and right spin, no spin, side spin (9 types total) |
| One-Click Ball Release | Yes |
| Output Frequency | 30-90 balls/min |
| Change Point | Fixed point / Global change of landing point (oscillation) |
| Ball Capacity | ≥300 balls |
| Serve Wheel | 2 (long and short ball) |
| Jump Ball Switch | Any jump ball, two hop ball switch |
| Item Weight (Product) | 22 pounds (approx. 9.98 kg) |

Image 9.1: Dimensional overview of the robot and the expanded ball collection net.
10. Warranty and Support
For warranty information or technical support, please refer to the contact details provided with your purchase documentation or contact Fablestoryem customer service. Keep your purchase receipt as proof of purchase.


