
1. Product Overview
The YOCTOSUN Headband Magnifier is a versatile tool designed for detailed close-up work, offering multiple magnification options and integrated LED lighting. It provides hands-free operation, making it ideal for hobbies, crafts, repairs, and other precision tasks.

Figure 1: Complete YOCTOSUN Headband Magnifier set including the headband, interchangeable lenses, storage case, and charging cable.
2. Package Contents
Upon opening your YOCTOSUN Headband Magnifier package, please verify that all components listed below are present:
- 1 x Headband Magnifier Unit with 3 LED Lights
- 5 x Interchangeable Lenses (1X, 1.5X, 2X, 2.5X, 3.5X)
- 1 x Auxiliary Lens (8X)
- 1 x USB Charging Cable (Micro USB)
- 1 x Protective Storage Case for Lenses
- 1 x Cleaning Cloth
- 1 x User Manual (this document)
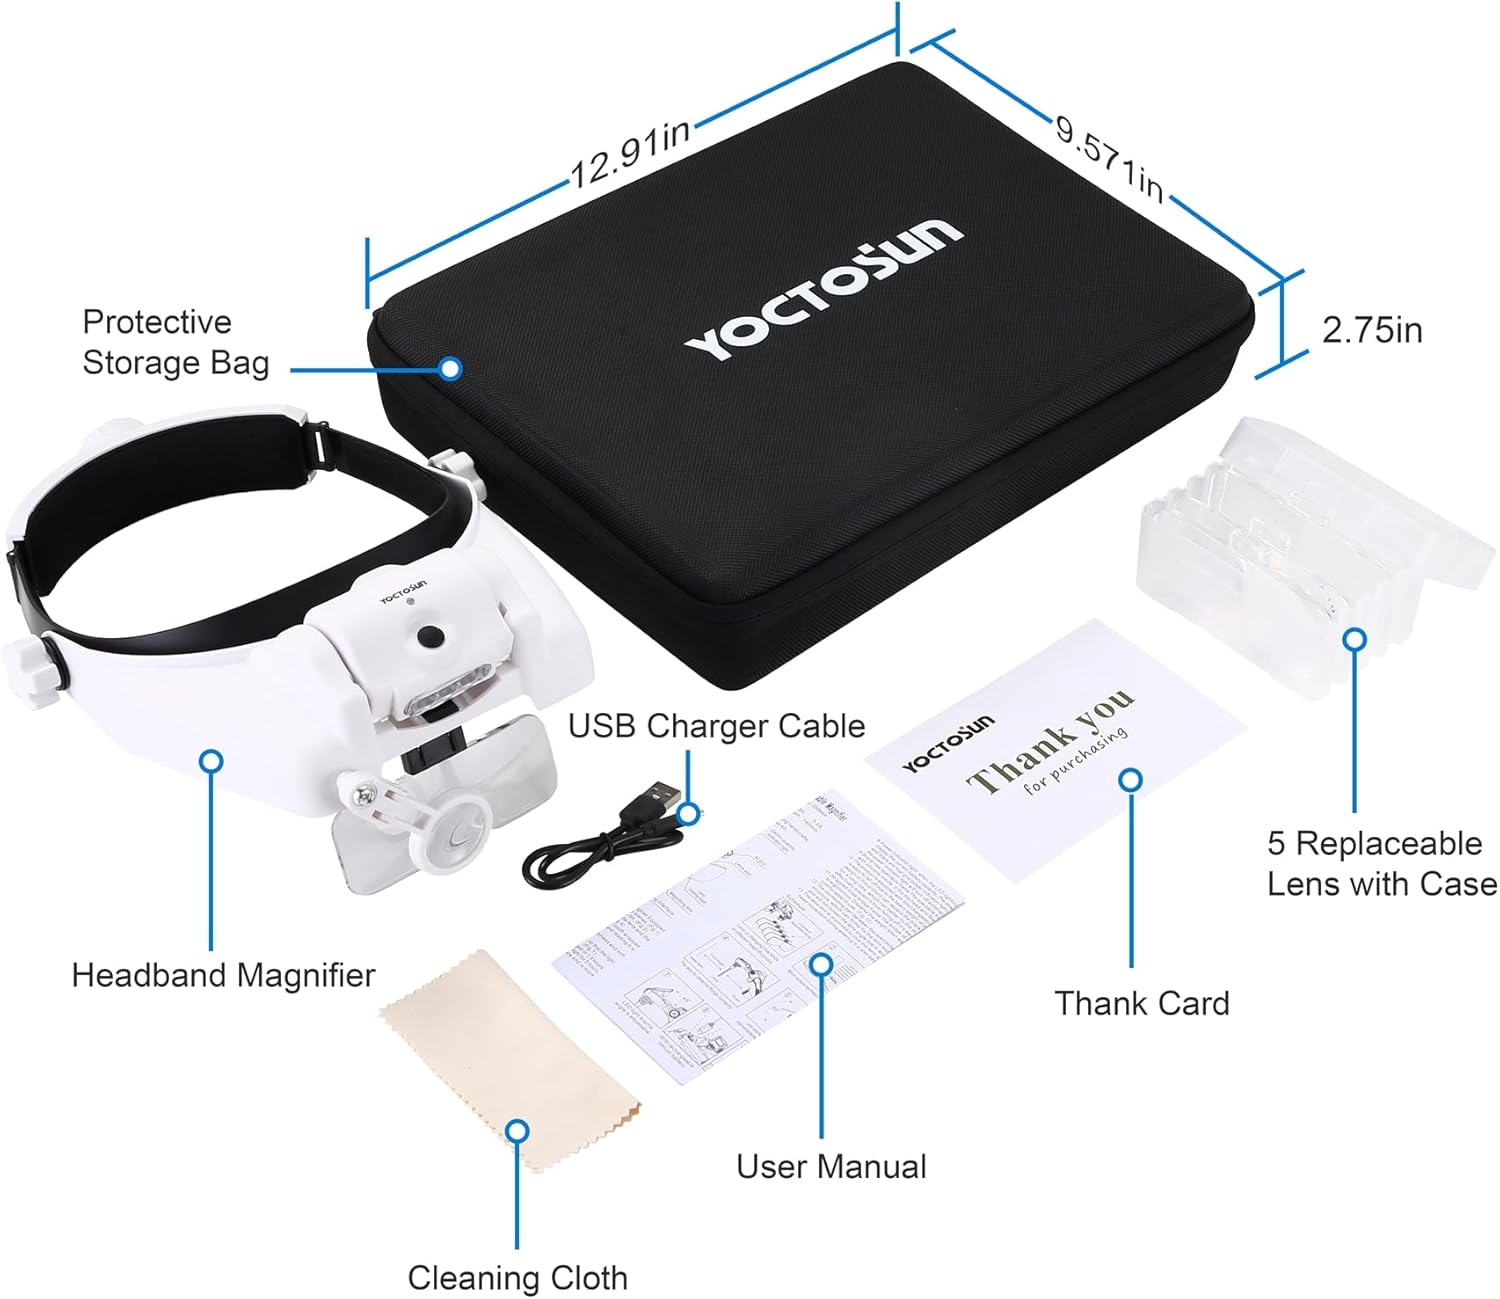
Figure 2: Visual representation of all items included in the product package.
3. Product Structure and Components
Familiarize yourself with the main parts of your headband magnifier for optimal use:
- Headband: Adjustable strap for secure and comfortable fit.
- LED Light Unit: Contains 3 detachable LED lights for illumination.
- Lens Slots: Designed to hold interchangeable main lenses.
- Auxiliary Lens Arm: Holds the small 8X round lens, which is 360° rotatable.
- Adjustment Knobs: Three knobs for adjusting lens height/angle and headband tightness.
- USB Charging Port: Located on the battery pack for recharging.

Figure 3: Detailed diagram showing the various parts of the headband magnifier.
4. Setup
4.1. Battery Charging
The headband magnifier is equipped with a rechargeable Lithium Polymer battery. Before first use, or when the LED lights dim, charge the unit using the provided USB cable.
- Locate the Micro USB charging port on the side of the LED light unit.
- Connect the smaller end of the USB charging cable to the magnifier's port.
- Connect the larger end of the USB cable to a standard USB power adapter (not included) or a computer USB port.
- A charging indicator light will illuminate. Charging typically takes about 4 hours for a full charge.
- Once fully charged, the LED lights can last continuously for approximately 6-8 hours.

Figure 4: Illustrates the USB charging port and connection.
4.2. Lens Installation
The magnifier comes with 5 interchangeable main lenses and one auxiliary lens. You can combine them for various magnifications.
- Select the desired main lens(es) from the storage case. The lenses are made of shatterproof crystal clear acrylic.
- Gently slide the chosen main lens(es) into the designated lens slots on the magnifier unit. Ensure they click securely into place.
- The small round 8X auxiliary lens is pre-attached and can be rotated into position as needed.

Figure 5: Demonstrates the process of inserting a main lens.
4.3. Adjusting Fit
For comfortable and stable use, adjust the headband and lens positions:
- Headband Tightness: Use the knob on the back side of the headband to adjust it to fit your head size. The inner side is wrapped with a soft sponge for comfort.
- Lens Height/Angle: Use the two side knobs to adjust the height and angle of the main lenses for optimal viewing.
- Auxiliary Lens: The small round lens can be rotated 360° to position it precisely for your task.
- Folding Lenses: All optivisor lenses can be folded or rotated upwards when not in use, allowing for normal vision.


Figure 6: Illustrations of the angle/height regulating knob and the tightness regulating knob.
5. Operating Instructions
5.1. Changing Magnification
The headband magnifier offers a wide range of magnification levels by combining its lenses:
- You can use a single main lens (1X, 1.5X, 2X, 2.5X, 3.5X).
- Combine two main lenses for increased magnification (e.g., 1X + 1.5X = 2.5X).
- Utilize the 8X auxiliary lens in conjunction with main lenses for even higher magnification (e.g., 1X + 8X = 9X).
- A total of 23 magnification combinations are possible, ranging from 1X to 14X.

Figure 7: Reference table for various magnification combinations and their corresponding focal lengths.
5.2. Using LED Lights
The magnifier features 3 detachable LED lights to illuminate your work area:
- Press the power button on the LED light unit to turn the lights on.
- Press again to cycle through different brightness levels (if available) or turn off.
- Adjust the direction of the LED lights by tilting the light unit for precise illumination.

Figure 8: The integrated LED lights provide excellent illumination for detailed work.
6. Maintenance
- Cleaning Lenses: Use the provided cleaning cloth to gently wipe the acrylic lenses. Avoid abrasive materials or harsh chemicals that could scratch the lens surface.
- Storage: When not in use, store the magnifier and its lenses in the protective storage case to prevent dust accumulation and damage.
- Battery Care: To prolong battery life, avoid fully discharging the battery frequently. Recharge when the lights dim. If storing for extended periods, charge the battery every 3-6 months.
- General Care: Keep the unit away from extreme temperatures, direct sunlight, and moisture.
7. Troubleshooting
- LED Lights Not Turning On:
- Ensure the battery is charged. Connect the USB cable and charge for at least 30 minutes.
- Verify the power button is being pressed correctly.
- Magnification Not Clear:
- Check if the lenses are clean. Use the cleaning cloth to remove any smudges or dust.
- Adjust the lens height and angle using the side knobs to find the optimal focal point for your eyes and the object.
- Ensure you are using the correct magnification for the task and distance. Refer to the magnification table.
- Headband Feels Loose/Uncomfortable:
- Adjust the tightness regulating knob at the back of the headband.
- Ensure the soft sponge padding is correctly positioned on your forehead.
8. Specifications
| Feature | Detail |
|---|---|
| Brand | YOCTOSUN |
| Model | Headband Magnifier 1x-14x With Storage Case |
| Lens Material | Acrylic |
| Magnification Range | 1X, 1.5X, 2X, 2.5X, 3.5X (main lenses); 8X (auxiliary lens); Combinations up to 14X |
| Light Source | 3 Detachable LED Lights (Adjustable Brightness/Direction) |
| Battery Type | 1 Lithium Polymer Battery (Included) |
| Charging Time | Approx. 4 hours |
| Working Time (LED) | Approx. 6-8 hours (fully charged) |
| Item Weight | 1.98 pounds |
| Package Dimensions | 13.27 x 10.87 x 2.91 inches |
| UPC | 726679582455 |

Figure 9: Product dimensions and battery details.
9. Warranty and Support
For detailed warranty information, product registration, or technical support, please refer to the official YOCTOSUN website or contact their customer service directly. Contact information is typically provided in the full product manual or on the manufacturer's packaging.
You can visit the YOCTOSUN Store on Amazon for more information.