
dsorupa V10 Ultra
dsorupa V10 Ultra Cordless Vacuum Cleaner User Manual
Model: V10 Ultra
Brand: dsorupa
1. Important Safety Instructions
Please read all instructions carefully before using this appliance. Failure to follow these instructions may result in electric shock, fire, or serious injury.
- This appliance is for household use only. Do not use outdoors or on wet surfaces.
- Do not allow children to operate the vacuum cleaner. Close supervision is necessary when used near children.
- Do not pick up flammable or combustible liquids, such as gasoline, or use in areas where they may be present.
- Do not pick up anything that is burning or smoking, such as cigarettes, matches, or hot ashes.
- Do not use without the dust cup and filters in place.
- Turn off the appliance before connecting or disconnecting the motorized brush, charging, or performing any maintenance.
- Use only as described in this manual. Use only manufacturer's recommended attachments.
- Keep hair, loose clothing, fingers, and all parts of body away from openings and moving parts.
- Store the vacuum cleaner indoors in a cool, dry place.
2. Package Contents
Verify that all components are present in the package:
- dsorupa V10 Ultra Vacuum Cleaner Main Body
- 2500mAh Battery Pack
- Tangle-Free Roller Brush Head
- Wall-Mounted Charging Dock Station
- 1.8L Dust Cup (pre-installed)
- Aromatherapy Tablets (set of 2)
- Telescopic Extension Tube
- Crevice Nozzle
- Cleaning Brush Tool
- Charger
- Instruction Manual
- HEPA Filters (2 included, 1 pre-installed)
- 2-in-1 Brush Tool

Image: The dsorupa V10 Ultra Cordless Vacuum Cleaner shown with its main body, telescopic tube, floor brush, battery, wall mount, and various attachments including the crevice tool, 2-in-1 brush, and spare filters.
3. Product Overview
3.1 Main Components
- Main Body: Contains the motor, dust cup, filtration system, and control panel.
- Battery Pack: Rechargeable 2500mAh lithium-ion battery.
- Telescopic Extension Tube: Adjustable length for various cleaning tasks.
- Motorized Floor Brush: Features a V-shaped anti-tangle soft and hard roller for different floor types. Includes LED lights.
3.2 Attachments
- Crevice Nozzle: Ideal for narrow gaps, corners, and edges.
- 2-in-1 Brush Tool: Combines a brush and wide nozzle for upholstery, curtains, and delicate surfaces.
- Mite Remover: Specialized attachment for deep cleaning mattresses and fabric surfaces to remove dust mites.

Image: A visual representation of the vacuum's versatility, showing the crevice tool for tight spaces, the 2-in-1 brush for surfaces, and the extension tube for high-reach cleaning.
4. Setup
4.1 Assembly
- Attach the Battery: Slide the battery pack into the main body until it clicks securely into place.
- Connect the Extension Tube: Insert one end of the telescopic extension tube into the main body until it locks.
- Attach the Floor Brush: Connect the motorized floor brush to the other end of the extension tube. Ensure it clicks firmly.
- Install Wall-Mounted Charging Dock: Choose a suitable location near a power outlet. Secure the dock to the wall using the provided screws and anchors.
4.2 Charging the Battery
Before first use, fully charge the battery for approximately 4-5 hours.
- Connect the charger to the wall-mounted dock or directly to the battery pack.
- Plug the charger into a power outlet.
- The LED display on the vacuum will show charging progress. A full charge is indicated by 100% on the display.

Image: A detailed view of the vacuum's removable battery pack, highlighting its internal components and the '70 Mins Runtime' capability.

Image: The dsorupa V10 Ultra vacuum cleaner is shown mounted on its wall-mounted charging dock, connected to a power outlet, indicating convenient storage and charging.
5. Operating Instructions
5.1 Power On/Off and Suction Modes
- Press the power button to turn the vacuum cleaner on. It will start in the default suction mode.
- Press the mode button to cycle through different suction power levels (e.g., Eco, Standard, Max).
- Press the power button again to turn the vacuum cleaner off.
5.2 Digital LED Display
The integrated LED display provides real-time information:
- Battery Percentage: Shows the remaining battery life.
- Suction Mode Indicator: Displays the current power setting.
- Error Codes: Alerts for potential issues (refer to Troubleshooting section).

Image: A close-up of the vacuum cleaner's digital LED display, illustrating how it shows battery percentage and current suction mode, with examples of different battery levels.
5.3 Using the Vacuum Cleaner
- Floor Cleaning: Use the motorized floor brush for carpets and hard floors. The V-shaped roller is designed for effective debris pick-up and anti-tangle performance.
- Above-Floor Cleaning: Detach the extension tube and floor brush to use the main body with the crevice nozzle or 2-in-1 brush for furniture, stairs, or car interiors.
- High-Reach Cleaning: Use the extension tube with the crevice nozzle or 2-in-1 brush to clean ceilings, cobwebs, or high shelves.
- Mite Removal: Attach the mite remover tool directly to the main body for cleaning mattresses and upholstered items.

Image: A person is shown operating the dsorupa V10 Ultra cordless vacuum cleaner on a hard floor, demonstrating its powerful 580W/48KPA suction capability to clean scattered debris.

Image: The motorized floor brush of the vacuum cleaner is shown cleaning dirt particles right up against a wall, illustrating its 'Close To The Wall Cleaning' feature.

Image: A close-up of the vacuum cleaner's anti-tangle brush head, designed to prevent hair and debris from wrapping around the roller during operation.
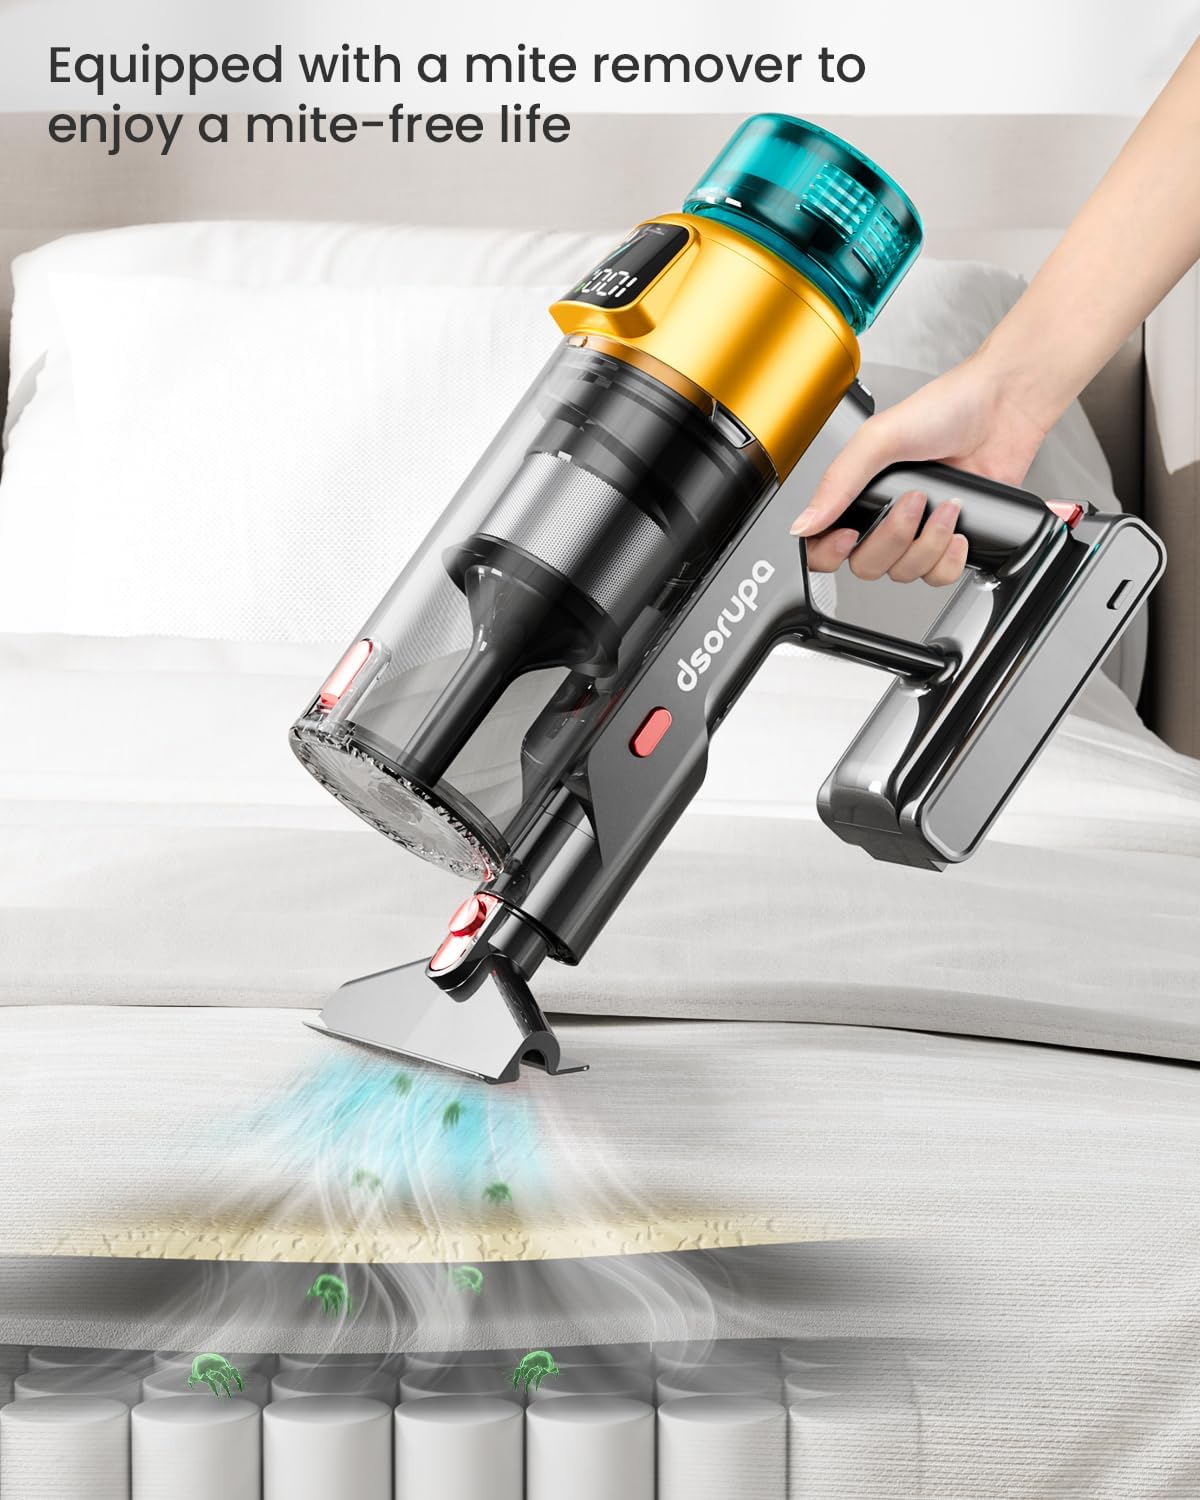
Image: The vacuum cleaner is depicted with its specialized mite remover attachment, actively cleaning a mattress surface to eliminate dust mites, promoting a mite-free environment.
6. Maintenance
Regular maintenance ensures optimal performance and extends the life of your vacuum cleaner.
6.1 Emptying the Dust Cup
Empty the 1.8L dust cup after each use or when the MAX fill line is reached.
- Ensure the vacuum is turned off.
- Press the dust cup release button to detach it from the main body.
- Position the dust cup over a trash bin and press the bottom release latch to open the flap and empty contents.
- Close the flap and reattach the dust cup to the main body.
6.2 Cleaning Filters
The vacuum features an 8-stage filtration system, including HEPA filters. Clean filters regularly to maintain suction power.
- Twist and pull to remove the filter assembly from the dust cup.
- Separate the HEPA filter and mesh filter.
- Tap off loose dirt. Rinse both filters under cold running water until the water runs clear. Do not use detergent.
- Allow filters to air dry completely for at least 24 hours before reassembling and placing back into the vacuum. Do not use a hairdryer or other heating methods.
- Replace HEPA filters every 3-6 months, depending on usage.

Image: An exploded view diagram illustrating the vacuum cleaner's 8-layer filtration system, including the HEPA filter and the integrated aromatherapy tablet feature, designed to capture fine dust and release a pleasant scent.
6.3 Cleaning the Brush Roll
The anti-tangle brush roll minimizes hair wrapping, but occasional cleaning may be necessary.
- Ensure the vacuum is off and disconnected from power.
- Locate the brush roll release tab on the side of the motorized floor brush.
- Unlock and remove the brush roll.
- Use scissors or the provided cleaning tool to cut and remove any tangled hair or debris.
- Reinsert the brush roll and secure the release tab.

Image: A detailed illustration of the vacuum's soft and hard roller brush, highlighting its dual-material design optimized for deep cleaning on both carpets and hard floors.
6.4 Battery Care
- Do not expose the battery to extreme temperatures.
- If storing the vacuum for an extended period, charge the battery to about 50% and store in a cool, dry place.
- Use only the original charger provided with the appliance.
7. Troubleshooting
Refer to this section for common issues and their solutions.
| Problem | Possible Cause | Solution |
|---|---|---|
| Vacuum does not turn on | Battery is not charged or not properly installed. | Ensure battery is fully charged and securely clicked into place. |
| Low suction power | Dust cup is full; filters are clogged; blockage in nozzle/tube/brush roll. | Empty dust cup; clean filters; check for and remove any blockages. |
| Brush roll not spinning | Hair/debris tangled in brush roll; brush roll not properly installed. | Clean brush roll; ensure it is correctly reinstalled and locked. |
| Short battery runtime | Using Max suction mode; battery not fully charged; aging battery. | Use lower suction modes for longer runtime; ensure full charge; contact support if battery life significantly degrades. |
8. Specifications
| Feature | Detail |
|---|---|
| Model Name | V10 Ultra cordless vacuum cleaner |
| Brand | dsorupa |
| Wattage | 580 watts |
| Suction Power | Up to 48KPA |
| Battery Life | Up to 70 minutes (in Eco mode) |
| Dust Cup Capacity | 1.8 Liters |
| Filter Type | HEPA Filter (8-stage filtration system) |
| Special Features | LED display, Anti-tangle brush, Aromatherapy tablet, Ultra-Quiet Mode (64DB) |
| Product Dimensions | 13 x 8 x 49 inches |
| Item Weight | 8 pounds |
9. Warranty and Customer Support
dsorupa provides a 2-year warranty for this product, covering manufacturing defects from the date of purchase.
- This warranty does not cover damage caused by misuse, neglect, accident, unauthorized modification, or normal wear and tear.
- Proof of purchase is required for all warranty claims.
Customer Service
For any questions, concerns, or warranty claims, please contact dsorupa customer service. We offer 24-hour attentive service.
- Email: Refer to your product packaging or the official dsorupa website for contact information.
- Online Support: Visit the dsorupa official website for FAQs and support resources.

Image: A customer service representative wearing a headset, symbolizing the availability of 24-hour online customer service and the 2-year warranty provided with the product.
Related Documents - V10 Ultra
 |
Epson Printer and Scanner Support for Windows 11 and Windows 10 ARM64 Comprehensive guide to Epson printer and scanner compatibility and driver support for Windows 11 and Windows 10 ARM64, including installation steps, software compatibility, and answers to frequently asked questions regarding ARM processors and Windows compatibility. |
 |
Eleckeys K20 Cordless Vacuum Cleaner User Manual Comprehensive user manual for the Eleckeys K20 cordless vacuum cleaner, covering safety instructions, product overview, installation, charging, maintenance, and troubleshooting. |
 |
AFERIY AF-DC060 580W DC-DC Charger User Manual User manual for the AFERIY AF-DC060 580W DC-DC Charger, providing installation guidelines, safety information, technical specifications, and troubleshooting for charging portable energy storage products. |
 |
Felicitysolar GK-1-72HTBD-580M 580W Monocrystalline Solar Panel Installation Guide Comprehensive installation, operation, and maintenance guide for Felicitysolar GK-1-72HTBD-580M 580W Monocrystalline Solar Panels. Covers safety, electrical, mechanical, grounding, and performance specifications. |
 |
Epson ES-580W/RR-600W User's Guide Comprehensive user guide for the Epson ES-580W and RR-600W document scanners, covering setup, operation, scanning features, networking, maintenance, and troubleshooting. |
Ask a question about this manual
Ask about setup, troubleshooting, compatibility, parts, safety, or missing instructions. Manuals+ will review the question and use this page’s manual context to help answer it.