
1. Introduction
Thank you for choosing the Yeego YG-WS24-A 24-inch Wine Fridge. This manual provides essential information for the safe and efficient operation, installation, and maintenance of your new wine cooler. Please read these instructions thoroughly before use and retain them for future reference.
Important Safety Information
- Ensure the appliance is properly grounded.
- Do not store explosive substances such as aerosol cans with flammable propellants in this appliance.
- Keep ventilation openings clear of obstruction.
- Do not use mechanical devices or other means to accelerate the defrosting process, other than those recommended by the manufacturer.
- Do not damage the refrigerant circuit.
- This appliance is intended for household use only.
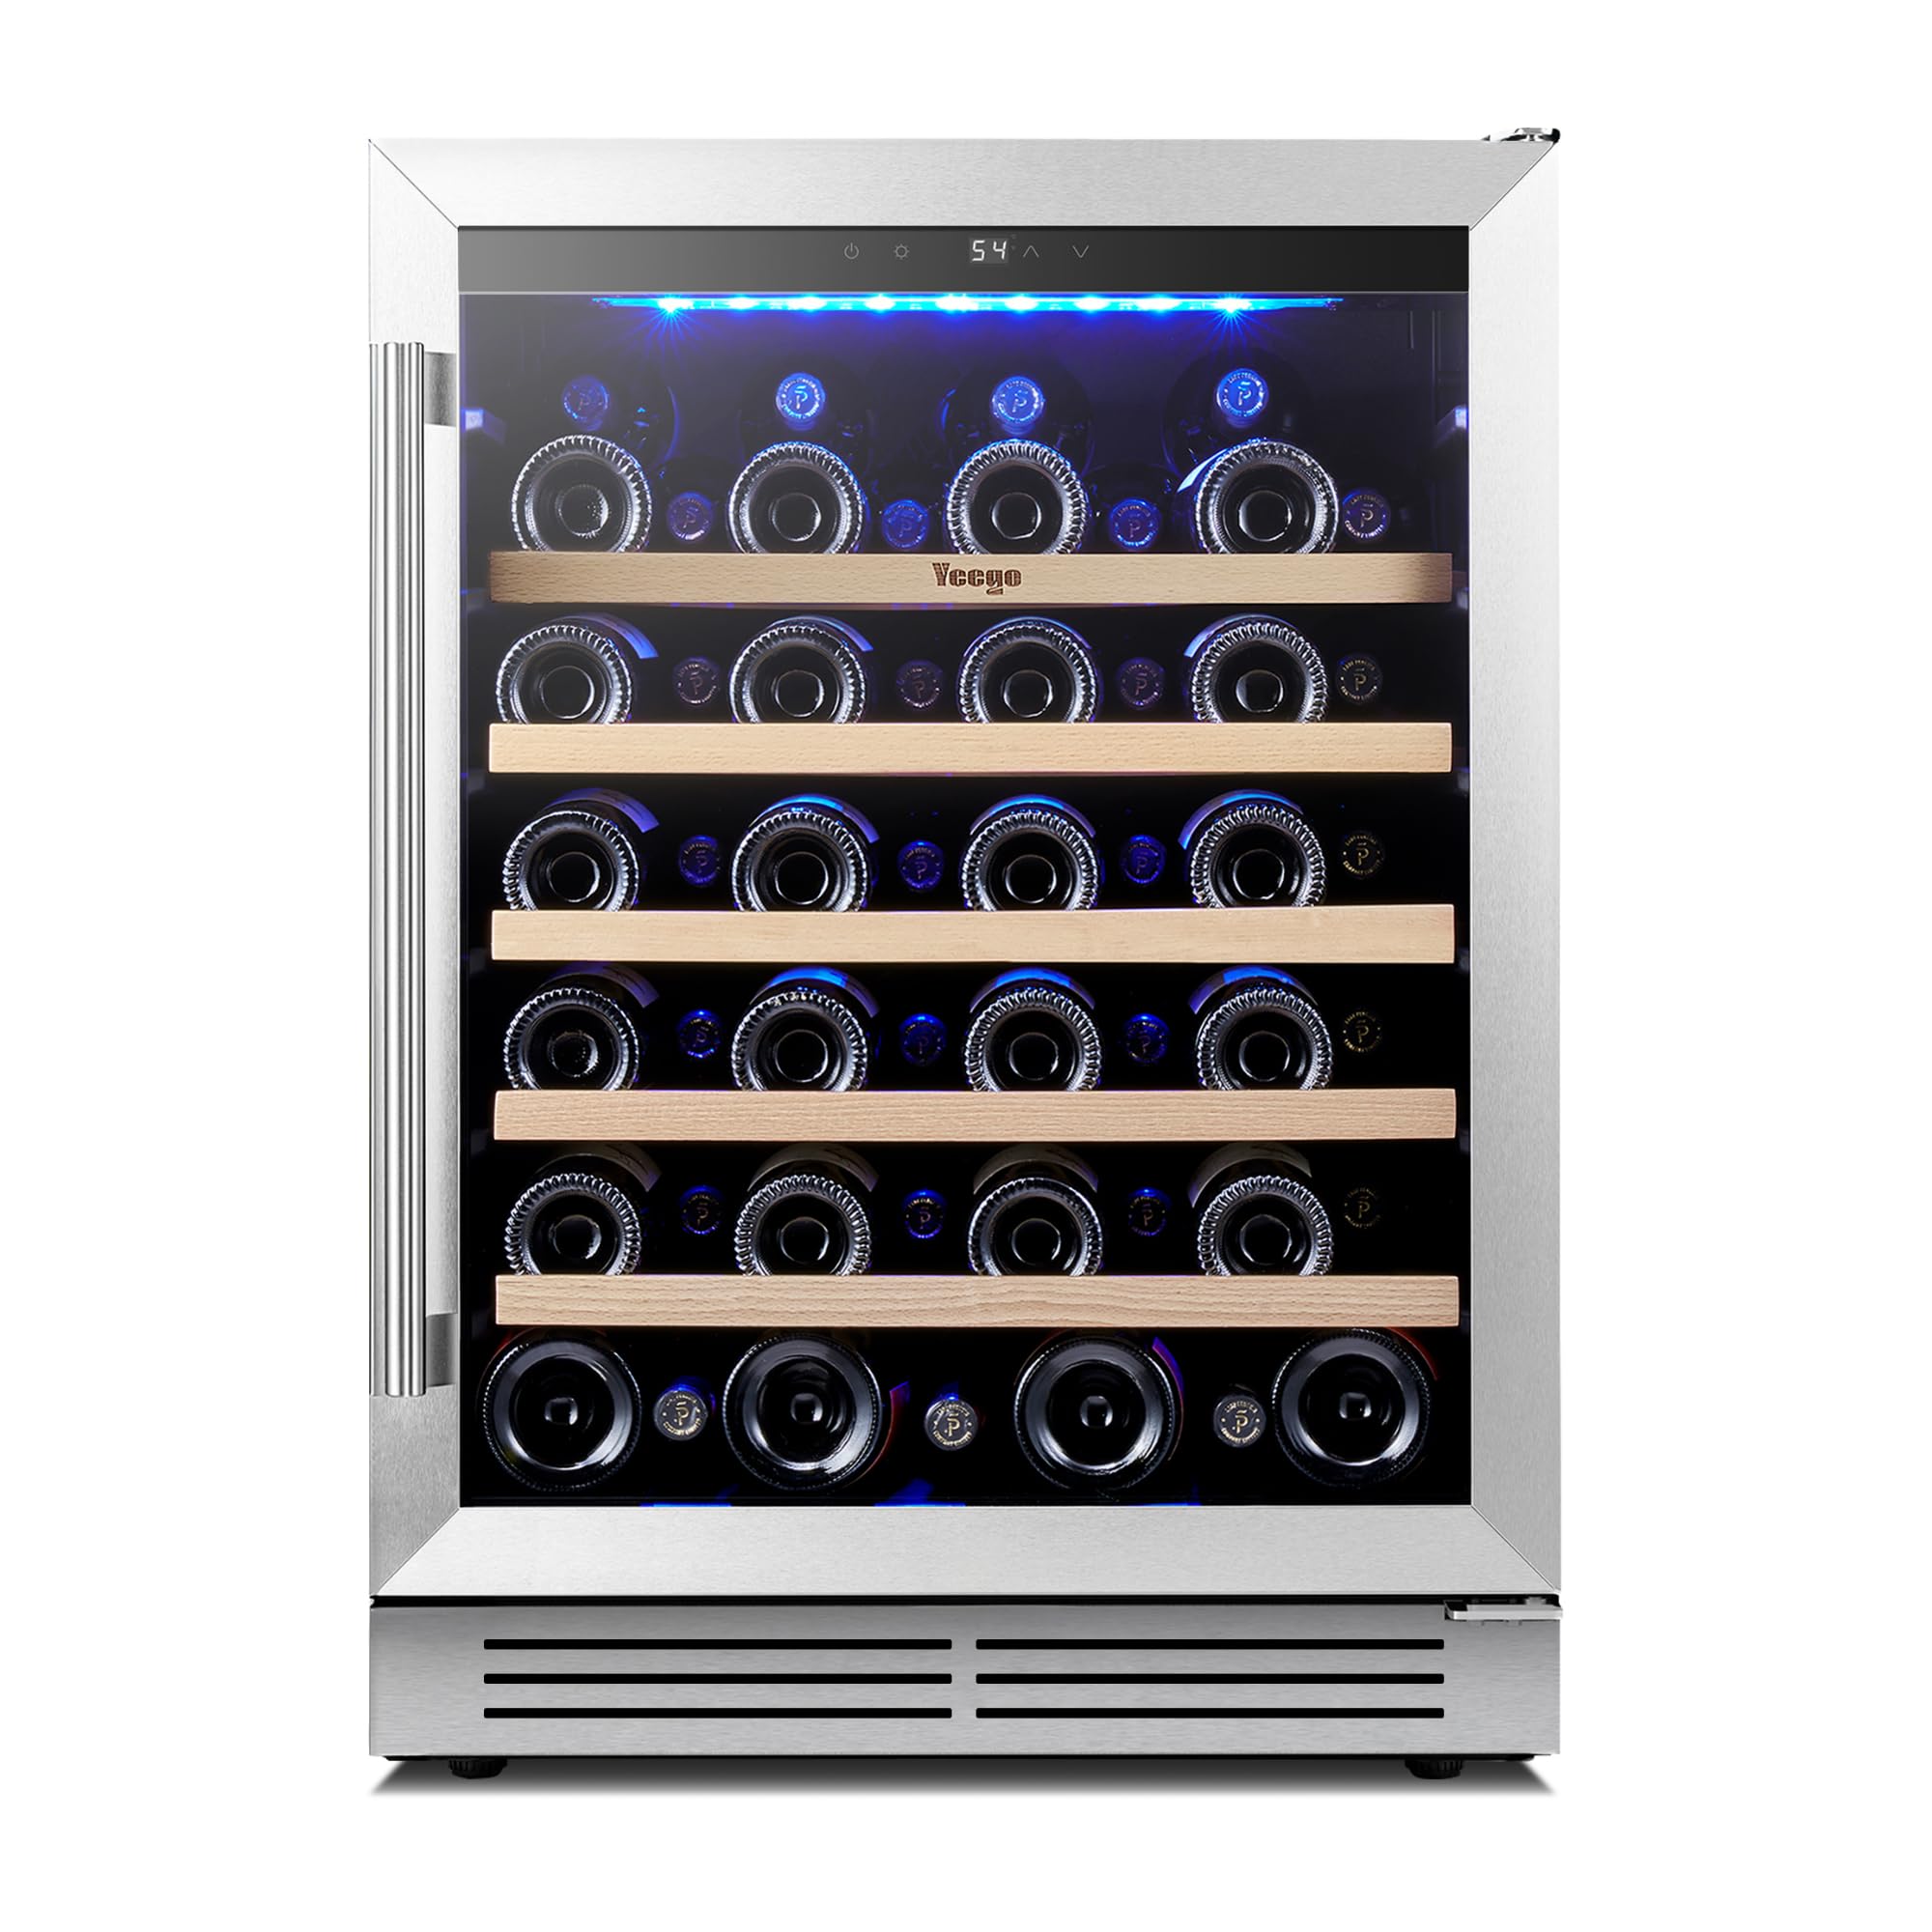
Figure 1: Front view of the Yeego YG-WS24-A Wine Fridge.

Figure 2: The wine fridge is protected by 5 layers of foam cotton packaging for secure delivery.
2. Product Features
The Yeego YG-WS24-A wine fridge is designed with advanced features to ensure optimal wine preservation and user convenience.
Precise Temperature Control
- Temperature range: 40-65℉ (5-18℃).
- Allows for optimal storage conditions for various wine types (red, white, champagne).

Figure 3: Digital touch control panel for precise temperature adjustment and light control.
Flexible Storage & Capacity
- Capacity: 5.12 cubic feet, accommodating up to 47 standard 750ml bottles.
- Features 5 removable and rearrangeable beechwood shelves, sourced from sustainable forests.
- Shelves include a snap-in rail design to prevent accidental slippage.

Figure 4: Interior capacity of 5.12 cu.ft with 5 adjustable shelves for various bottle sizes.

Figure 5: Environmentally friendly beechwood shelves with snap-in rail design.
Efficient Cooling & Anti-Vibration
- Equipped with an advanced R600A compressor cooling system for fast, consistent, and even cooling.
- Maintains a vibration-free environment to protect wine integrity.
- Operates quietly at 38 decibels.

Figure 6: R600A Compressor Cooler with 360° air circulation for optimal temperatures.

Figure 7: Dual-pane glass door blocks 95% of UV rays, and the unit operates quietly.
User-Friendly Design
- Intuitive touchscreen control panel for temperature and lighting adjustments.
- Dual-pane, UV-resistant, and heat-insulated glass door.
- Blue LED interior lighting for clear visibility and elegant ambiance.
- Equipped with an activated carbon filter to remove odors and maintain fresh air inside.

Figure 8: Blue LED lighting enhances visibility and creates an elegant display.

Figure 9: Activated carbon filter ensures fresh and pure air inside the wine cooler.
Durable Construction & Installation Flexibility
- Sleek silver finish with high-quality stainless steel door frame and handle.
- Corrosion-resistant, smudge-free, and easy to clean.
- Sealed gasket ensures an airtight closure.
- Adjustable feet for leveling on uneven floors and cabinet base alignment.
- Front ventilation for built-in, under-counter, or freestanding installation.

Figure 10: High-quality stainless steel frame, sealed gasket, and adjustable feet for stability.

Figure 11: Durable and corrosion-resistant stainless steel door frame and handle.

Figure 12: Adjustable feet for leveling and proper alignment in various installations.

Figure 13: Front ventilation allows for built-in or under-counter installation without compromising cooling efficiency.
3. Setup and Installation
Unpacking
- Carefully remove all packaging materials, including foam and tape.
- Inspect the appliance for any damage during transit. Report any damage immediately to the retailer.
- Allow the unit to stand upright for at least 24 hours before plugging it in to allow the refrigerant to settle.
Placement Options
Your Yeego wine fridge can be installed as a built-in, under-counter, or freestanding unit.
- Built-in/Under-counter: Ensure adequate clearance for front ventilation. Refer to the product dimensions for precise measurements.
- Freestanding: Allow at least 2-3 inches of space around the sides and back for proper air circulation.

Figure 14: Example of built-in installation.

Figure 15: Example of under-counter installation.

Figure 16: Example of freestanding installation.
Leveling
- Use the adjustable feet at the bottom of the unit to ensure it is perfectly level. This is crucial for proper door sealing and efficient operation.
Electrical Connection
- Plug the appliance into a dedicated, grounded 115V AC outlet. Do not use extension cords or adapter plugs.
4. Operating Instructions
Control Panel Functions
- On/Off Button: Press to turn the unit on or off.
- Temperature Up/Down Buttons (↑/↓): Press to adjust the desired temperature. The temperature range is 40-65℉.
- Light Button: Press to turn the interior blue LED light on or off.
- Temperature Display: Shows the current internal temperature or the set temperature during adjustment.

Figure 17: The wine fridge features power-outage memory, automatically restoring the preset temperature after a power interruption.
Setting the Temperature
- Press the On/Off button to power on the unit.
- Use the Temperature Up (↑) or Down (↓) buttons to select your desired temperature.
- The display will flash while adjusting and then show the current internal temperature once set.
Power-Outage Memory
- The unit is equipped with a power-outage memory function. In case of a power interruption, the fridge will automatically restore the last set temperature once power is resumed, preventing fluctuations that could affect wine quality.
5. Maintenance
Cleaning the Interior
- Unplug the appliance before cleaning.
- Clean the interior with a soft cloth dampened with a solution of mild detergent and warm water.
- Do not use abrasive cleaners or solvents.
- Ensure the interior is completely dry before plugging the unit back in.
Cleaning the Exterior
- Wipe the exterior surfaces with a soft, damp cloth. For stainless steel, use a stainless steel cleaner if necessary.
- Clean the door gasket regularly to ensure a tight seal.
Shelf Care
- The wooden shelves can be removed for cleaning. Wipe them with a damp cloth and dry thoroughly.
Activated Carbon Filter Replacement
- The activated carbon filter should be replaced periodically (e.g., every 6-12 months) to maintain optimal odor removal. Refer to the manufacturer's guidelines for specific replacement instructions and compatible filters.
6. Troubleshooting
Before contacting customer support, please refer to the following table for common issues and their solutions.
| Problem | Possible Cause | Solution |
|---|---|---|
| Appliance does not operate | Not plugged in; circuit breaker tripped; power switch off. | Ensure plug is secure; check circuit breaker; turn power switch on. |
| Temperature is not cold enough | Door not closed properly; frequent door openings; warm items added; poor ventilation; unit in direct sunlight. | Check door seal; minimize door openings; allow new items to cool; ensure proper clearance; relocate unit. |
| Excessive vibration | Unit not level. | Adjust leveling feet. |
| Noise from unit | Normal compressor operation; fan noise; unit not level. | This is normal; ensure unit is level. |
| Door does not close properly | Unit not level; gasket dirty or damaged; shelves out of position. | Adjust leveling feet; clean/replace gasket; reposition shelves. |
7. Specifications
| Feature | Detail |
|---|---|
| Brand | Yeego |
| Model Number | YG-WS24-A |
| Capacity | 5.12 Cubic Feet (approx. 47 standard bottles) |
| Temperature Range | 40-65℉ (5-18℃) |
| Installation Type | Under-Counter/Freestanding/Built-In |
| Product Dimensions (D x W x H) | 22.4 x 23.4 x 32.3 inches |
| Item Weight | 99.7 Pounds |
| Noise Level | 38 Decibels |
| Annual Energy Consumption | 195 Kilowatt Hours Per Year |
| Voltage | 115 Volts (AC) |
| Defrost System | Automatic |
| Shelves | 5, Wood (Beechwood) |
| Door Material Type | Glass, Stainless Steel |
| Certification | DOE, ETL |

Figure 18: Detailed product dimensions for installation planning.
8. Warranty and Support
Warranty Information
Your Yeego YG-WS24-A Wine Fridge comes with a 12-month warranty from the date of purchase. This warranty covers manufacturing defects and malfunctions under normal use. Please retain your proof of purchase for warranty claims.
Customer Support
For any questions, technical assistance, or warranty claims, please contact Yeego customer support. Our support team is available 24/7 to assist with installation and troubleshooting.
- Online Support: Visit the official Yeego website for FAQs and contact forms.
- Email Support: Refer to your purchase documentation for the dedicated support email address.

Figure 19: Yeego is committed to providing comprehensive after-sales service, including protective packaging, secure delivery, and expert support.
9. Product Overview Video
Video 1: A detailed overview of the Yeego YG-WS24-A Wine Fridge, demonstrating its features and functionality.


