1. Introduction
The PWAY PW-DT273P HDMI Extender is designed to transmit high-definition HDMI signals over long distances using standard Cat5e/6 Ethernet cables. This device supports 1080p@60Hz resolution and offers flexible deployment options, including one-to-one and one-to-many configurations via 100M/1000M Ethernet switches. It also supports Power over Ethernet (POE) for simplified installation.
Key Features:
- Extends HDMI signals up to 400ft (120 meters) over Cat5e/6 cable.
- Supports multi-video output via Ethernet switches for flexible management.
- Compatible with POE switches, reducing the need for additional power adapters.
- Works with conventional 100M/1000M Ethernet switches.
- Delivers crisp 1080p@60Hz full HD resolution.
2. Package Contents
Please verify that all items are included in your package:
- 1x HDMI Transmitter (TX) Unit
- 1x HDMI Receiver (RX) Unit
- 2x DC 12V Power Adapters
- 1x User Manual

Image: Package Contents
3. Product Overview
The PWAY PW-DT273P system consists of a Transmitter (TX) unit and a Receiver (RX) unit. Familiarize yourself with the ports and indicators on each unit:
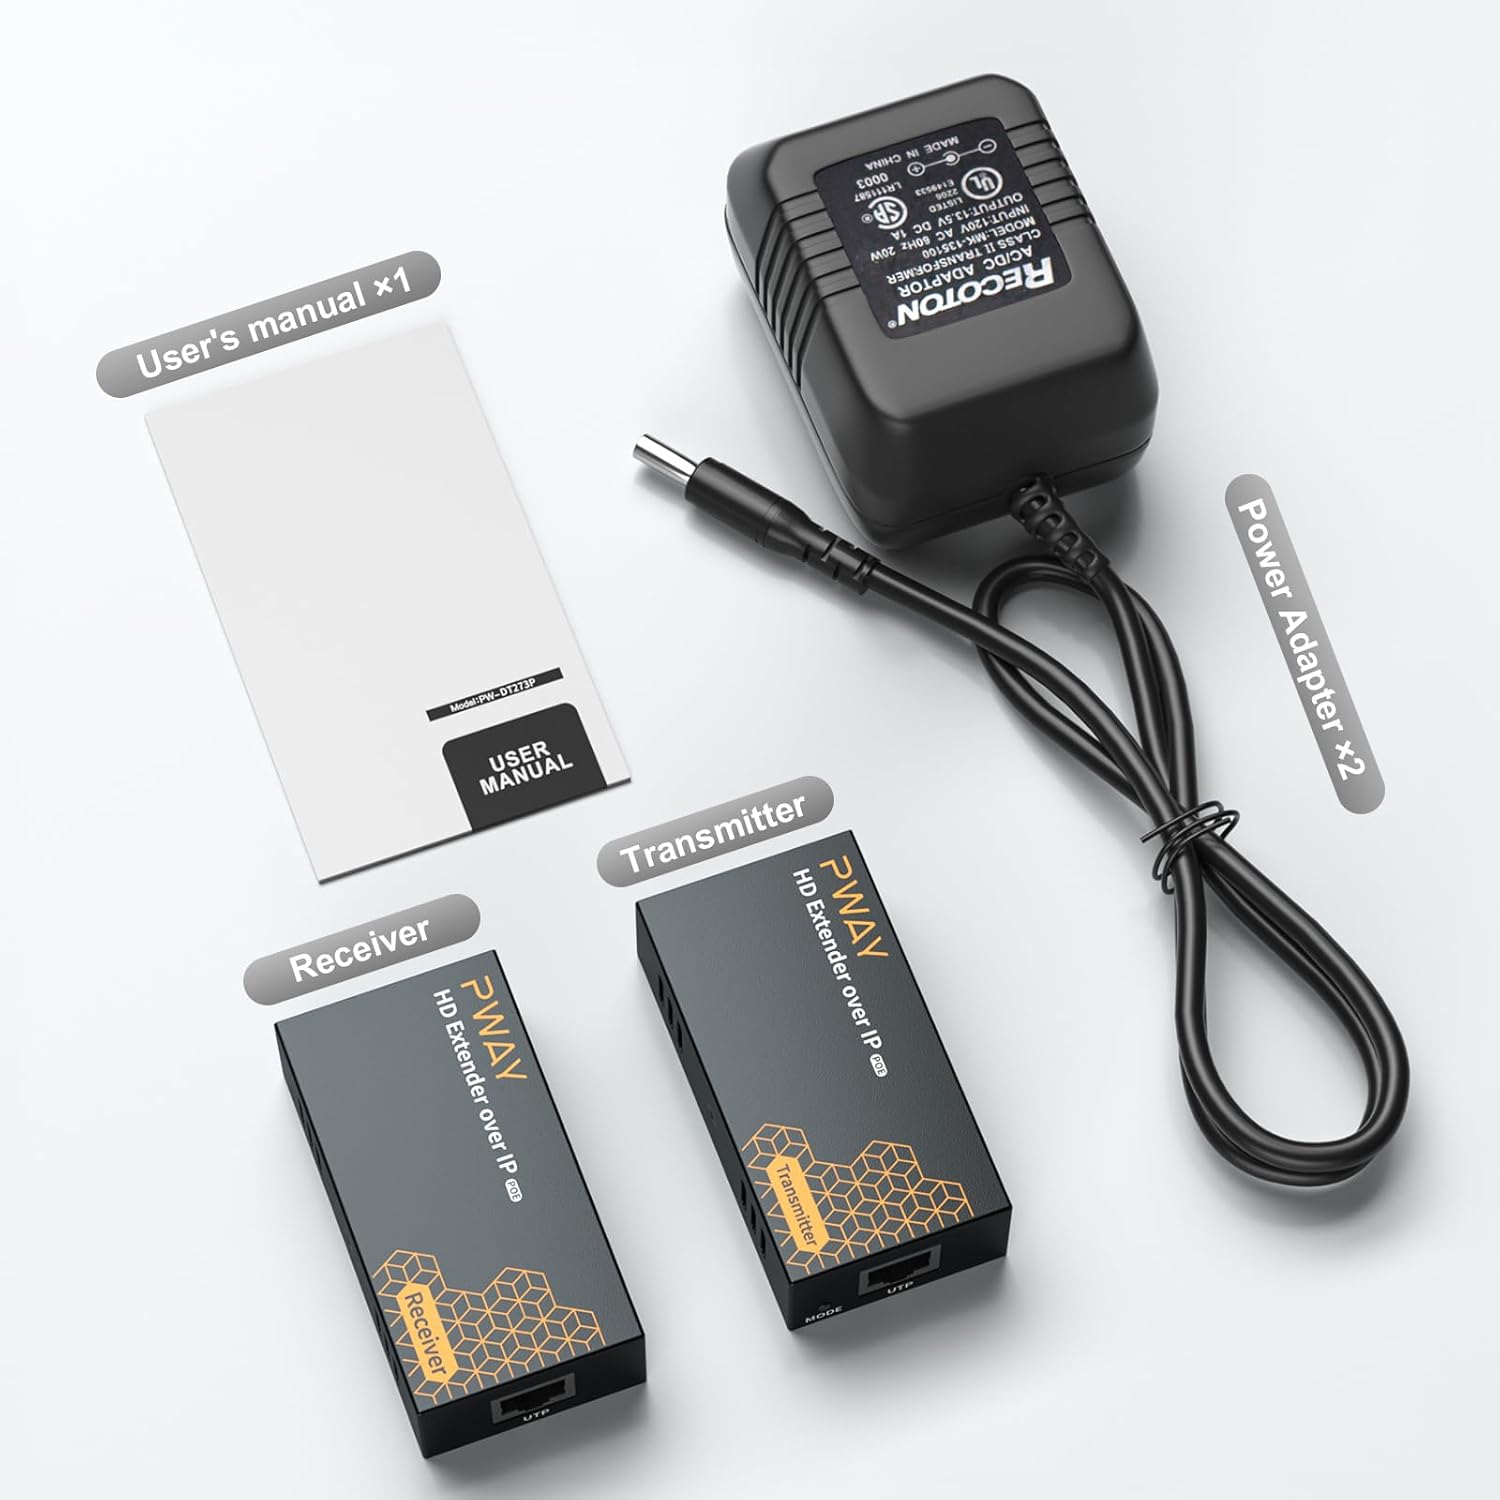
Image: Transmitter and Receiver Ports
Transmitter (TX) Unit:
- HD IN: HDMI input port for connecting to the source device (e.g., DVD player, laptop).
- UTP: RJ45 Ethernet port for connecting to the Receiver unit or network switch.
- DC 12V: Power input port (use one of the provided adapters if not using POE).
- LINK LED: Indicates Ethernet link status.
- STA LED: Indicates HDMI signal status.
- MODE Button: For specific operational modes (refer to advanced settings if applicable, typically for pairing or reset).
Receiver (RX) Unit:
- HD OUT: HDMI output port for connecting to the display device (e.g., TV, monitor).
- UTP: RJ45 Ethernet port for connecting to the Transmitter unit or network switch.
- DC 12V: Power input port (use one of the provided adapters if not using POE).
- LINK LED: Indicates Ethernet link status.
- STA LED: Indicates HDMI signal status.
4. Setup Instructions
4.1 Safety Precautions
- Ensure all devices are powered off before making connections.
- Use only the provided power adapters or a compatible POE switch.
- Avoid exposing the units to moisture or extreme temperatures.
4.2 Cable Requirements
Use high-quality Cat5e or Cat6 Ethernet cables for optimal performance and signal integrity. The maximum recommended distance is 400ft (120 meters).
4.3 One-to-One Connection
This configuration extends an HDMI signal from a single source to a single display.
- Connect your HDMI source device (e.g., DVD player, laptop) to the HD IN port of the Transmitter (TX) unit using an HDMI cable.
- Connect your display device (e.g., TV, monitor) to the HD OUT port of the Receiver (RX) unit using an HDMI cable.
- Connect the UTP port of the TX unit to the UTP port of the RX unit using a single Cat5e/6 Ethernet cable.
- Connect the provided DC 12V power adapters to both the TX and RX units, or ensure both units are connected to a POE-enabled network switch.
- Power on all connected devices.

Image: One-to-One Connection Diagram
4.4 One-to-Many Connection via POE Switch
This configuration allows a single HDMI source to be displayed on multiple screens using a POE-enabled network switch.
- Connect your HDMI source device to the HD IN port of the Transmitter (TX) unit using an HDMI cable.
- Connect the UTP port of the TX unit to a port on your POE-enabled network switch using a Cat5e/6 Ethernet cable.
- Connect the UTP port of each Receiver (RX) unit to a separate POE-enabled port on the same network switch using Cat5e/6 Ethernet cables.
- Connect each display device to the HD OUT port of its respective RX unit using an HDMI cable.
- Power on all connected devices. The TX and RX units will receive power from the POE switch.

Image: One-to-Many POE Switch Connection Diagram
4.5 One-to-Many Connection via Regular Switch
This configuration allows a single HDMI source to be displayed on multiple screens using a standard network switch. External power adapters are required for the RX units.
- Connect your HDMI source device to the HD IN port of the Transmitter (TX) unit using an HDMI cable.
- Connect the UTP port of the TX unit to a port on your regular network switch using a Cat5e/6 Ethernet cable.
- Connect the UTP port of each Receiver (RX) unit to a separate port on the same network switch using Cat5e/6 Ethernet cables.
- Connect each display device to the HD OUT port of its respective RX unit using an HDMI cable.
- Connect the provided DC 12V power adapters to the TX unit and each RX unit.
- Power on all connected devices.

Image: One-to-Many Regular Switch Connection Diagram
5. Operating Instructions
Once all connections are made and power is supplied, the system should operate automatically.
- Ensure all source and display devices are powered on.
- Check the LINK and STA LED indicators on both the TX and RX units. A solid light typically indicates a successful connection and signal transmission.
- The extender supports 1080p@60Hz resolution. Your display should automatically detect and show the extended HDMI signal.

Image: 1080p@60Hz HD Vision
6. Maintenance
- Keep the units clean by wiping them with a soft, dry cloth. Do not use liquid cleaners or aerosols.
- Store the units in a cool, dry place away from direct sunlight and heat sources.
- Ensure proper ventilation around the units to prevent overheating.
- Regularly check cable connections to ensure they are secure.
7. Troubleshooting
If you encounter issues with your PWAY HDMI Extender, refer to the following common problems and solutions:
| Problem | Possible Cause | Solution |
|---|---|---|
| No image on display | No power to TX/RX units; Loose HDMI/Ethernet cables; Incorrect input selection on display; Incompatible resolution. | Check power connections and adapters; Ensure all cables are securely connected; Select the correct HDMI input on your display; Try a different HDMI source or display. |
| Flickering or poor image quality | Poor quality Ethernet cable; Ethernet cable too long; Interference; Encoder overload with fast-moving images at 1080p. | Use a high-quality Cat6 cable; Ensure cable length is within 400ft (120m); Reduce interference by separating cables; Try setting the source resolution to 720p, especially for content with rapid motion. |
| No audio | Audio settings on source/display; HDMI cable issue. | Check audio output settings on your source device; Ensure your display's audio is not muted; Try a different HDMI cable. |
| LINK/STA LEDs not lit | No power; No Ethernet link; No HDMI signal. | Verify power supply to both units; Check Ethernet cable connection; Ensure HDMI source is active and connected. |
8. Specifications
| Feature | Detail |
|---|---|
| Model Number | PW-DT273P |
| Product Dimensions | 3.2 x 1.7 x 0.9 inches |
| Item Weight | 1.01 pounds |
| Connector Type | HDMI |
| Cable Type | HDMI, Cat5e/6 Ethernet |
| Compatible Devices | DVD Player, Laptop, Monitor, Television |
| Resolution Support | Up to 1080p@60Hz |
| Transmission Distance | Up to 400ft (120 meters) |
| Power Supply | DC 12V (included adapters) or POE |
| Color | Black |
| Manufacturer | PWAY Technology |
9. Warranty and Support
PWAY products are designed for reliability and performance. This product comes with a standard manufacturer's warranty against defects in materials and workmanship. For specific warranty details, please refer to the warranty card included in your package or contact PWAY customer support.
For technical assistance, troubleshooting, or further inquiries, please visit the official PWAY store or contact their customer service department. You can find more information and support resources at the PWAY Store on Amazon.


