Introduction
This manual provides detailed instructions for the assembly, installation, operation, and maintenance of your AECOJOY 14' x 8' Hard Top Wall-Mounted Gazebo. Please read all instructions carefully before beginning assembly and retain this manual for future reference. Proper assembly and adherence to safety guidelines are crucial for the stability and longevity of your gazebo.
Safety Information
WARNING: Failure to follow these safety instructions may result in injury or damage to the product.
- Always secure the gazebo to a stable wall and ground as instructed. This product is designed to be wall-mounted, not freestanding.
- Be cautious when handling components due to the product's weight. It is recommended to have at least two people for assembly.
- Ensure the gazebo is properly secured and stabilized to withstand winds of up to 70 mph. Regular checks of all anchor points are advised.
- Do not hang heavy objects from the gazebo frame.
- Clear snow accumulation from the roof to prevent structural damage, especially in heavy snow areas. The roof is designed to withstand approximately 7 inches of heavy snow (6 lbs/sq.ft).
Product Specifications
| Feature | Specification |
|---|---|
| Brand | AECOJOY |
| Model Number | 16408 |
| Product Dimensions | 168"L x 96"W x 96"H (14' x 8' x 8') |
| Material | Aluminum, Metal, Sun Panels |
| Frame Material | Metal & Aluminum |
| Item Weight | 154 Pounds |
| Water Resistance Level | Waterproof |
| Ultraviolet Light Protection | Yes (UPF 50+, 99% UV block) |
| Wind Resistance | Up to 70 mph (when properly anchored) |
| Snow Capacity | Up to 7 inches thick (6 lbs/sq.ft) |
Package Contents
Before assembly, ensure all parts are present and undamaged. Refer to the detailed parts list provided in the separate assembly guide. Typical components include:
- Aluminum and Metal Frame Components (posts, beams, connectors)
- Hard Top Sun Panels
- Mounting Hardware (screws, bolts, anchors for wall and ground)
- Instruction Manual and Assembly Guide
Assembly Instructions
This gazebo requires assembly. Detailed step-by-step instructions are provided in the separate assembly guide included with your product. Please review the entire guide before starting.
Pre-Assembly Checklist:
- Read Instructions: Thoroughly read the assembly instructions multiple times.
- Organize Parts: Lay out all parts and pieces, organizing them to save time and prevent frustration.
- Tools: Gather necessary tools. Hand tools are recommended for tightening nuts/bolts/screws to avoid damaging painted surfaces.
- Personnel: Assembly is best performed by two people to manage components and ensure stability during construction.
Key Assembly Steps and Tips:
- Frame Assembly: Assemble the main frame structure according to the provided diagrams. Ensure all connections are secure.
- Wall Mounting: This gazebo is designed to be attached to a wall. All necessary accessories for wall attachment are provided. Ensure the wall is structurally sound to support the gazebo.
- Ground Anchoring: Securely fix and stabilize the gazebo to the ground (e.g., concrete patio, deck) using appropriate anchors. This is critical for wind resistance.
- Roof Panel Installation: When installing the hard top sun panels, ensure they are correctly aligned and slide smoothly into the channels. Some users have found it easier to assemble back and front roof sections with the middle bracket on the ground before sliding the entire unit into place, rather than installing panels individually after the frame is fully upright. This can prevent splitting of panels.
- Stability Checks: After assembly, double-check all bolts and screws for tightness. Ensure the gazebo is level and stable.

Image: Detailed dimensions of the 14' x 8' hardtop gazebo, showing height, length, and width measurements.

Image: Illustration of the stable frame leg with four pre-drilled holes for floor attachment and additional holes for secure wall mounting.
Operating Instructions
Your AECOJOY gazebo is designed to provide a sheltered outdoor space. Once properly installed, it offers protection from sun, rain, and moderate wind.
- Sun Protection: The heavily tinted roof panels block harmful UV rays (UPF 50+, 99% UV).
- Rain Protection: The inclined roof design and waterproof panels ensure effective water drainage, keeping the area beneath dry.
- Wind Resistance: With proper wall and ground anchoring, the gazebo can withstand winds up to 70 mph.
- Snow Load: The hard top roof is engineered to support up to 7 inches of heavy snow. However, it is advisable to remove excessive snow accumulation to prolong the product's life.
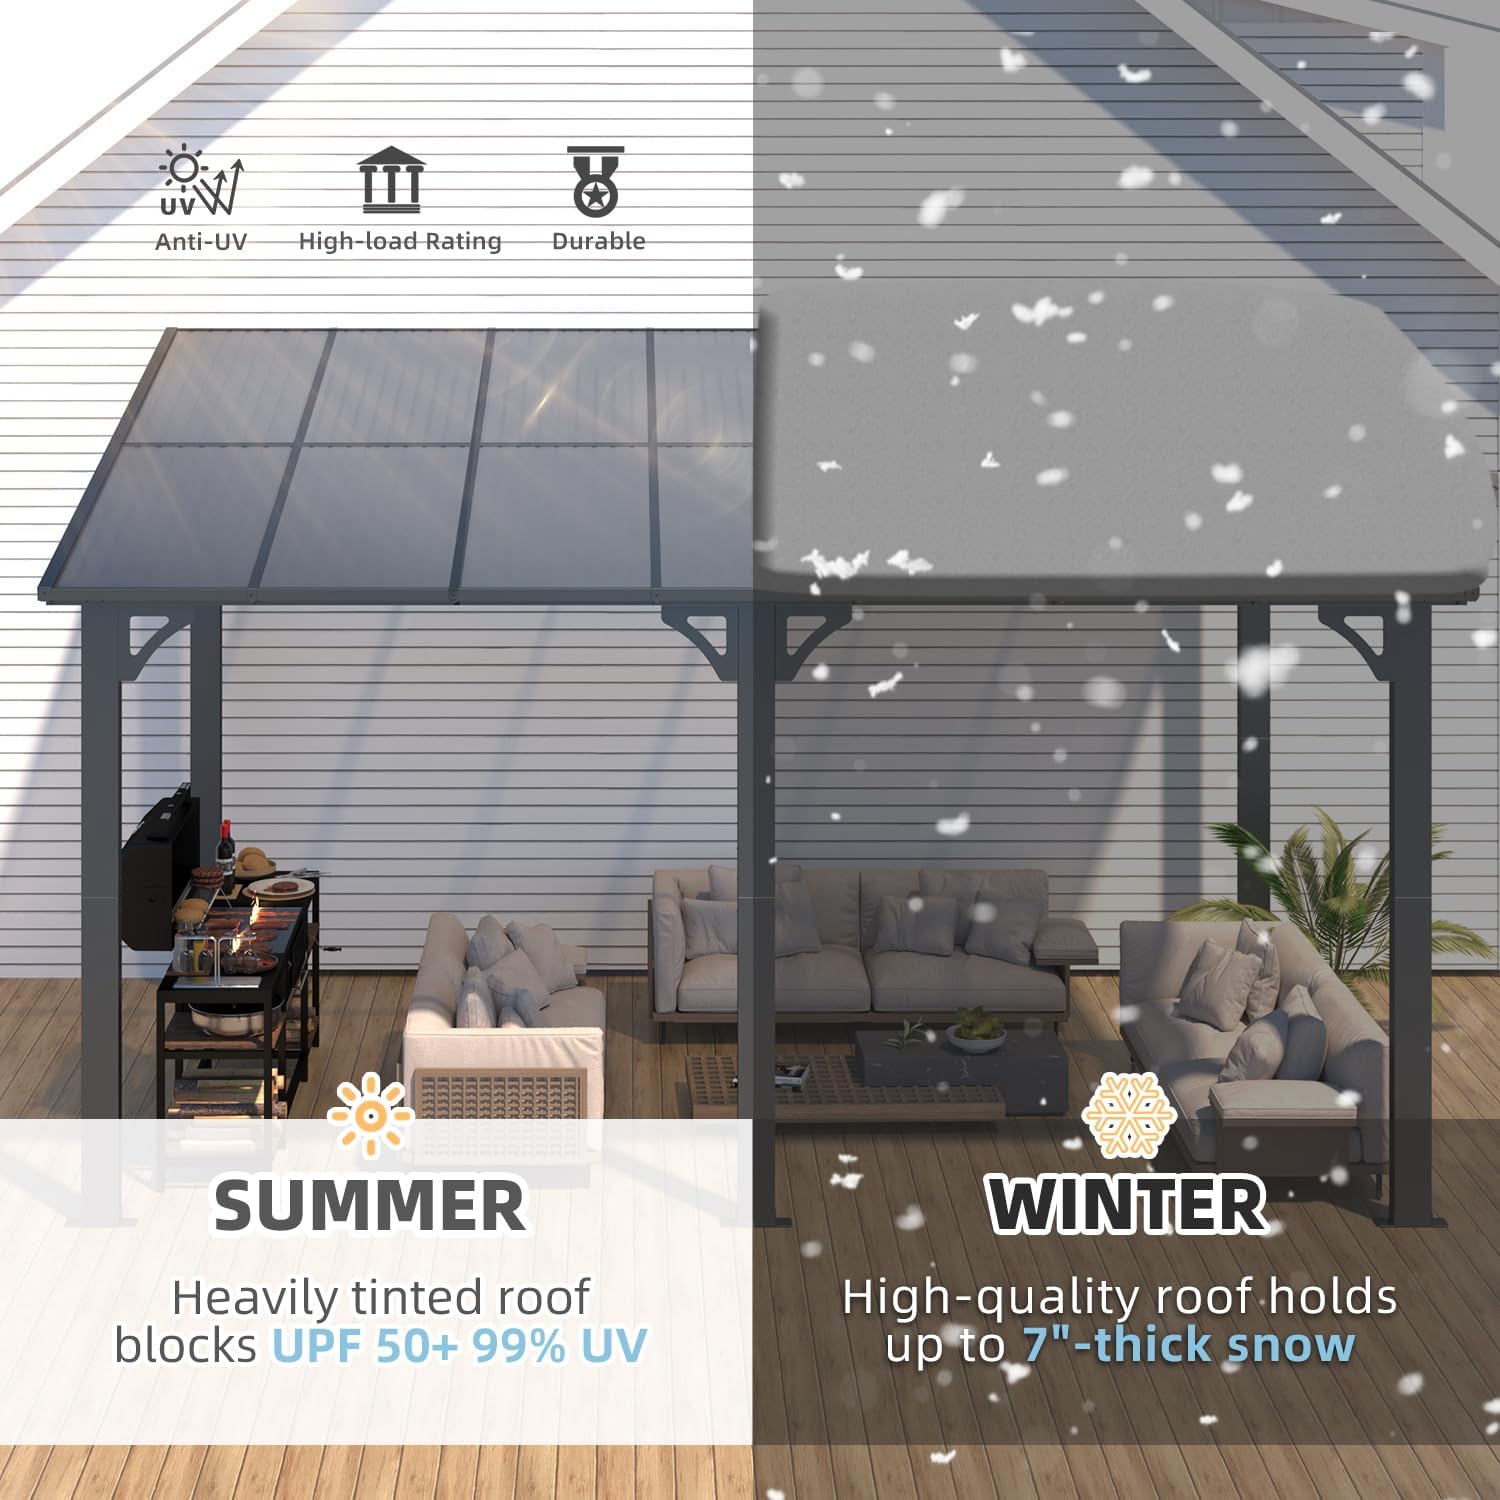
Image: Visual representation of the gazebo's performance in different seasons, highlighting UV protection in summer and snow load capacity in winter.

Image: Detailed view of the flexible roof panels and heavy-duty frame, illustrating features like Anti-UV, Fire-resistant, Waterproof, Smooth Drainage, and Windproof capabilities.
Maintenance
Regular maintenance will help preserve the appearance and functionality of your gazebo.
- Cleaning: Clean the frame and roof panels periodically with mild soap and water. Avoid abrasive cleaners or harsh chemicals that could damage the finish or materials.
- Fastener Checks: Annually, or after severe weather, inspect all bolts, screws, and anchor points to ensure they remain tight and secure. Tighten any loose fasteners.
- Snow Removal: In areas with heavy snowfall, gently remove accumulated snow from the roof to prevent excessive load and potential damage.
- Drainage: Ensure the roof's drainage channels are clear of debris (leaves, twigs) to maintain effective water runoff.
Troubleshooting
Here are solutions to common issues you might encounter:
- Gazebo feels unstable:
- Ensure all frame bolts and screws are fully tightened.
- Verify that the gazebo is securely anchored to both the wall and the ground as per instructions.
- Check that the ground surface is level.
- Water leakage from the roof:
- Inspect roof panels for proper seating in their channels and ensure all seals are intact.
- Check for any debris blocking the roof's drainage path.
- Difficulty installing roof panels:
- Refer to the specific instructions for panel installation in your assembly guide. Some panels may require a specific orientation or technique to slide into place without damage. Consider assembling roof sections on the ground before lifting.
Warranty and Support
AECOJOY stands behind its products. Your gazebo comes with a one-year warranty covering manufacturing defects.
For any concerns related to installation, usage, maintenance, or to request replacements, a professional technical support team is available 24/7. Please refer to the contact information provided in your product packaging or on the AECOJOY website for assistance.


