
AirWire AYGF0814BG-C02
AirWire 8x14 FT Greenhouse Instruction Manual
Model: AYGF0814BG-C02 | Brand: AirWire
Introduction
This manual provides detailed instructions for the assembly, operation, maintenance, and troubleshooting of your AirWire 8x14 FT Walk-in Heavy Duty Greenhouse. Designed for outdoor garden and backyard use, this greenhouse features an aluminum frame, polycarbonate panels, and a roof vent for optimal plant cultivation. Please read this manual thoroughly before beginning assembly or operation.

Figure 1: Exterior view of the AirWire 8x14 FT Greenhouse.
Safety Information
Important: Please observe all safety precautions during assembly and use.
- This product may have sharp edges and is heavy. Handle all components with care during assembly to prevent injury.
- Wear appropriate safety gear, such as gloves, during assembly.
- While the polycarbonate panels offer UV resistance, avoid prolonged exposure to direct sunlight inside the greenhouse without proper ventilation, especially during hot weather.
- Ensure safe installation by anchoring the greenhouse securely to the ground to prevent damage or injury from strong winds.
- Assemble the greenhouse on a level surface.
- Keep children and pets away from the assembly area.
Setup and Assembly
The AirWire greenhouse features a quick-install system designed for efficient assembly. It is recommended to have at least two people for assembly.
Preparation:
- Unpack Components: Carefully unpack all boxes and verify that all parts are present against the included parts list.
- Clear Area: Choose a level, clear area for assembly, free from obstructions.
- Tools Required: Refer to your specific instruction manual for a list of required tools (e.g., screwdrivers, wrenches, measuring tape).
Assembly Steps:
- Base Frame Assembly: Begin by assembling the base frame on your prepared level surface. Ensure it is square and plumb.
- Wall Frame Construction: Attach the vertical and horizontal frame components to form the walls.
- Panel Insertion: The polycarbonate panels are designed to slide into designated channels. Insert these panels carefully into the frame sections.
- Roof Assembly: Construct the roof frame and attach it to the wall structure. Insert the roof polycarbonate panels.
- Door and Vent Installation: Install the sliding door and the roof vent(s) according to the detailed diagrams in your manual.
- Anchoring: Securely anchor the greenhouse to the ground using appropriate methods for your soil type and local weather conditions. This is crucial for stability.
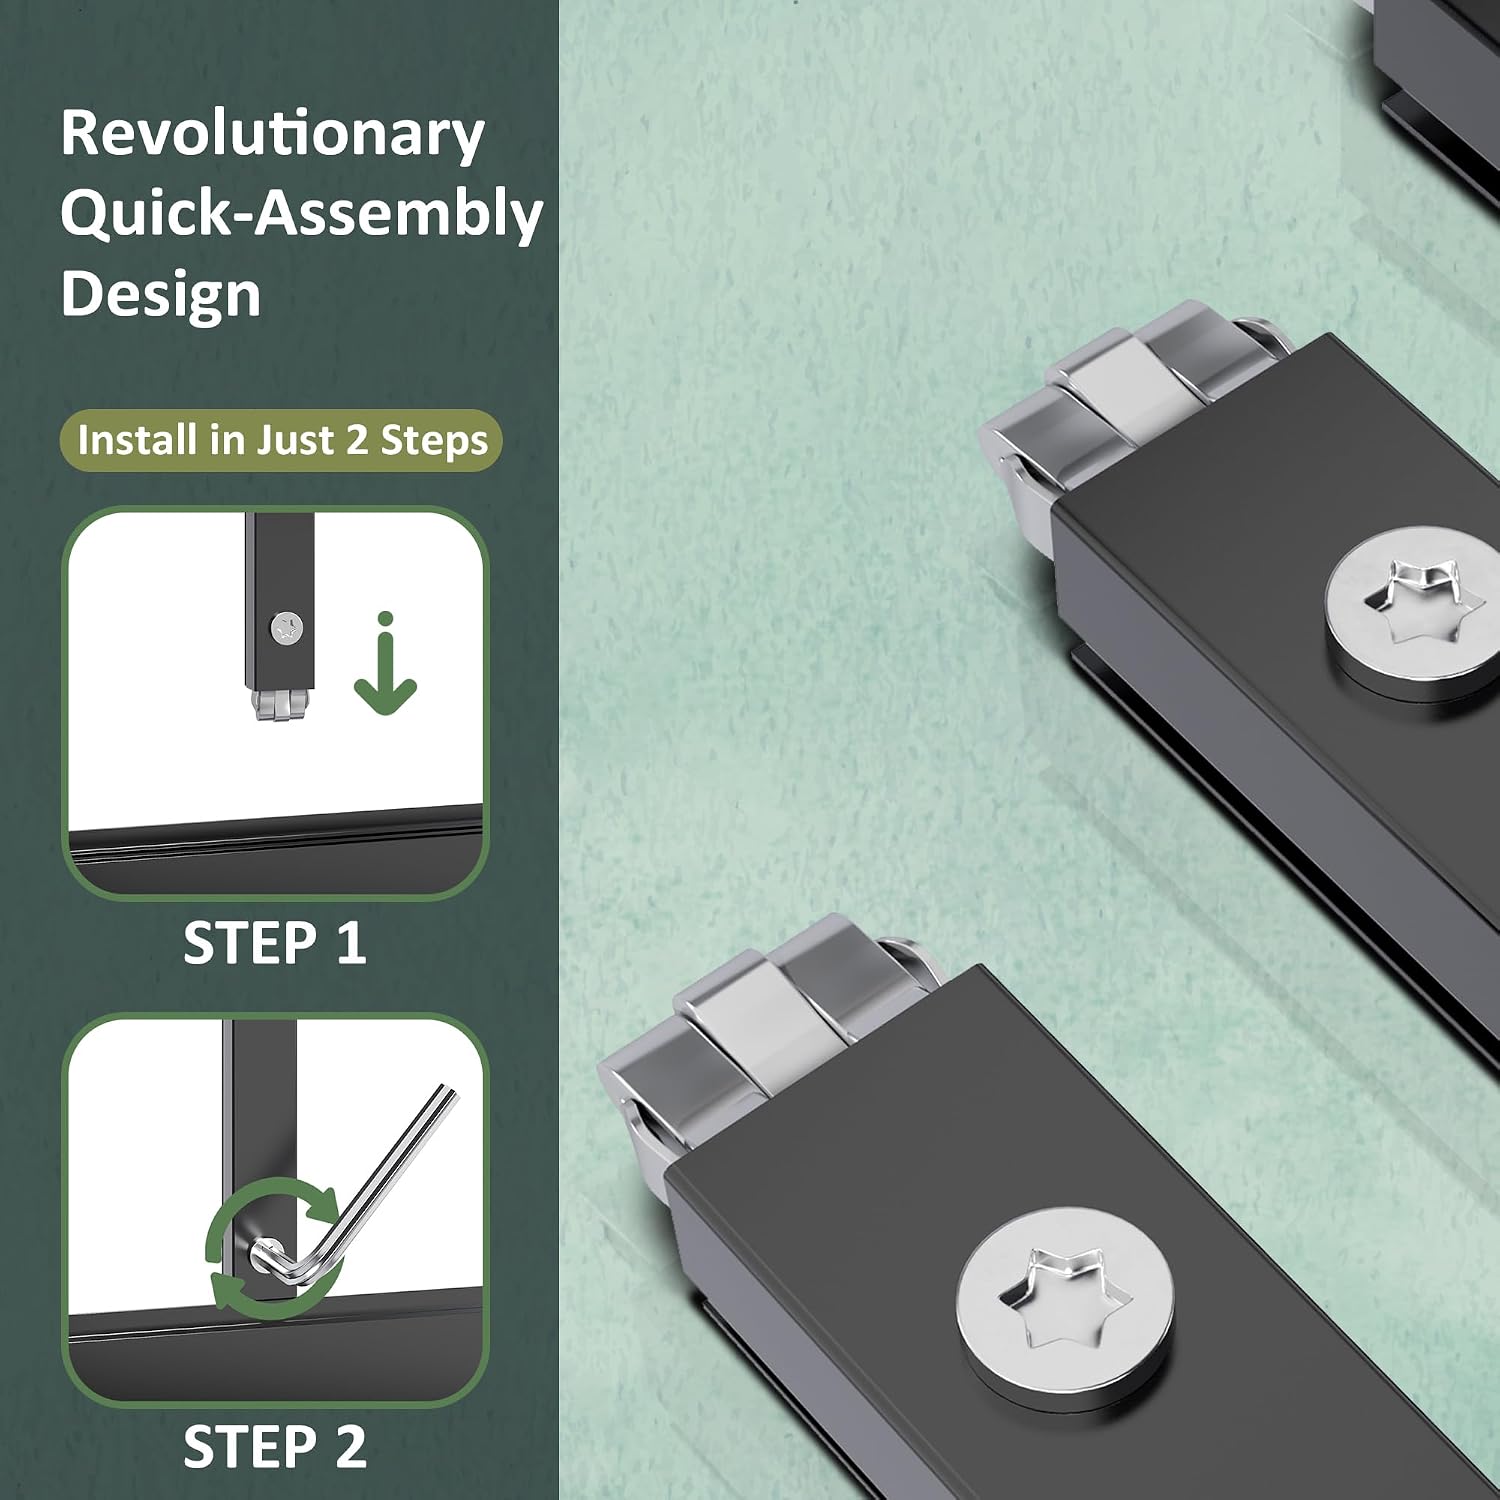
Figure 2: Illustration of the quick-assembly design, showing panel insertion and locking mechanism.

Figure 3: Detail of polycarbonate panels inserted into the frame.
Operation
Proper operation of your greenhouse ensures a thriving environment for your plants.
Ventilation:
The greenhouse is equipped with a roof vent and a sliding door to manage internal temperature and humidity. Open the roof vent and/or the sliding door to allow hot air to escape and fresh air to circulate. Adjust the opening based on external temperature and the specific needs of your plants.

Figure 4: Height-adjustable roof window for ventilation.
Light Management:
The polycarbonate panels are coated with UV resistance to attenuate harmful rays while allowing beneficial sunlight to pass through. This provides balanced light for plant growth. Monitor your plants for signs of too much or too little light and adjust shading if necessary.
Security:
The sliding door features a locking mechanism for enhanced security. Ensure the door is properly closed and locked when not in use, especially during windy conditions or when leaving the greenhouse unattended.

Figure 5: Interior of the greenhouse, demonstrating ample space for plants.
Maintenance
Regular maintenance will extend the lifespan of your AirWire greenhouse.
- Cleaning Panels: Clean polycarbonate panels periodically with mild soap and water using a soft cloth or sponge. Avoid abrasive cleaners or brushes that could scratch the surface. Rinse thoroughly with clean water.
- Frame Inspection: Annually inspect the aluminum frame for any signs of corrosion, loose bolts, or damage. Tighten any loose fasteners.
- Vent and Door Check: Ensure the roof vent and sliding door operate smoothly. Lubricate hinges or tracks if necessary.
- Gutter System: If equipped with a gutter system, regularly clear it of debris to ensure proper water drainage.
- Winter Care: In areas with heavy snowfall, gently remove accumulated snow from the roof to prevent structural stress. The greenhouse is designed to withstand various weather conditions, but excessive loads should be avoided.

Figure 6: The greenhouse designed for all-season use, including winter conditions.
Troubleshooting
This section addresses common issues you might encounter.
| Problem | Possible Cause | Solution |
|---|---|---|
| Panels blow out or become loose. | Insufficient anchoring; loose panel clips/fasteners; extreme wind conditions. | Ensure the greenhouse is securely anchored to the ground. Check and tighten all panel fasteners. Consider additional bracing in high-wind areas. |
| Difficulty during assembly. | Incorrect part orientation; missing or mislabeled parts; uneven assembly surface. | Review the instruction manual carefully, paying close attention to diagrams. Ensure the assembly surface is level and square. Contact customer service if parts are missing or damaged. |
| Greenhouse interior too hot. | Inadequate ventilation. | Open roof vents and sliding door to increase airflow. Consider additional shading during peak sunlight hours. |
| Roof vent(s) not staying open or detaching. | Latch mechanism failure; strong winds. | Inspect the latch mechanism for damage. Ensure it is properly engaged. In very windy conditions, consider temporarily securing vents or closing them. |
Specifications
| Feature | Detail |
|---|---|
| Model Number | AYGF0814BG-C02 |
| Brand | AirWire |
| Dimensions (L x W x H) | 97.5"L x 96"W x 81.5"H (Approx. 8x14 FT) |
| Frame Material | Aluminum |
| Cover Material | Polycarbonate (PC) |
| Color | Black |
| Door Style | Sliding Door |
| Number of Doors | 1 |
| Number of Vents | 1 (Roof Vent) |
| Special Features | Quick Setup Structure, Resistant and Sturdy, Balanced Light, Ventilation & Enhanced Security |

Figure 7: Key dimensions of the greenhouse.
Warranty and Support
AirWire is committed to providing quality products and customer satisfaction.
- Returns: This product is eligible for 30-day easy returns. Please refer to your purchase documentation for specific return procedures.
- Customer Service: For setup assistance, parts inquiries, or gardening advice, AirWire offers around-the-clock customer service. Contact information can typically be found on the product packaging or the retailer's website.
- Product Registration: Consider registering your product to receive updates and support.
Ask a question about this manual
Ask about setup, troubleshooting, compatibility, parts, safety, or missing instructions. Manuals+ will review the question and use this page’s manual context to help answer it.